LEXUS LS430 2003 Factory Repair Manual
Manufacturer: LEXUS, Model Year: 2003,
Model line: LS430,
Model: LEXUS LS430 2003
Pages: 4500, PDF Size: 87.45 MB
LEXUS LS430 2003 Factory Repair Manual
LS430 2003
LEXUS
LEXUS
https://www.carmanualsonline.info/img/36/57050/w960_57050-0.png
LEXUS LS430 2003 Factory Repair Manual
Trending: AUX, catalytic converter, Spark plug firing order, bluetooth, AC Expansion Valve, USB, Door lock actuator
Page 4251 of 4500
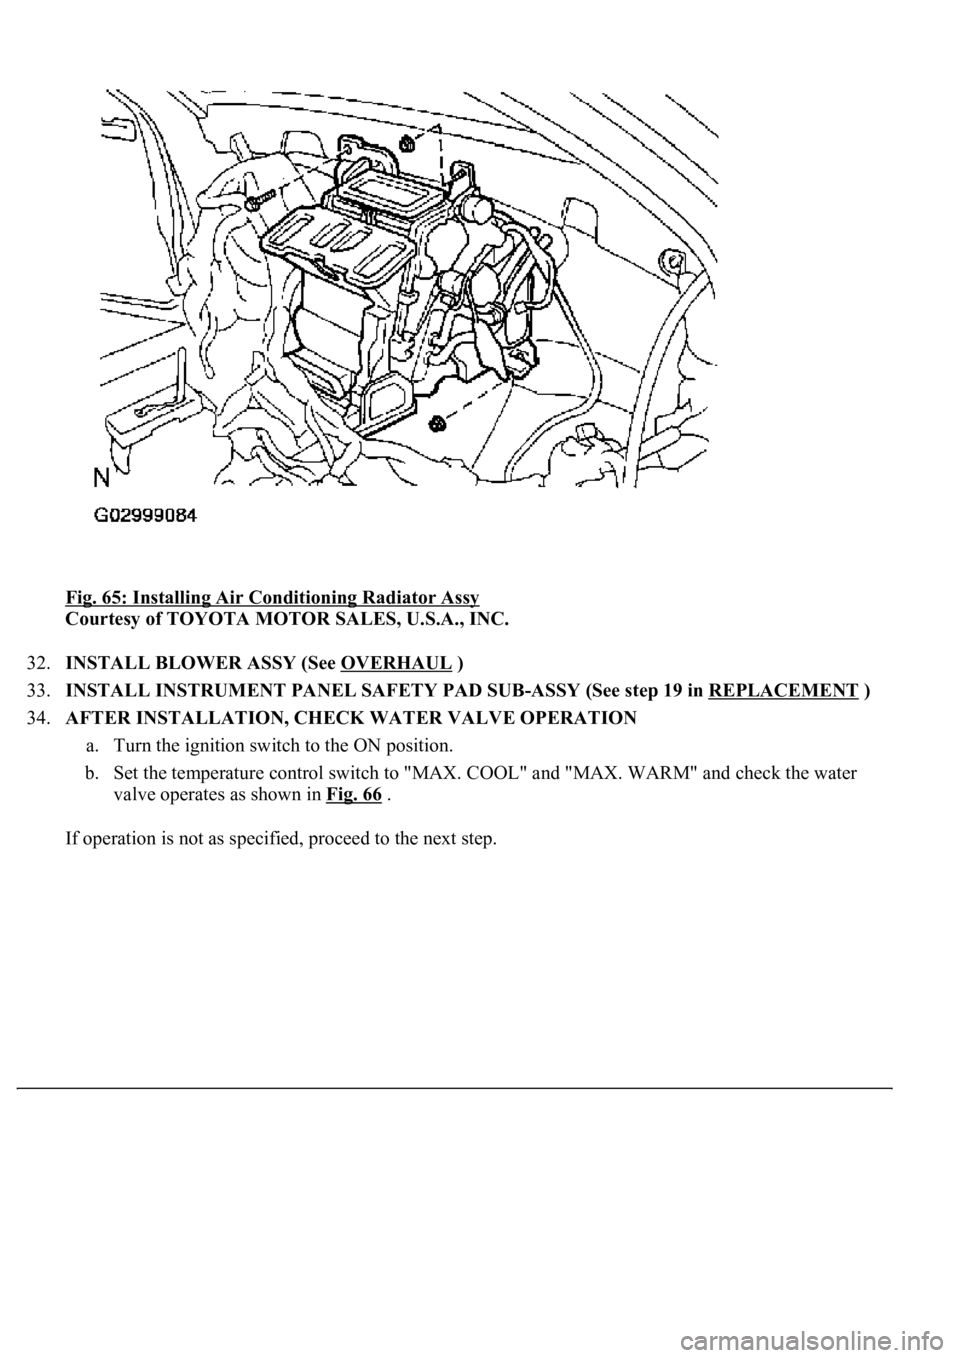
Fig. 65: Installing Air Conditioning Radiator Assy
Courtesy of TOYOTA MOTOR SALES, U.S.A., INC.
32.INSTALL BLOWER ASSY (See OVERHAUL
)
33.INSTALL INSTRUMENT PANEL SAFETY PAD SUB-ASSY (See step 19 in REPLACEMENT
)
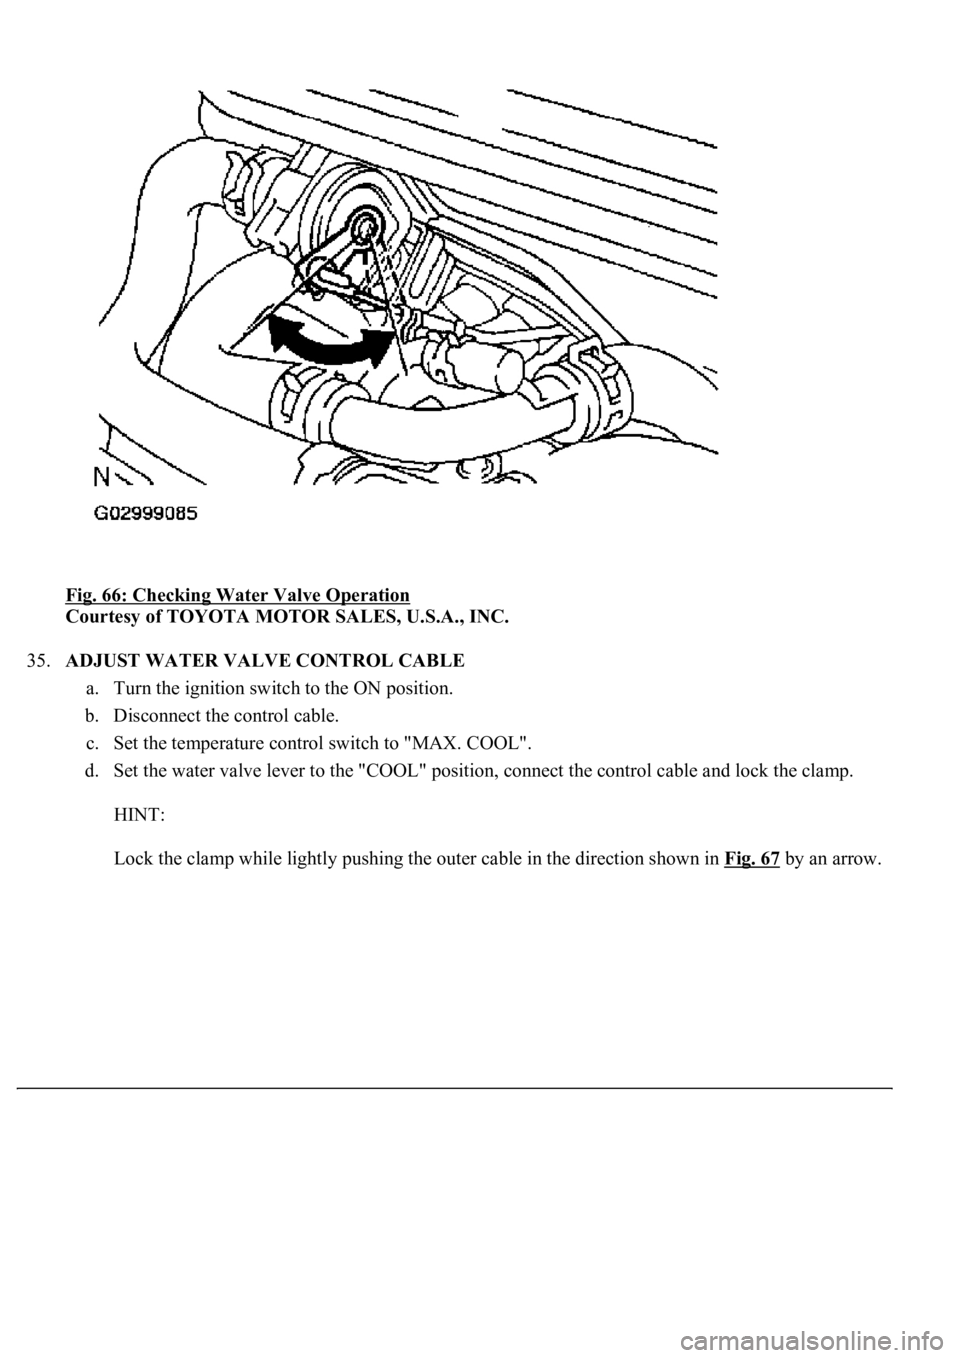
34.AFTER INSTALLATION, CHECK WATER VALVE OPERATION
a. Turn the ignition switch to the ON position.
b. Set the temperature control switch to "MAX. COOL" and "MAX. WARM" and check the water
valve operates as shown in Fig. 66
.
If operation is not as specified, proceed to the next step.
Page 4252 of 4500
Fig. 66: Checking Water Valve Operation
Courtesy of TOYOTA MOTOR SALES, U.S.A., INC.
35.ADJUST WATER VALVE CONTROL CABLE
a. Turn the ignition switch to the ON position.
b. Disconnect the control cable.
c. Set the temperature control switch to "MAX. COOL".
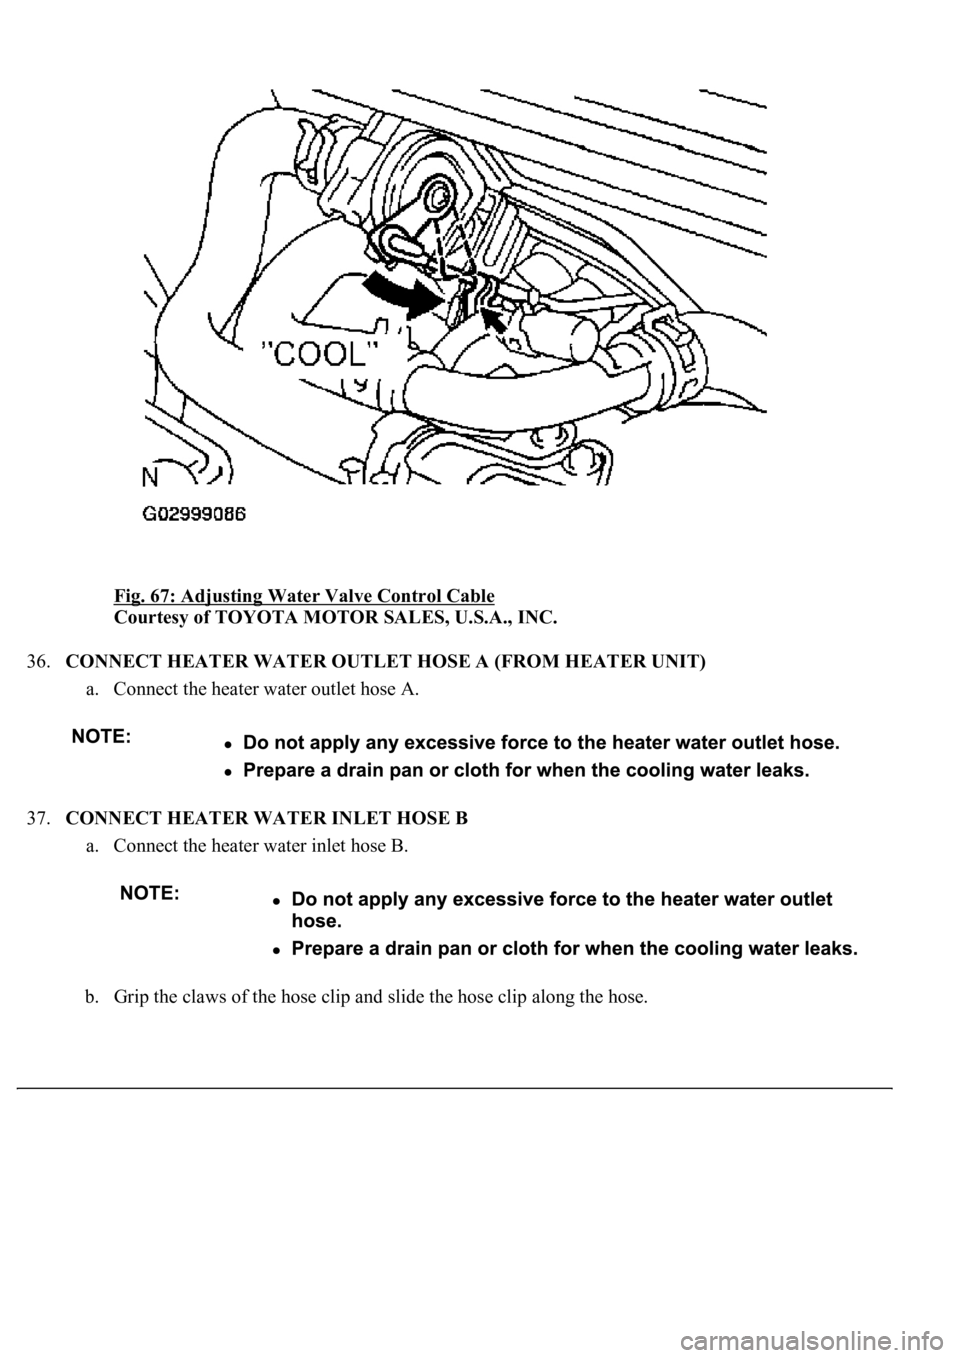
d. Set the water valve lever to the "COOL" position, connect the control cable and lock the clamp.
HINT:
Lock the clamp while lightly pushing the outer cable in the direction shown in Fig. 67
by an arrow.
Page 4253 of 4500
Fig. 67: Adjusting Water Valve Control Cable
Courtesy of TOYOTA MOTOR SALES, U.S.A., INC.
36.CONNECT HEATER WATER OUTLET HOSE A (FROM HEATER UNIT)
a. Connect the heater water outlet hose A.
37.CONNECT HEATER WATER INLET HOSE B
a. Connect the heater water inlet hose B.
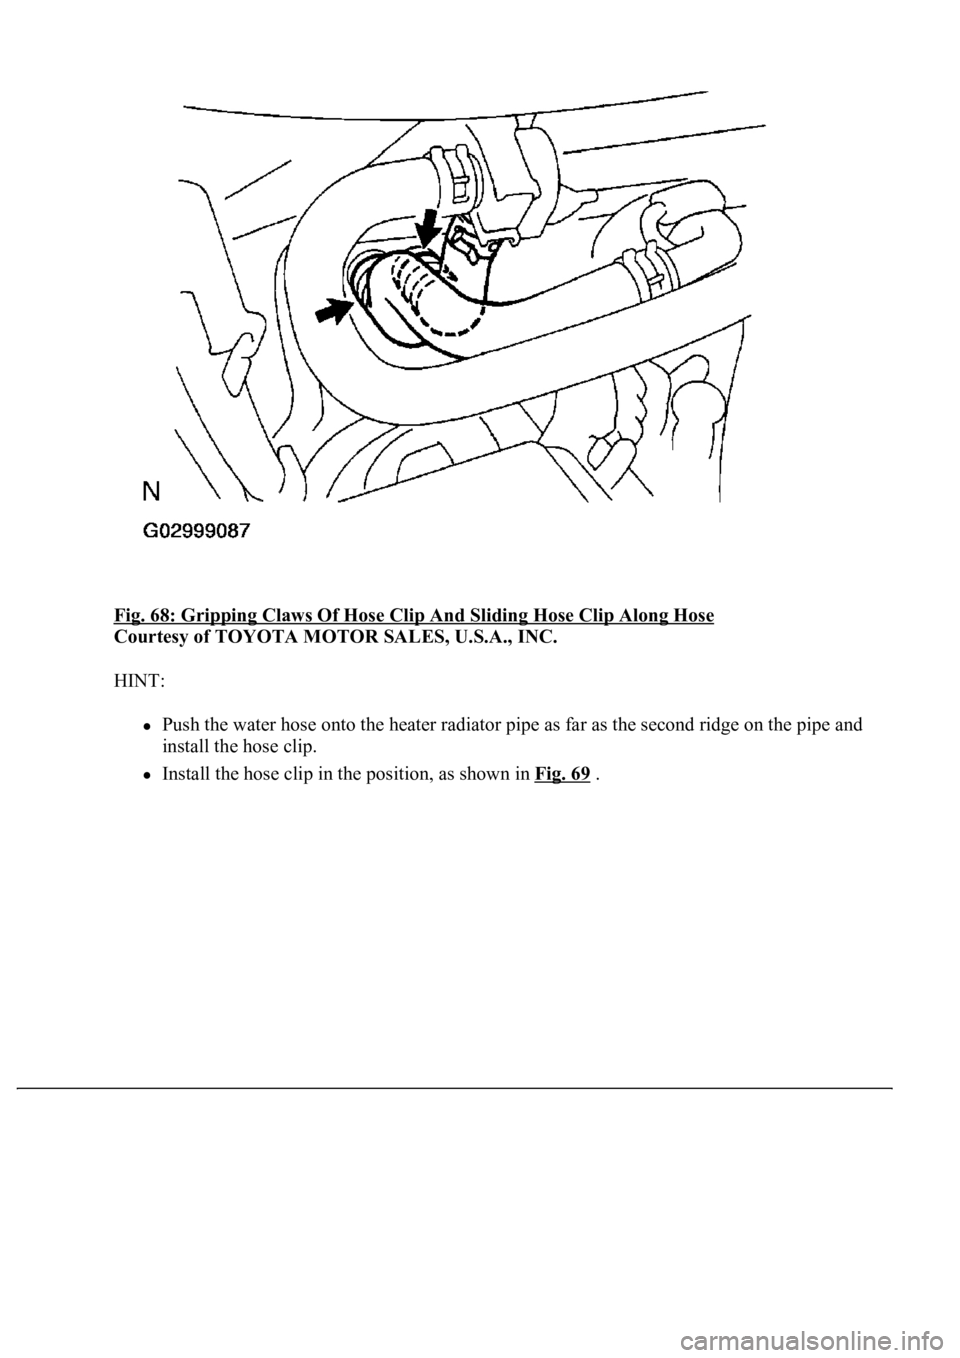
b. Grip the claws of the hose clip and slide the hose clip along the hose.
Page 4254 of 4500
Fig. 68: Gripping Claws Of Hose Clip And Sliding Hose Clip Along Hose
Courtesy of TOYOTA MOTOR SALES, U.S.A., INC.
HINT:
Push the water hose onto the heater radiator pipe as far as the second ridge on the pipe and
install the hose clip.
Install the hose clip in the position, as shown in Fig. 69.
Page 4255 of 4500
Fig. 69: Installing Hose Clip
Courtesy of TOYOTA MOTOR SALES, U.S.A., INC.
38.INSTALL LIQUID TUBE SUB-ASSY A
a. Sufficiently apply compressor oil to a new O-ring.
Compressor oil: ND-OIL 8 or equivalent
b. Install the O-ring.
c. Connect the liquid tube sub-assy.
39.INSTALL SUCTION TUBE SUB-ASSY B
a. Sufficiently apply compressor oil to a new O-ring.
Compressor oil: ND-OIL 8 or equivalent
b. Install the O-ring.
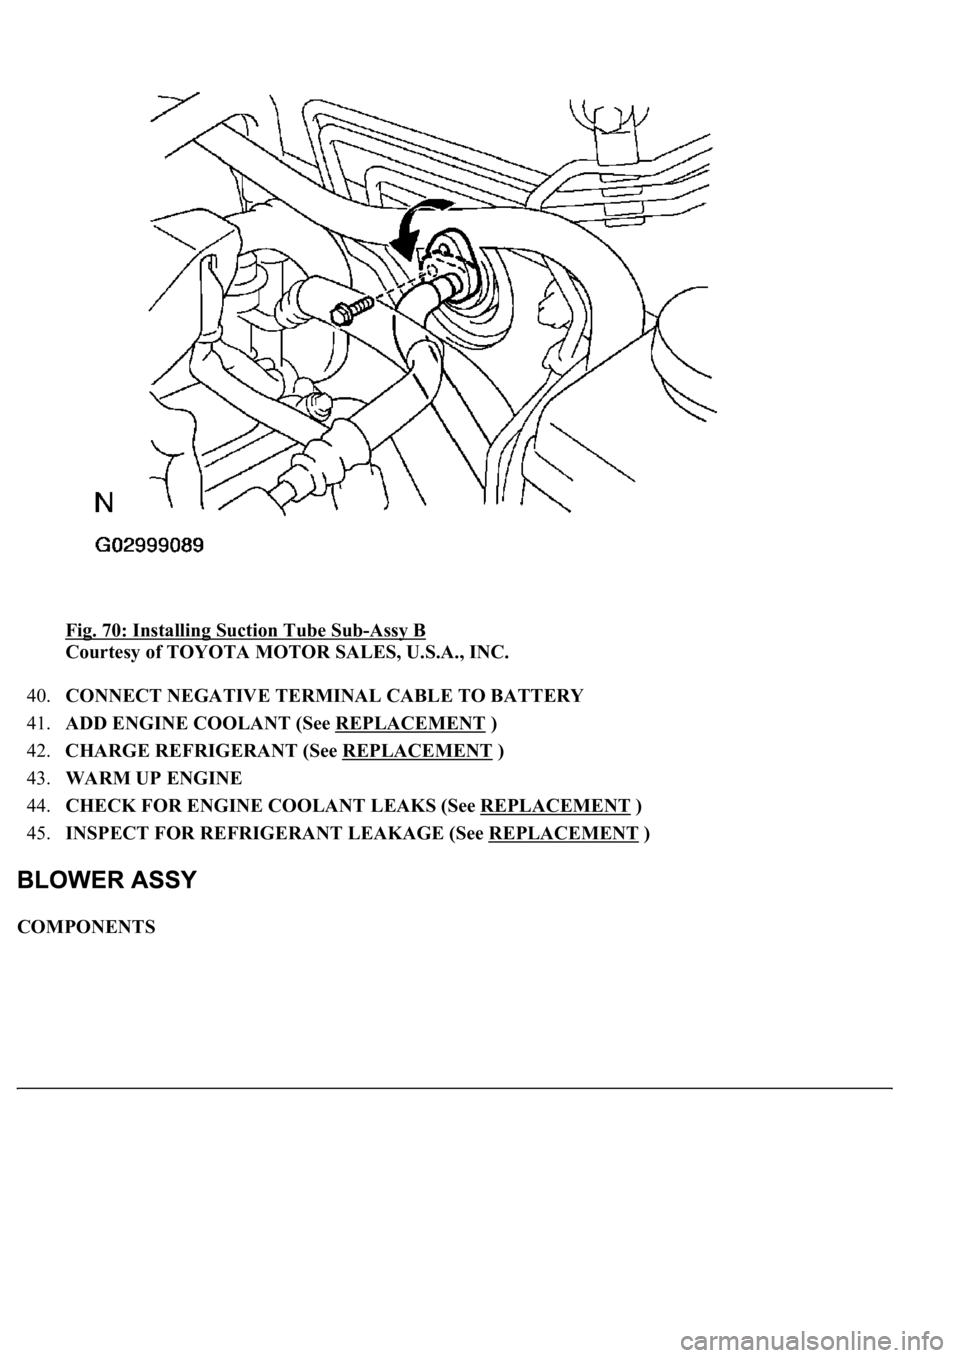
c. Connect the suction tube sub-assy B and slide the plate.
d. Install a bolt.
Torque: 10 N.m (100 kgf.cm, 7 ft.lbf)
Page 4256 of 4500
Fig. 70: Installing Suction Tube Sub-Assy B
Courtesy of TOYOTA MOTOR SALES, U.S.A., INC.
40.CONNECT NEGATIVE TERMINAL CABLE TO BATTERY
41.ADD ENGINE COOLANT (See REPLACEMENT
)
42.CHARGE REFRIGERANT (See REPLACEMENT
)
43.WARM UP ENGINE
44.CHECK FOR ENGINE COOLANT LEAKS (See REPLACEMENT
)
45.INSPECT FOR REFRIGERANT LEAKAGE (See REPLACEMENT
)
COMPONENTS
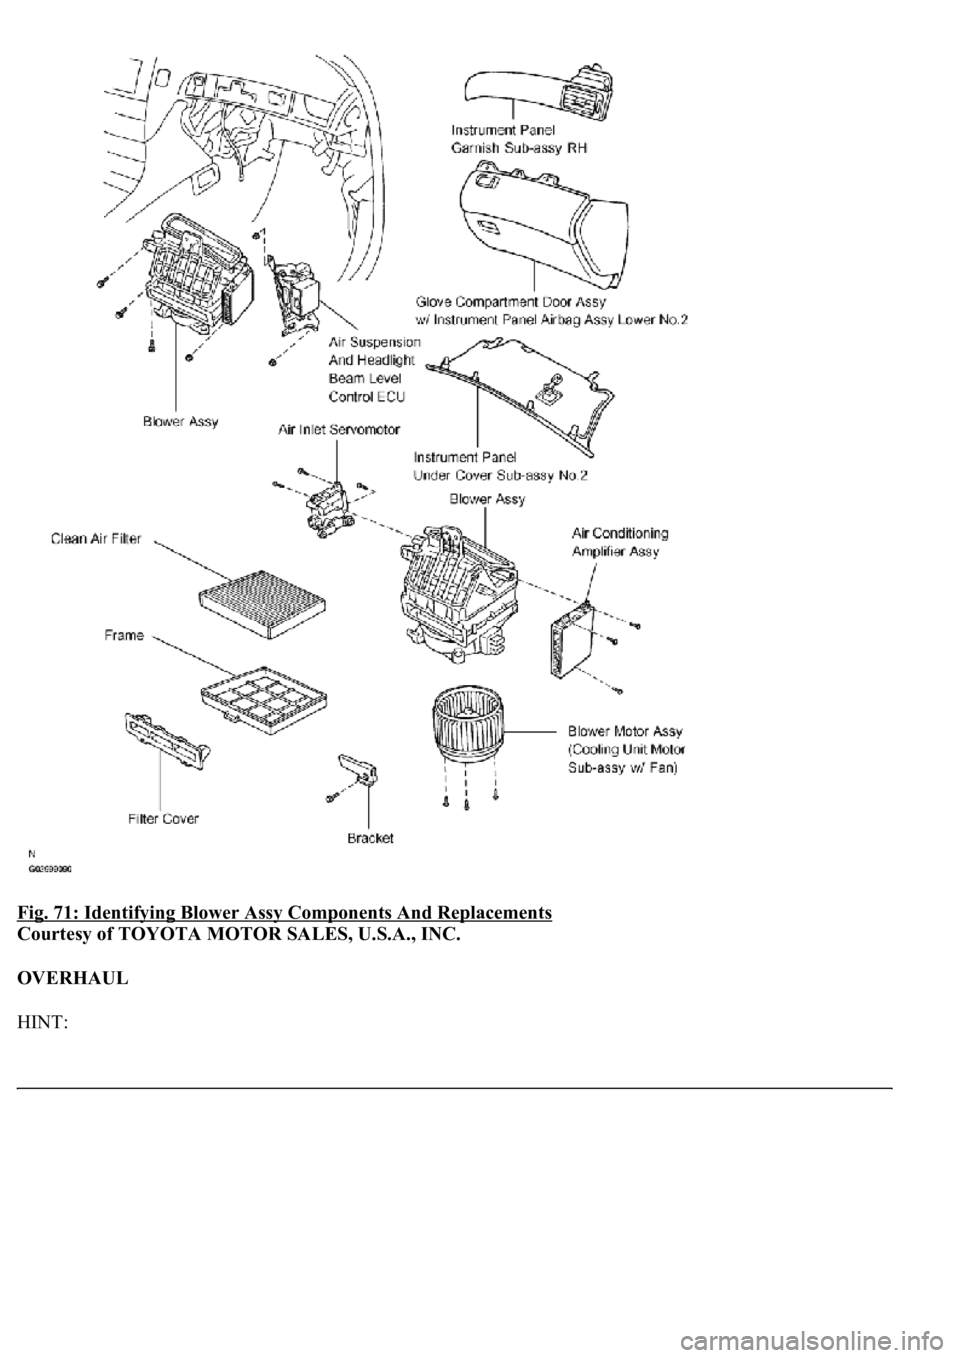
Page 4257 of 4500
Fig. 71: Identifying Blower Assy Components And Replacements
Courtesy of TOYOTA MOTOR SALES, U.S.A., INC.
OVERHAUL
HINT:
Page 4258 of 4500
Installation is in the reverse order of removal.
See COMPONENTS .
1.DISCONNECT NEGATIVE TERMINAL CABLE FROM BATTERY
2.REMOVE FRONT DOOR SCUFF PLATE LH (See REPLACEMENT
)
3.REMOVE FRONT PILLAR GARNISH LH (See step 33 in REPLACEMENT
)
4.REMOVE INSTRUMENT PANEL UNDER COVER SUB-ASSY NO. 2 (See step 21 in
REPLACEMENT
)
5.REMOVE INSTRUMENT PANEL GARNISH SUB-ASSY RH (See step 22 in REPLACEMENT
)
6.REMOVE GLOVE COMPARTMENT DOOR ASSY W/ INSTRUMENT PANEL AIRBAG ASSY
LOWER NO. 2 (See step 25 in REPLACEMENT
)
7.REMOVE AIR SUSPENSION AND HEADLIGHT BEAM LEVEL CONTROL ECU
a. Disconnect the connectors.
b. Remove the 2 nuts and air suspension and headlight beam level control ECU.
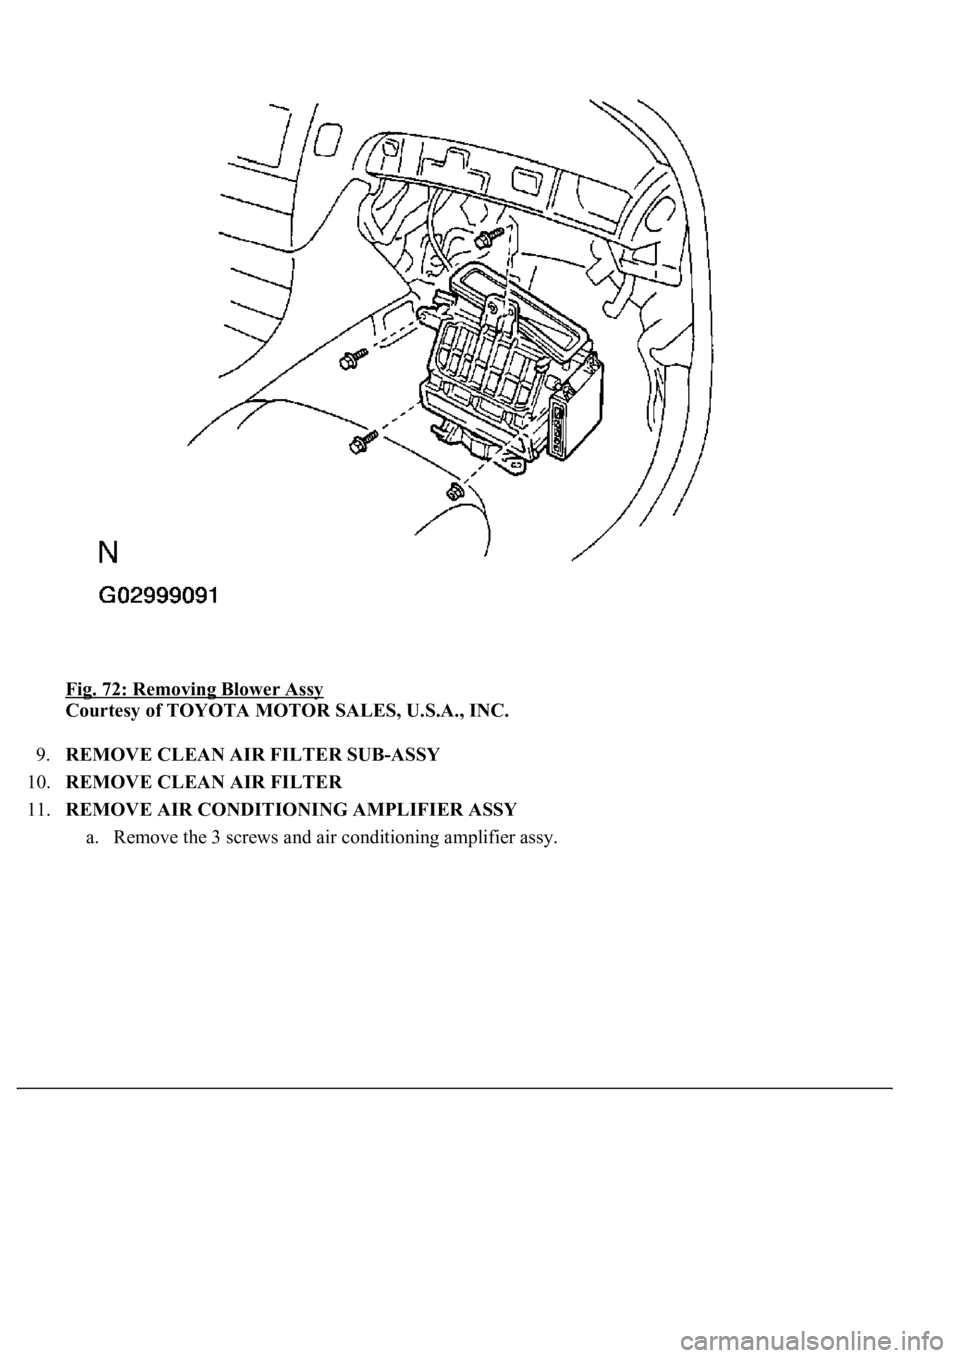
8.REMOVE BLOWER ASSY
a. Disconnect the connectors.
b. Remove the nut and 3 bolts.
c. Remove the blower assy.
Page 4259 of 4500
Fig. 72: Removing Blower Assy
Courtesy of TOYOTA MOTOR SALES, U.S.A., INC.
9.REMOVE CLEAN AIR FILTER SUB-ASSY
10.REMOVE CLEAN AIR FILTER
11.REMOVE AIR CONDITIONING AMPLIFIER ASSY
a. Remove the 3 screws and air conditionin
g amplifier assy.
Page 4260 of 4500
Fig. 73: Removing Air Conditioning Amplifier Assy
Courtesy of TOYOTA MOTOR SALES, U.S.A., INC.
12.REMOVE AIR INLET SERVOMOTOR
a. Remove the 3 screws and the air inlet servomotor.
Trending: trip computer, center console, mirror controls, zero point calibration, B2419 bean, service, spare tire
