LEXUS LS430 2003 Factory Repair Manual
Manufacturer: LEXUS, Model Year: 2003,
Model line: LS430,
Model: LEXUS LS430 2003
Pages: 4500, PDF Size: 87.45 MB
LEXUS LS430 2003 Factory Repair Manual
LS430 2003
LEXUS
LEXUS
https://www.carmanualsonline.info/img/36/57050/w960_57050-0.png
LEXUS LS430 2003 Factory Repair Manual
Trending: sat nav, rear view mirror, power steering, service indicator, rear seat, coolant, weight
Page 4331 of 4500
INSPECTION
1.INSPECT SPARK PLUG
a. Check the electrode.
1. Using an megaohmmeter, measure the insulation resistance.
Correct insulation resistance: 10 Mohms or higher
Fig. 5: Checking Electrode
Courtesy of TOYOTA MOTOR SALES, U.S.A., INC.
Page 4332 of 4500
If the resistance is less than the specified value, proceed to step (d).
HINT:
If the megaohmmeter is not available, perform the following simple inspection instead.
b. Alternative inspection method:
1. Quickly accelerate the engine to 4,000 rpm 5 times.
2. Remove the spark plug.
3. Visually check the spark plug.
If the electrode is dry, the spark plug is functioning. Reinstall the spark plug. Proceed to step
3.
If the electrode is damp, proceed to steps (c), (d) and (e).
Page 4333 of 4500
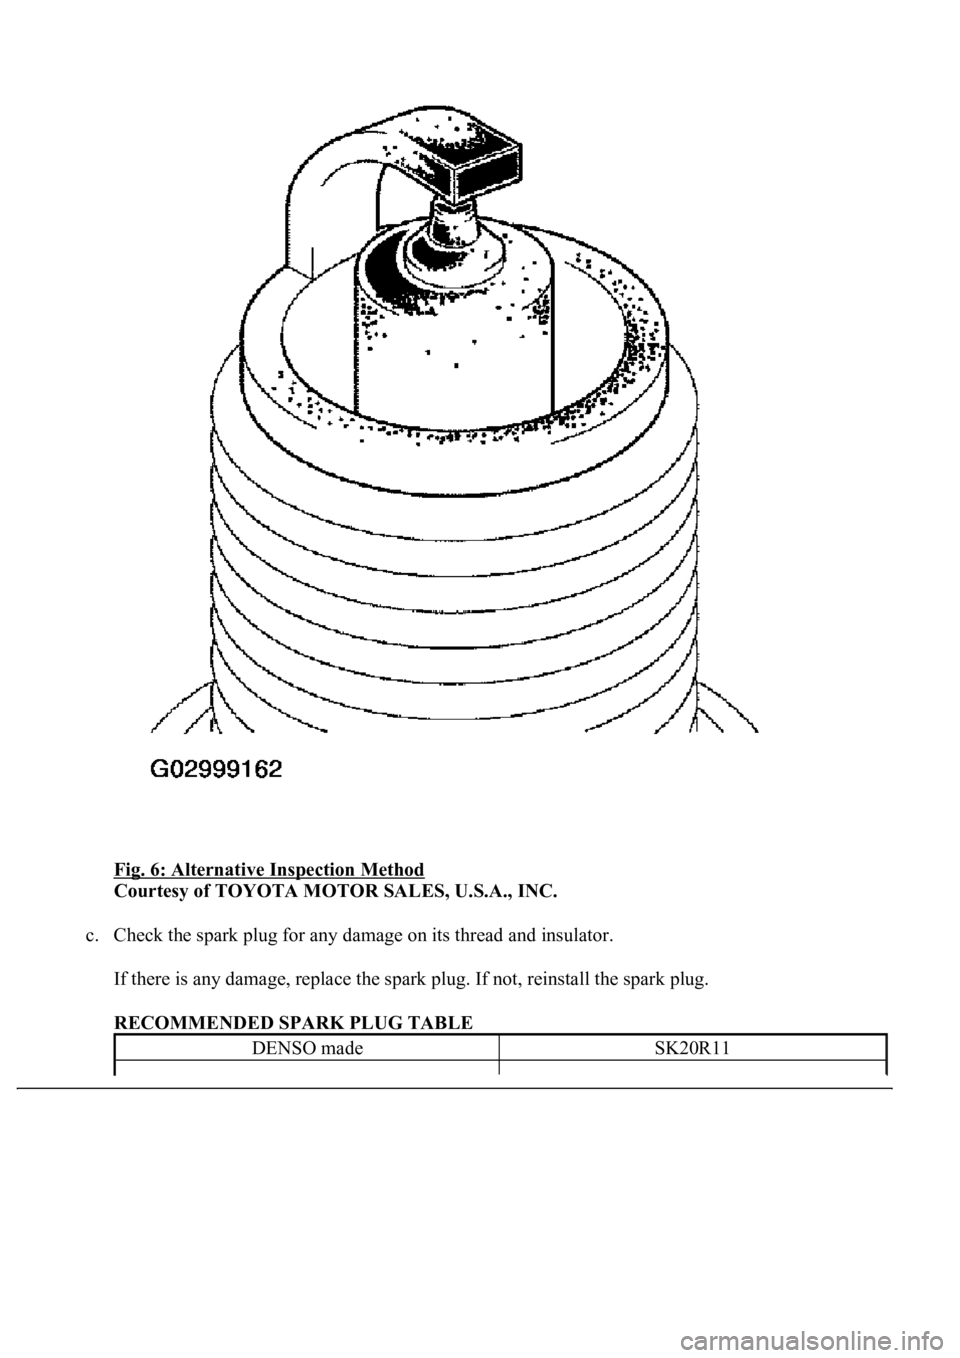
Fig. 6: Alternative Inspection Method
Courtesy of TOYOTA MOTOR SALES, U.S.A., INC.
c. Check the spark plug for any damage on its thread and insulator.
If there is any damage, replace the spark plug. If not, reinstall the spark plug.
RECOMMENDED SPARK PLUG TABLE
DENSO madeSK20R11
Page 4334 of 4500
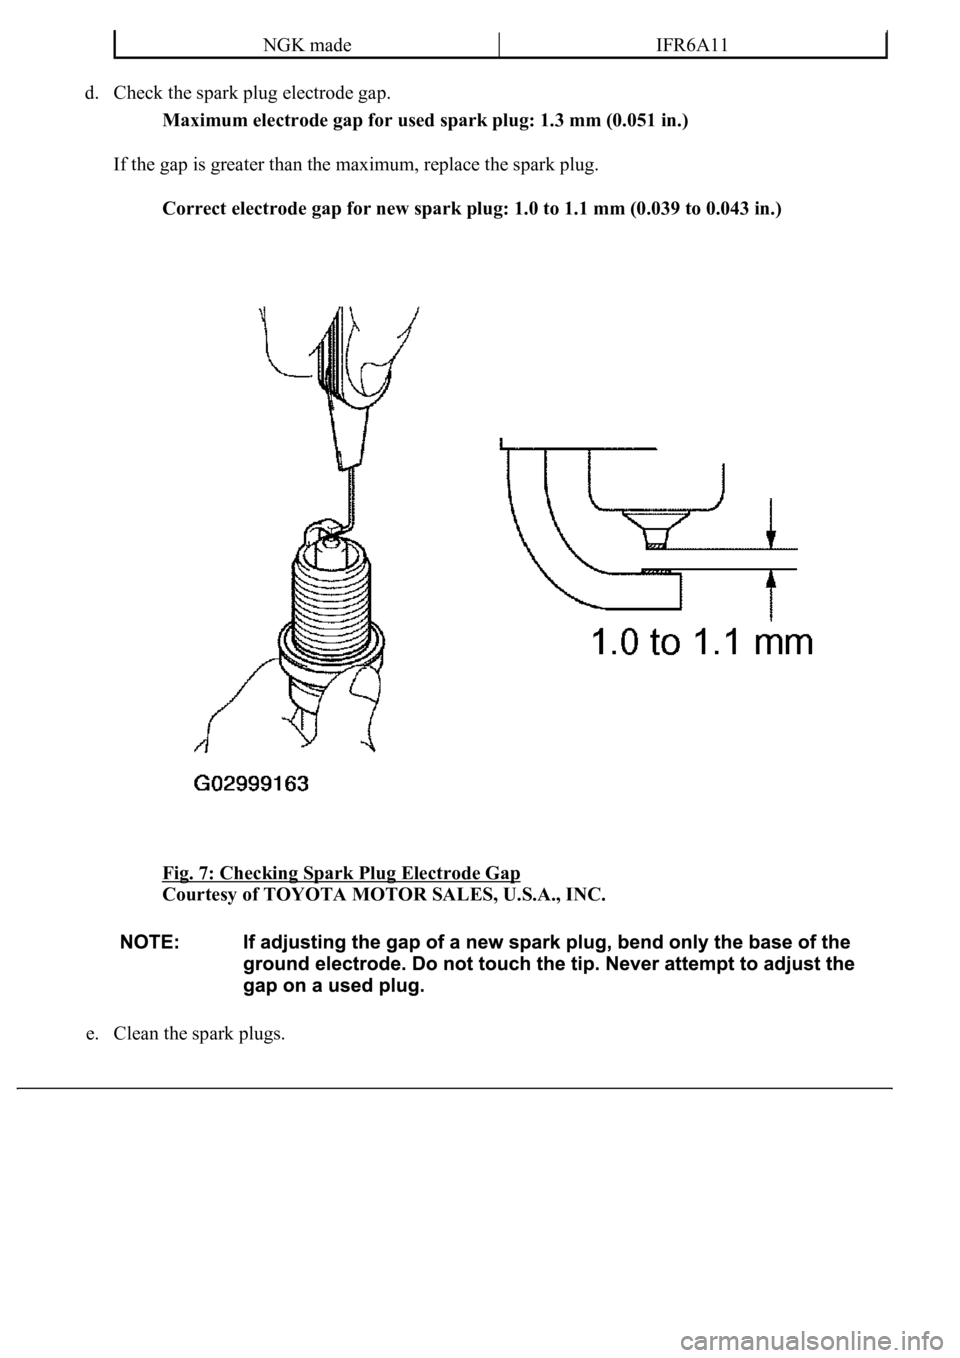
d. Check the spark plug electrode gap.
Maximum electrode gap for used spark plug: 1.3 mm (0.051 in.)
If the gap is greater than the maximum, replace the spark plug.
Correct electrode gap for new spark plug: 1.0 to 1.1 mm (0.039 to 0.043 in.)
Fig. 7: Checking Spark Plug Electrode Gap
Courtesy of TOYOTA MOTOR SALES, U.S.A., INC.
e. Clean the spark plu
gs.
NGK madeIFR6A11
Page 4335 of 4500
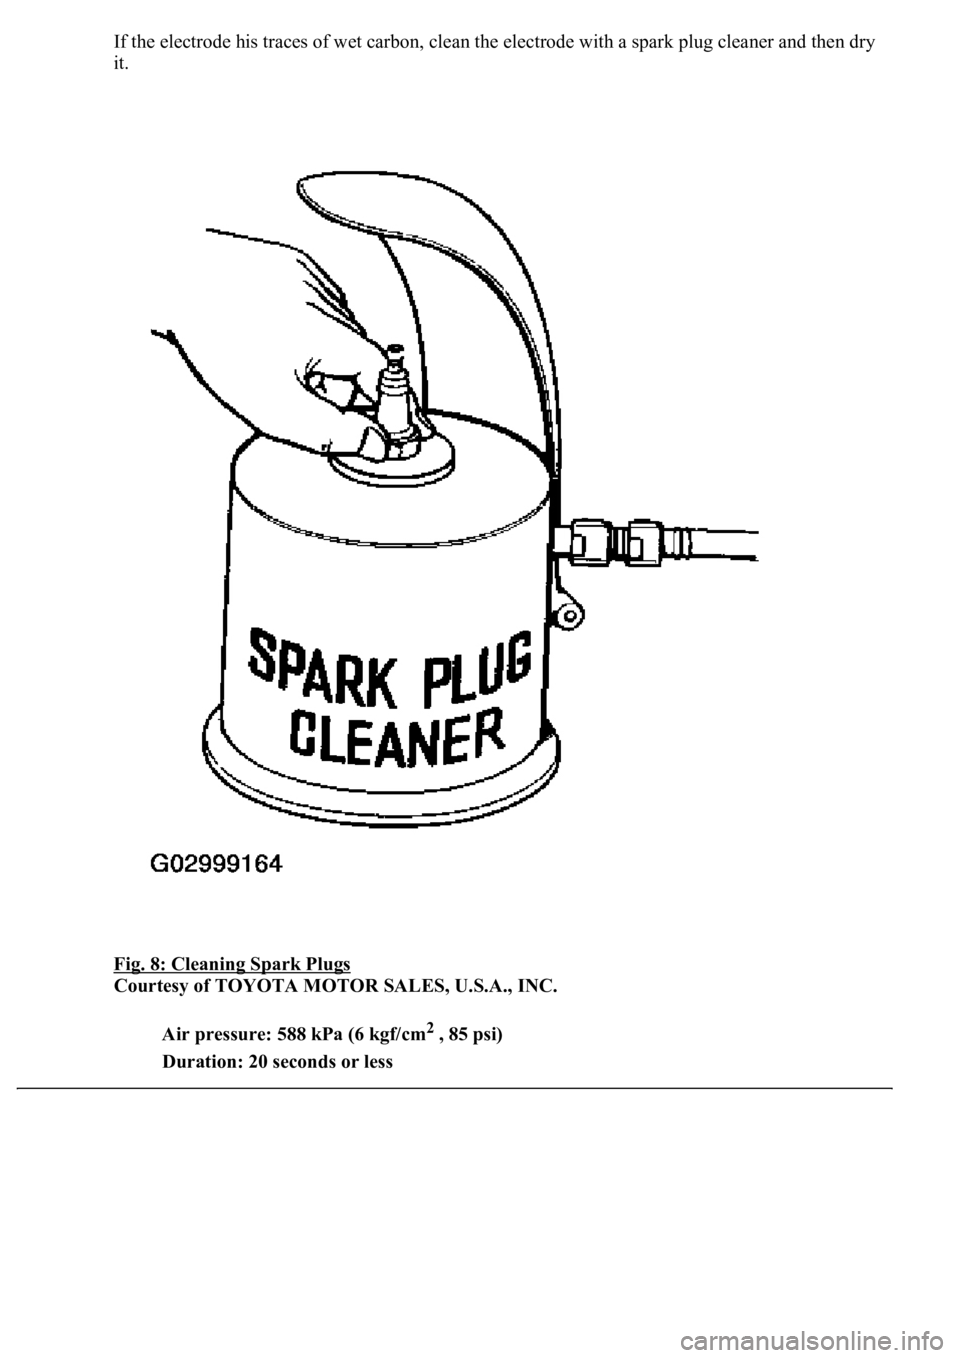
If the electrode his traces of wet carbon, clean the electrode with a spark plug cleaner and then dry
it.
Fig. 8: Cleaning Spark Plugs
Courtesy of TOYOTA MOTOR SALES, U.S.A., INC.
Air pressure: 588 kPa (6 kgf/cm
2 , 85 psi)
Duration: 20 seconds or less
Page 4336 of 4500
HINT:
Only use the spark plug cleaner when the electrode is free of oil. If the electrode has traces of oil,
use gasoline to clean off the oil before using the spark plug cleaner.
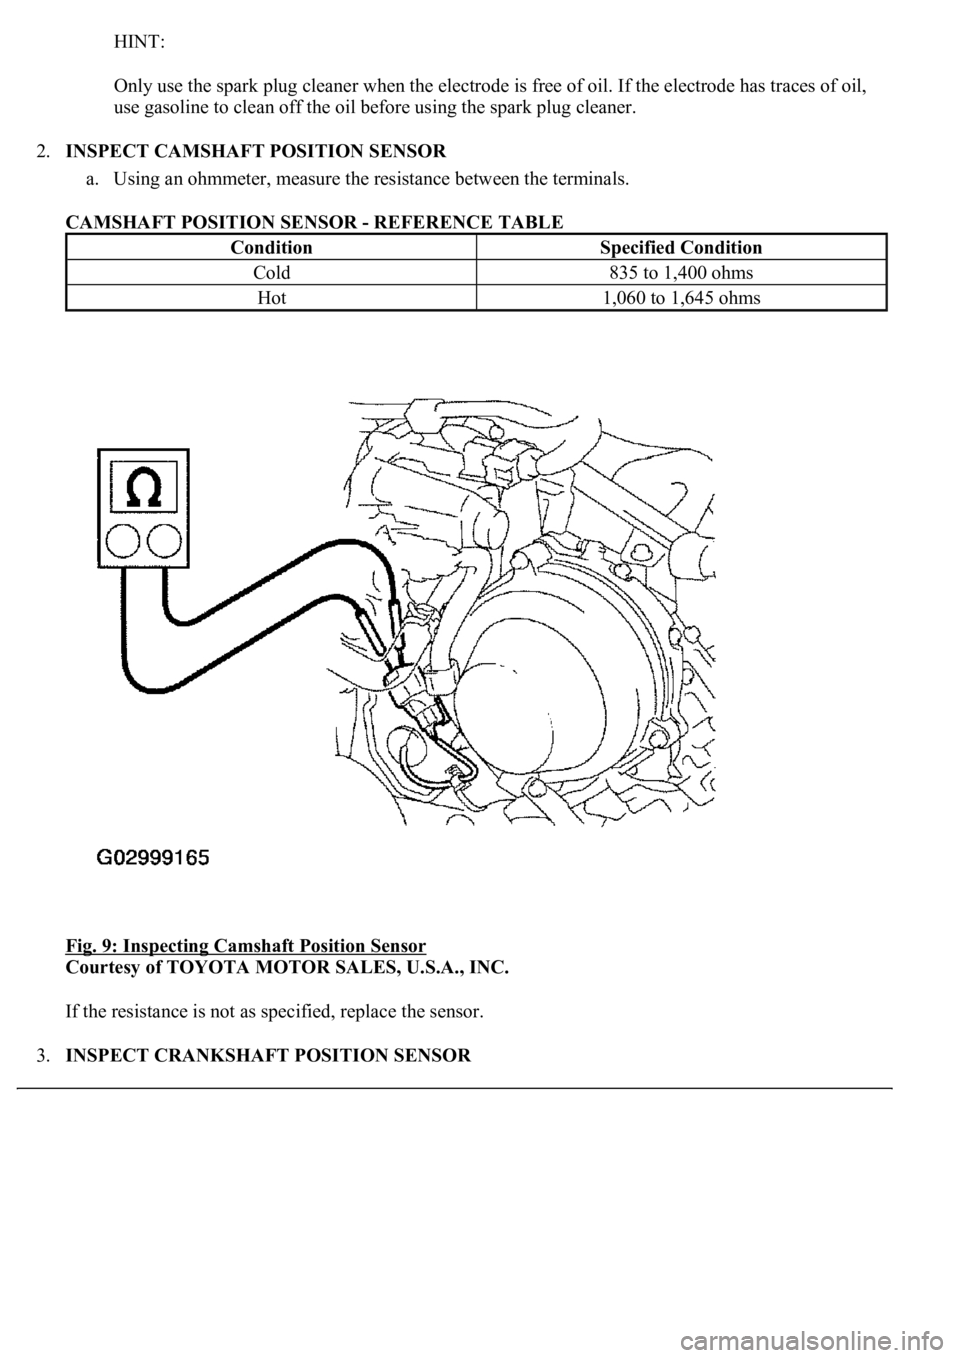
2.INSPECT CAMSHAFT POSITION SENSOR
a. Using an ohmmeter, measure the resistance between the terminals.
CAMSHAFT POSITION SENSOR - REFERENCE TABLE
Fig. 9: Inspecting Camshaft Position Sensor
Courtesy of TOYOTA MOTOR SALES, U.S.A., INC.
If the resistance is not as specified, replace the sensor.
3.INSPECT CRANKSHAFT POSITION SENSOR
ConditionSpecified Condition
Cold835 to 1,400 ohms
Hot1,060 to 1,645 ohms
Page 4337 of 4500
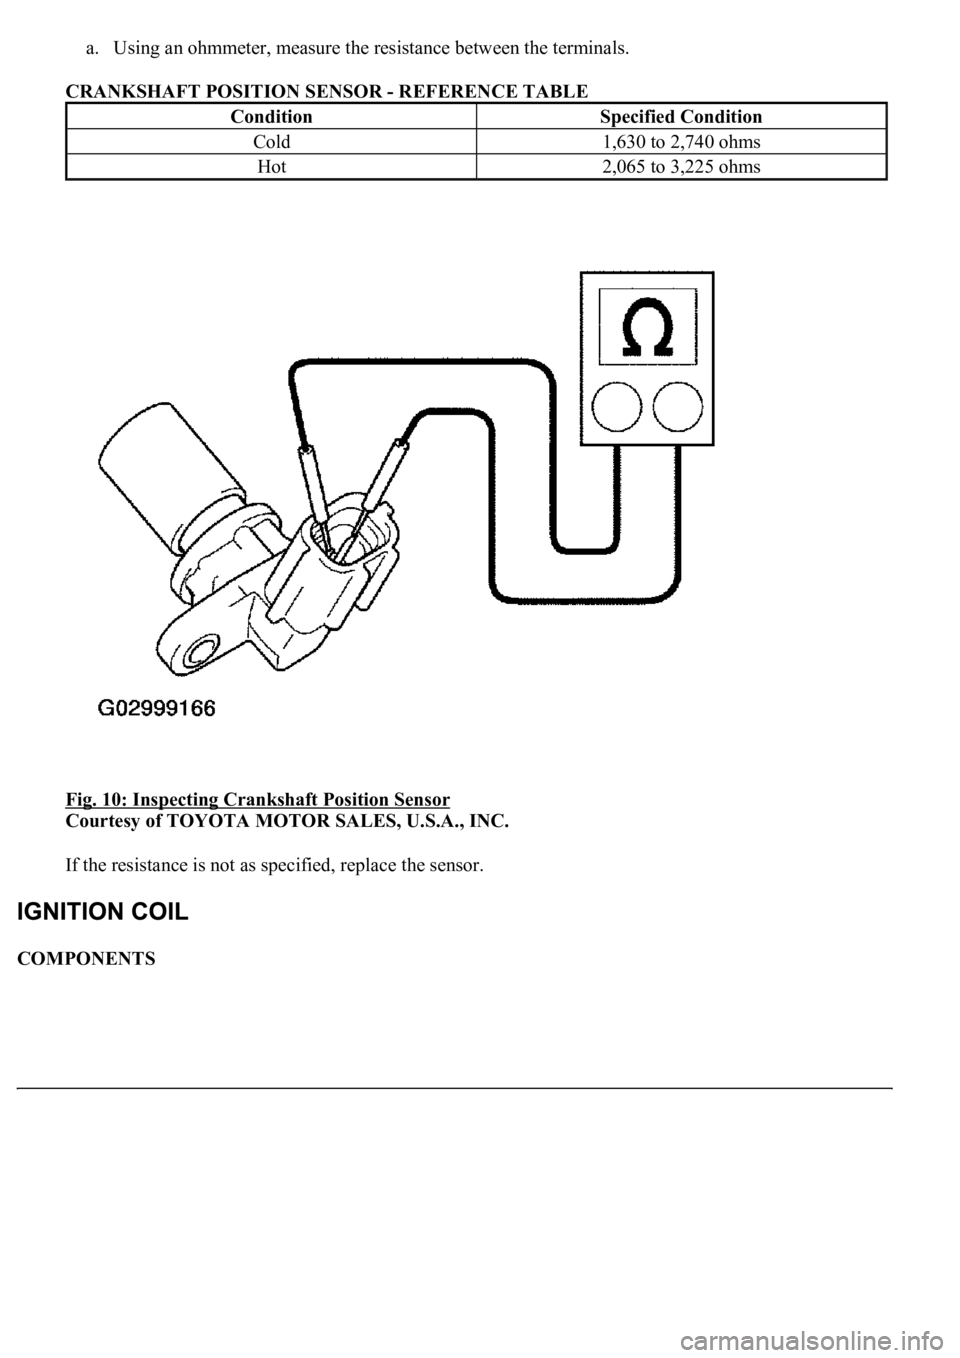
a. Using an ohmmeter, measure the resistance between the terminals.
CRANKSHAFT POSITION SENSOR - REFERENCE TABLE
Fig. 10: Inspecting Crankshaft Position Sensor
Courtesy of TOYOTA MOTOR SALES, U.S.A., INC.
If the resistance is not as specified, replace the sensor.
COMPONENTS
ConditionSpecified Condition
Cold1,630 to 2,740 ohms
Hot2,065 to 3,225 ohms
Page 4338 of 4500
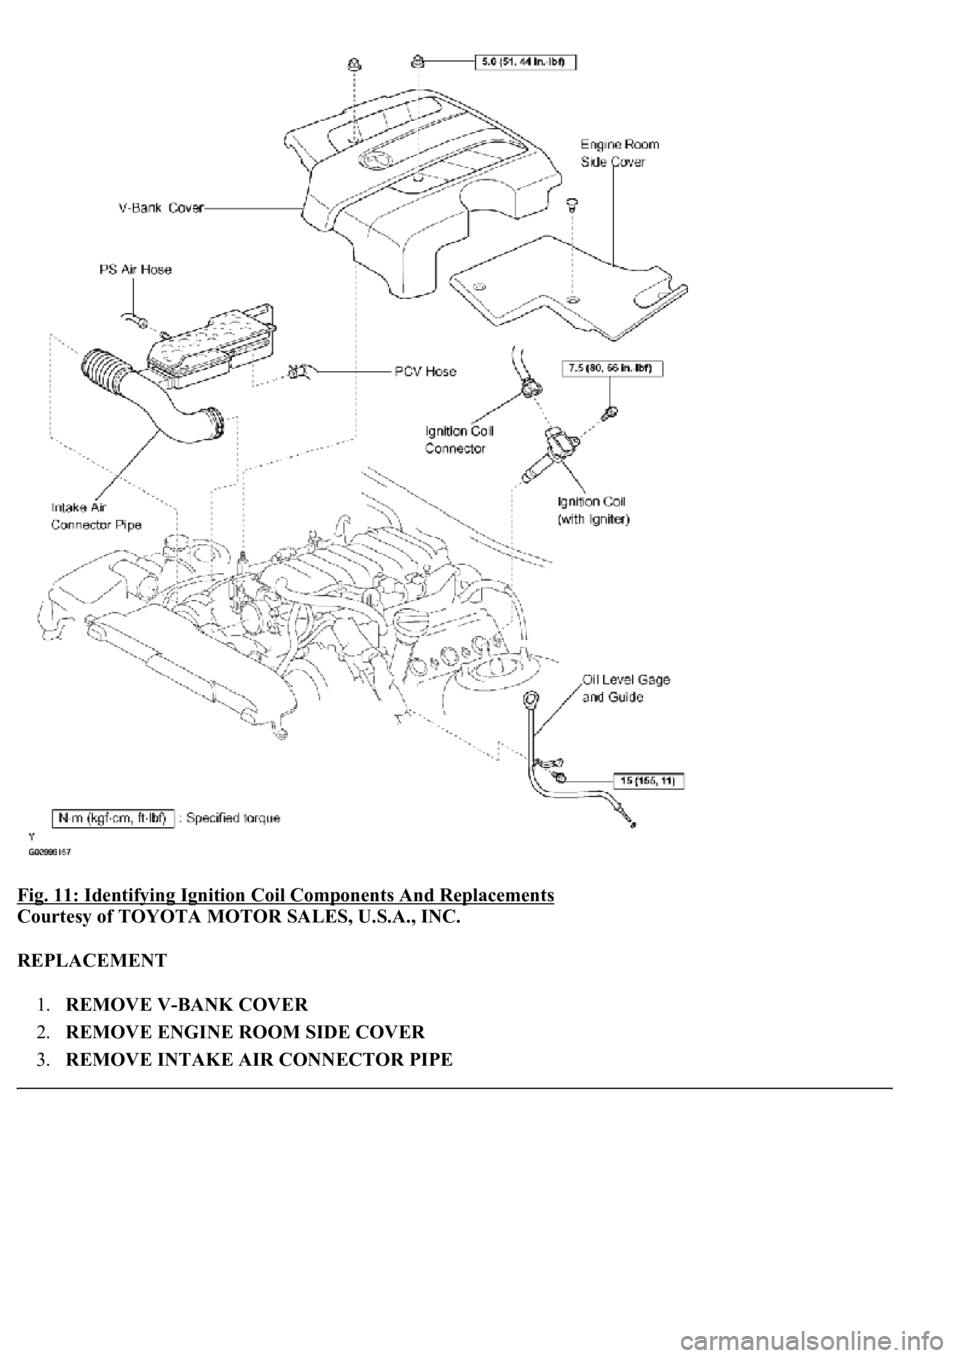
Fig. 11: Identifying Ignition Coil Components And Replacements
Courtesy of TOYOTA MOTOR SALES, U.S.A., INC.
REPLACEMENT
1.REMOVE V-BANK COVER
2.REMOVE ENGINE ROOM SIDE COVER
3.REMOVE INTAKE AIR CONNECTOR PIPE
Page 4339 of 4500
4.REMOVE OIL LEVEL GAGE SUB-ASSY (See step 8 in REPLACEMENT )
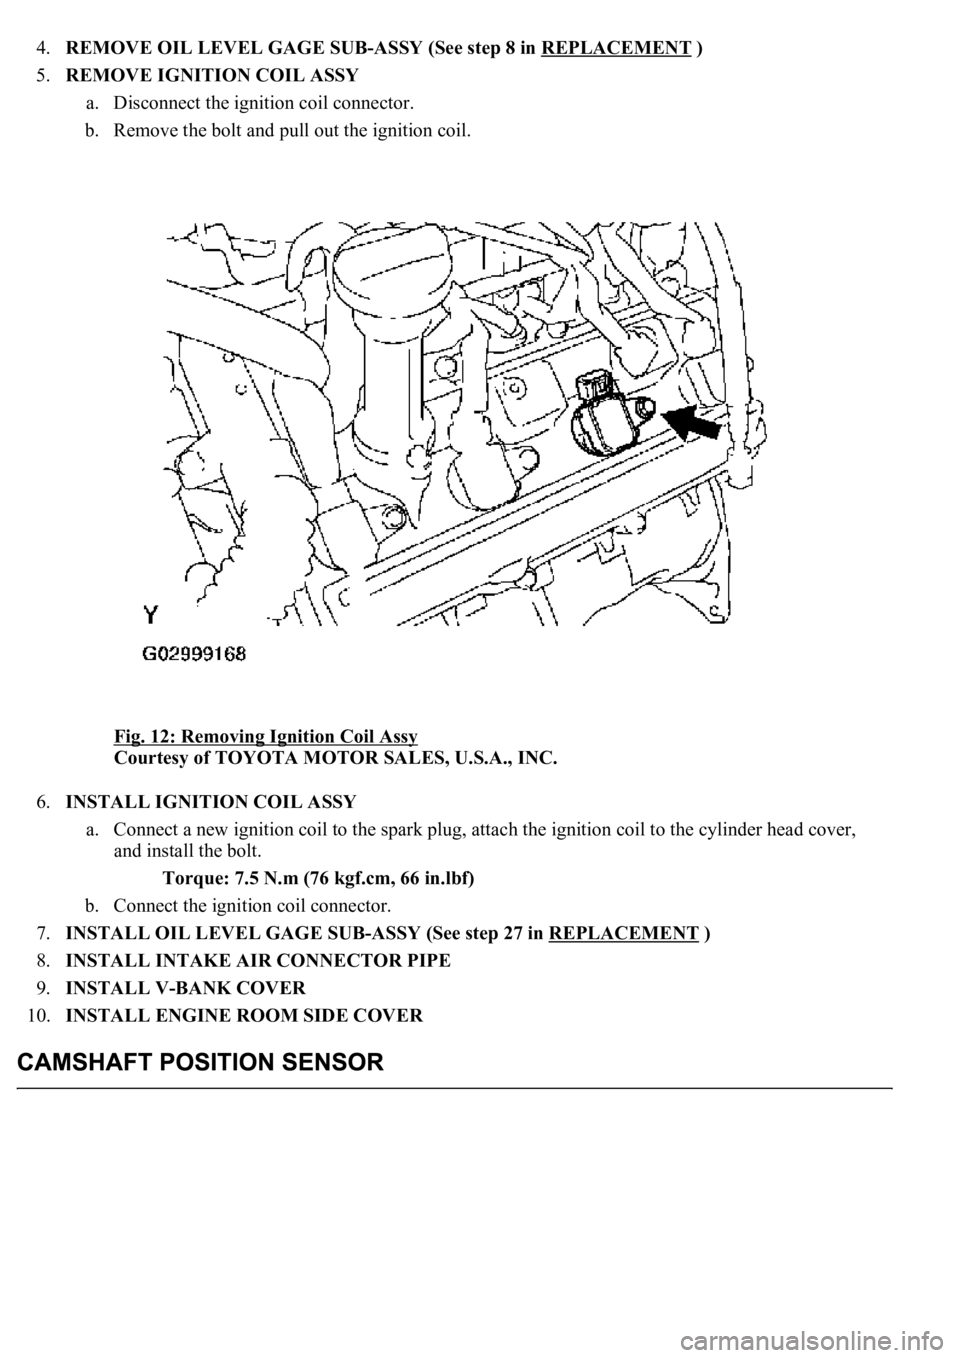
5.REMOVE IGNITION COIL ASSY
a. Disconnect the ignition coil connector.
b. Remove the bolt and pull out the ignition coil.
Fig. 12: Removing Ignition Coil Assy
Courtesy of TOYOTA MOTOR SALES, U.S.A., INC.
6.INSTALL IGNITION COIL ASSY
a. Connect a new ignition coil to the spark plug, attach the ignition coil to the cylinder head cover,
and install the bolt.
Torque: 7.5 N.m (76 kgf.cm, 66 in.lbf)
b. Connect the ignition coil connector.
7.INSTALL OIL LEVEL GAGE SUB-ASSY (See step 27 in REPLACEMENT
)
8.INSTALL INTAKE AIR CONNECTOR PIPE
9.INSTALL V-BANK COVER
10.INSTALL ENGINE ROOM SIDE COVER
Page 4340 of 4500
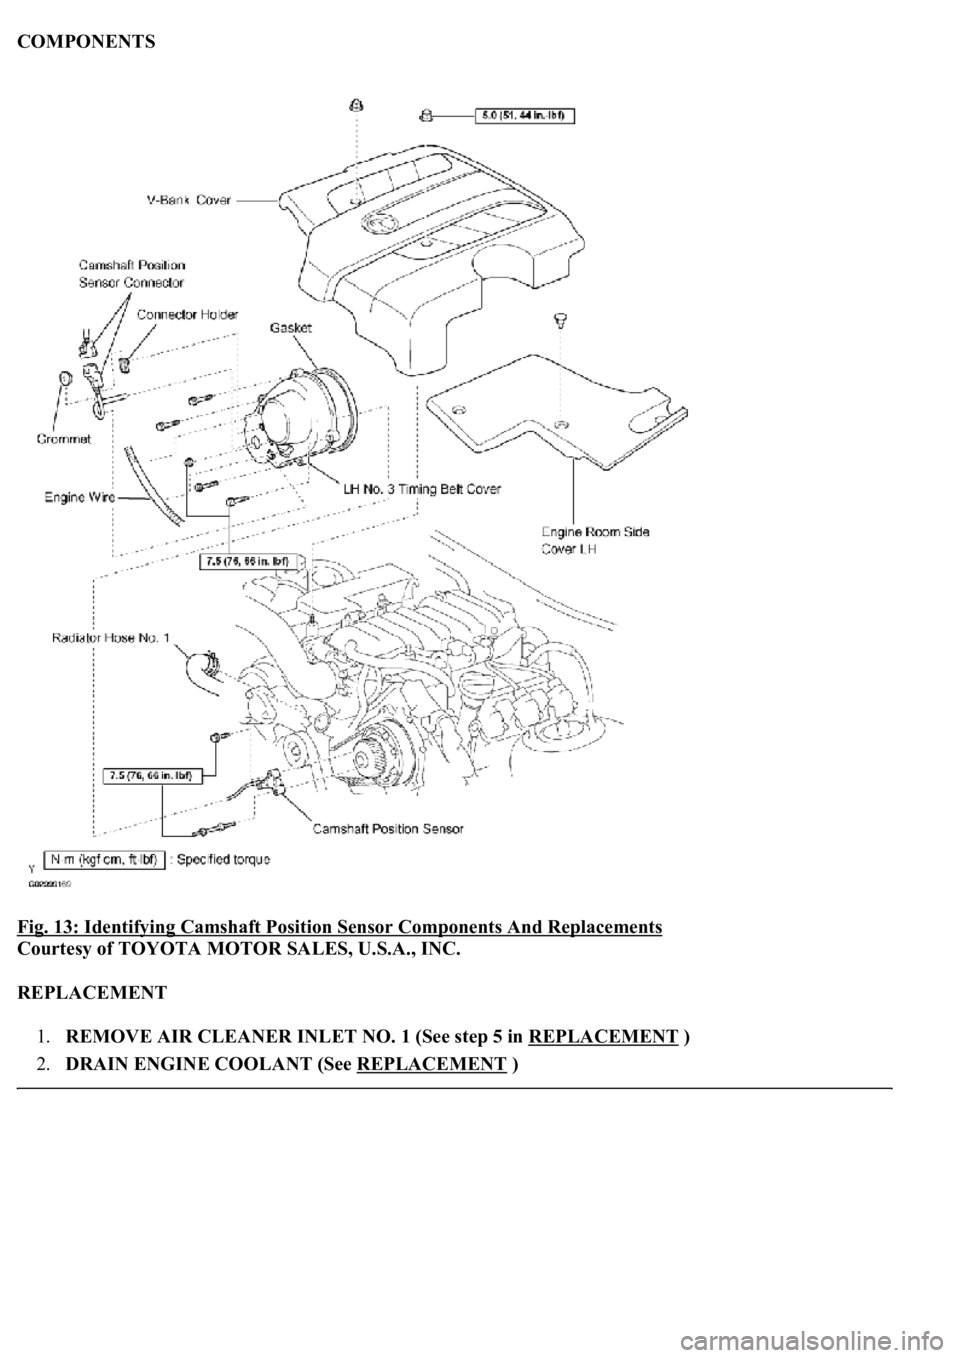
COMPONENTS
Fig. 13: Identifying Camshaft Position Sensor Components And Replacements
Courtesy of TOYOTA MOTOR SALES, U.S.A., INC.
REPLACEMENT
1.REMOVE AIR CLEANER INLET NO. 1 (See step 5 in REPLACEMENT
)
2.DRAIN ENGINE COOLANT (See REPLACEMENT
)
Trending: replacement, coolant, intake manifold inlet, ABS, AC Expansion Valve, steering wheel, glove box
