MAZDA 626 1987 Workshop Manual
Manufacturer: MAZDA, Model Year: 1987, Model line: 626, Model: MAZDA 626 1987Pages: 1865, PDF Size: 94.35 MB
Page 261 of 1865

1C INSPECTION AND REPAIR
76G01C-105
Replacement of valve guide
Caution
When the valve guide is replaced, check the
gap between the valve and guide once again.
The valve seal should be installed after in-
spection and repair of the valve seat.
Don't misassemble the valve guides because
intake and exhaust valve guides have a differ-
ent seat.
Intake side valve guide longer
Exhaust side valve guide shorter
Removal
1. Gradually heat the cylinder head in water to ap-
prox. 90°C (194°F).
76G01C-106
2. Remove the valve guide from the side opposite the
combustion chamber with the SST.
86U01X-084
Installation
1. Gradually heat the cylinder head in water to ap-
prox. 90°C (194°F).
76G01C-111
1C-49
Page 262 of 1865

1C INSPECTION AND REPAIR
76G01C-103
76G01C-104
76G01C-110
2. Fit the clip onto the valve guide.
3. Tap the valve guide in from the side opposite the
combustion chamber with the SST until the clip
contacts the cylinder head.
4. Check the guide protrusion height (dimension A
in the figure) is as specified.
Height:
8.3—8.8 mm (0.327—0.346 in)
Valve Seat
1. Inspect the contact surface of the valve seat and
valve face for the following.
(1) Roughness
(2) Damage
2. If necessary, resurface the valve seat to the speci-
fied angle with valve seat cutter and/or resurface
the valve face.
Angle
RF-CX IN 60° RF-CX EX 45°
RF-N IN 45° RF-N EX 45°
3. Apply a thin coat of prussian blue to the valve face.
4. Check the valve seating by pressing the valve
against the seat.
(1) If blue does not appear 360° around the valve
face, replace the valve.
(2) If blue does not appear 360° around the valve
seat, resurface the seat.
76G01C-111
1C-50
Page 263 of 1865

INSPECTION AND REPAIR 1C
76G01C-112
76G01C-113
76G01C-114
5. Check the seat contact width.
Width mm (in)
RF-CX IN 1.4-1.8 (0.055-0.071) RF-CX EX 1.64-2.04 (0.065-0.080)
RF-N IN 1.7—2.3 (0.067-0.091) RF-N EX 1.7—2.3 (0.067—0.091)
6, Check that the valve seating position is at the cen-
ter of the valve face.
(1) If the seating position is too high, correct the
valve seat as below.
Angle
- - • -1st 2nd
RF-CX IN 75° 60° RF-CX EX 60° 45°
RF-N IN 60° 45° RF-N EX 60° 45°
(2) If the seating position is too low, correct the
valve seat as below.
Angle
1st 2nd
RF-CX IN 15° 45° RF-CX EX 30° 45°
RF-N IN 30° 45° RF-N EX 30° 45°
7. Seat the valve to the valve seat with a lapping
compound.
Caution
Do not let compound adhere to the valve
stem.
8. Measure the receded amount from the cylinder
head surface by using a feeler gauge.
Recession-
0.75—1.05 mm (0.030—0.041 in)
Maximum: 2.55 mm (0.100 in)
(1) If the receded amount is 1.55—2.55 mm
(0.061—0.100 in), install the washer into the
valve spring seat area.
The washer thickness should be equal to the
amount subtracted 1 mm (0.04 in) from the
receded amount.
(2) If the receded amount exceeds 2.55 mm
(0.100 in), replace the cylinder head.
76G01C-144
1C-51
Page 264 of 1865

INSPECTION AND REPAIR 1C
76G01C-116
76G01C-117
—Angle limit
S//////A 777;////////
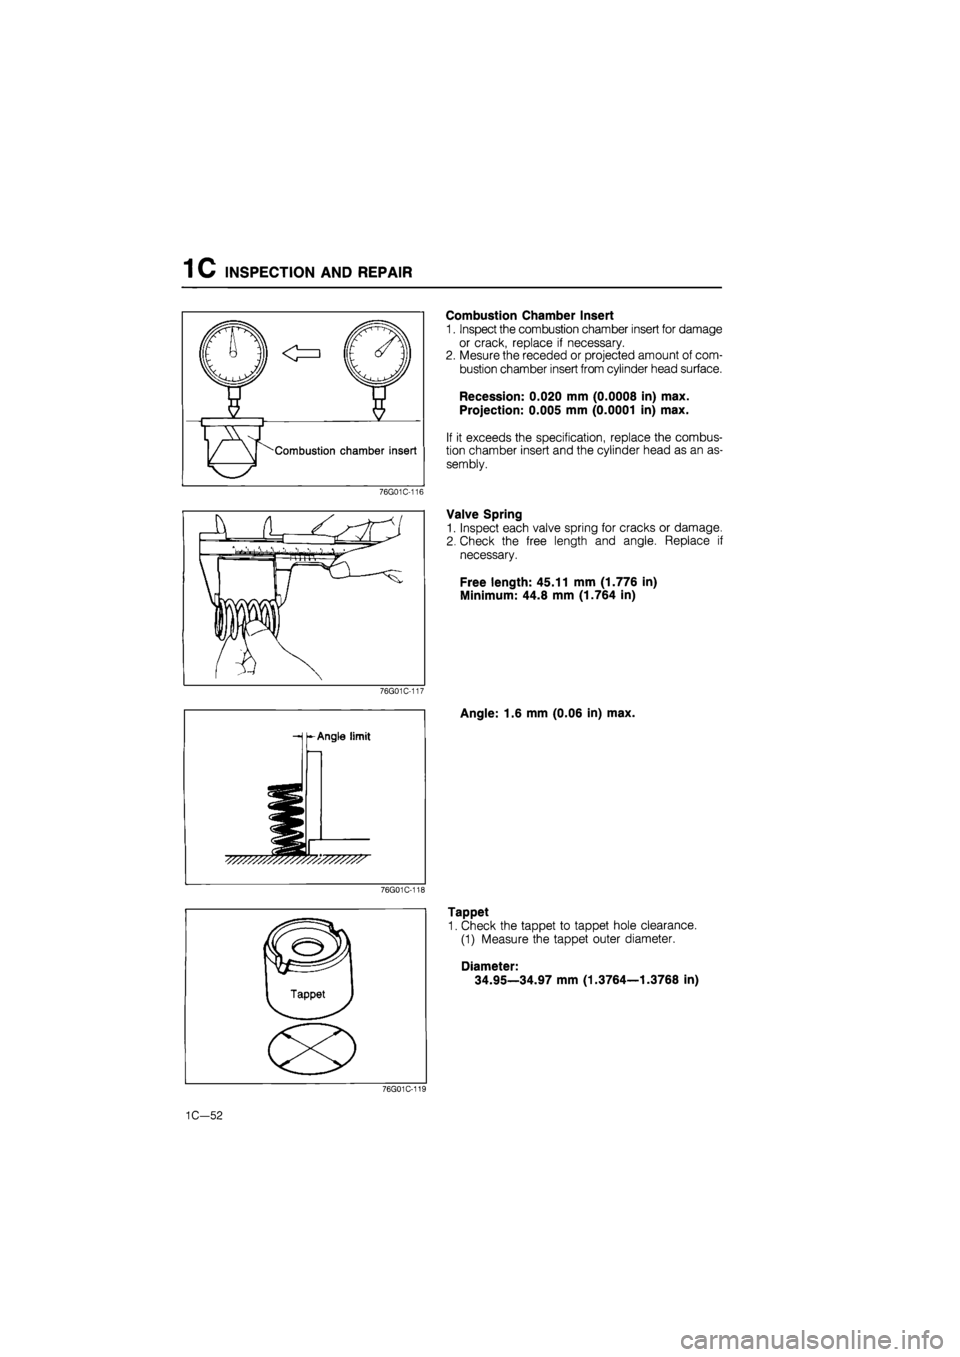
Combustion Chamber Insert
1. Inspect the combustion chamber insert for damage
or crack, replace if necessary.
2. Mesure the receded or projected amount of com-
bustion chamber insert from cylinder head surface.
Recession: 0.020 mm (0.0008 in) max.
Projection: 0.005 mm (0.0001 in) max.
If it exceeds the specification, replace the combus-
tion chamber insert and the cylinder head as an as-
sembly.
Valve Spring
1. Inspect each valve spring for cracks or damage.
2. Check the free length and angle. Replace if
necessary.
Free length: 45.11 mm (1.776 in)
Minimum: 44.8 mm (1.764 in)
Angle: 1.6 mm (0.06 in) max.
76G01C-118
Tappet
1. Check the tappet to tappet hole clearance.
(1) Measure the tappet outer diameter.
Diameter:
34.95—34.97 mm (1.3764—1.3768 in)
76G01C-144
1C-52
Page 265 of 1865

INSPECTION AND REPAIR 1C
(2). Measure the inner diameter of the tappet hole
in the cylinder head.
Hole diameter:
34.99—35.01 mm (1.3776—1.3787 in)
2. Calculate the difference (clearance) between the
tappet diameter and hole inner diameter.
If the clearance exceeds the specification , replace
the tappet or the cylinder head.
Clearance: 0.10 mm (0.004 in) max.
76G01C-120
76G01C-121
76G01C-122
Camshaft
1. Set the front and rear journals on V-blocks.
Check the camshaft runout. Replace if necessary.
Runout: 0.10 mm (0.004 in) max.
2. Check the cam for wear or damage. Replace if
necessary.
3. Check the cam lobe height at the two points as
shown in the figure.
Height mm (in)
' " " Standard Mimimum
RF-CX IN 42.521 (1.6741) 42.11 (1.658) RF-CX EX 45.300 (1.7835) 44.90 (1.768)
RF-N IN 44.306 (1.7443) 43.90 (1.728) RF-N EX 45.300 (1.7835) 44.90 (1.768)
4. Measure wear of the journals in X and Y directions
at the two points as shown in the figure.
Diameter:
31.959—31.975 mm (1.2582—1.2589 in)
Out-of-round: 0.05 mm (0.002 in) max.
76G01C-144
1C-53
Page 266 of 1865

INSPECTION AND REPAIR 1C
n a. n _ n
76G01C-124
76G01C-250
76G01C-125
5. Measure the oil clearance of the camshaft.
(1) Remove the tappets and adjusting discs from
the cylinder head, and separate them by
cylinder.
(2) Clean the camshaft and cylinder head journal.
(3) Install the camshaft into position.
(4) Set a Plasti-gauge on the camshaft journal in
the axial direction.
(5) Install the camshaft caps according to the num-
ber and arrow marks.
(6) Tighten the camshaft caps evenly and in ord-
er shown in the figure.
Tighten torque:
20—26 Nm (2.0—2.7 m-kg, 14—20 ft-lb)
(7) Remove the camshaft caps and measure the
oil clearance.
Oil clearance:
0.025—0.066 mm (0.0010—0.0026 in)
Maximum: 0.10 mm (0.004 in)
(8) If the oil clearance exceeds the maximum,
replace the cylinder head or camshaft.
76G01C-144
1C-54
Page 267 of 1865

INSPECTION AND REPAIR 1C
76G01C-127
76G01C-128
Feeler gauge
76G01C-129
6. Measure the camshaft end play. If it exceeds the
maximum, replace the camshaft and/or the cylin-
der head.
End play:
0.02—0.15 mm (0.0008—0.0059 in)
Maximum: 0.20 mm (0.008 in)
Cylinder Block
1. Check the cylinder block. Repair or replace if
necessary.
(1) Leakage damage
(2) Cracks
(3) Scoring of wall
2. Measure the distortion of the top surface of the cyl-
inder block in the six directions as shown in the
figure.
Distortion: 0.10 mm (0.004 in) max.
3. If the distortion exceeds the maximum, replace the
cylinder block.
Caution
Do not grind the surface of the cylinder block.
4. Measure the cylinder bore in directions X and Y
at three levels in each cylinder as shown.
Cylinder bore mm (in)
Size Bore
Standard 86.000-86.022 (3.3858—3.3867)
0.25 (0.010) oversize 86.250—86.272 (3.3957—3.3965)
0.50 (0.020) oversize 86.500-86.522 (3.4055—3.4064)
76G01C-144
1C-55
Page 268 of 1865

1C INSPECTION AND REPAIR
(1) If the difference between the measurement A
and C exceeds the maximum taper, rebore the
cylinder to oversize.
Taper: 0.022 mm (0.0009 in) max.
76G01C-131
Ot?
a
—-]
^y A
o ^r c^
O
n r
(2) If the difference between the measurement X
and Y exceeds the maximum out-of-round, re-
bore the cylinder to oversize.
Out-of-round: 0.022 mm (0.0009 in) max.
Caution
The boring size should be based on the size
of an oversize piston and be the same for all
cylinders.
76G01C-132
5. If the upper part of the cylinder wall shows uneven
wear, remove the ridge with a ridge reamer.
86U01X-102
Piston
1. Inspect the outer circumferences of all pistons for
seizure or scoring. Replace if necessary.
2. Measure the outer diameter of each piston at a right
angle (90°) to the piston pin, 19 mm (0.75 in)
above the bottom of piston.
Piston diameter mm (in)
Size Diameter
Standard 85.957-85.983 (3.3841-3.3852)
0.25 (0.010) oversize 86.207-86.233 (3.3940-3.3950)
0.50 (0.020) oversize 86.457-86.483 (3.4038-3.4048)
76G01C-133
1C—56
Page 269 of 1865

INSPECTION AND REPAIR 1C
-Clearance
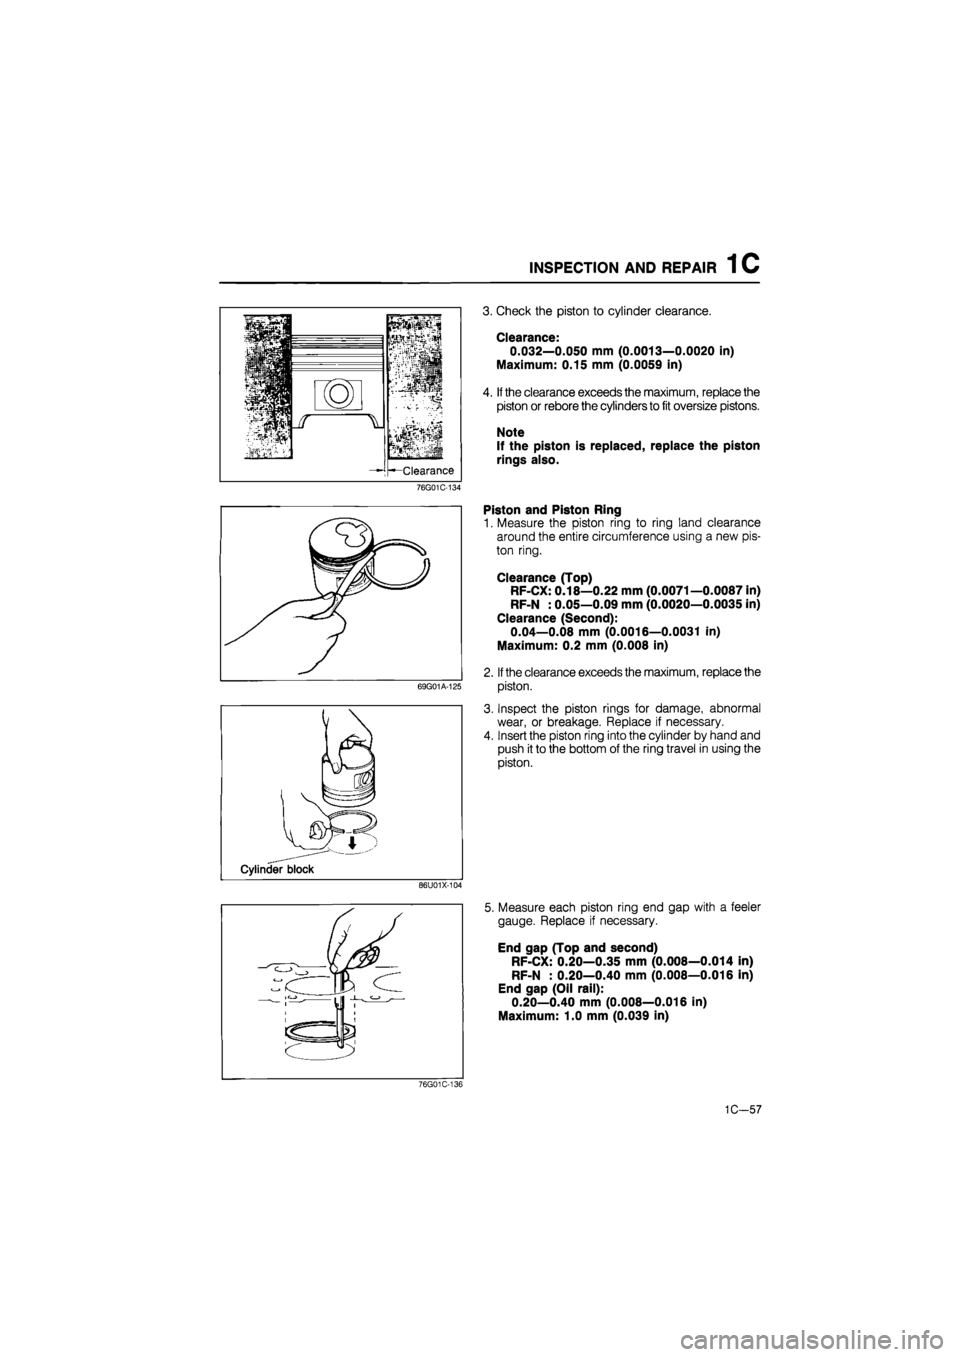
3. Check the piston to cylinder clearance.
Clearance-
0.032—0.050 mm (0.0013—0.0020 in)
Maximum: 0.15 mm (0.0059 in)
4. If the clearance exceeds the maximum, replace the
piston or rebore the cylinders to fit oversize pistons.
Note
If the piston is replaced, replace the piston
rings also.
76G01C-134
69G01A-125
Piston and Piston Ring
1. Measure the piston ring to ring land clearance
around the entire circumference using a new pis-
ton ring.
Clearance (Top)
RF-CX: 0.18—0.22 mm (0.0071—0.0087 in)
RF-N : 0.05—0.09 mm (0.0020—0.0035 in)
Clearance (Second):
0.04—0.08 mm (0.0016—0.0031 in)
Maximum: 0.2 mm (0.008 in)
2.
If
the clearance exceeds the maximum, replace the
piston.
3. Inspect the piston rings for damage, abnormal
wear, or breakage. Replace if necessary.
4. Insert the piston ring into the cylinder by hand and
push it to the bottom of the ring travel in using the
piston.
86U01X-104
5. Measure each piston ring end gap with a feeler
gauge. Replace if necessary.
End gap (Top and second)
RF-CX: 0.20—0.35 mm (0.008—0.014 in)
RF-N : 0.20—0.40 mm (0.008—0.016 in)
End gap (Oil rail):
0.20—0.40 mm (0.008—0.016 in)
Maximum: 1.0 mm (0.039 in)
76G01C-144
1C-57
Page 270 of 1865

INSPECTION AND REPAIR 1C
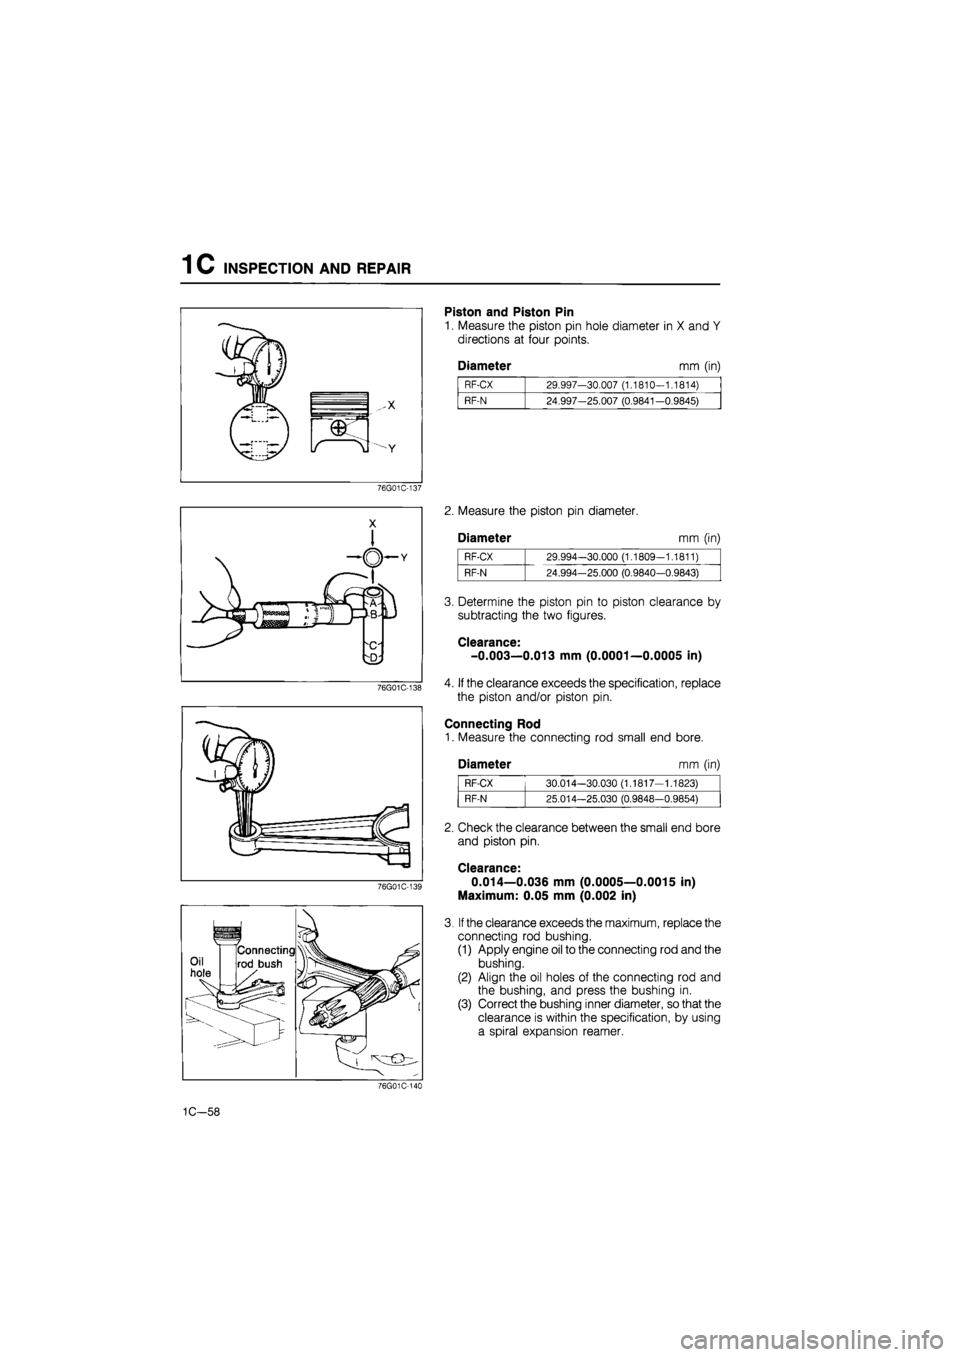
Piston and Piston Pin
1. Measure the piston pin hole diameter in X and Y
directions at four points.
Diameter mm (in)
RF-CX 29.997-30.007 (1.1810-1.1814)
RF-N 24.997-25.007 (0.9841-0.9845)
76G01C-137
76G01C-139
2. Measure the piston pin diameter.
Diameter mm (in)
RF-CX 29.994-30.000 (1.1809-1.1811)
RF-N 24.994-25.000 (0.9840-0.9843)
3. Determine the piston pin to piston clearance by
subtracting the two figures.
Clearance-
-0.003—0.013 mm (0.0001—0.0005 in)
4. If the clearance exceeds the specification, replace
the piston and/or piston pin.
Connecting Rod
1. Measure the connecting rod small end bore.
Diameter mm (in)
RF-CX 30.014-30.030 (1.1817-1.1823)
RF-N 25.014-25.030 (0.9848-0.9854)
2. Check the clearance between the small end bore
and piston pin.
Clearance*
0.014—0.036 mm (0.0005—0.0015 in)
Maximum: 0.05 mm (0.002 in)
3. If the clearance exceeds the maximum, replace the
connecting rod bushing.
(1) Apply engine oil to the connecting rod and the
bushing.
(2) Align the oil holes of the connecting rod and
the bushing, and press the bushing in.
(3) Correct the bushing inner diameter, so that the
clearance is within the specification, by using
a spiral expansion reamer.
76G01C-144
1C-58