MITSUBISHI ENDEAVOR 2004 Service Repair Manual
ENDEAVOR 2004
MITSUBISHI
MITSUBISHI
https://www.carmanualsonline.info/img/19/57105/w960_57105-0.png
MITSUBISHI ENDEAVOR 2004 Service Repair Manual
Trending: high beam, oil level, wheel, keyless entry, transmission oil, Battery terminals, battery output
Page 1021 of 3870
Courtesy of MITSUBISHI MOTOR SALES OF AMERICA
.
CIRCUIT BREAKER (INCORPORATED IN THE POWER WINDOW MOTOR) INSPECTION 1. Pull the power window switch to the UP position to fully close the door
window glass, and keep pulling the switch for an additional ten seconds.
2. Release the power window switch from the UP position and immediately press
it to the DOWN position. The condition of the circuit breaker is good if the
door window glass starts to move downwards within about 60 seconds. POWER WINDOW CHECK 1. Operate the power window switch of each door to verify that the power
windows operate properly. If they don't, then troubleshoot as described in
SYMPTOM CHART
.
2. Turn ON the power window lock switch of the power window main switch.
Then operate the passenger's door and rear door power window sub-switches to
ensure that they do not operate. If they do, replace the power window main
switch (Refer to DOOR GLASS AND REGULATOR
).
CENTRAL DOOR LOCKING SYSTEM INSPECTION Check the following. Troubleshoot if operations malfunction (Refer to SYMPTOM CHART
).
Insert the key into the driver's key cylinder and turn once to the unlock side to
unlock the driver's door. Turn the key once again to the unlock side to unlock
all doors and the liftgate. All doors and liftgate can be locked using the door lock switch built into the
front power window (main or sub < RH>) switch.
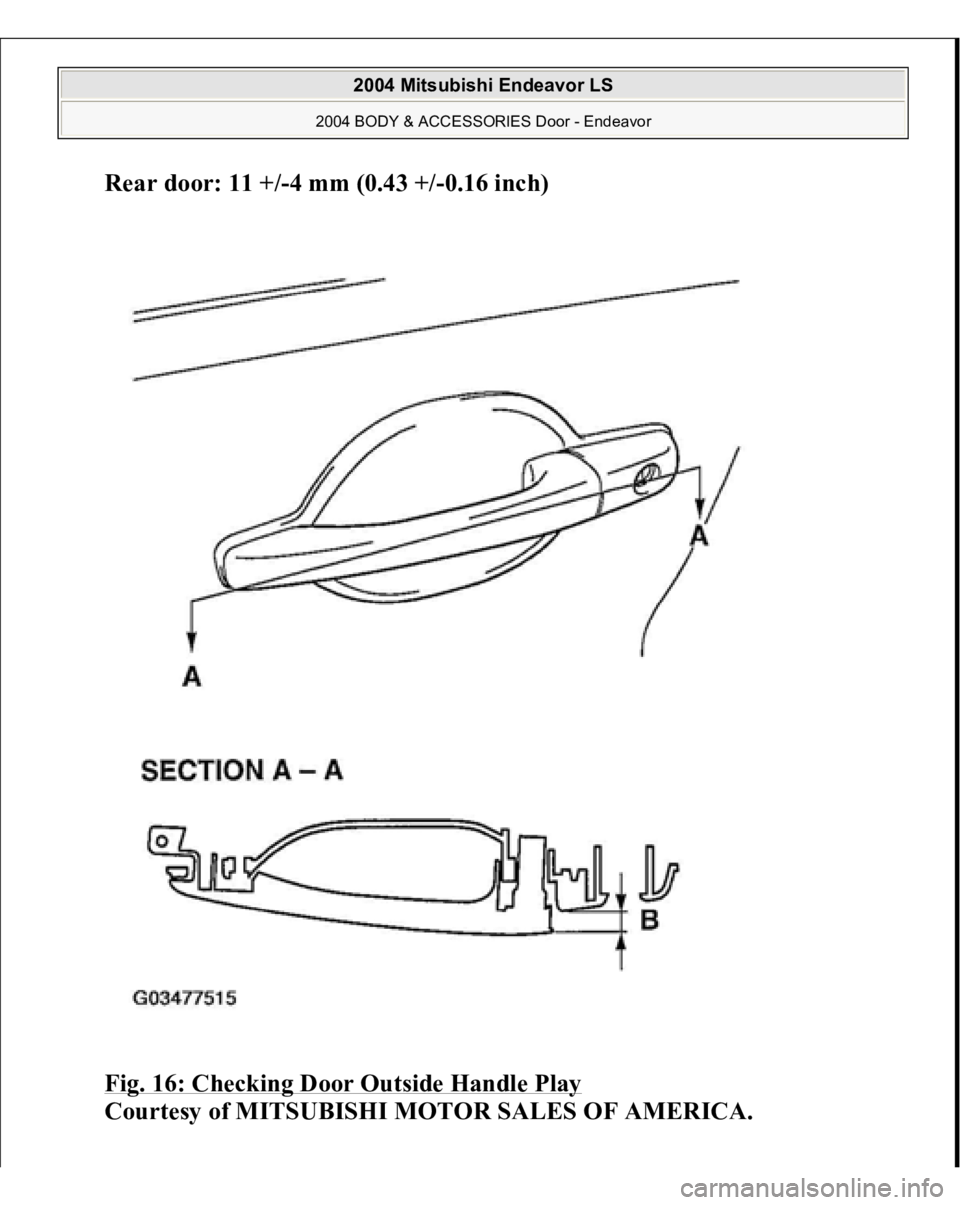
DOOR OUTSIDE HANDLE PLAY CHECK 1. Check that the door outside handle play is within the standard value range.
Standard value (B):
Front door: 10 +/- 3.5 mm (0.39 +/- 0.138 inch)
2004 Mitsubishi Endeavor LS
2004 BODY & ACCESSORIES Door - Endeavor
Page 1022 of 3870
Rear door: 11 +
/-4 mm (0.43 +/-0.16 inch)
Fig. 16: Checking Door Outside Handle Play
Courtesy of MITSUBISHI MOTOR SALES OF AMERICA.
2004 Mitsubishi Endeavor LS
2004 BODY & ACCESSORIES Door - Endeavor
Page 1023 of 3870
2. If the door outside handle play is not within the standard value range, check the
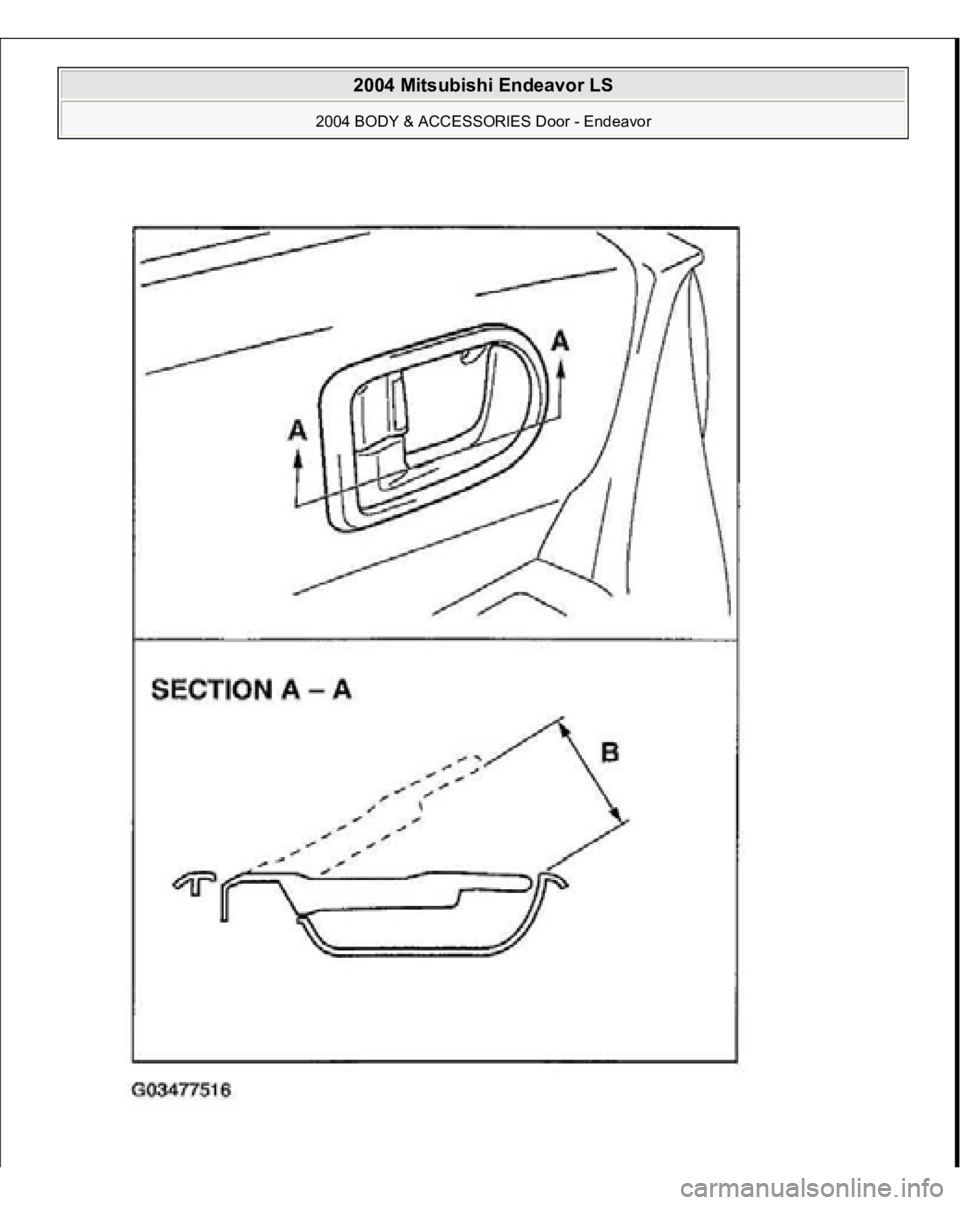
door outside handle or the door latch assembly. Replace if necessary. DOOR INSIDE HANDLE PLAY CHECK 1. Check that the door inside handle play is within the standard value range.
Standard value (B):
Front door: 42 +/- 16 mm (1.65 +/-0.63 inch)
Rear door: 44 +/- 14 mm (1.73 +/-0.55 inch)
2004 Mitsubishi Endeavor LS
2004 BODY & ACCESSORIES Door - Endeavor
Page 1024 of 3870
2004 Mitsubishi Endeavor LS
2004 BODY & ACCESSORIES Door - Endeavor
Page 1025 of 3870
Fig. 17: Checking Door Inside Handle Pla
y
Courtesy of MITSUBISHI MOTOR SALES OF AMERICA.
2. If the door inside handle play is not within the standard value range, check the
door inside handle or the inside handle cable. Replace if necessary.
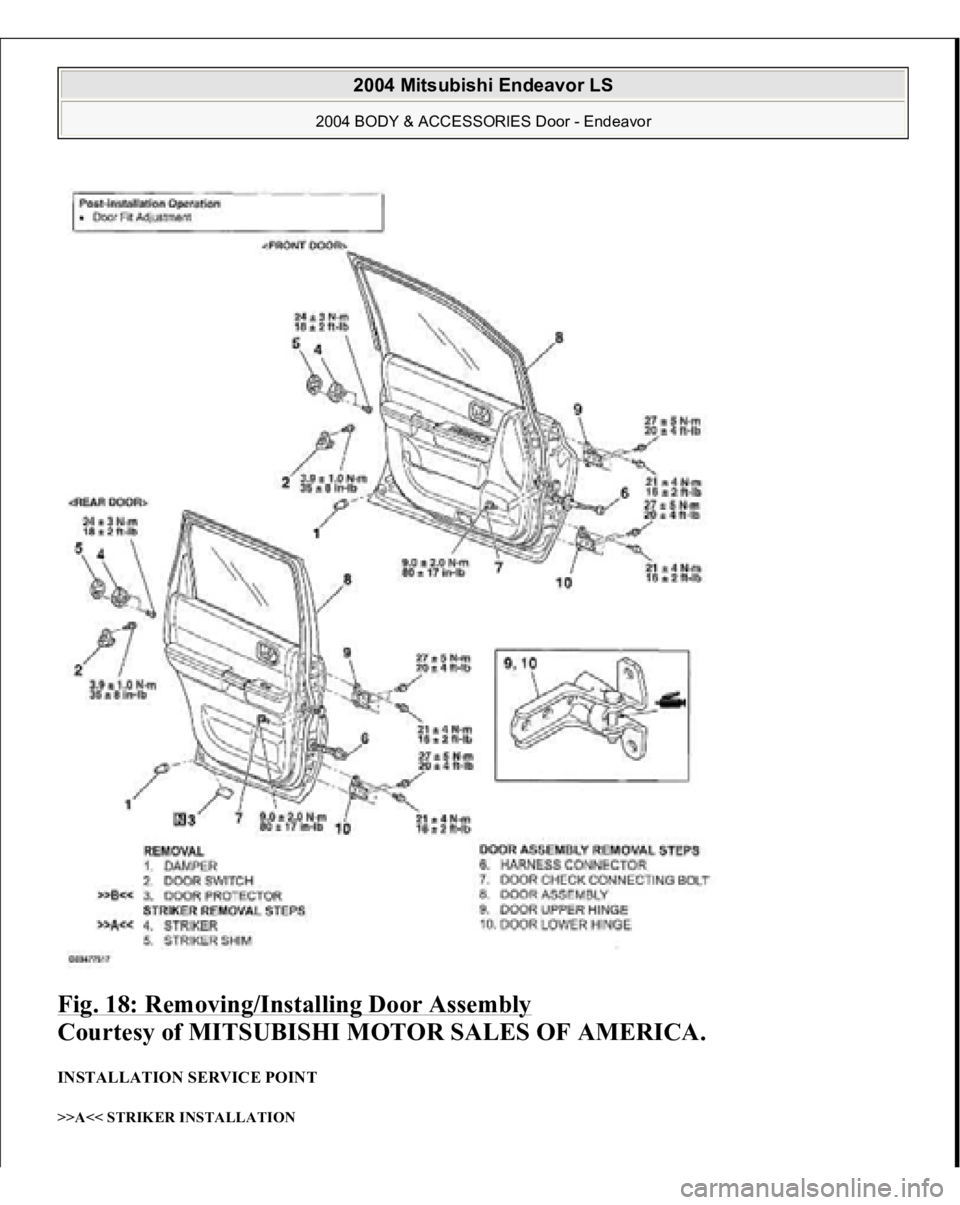
DOOR ASSEMBLY REMOVAL AND INSTALLATION
2004 Mitsubishi Endeavor LS
2004 BODY & ACCESSORIES Door - Endeavor
Page 1026 of 3870
Fig. 18: Removing/Installing Door Assembly
Courtesy of MITSUBISHI MOTOR SALES OF AMERICA.
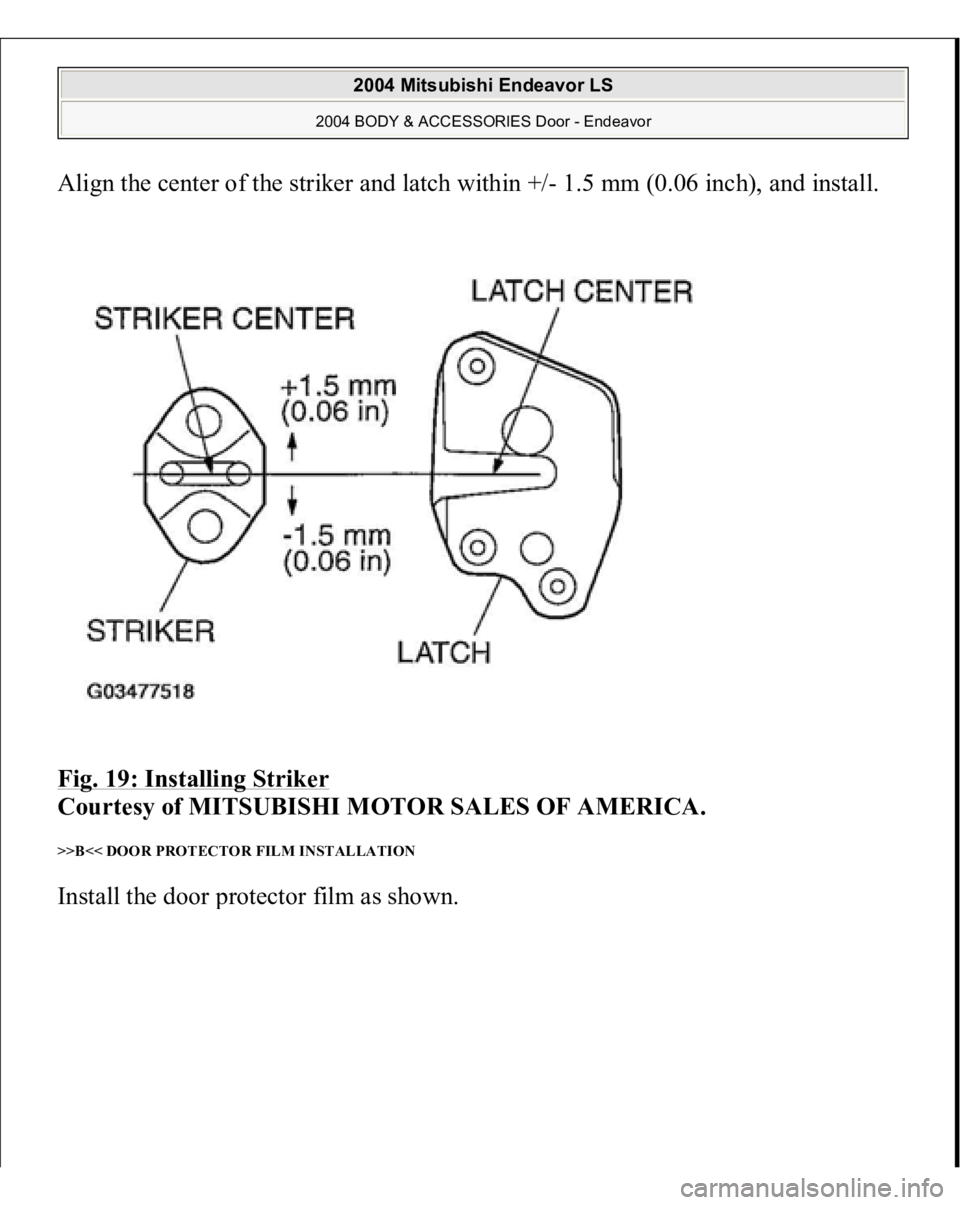
INSTALLATION SERVICE POINT >>A<< STRIKER INSTALLATION
2004 Mitsubishi Endeavor LS
2004 BODY & ACCESSORIES Door - Endeavor
Page 1027 of 3870
Align the center of the striker and latch within +/- 1.5 mm (0.06 inch), and install.
Fig. 19: Installing Striker
Courtesy of MITSUBISHI MOTOR SALES OF AMERICA.
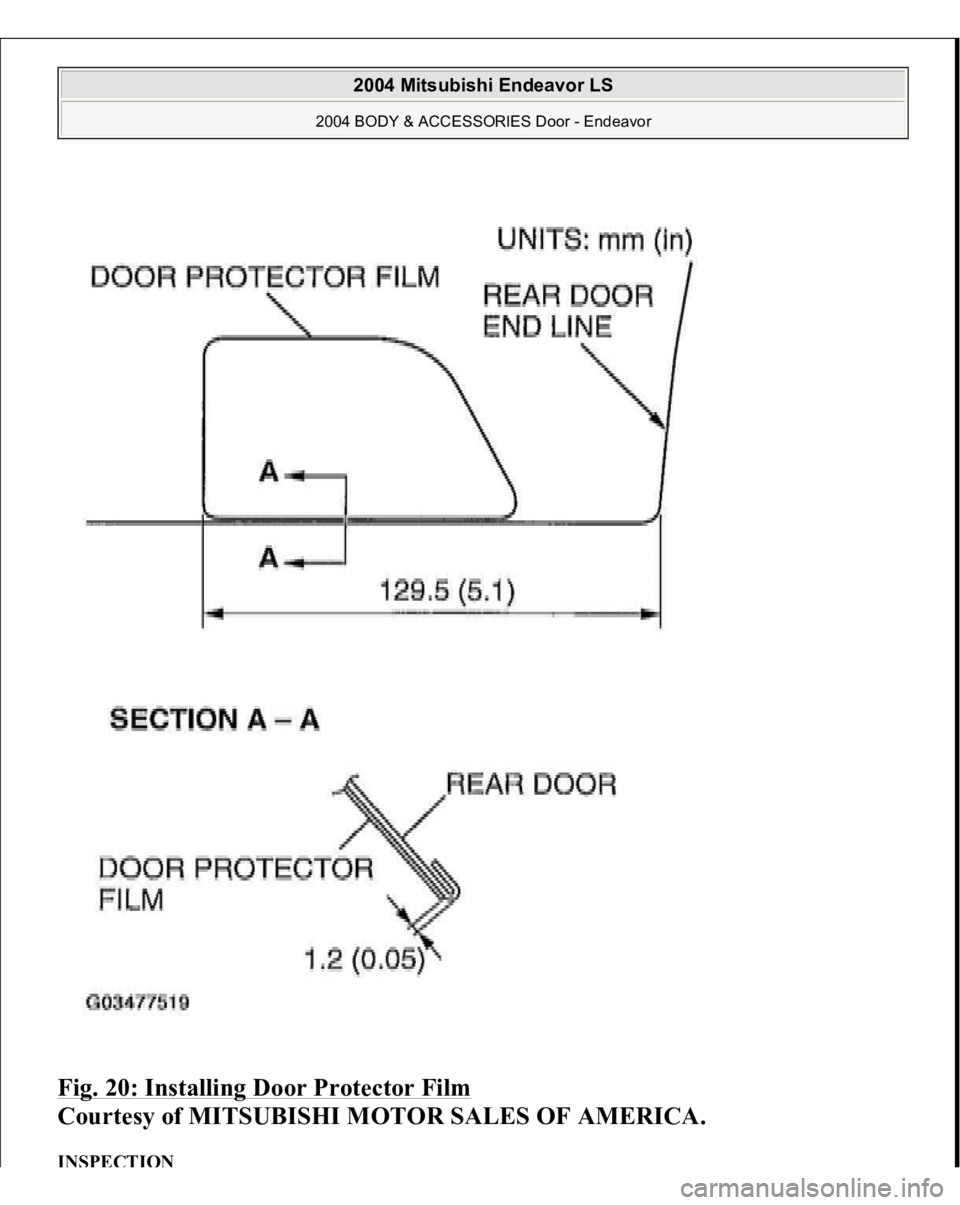
>>B<< DOOR PROTECTOR FILM INSTALLATION Install the door
protector film as shown.
2004 Mitsubishi Endeavor LS
2004 BODY & ACCESSORIES Door - Endeavor
Page 1028 of 3870
Fig. 20: Installing Door Protector Film
Courtesy of MITSUBISHI MOTOR SALES OF AMERICA.
INSPECTION
2004 Mitsubishi Endeavor LS
2004 BODY & ACCESSORIES Door - Endeavor
Page 1029 of 3870
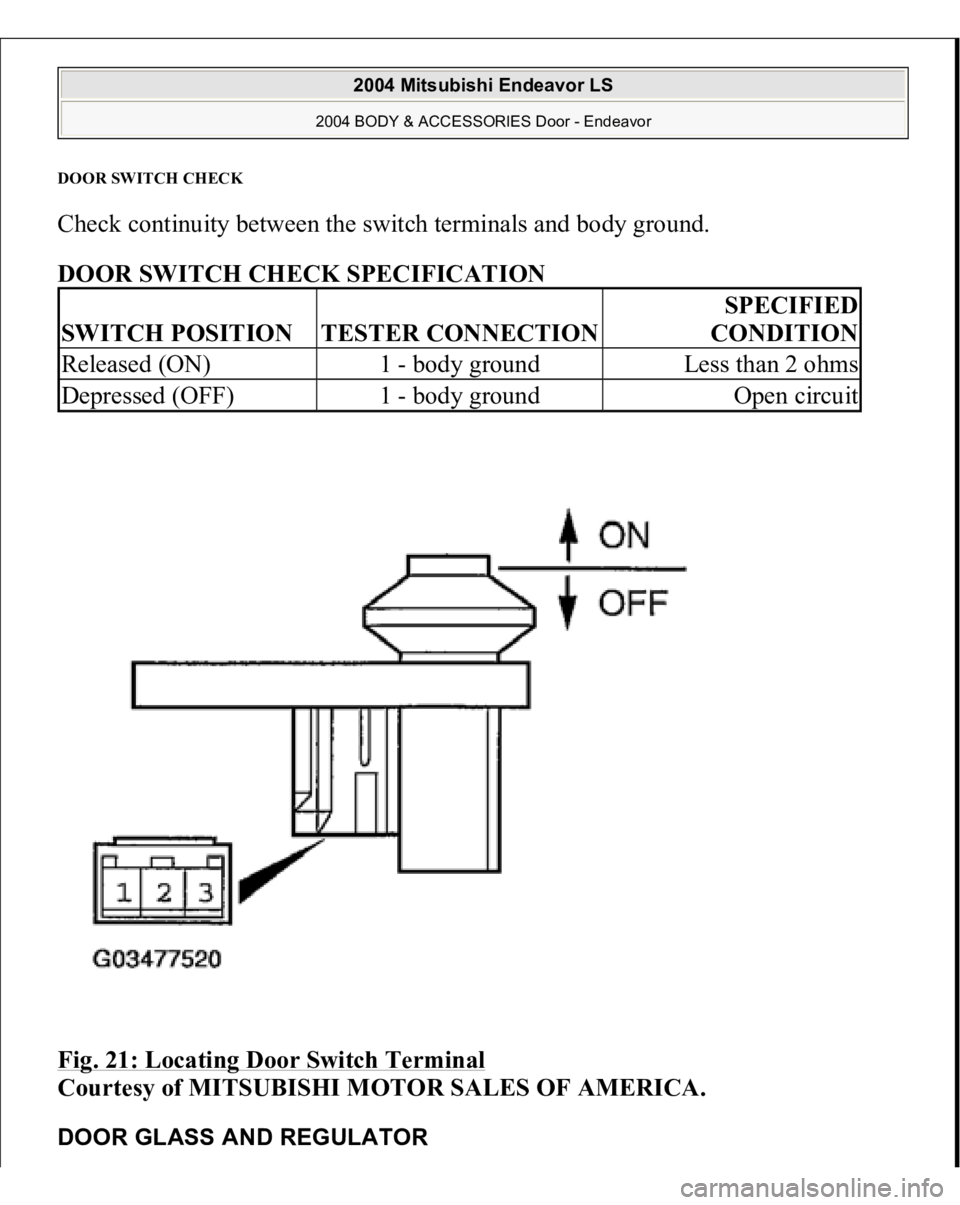
DOOR SWITCH CHEC
K
Check continuity between the switch terminals and body ground.
DOOR SWITCH CHECK SPECIFICATION
Fig. 21: Locating Door Switch Terminal
Courtesy of MITSUBISHI MOTOR SALES OF AMERICA.
DOOR GLASS AND REGULATO
R
SWITCH POSITION
TESTER CONNECTION
SPECIFIED
CONDITION
Released (ON)
1 - body ground
Less than 2 ohms
Depressed (OFF)
1 - body ground
Open circuit
2004 Mitsubishi Endeavor LS
2004 BODY & ACCESSORIES Door - Endeavor
Page 1030 of 3870
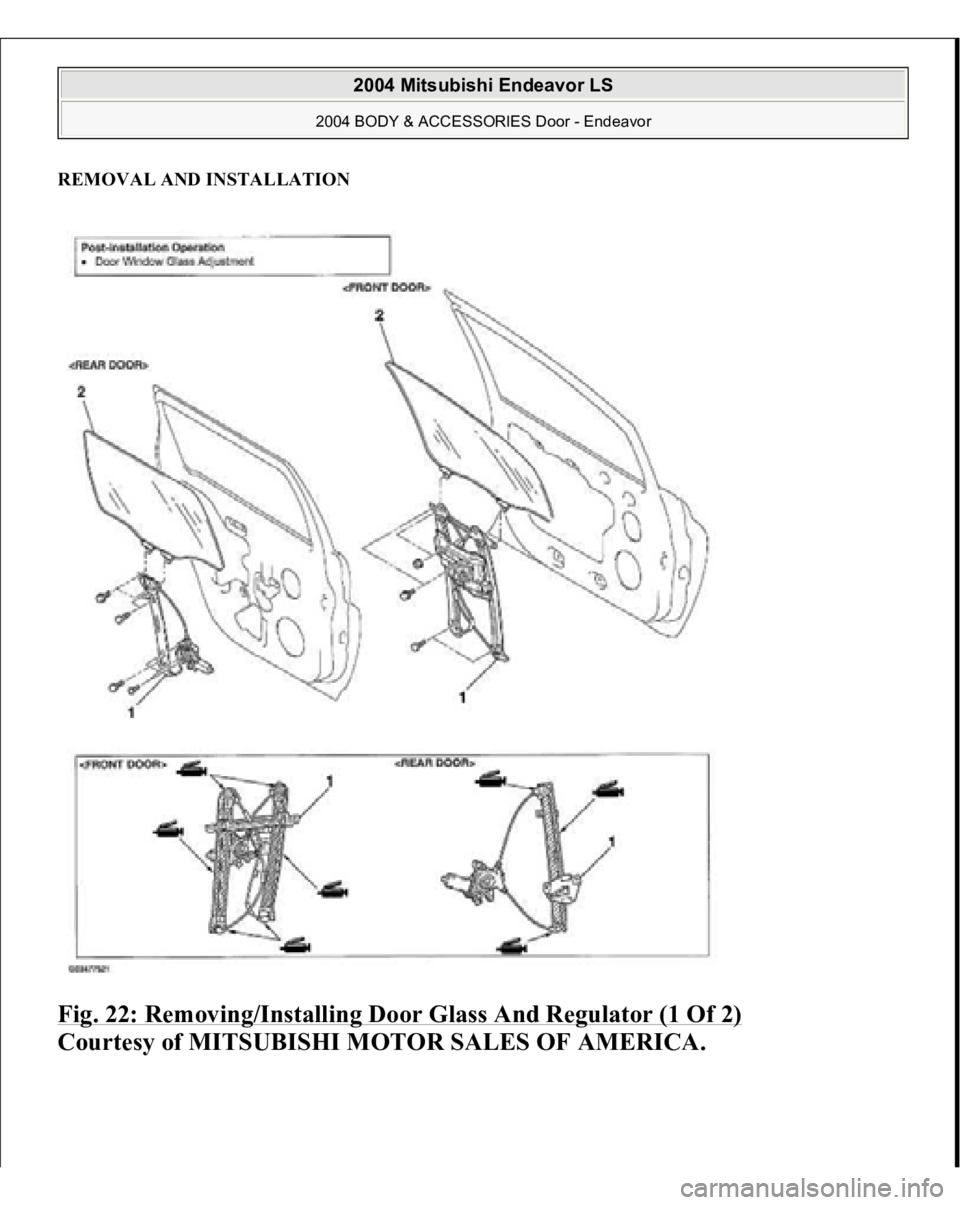
REMOVAL AND INSTALLATIONFig. 22: Removing/Installing Door Glass And Regulator (1 Of 2)
Courtesy of MITSUBISHI MOTOR SALES OF AMERICA.
2004 Mitsubishi Endeavor LS
2004 BODY & ACCESSORIES Door - Endeavor
Trending: fuel pump, Service engine light, Rear hub, battery, module, cycle, Oxygen sensor

