MITSUBISHI ENDEAVOR 2004 Service Repair Manual
ENDEAVOR 2004
MITSUBISHI
MITSUBISHI
https://www.carmanualsonline.info/img/19/57105/w960_57105-0.png
MITSUBISHI ENDEAVOR 2004 Service Repair Manual
Trending: compression ratio, seat memory, brake pads, battery location, brake, service indicator, air suspension
Page 1011 of 3870
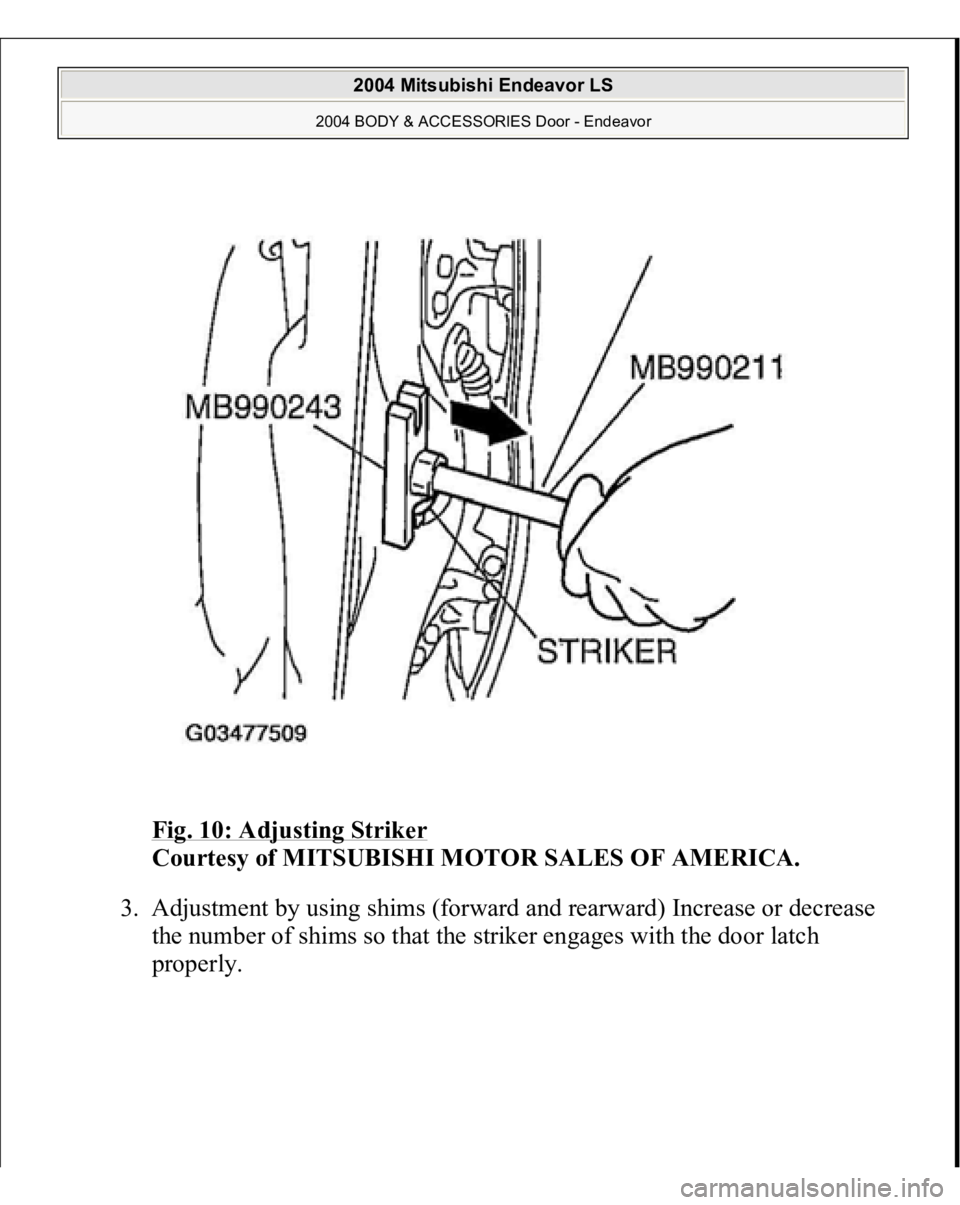
Fig. 10: Adjusting Striker
Courtesy of MITSUBISHI MOTOR SALES OF AMERICA.
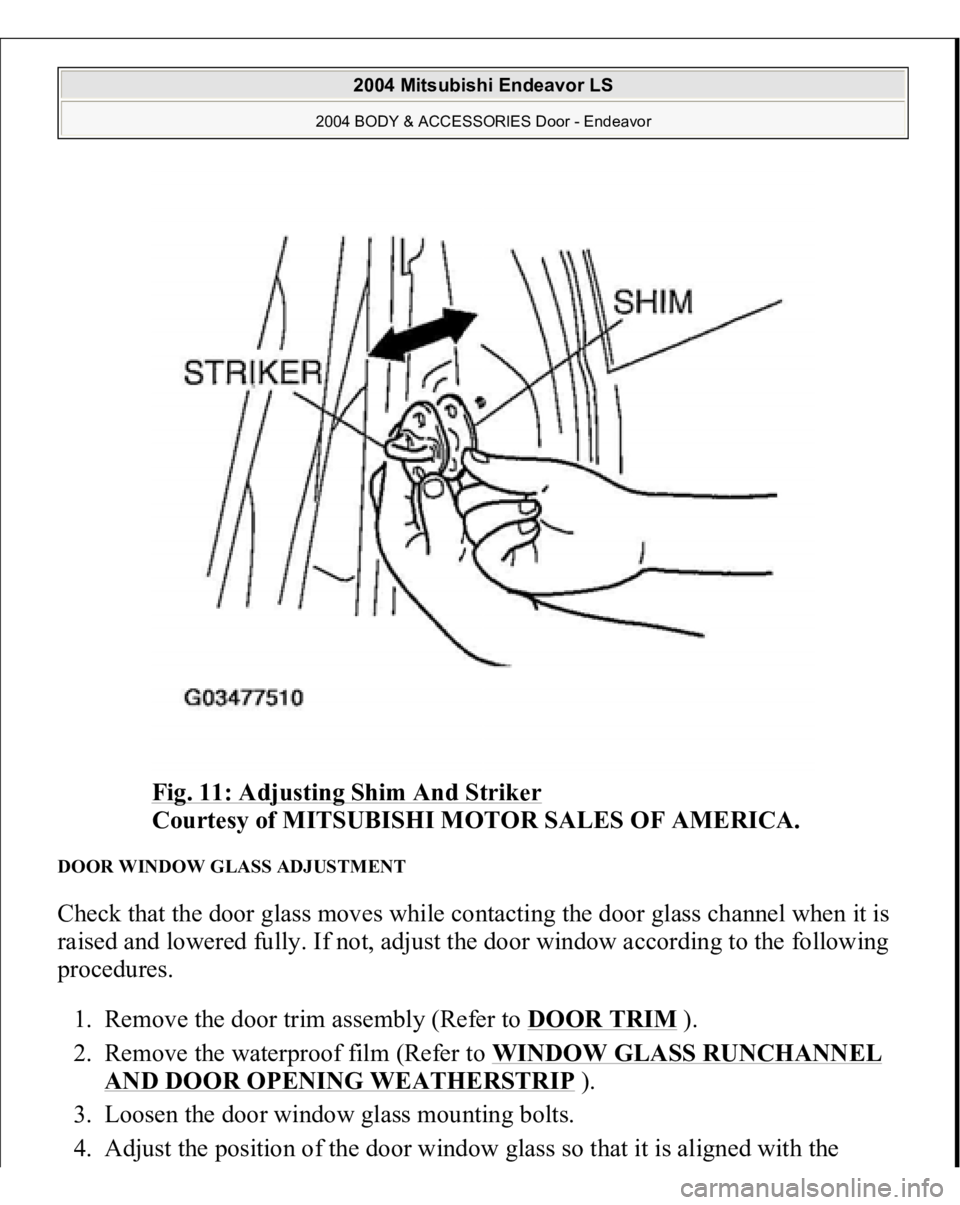
3. Adjustment by using shims (forward and rearward) Increase or decrease
the number of shims so that the striker engages with the door latch
properl
y.
2004 Mitsubishi Endeavor LS
2004 BODY & ACCESSORIES Door - Endeavor
Page 1012 of 3870
Fig. 11: Adjusting Shim And Striker
Courtesy of MITSUBISHI MOTOR SALES OF AMERICA.
DOOR WINDOW GLASS ADJUSTMENT Check that the door glass moves while contacting the door glass channel when it is
raised and lowered fully. If not, adjust the door window according to the following
procedures.
1. Remove the door trim assembly (Refer to DOOR TRIM
).
2. Remove the waterproof film (Refer to WINDOW GLASS RUNCHANNEL
AND DOOR OPENING WEATHERSTRIP
).
3. Loosen the door window glass mounting bolts.
4. Ad
just the
position of the door window
glass so that it is ali
gned with the
2004 Mitsubishi Endeavor LS
2004 BODY & ACCESSORIES Door - Endeavor
Page 1013 of 3870
runchannel. On com
pletion, ti
ghten the door window
glass mountin
g bolts.
2004 Mitsubishi Endeavor LS
2004 BODY & ACCESSORIES Door - Endeavor
Page 1014 of 3870
2004 Mitsubishi Endeavor LS
2004 BODY & ACCESSORIES Door - Endeavor
Page 1015 of 3870
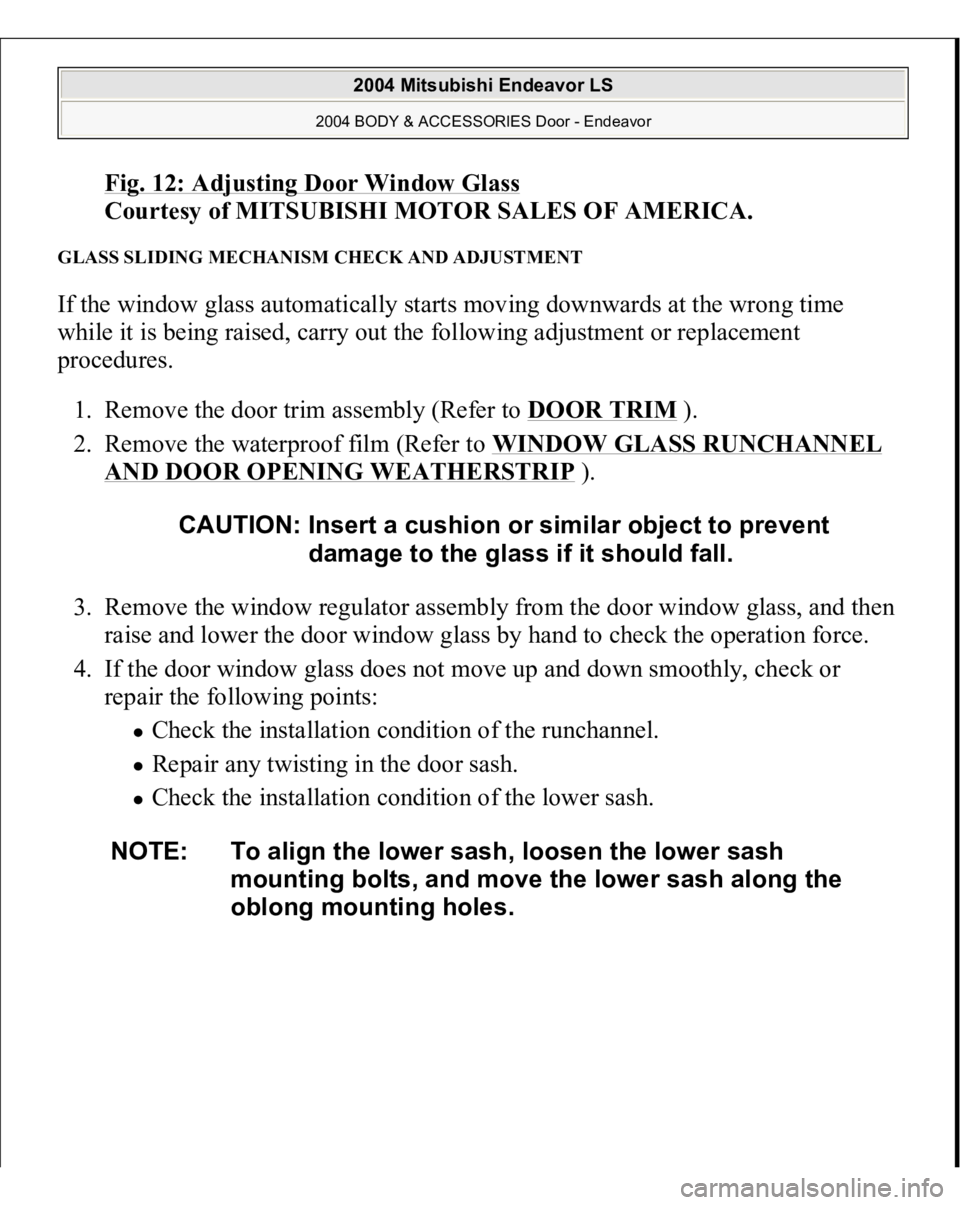
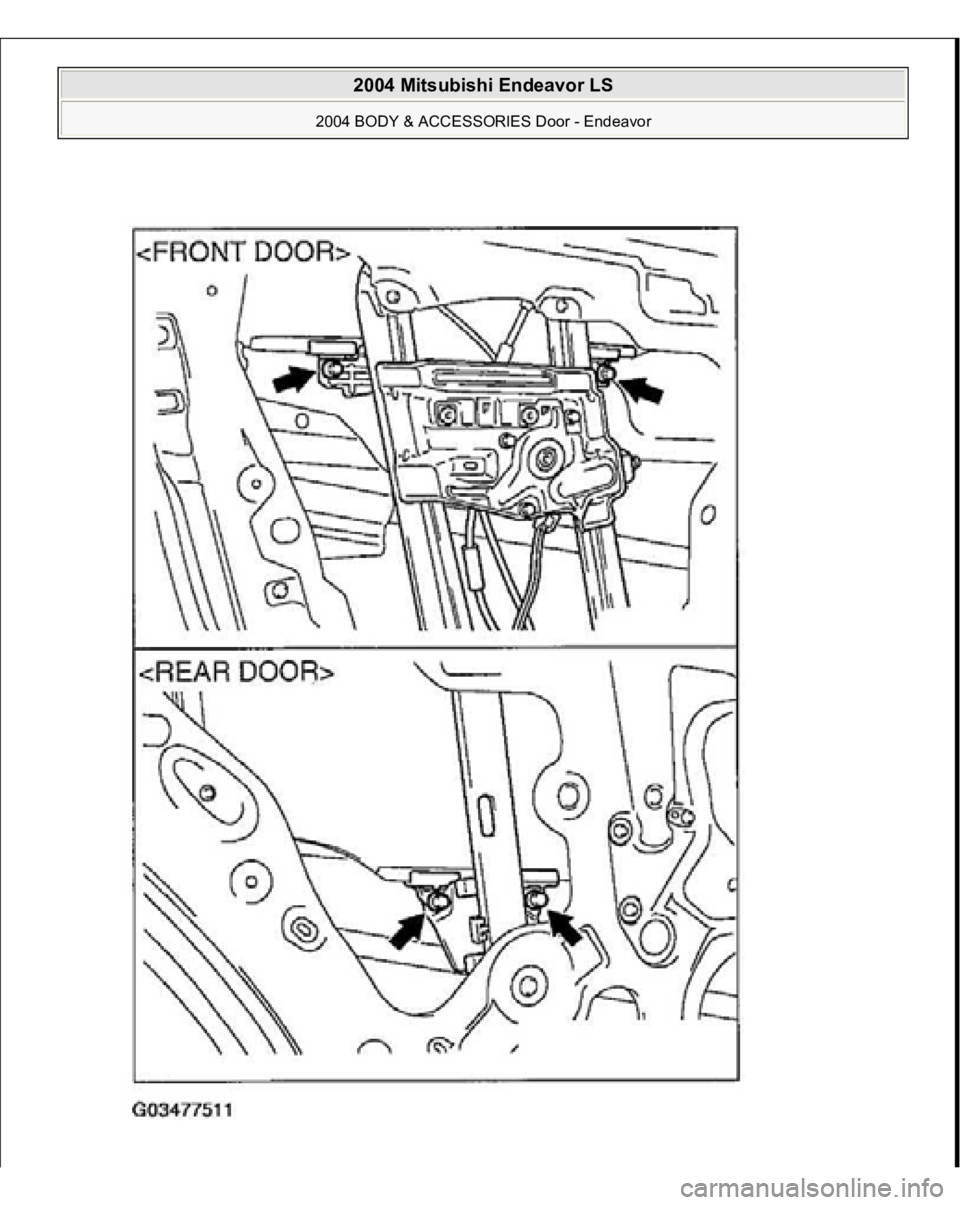
Fig. 12: Adjusting Door Window Glas
s
Courtesy of MITSUBISHI MOTOR SALES OF AMERICA.
GLASS SLIDING MECHANISM CHECK AND ADJUSTMENT If the window glass automatically starts moving downwards at the wrong time
while it is being raised, carry out the following adjustment or replacement
procedures.
1. Remove the door trim assembly (Refer to DOOR TRIM
).
2. Remove the waterproof film (Refer to WINDOW GLASS RUNCHANNEL
AND DOOR OPENING WEATHERSTRIP
).
3. Remove the window regulator assembly from the door window glass, and then
raise and lower the door window glass by hand to check the operation force.
4. If the door window glass does not move up and down smoothly, check or
repair the following points:
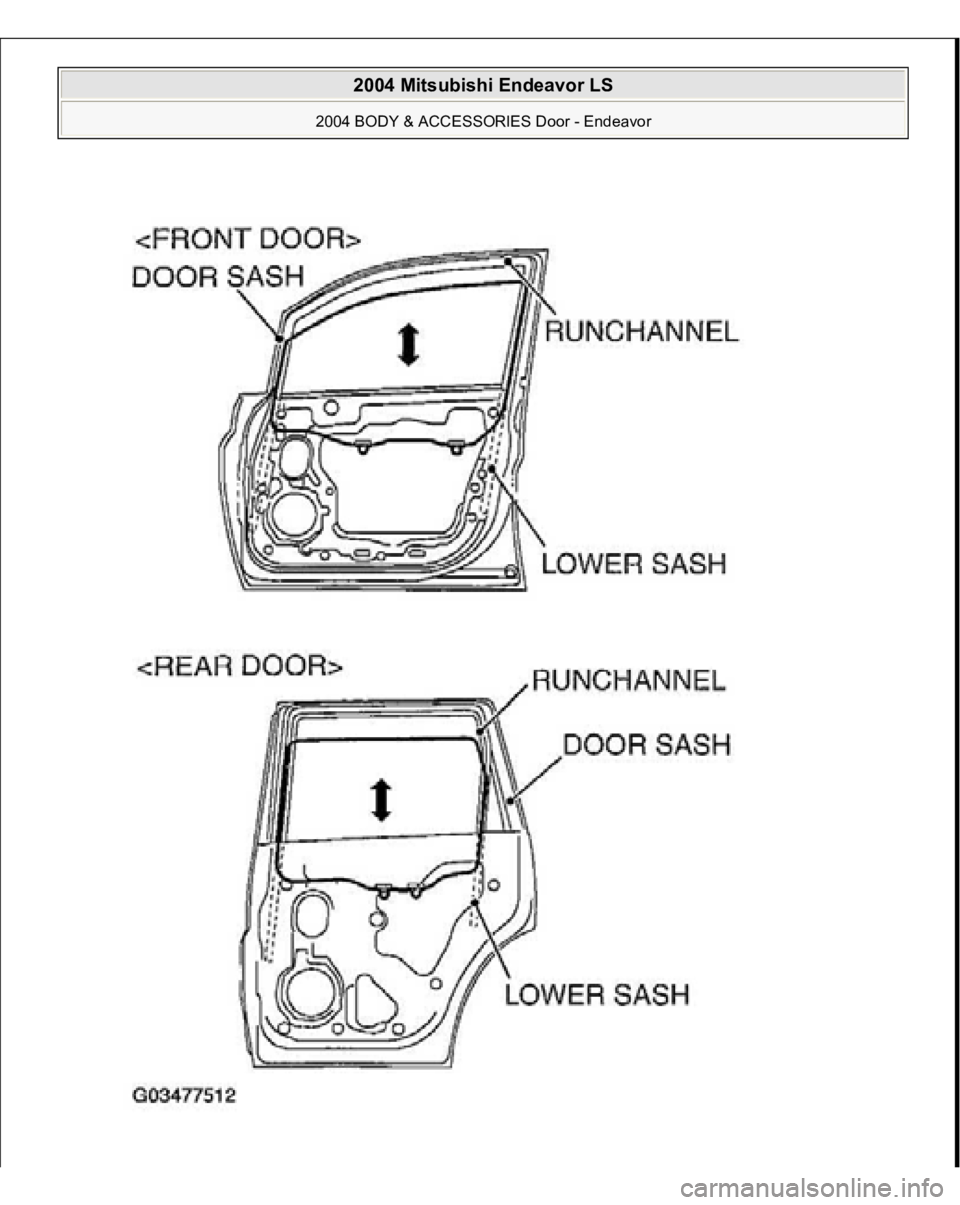
Check the installation condition of the runchannel. Repair any twisting in the door sash. Check the installation condition of the lower sash.
CAUTION: Insert a cushion or similar object to prevent
damage to the glass if it should fall.
NOTE: To align the lower sash, loosen the lower sash
mounting bolts, and move the lower sash along the
oblong mounting holes.
2004 Mitsubishi Endeavor LS
2004 BODY & ACCESSORIES Door - Endeavor
Page 1016 of 3870
2004 Mitsubishi Endeavor LS
2004 BODY & ACCESSORIES Door - Endeavor
Page 1017 of 3870
Fig. 13: Identifying Run Channel, Lower Sash And Door Sas
h
Courtesy of MITSUBISHI MOTOR SALES OF AMERICA.
5. If repair or adjustment is not possible, replace the door assembly.
POWER WINDOW TIMER FUNCTION CHECK After the doors are closed and the ignition switch is turned to the "LOCK" (OFF)
position, the power windows should work within 30 seconds. The timer expires if
the front door is opened during that 30 second time. If it does not, carry out the
timer troubleshooting in SYMPTOM CHART
.
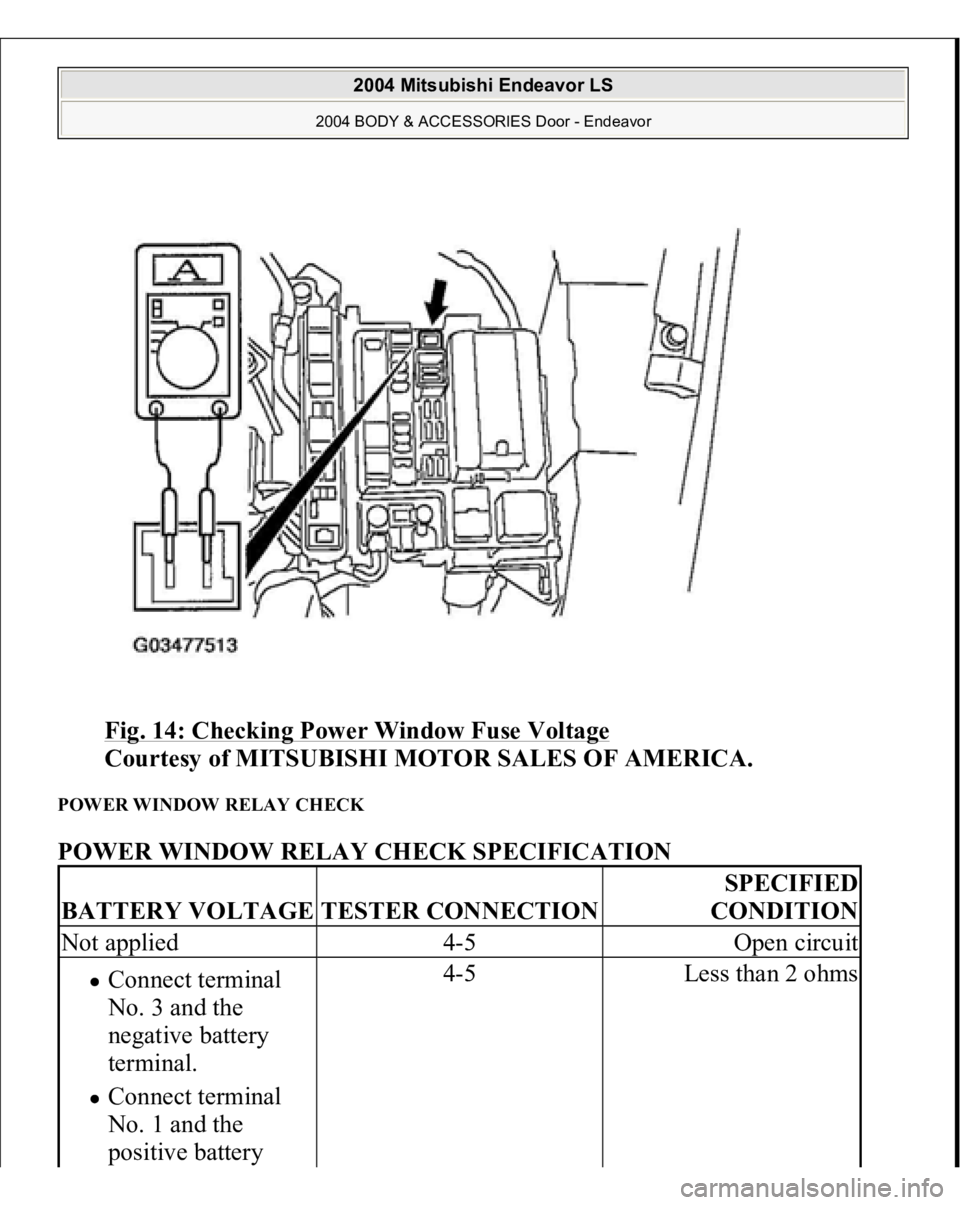
POWER WINDOW OPERATING CURRENT CHECK 1. Remove the power window fuse and connect an ammeter as shown in the
illustration.
2. When the power window switch is pressed in the "UP" position, a large amoun
t
of current flows from the time the window starts to close until it is fully closed,
Measure the current during this time
Standard value (A): 5 +/-1A [Power supply voltage 14.5 +/-0.5V, 25°C (77°
F)]
3. If the operation current is outside the standard value, refer to INPUT SIGNAL
CHART
.
2004 Mitsubishi Endeavor LS
2004 BODY & ACCESSORIES Door - Endeavor
Page 1018 of 3870
Fig. 14: Checking Power Window Fuse Voltage
Courtesy of MITSUBISHI MOTOR SALES OF AMERICA.
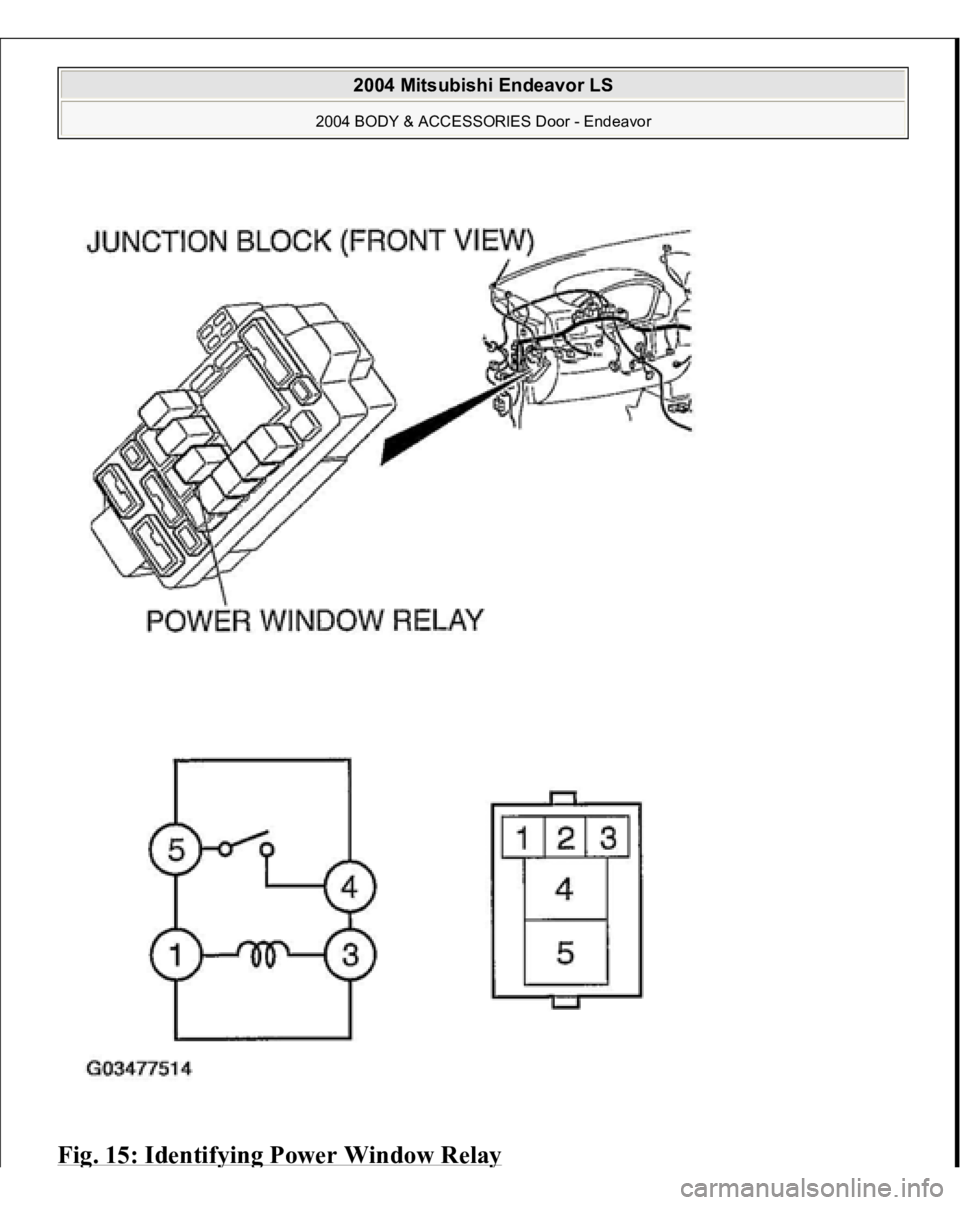
POWER WINDOW RELAY CHECK POWER WINDOW RELAY CHECK SPECIFICATION BATTERY VOLTAGE
TESTER CONNECTION
SPECIFIED
CONDITION
Not applied
4-5
Open circuit
Connect terminal
No. 3 and the
negative battery
terminal. Connect terminal
No. 1 and the
positive battery
4-5
Less than 2 ohms
2004 Mitsubishi Endeavor LS
2004 BODY & ACCESSORIES Door - Endeavor
Page 1019 of 3870
terminal.
2004 Mitsubishi Endeavor LS
2004 BODY & ACCESSORIES Door - Endeavor
Page 1020 of 3870
Fig. 15: Identif
ying Power Window Rela
y
2004 Mitsubishi Endeavor LS
2004 BODY & ACCESSORIES Door - Endeavor
Trending: clock light, power steering, air filter, Compressor, ELECTRICAL DIAGRAM, warning, Jack point
