MITSUBISHI ENDEAVOR 2004 Service Repair Manual
ENDEAVOR 2004
MITSUBISHI
MITSUBISHI
https://www.carmanualsonline.info/img/19/57105/w960_57105-0.png
MITSUBISHI ENDEAVOR 2004 Service Repair Manual
Trending: brake sensor, mirror, sport mode, sunroof jam, deactivate, fluid, center console
Page 1001 of 3870
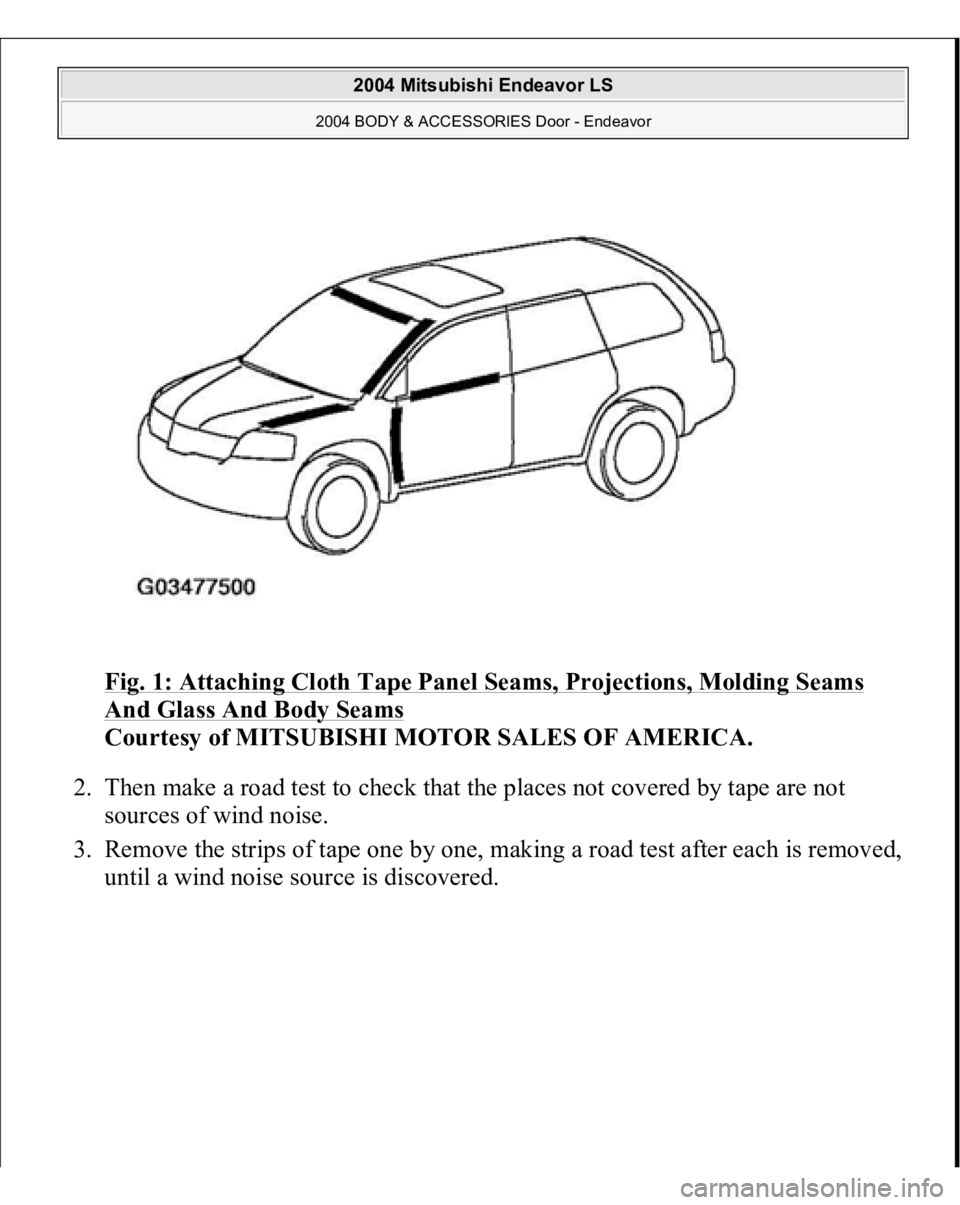
Fig. 1: Attaching Cloth Tape Panel Seams, Projections, Molding Seams And Glass And Body Seams
Courtesy of MITSUBISHI MOTOR SALES OF AMERICA.
2. Then make a road test to check that the places not covered by tape are not
sources of wind noise.
3. Remove the strips of tape one by one, making a road test after each is removed,
until a wind noise source is discovered.
2004 Mitsubishi Endeavor LS
2004 BODY & ACCESSORIES Door - Endeavor
Page 1002 of 3870
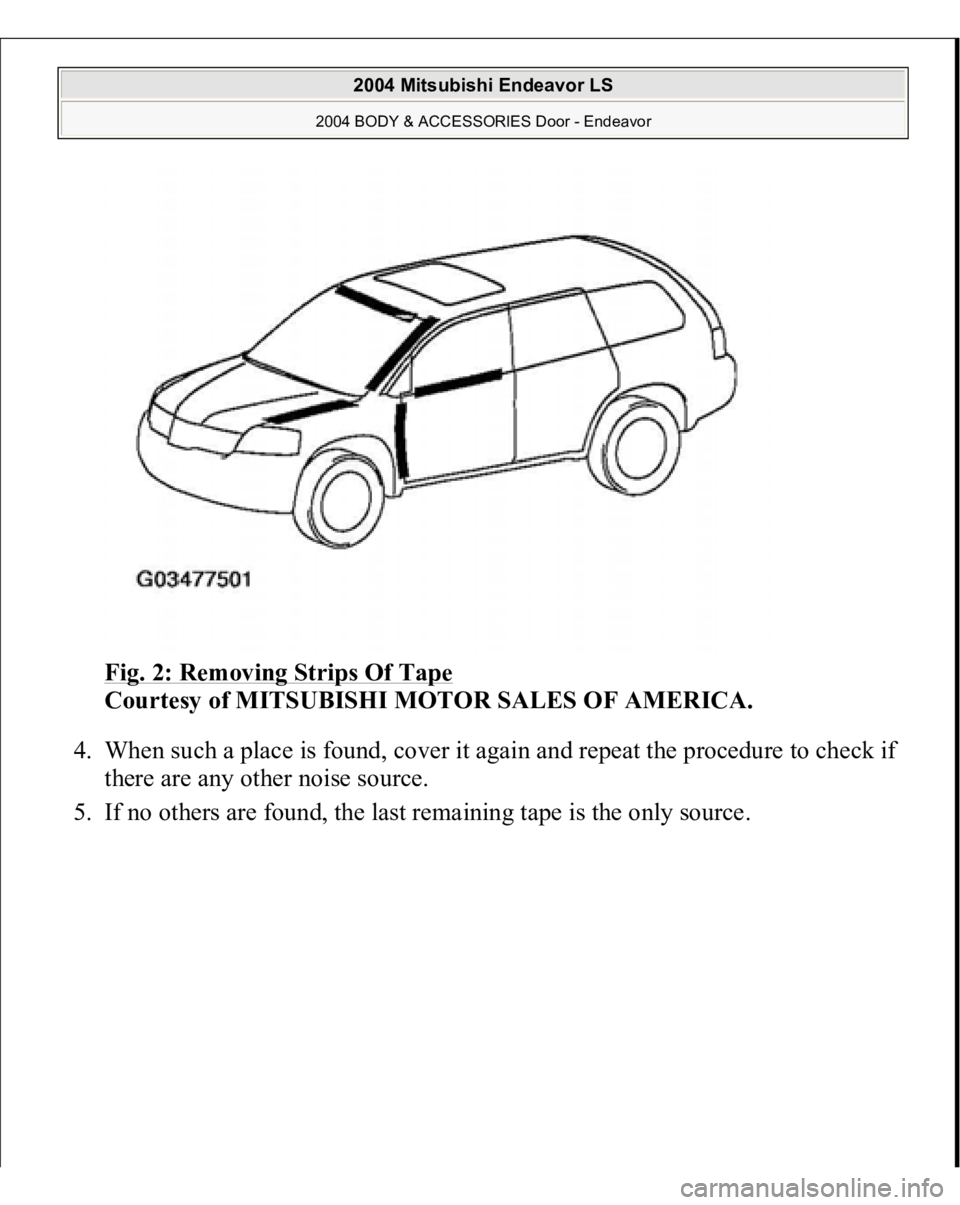
Fig. 2: Removing Strips Of Tape
Courtesy of MITSUBISHI MOTOR SALES OF AMERICA.
4. When such a place is found, cover it again and repeat the procedure to check if
there are any other noise source.
5. If no others are found, the last remaining tape is the only source.
2004 Mitsubishi Endeavor LS
2004 BODY & ACCESSORIES Door - Endeavor
Page 1003 of 3870
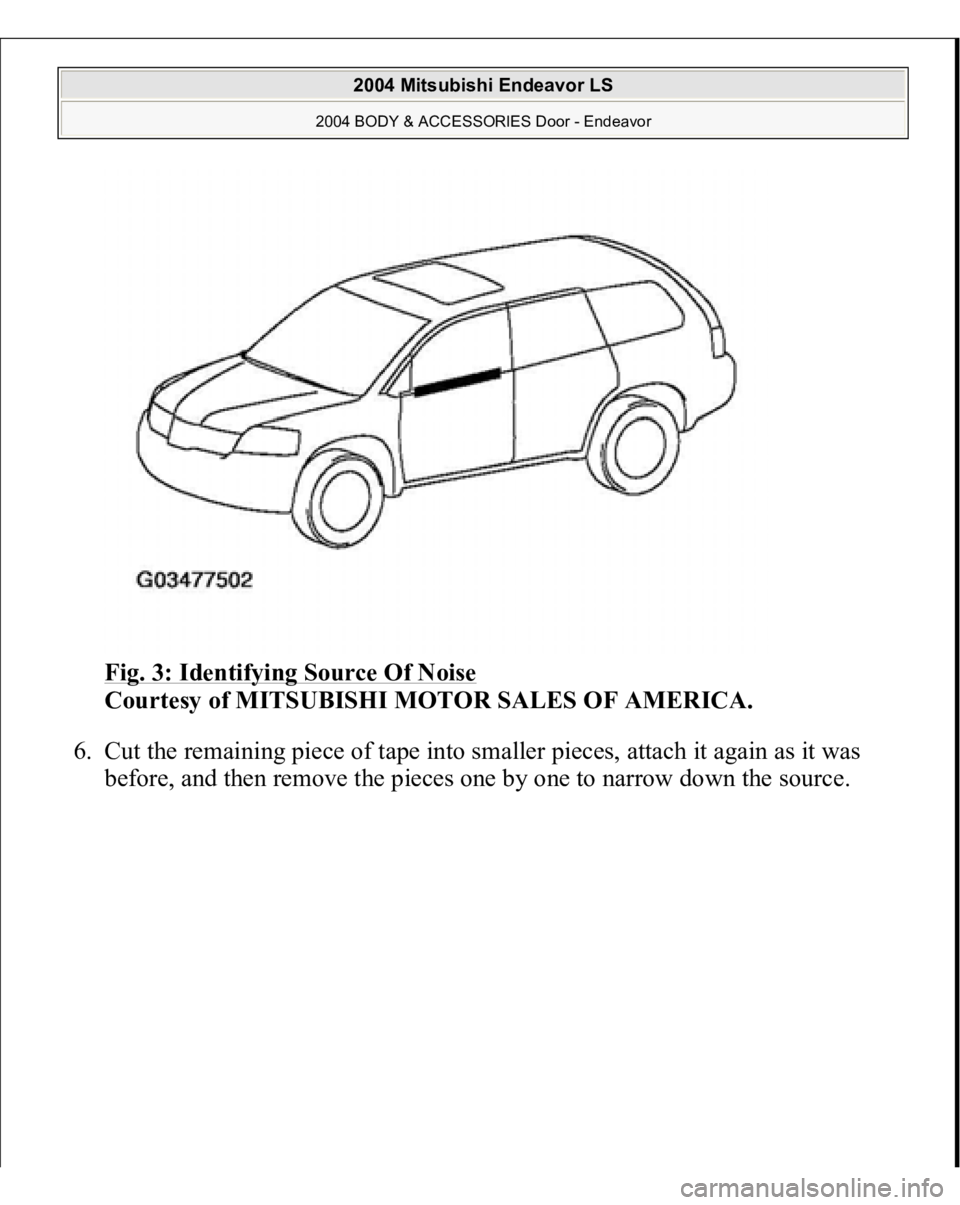
Fig. 3: Identifying Source Of Noise
Courtesy of MITSUBISHI MOTOR SALES OF AMERICA.
6. Cut the remaining piece of tape into smaller pieces, attach it again as it was
before, and then remove the pieces one by one to narrow down the source.
2004 Mitsubishi Endeavor LS
2004 BODY & ACCESSORIES Door - Endeavor
Page 1004 of 3870
Fig. 4: Cutting Remaining Piece Of Tape Into Smaller Pieces
Courtesy of MITSUBISHI MOTOR SALES OF AMERICA.
7. Check that wind noise occurs when the last remaining tape is removed, and
that noise does not occur when it is r
e-attached.
2004 Mitsubishi Endeavor LS
2004 BODY & ACCESSORIES Door - Endeavor
Page 1005 of 3870
Fig. 5: Checking Wind Noise Occurs When Removing Last Remaining Tape
Courtesy of MITSUBISHI MOTOR SALES OF AMERICA.
8. When the source(s) of the wind noise is finally located, attach butyl tape, body
sealer or similar material to obstruct this source as much as possible.
SPECIAL TOOLS
2004 Mitsubishi Endeavor LS
2004 BODY & ACCESSORIES Door - Endeavor
Page 1006 of 3870
Fig. 6: Identifying Special Tools Chart
Courtesy of MITSUBISHI MOTOR SALES OF AMERICA.
ON
-VEHICLE SERVIC
E
2004 Mitsubishi Endeavor LS
2004 BODY & ACCESSORIES Door - Endeavor
Page 1007 of 3870
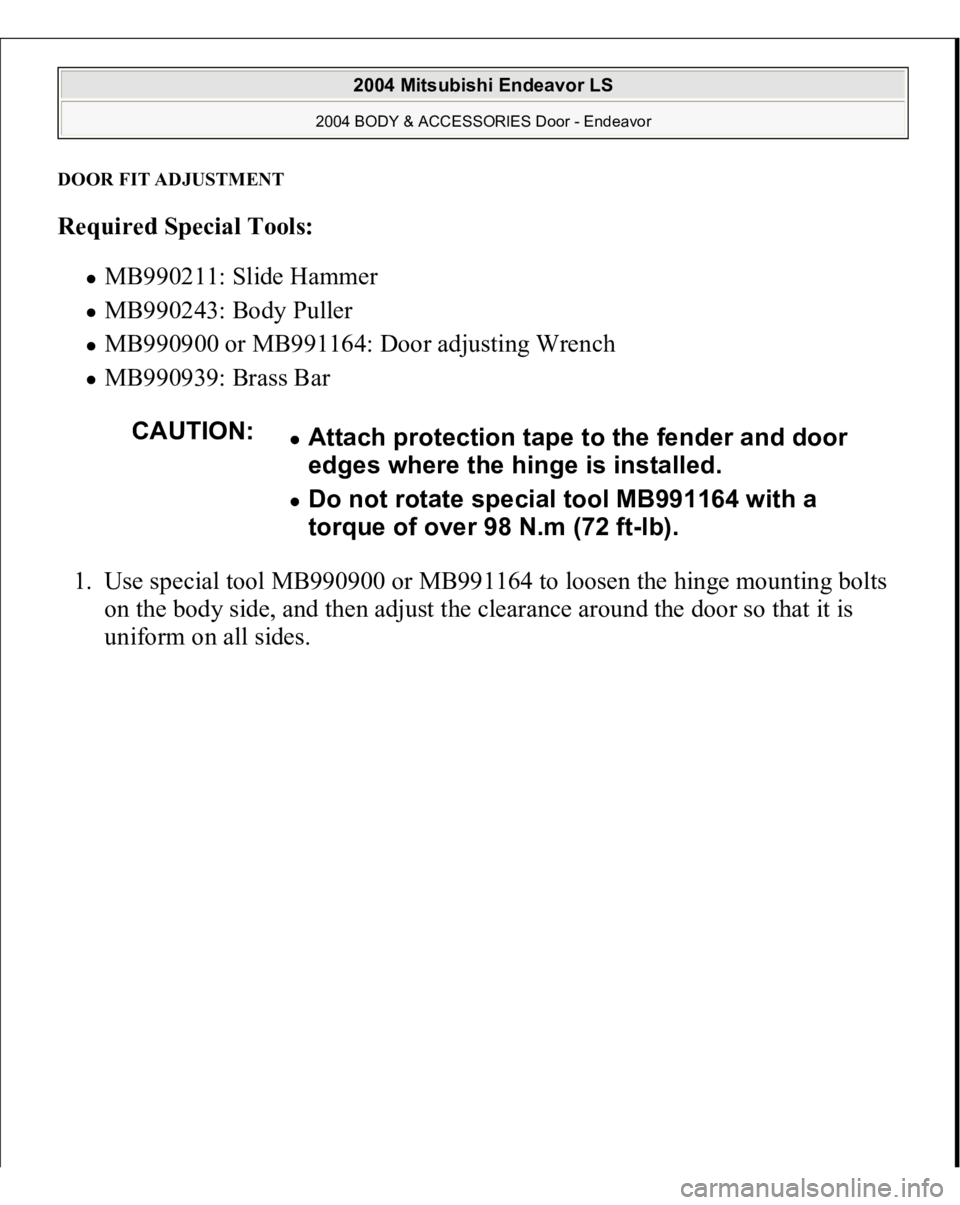
DOOR FIT ADJUSTMENT Required Special Tools:
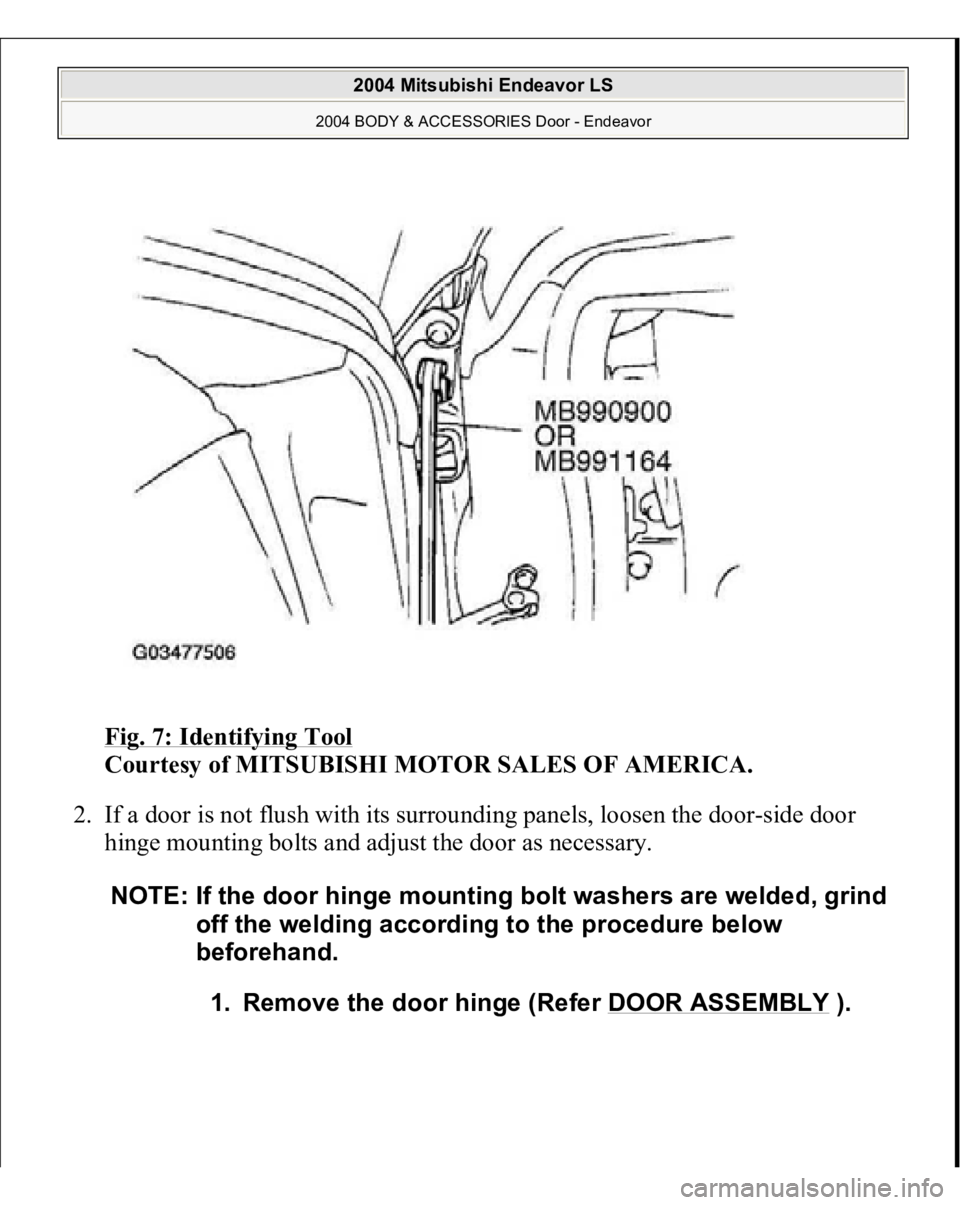
MB990211: Slide Hammer MB990243: Body Puller MB990900 or MB991164: Door adjusting Wrench MB990939: Brass Bar
1. Use special tool MB990900 or MB991164 to loosen the hinge mounting bolts
on the body side, and then adjust the clearance around the door so that it is
uniform on all sides.
CAUTION:
Attach protection tape to the fender and door
edges where the hinge is installed. Do not rotate special tool MB991164 with a
torque of over 98 N.m (72 ft-lb).
2004 Mitsubishi Endeavor LS
2004 BODY & ACCESSORIES Door - Endeavor
Page 1008 of 3870
Fig. 7: Identifying Tool
Courtesy of MITSUBISHI MOTOR SALES OF AMERICA.
2. If a door is not flush with its surrounding panels, loosen the door-side door
hinge mounting bolts and adjust the door as necessary.
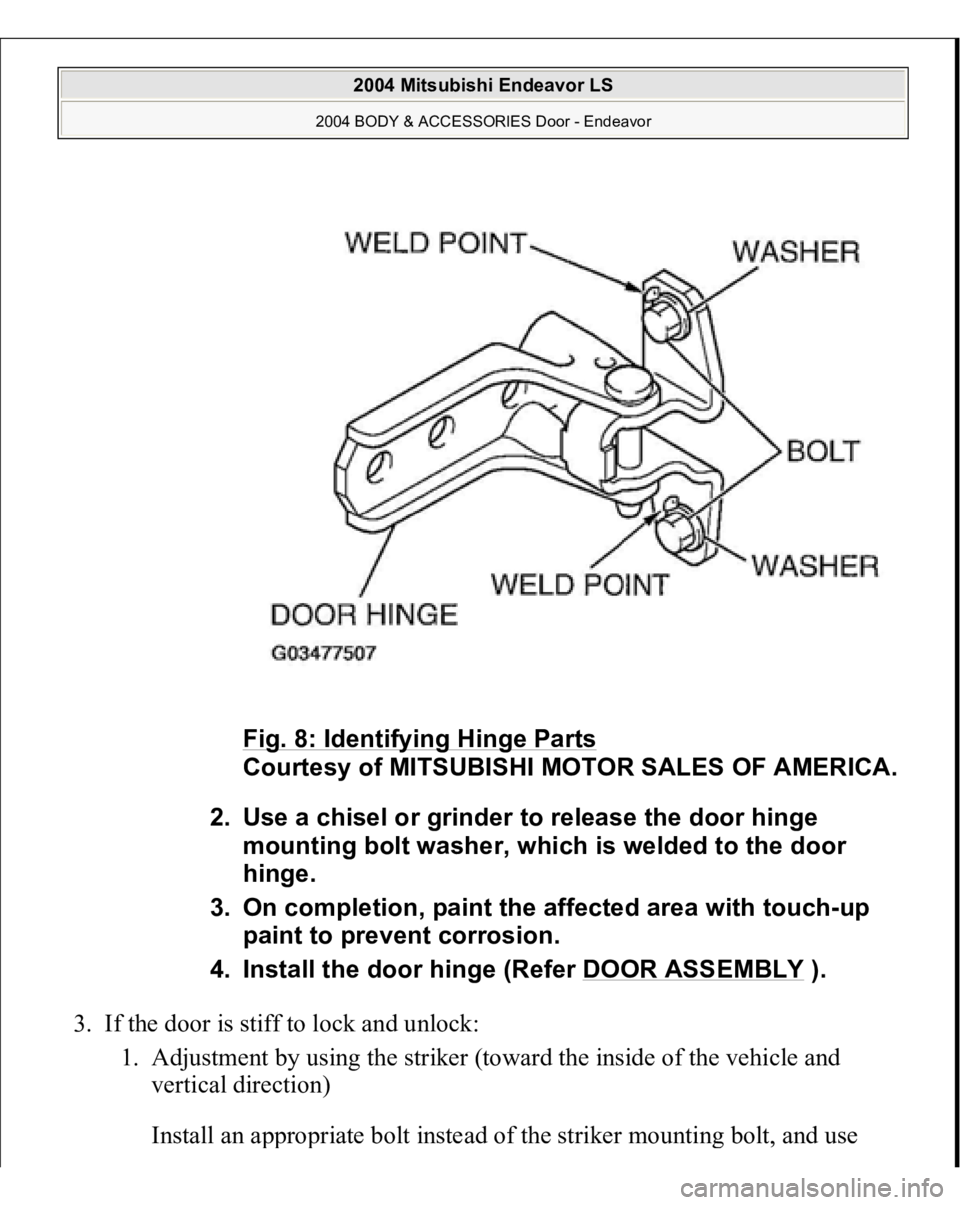
NOTE: If the door hinge mounting bolt washers are welded, grind
off the welding according to the procedure below
beforehand.
1. Remove the door hinge (Refer DOOR ASSEMBLY
).
2004 Mitsubishi Endeavor LS
2004 BODY & ACCESSORIES Door - Endeavor
Page 1009 of 3870
3. If the door is stiff to lock and unlock:
1. Adjustment by using the striker (toward the inside of the vehicle and
vertical direction)
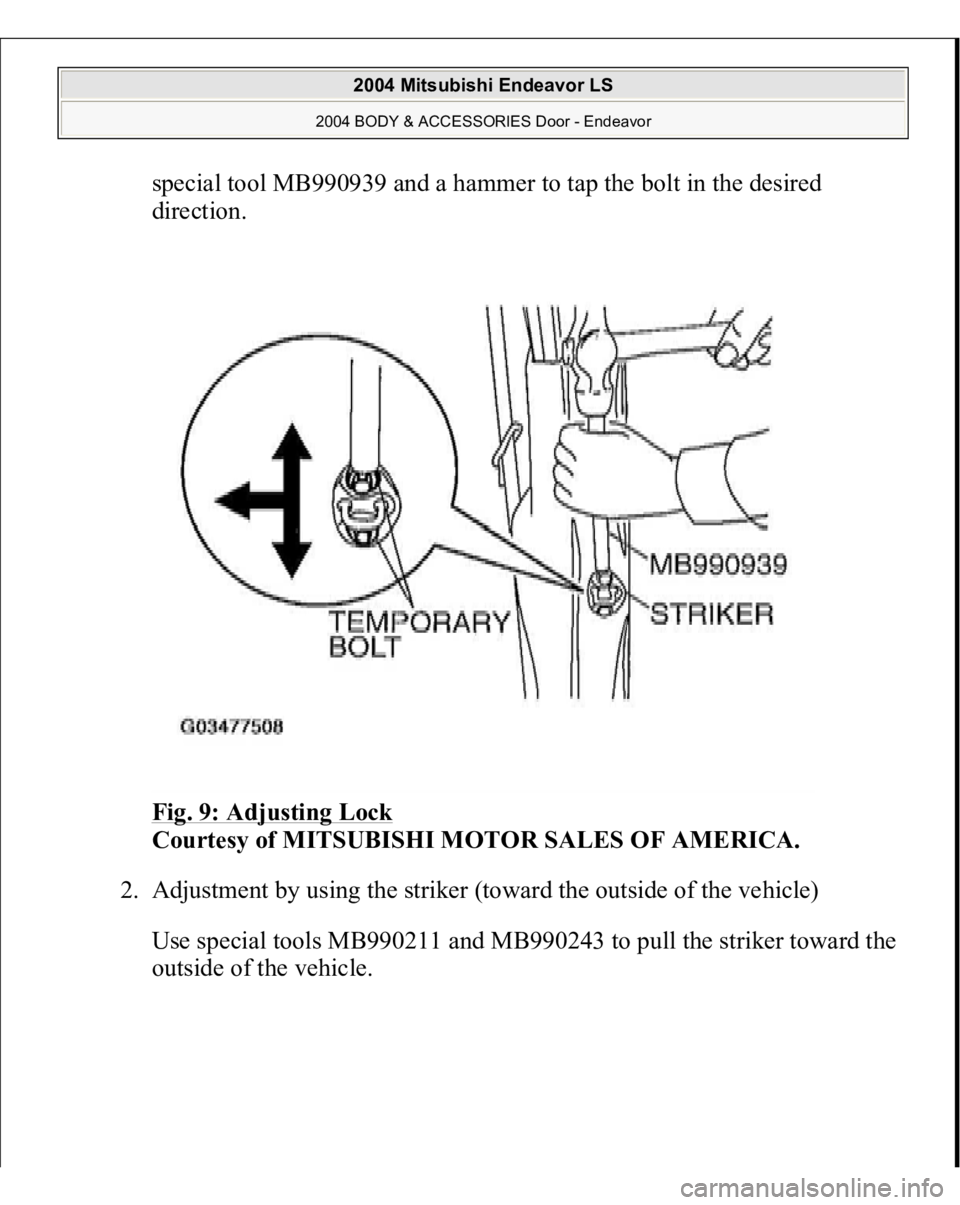
Install an a
ppropriate bolt instead of the striker mountin
g bolt, and use
Fig. 8: Identifying Hinge Parts
Courtesy of MITSUBISHI MOTOR SALES OF AMERICA.
2. Use a chisel or grinder to release the door hinge
mounting bolt washer, which is welded to the door
hinge.
3. On completion, paint the affected area with touch-up
paint to prevent corrosion.
4. Install the door hinge (Refer DOOR ASSEMBLY
).
2004 Mitsubishi Endeavor LS
2004 BODY & ACCESSORIES Door - Endeavor
Page 1010 of 3870
special tool MB990939 and a hammer to tap the bolt in the desired
direction.
Fig. 9: Adjusting Lock
Courtesy of MITSUBISHI MOTOR SALES OF AMERICA.
2. Adjustment by using the striker (toward the outside of the vehicle)
Use special tools MB990211 and MB990243 to pull the striker toward the
outside of the vehicle.
2004 Mitsubishi Endeavor LS
2004 BODY & ACCESSORIES Door - Endeavor
Trending: service interval, gas type, transmission, adding oil, fuel pump, ignition, camshaft
