service ISUZU TROOPER 1995 Workshop Manual
[x] Cancel search | Manufacturer: ISUZU, Model Year: 1995, Model line: TROOPER, Model: ISUZU TROOPER 1995Pages: 1928
Page 843 of 1928
DRIVEABILITY AND EMISSIONS 6E2-147
ON-VEHICLE SERVICE
KNOCK SENSOR (KS) SYSTEM
Refer to engine section of this service manual for intake
removal and access to the knock sensor (KS).
KNOCK SENSOR (KS) MODULE
Refer to (Figure C5-1).
KS module is mounted to a bracket, located at the
upper right hand corner
of the inner fender.
1••1 REMOVE OR DISCONNECT
1. Negative battery cable
2. KS module connector
3. Attaching screws
4. Evaporate emission canister purge bracket
5. KS module
1••1 INSTALL OR CONNECT
1. KS module
2. Attaching screws
3. KS module connector
4. Evaporate emission canister purge bracket
5. Negative battery cable
Page 847 of 1928
DRIVEABILITY AND EMISSIONS 6E2-151
SECTION C-7
EXHAUST GAS RECIRCULATION (EGR) SYSTEM
CONTENTS
GENERAL DESCRIPTION ................. 6E2-151
Operation . . . . . . . . . . . . . . . . . . . . . . . . . . . 6E2-151
Exhaust Gas
Recirculation (EGR) Valve
Check . .
. . . . . . . . . . . . . . . . . . . . . . . . . . 6E2-152
Exhaust Gas
Recirculation (EGR)
Backpressure Transducer (BPT) Check 6E2-152
Exhaust Gas
Recirculation (EGR)
Vacuum Switch Valve (VSV) Solenoid
Check . .
. . . . . . . . . . . . . . . . . . . . . . . . . . 6E2-152
DIAGNOSIS ........................... 6E2-153
ON-VEHICLE SERVICE .................... 6E2-153
Exhaust Gas
Recirculation (EGR)
Manifold Passage ................... 6E2-153
Exhaust Gas
Recirculation (EGR)
Valve Replacement .................. 6E2-153
Exhaust
Gas Recirculation (EGR)
Backpressure Transducer (BPT)
Replacement ....................... 6E2-153
Exhaust Gas
Recirculation (EGR)
Vacuum Switch Valve (VSV) Replacement . 6E2-153
CHART C-7A Exhaust Gas
Recirculation (EGR)
System Check ...................... 6E2-154
GENERAL DESCRIPTION
The Exhaust Gas Recirculation (EGR) System controls
the formation of NOx (Oxides of Nitrogen) Emissions
by
recirculating the exhaust gases into the combustion
chamber. This is done through the intake
manifold.
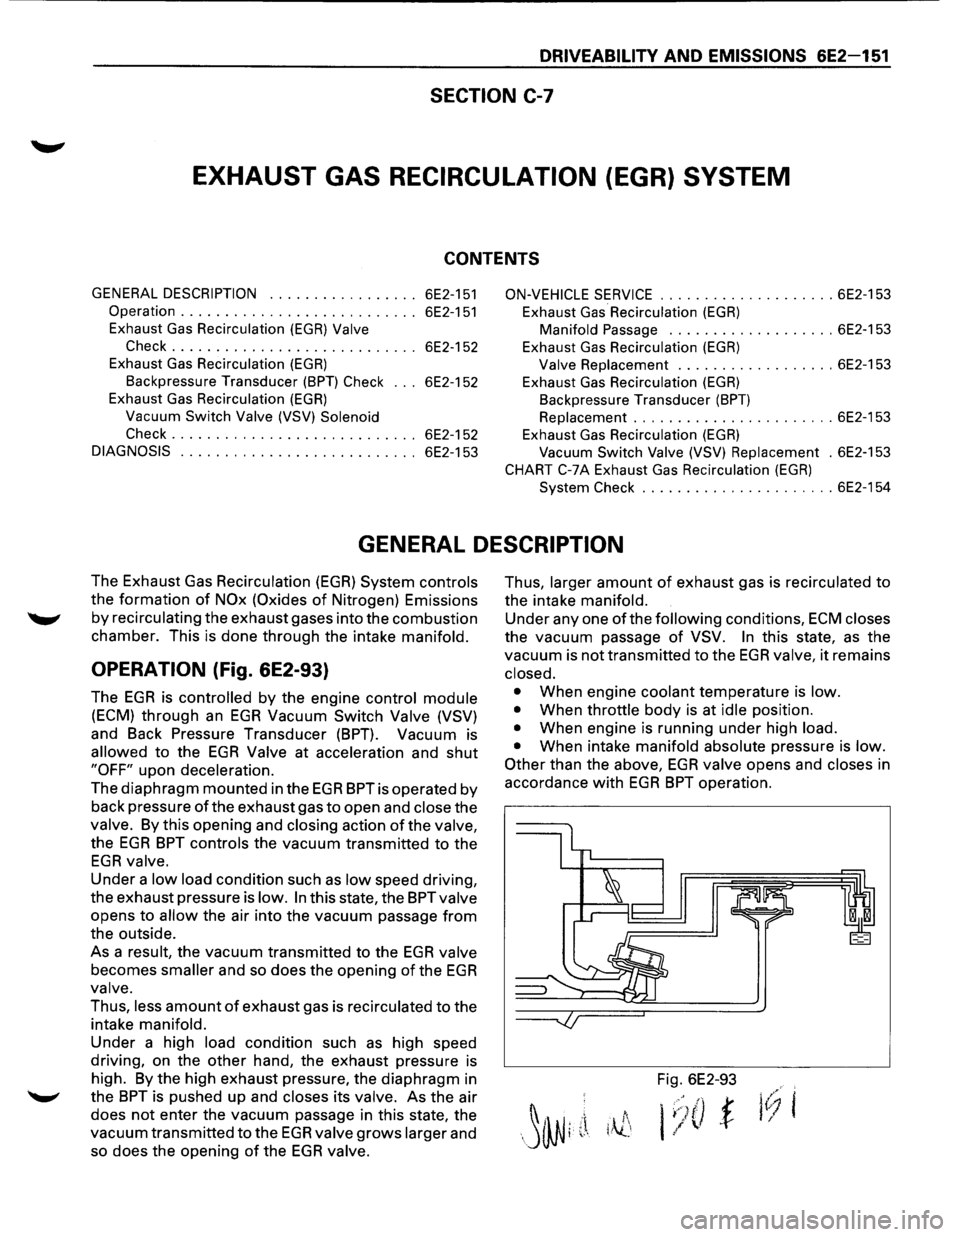
OPERATION (Fig. 6E2-93)
The EGR is controlled by the engine control module
(ECM) through an EGR Vacuum Switch Valve (VSV)
and Back Pressure Transducer (BPT). Vacuum is
allowed to the EGR Valve at acceleration and shut
"OFF" upon deceleration.
The diaphragm mounted in the EGR BPT is operated by
back pressure
of the exhaust gas to open and close the
valve. By this opening and closing action of the valve,
the EGR BPT controls the vacuum transmitted to the
EGR valve.
Under
a low load condition such as low speed driving,
the exhaust pressure is
low. In this state, the BPTvalve
opens to allow the air into the vacuum passage from
the outside.
As a
result, the vacuum transmitted to the EGR valve
becomes smaller and so does the opening of the EGR
valve.
Thus, less amount of exhaust gas is recirculated to the
intake
manifold.
Under
a high load condition such as high speed
driving, on the
other hand, the exhaust pressure is
high. By the high exhaust pressure, the diaphragm in
the
BPT is pushed up and closes its valve. As the air
does
not enter the vacuum passage in this state, the
vacuum transmitted
to the EGR valve grows larger and
so does the opening
of the EGR valve.
Thus, larger amount of exhaust gas is recirculated to
the intake manifold.
Under
any one ofthe following conditions, ECM closes
the vacuum passage of VSV. In this state, as the
vacuum is not transmitted
to the EGR valve, it remains
closed.
•
When engine coolant temperature is low.
•
When throttle body is at idle position.
• When engine is running under high load.
•
When intake manifold absolute pressure is low.
Other
than the above, EGR valve opens and closes in
accordance
with EGR BPT operation.
Fig. 6E2-93
i
.
,::·)I)' t
/
..f-l
Page 849 of 1928
DRIVEABILITV AND EMISSIONS 6E2-153
DIAGNOSIS
Diagnosis of the Exhaust Gas Recirculation (EGR)
system is covered in CHART C-7 at the end of this
section.
ON-VEHICLE SERVICE
EXHAUST GAS RECIRCULATION (EGR)
MANIFOLD PASSAGE
[!j INSPECTION AND REPAIR
If Exhaust Gas Recirculation (EGR) passages in the inlet
manifold indicate excessive build-up
of deposits, the
passages should
be cleaned. Care should be taken to
ensure that
all loose particles are completely removed,
to prevent them
from clogging the EGR valve, or from
being ingested into the engine.
Do not wash EGR valve in solvents or de greaser as
permanent damage to valve diaphragm may result.
Also, sand blasting
of the valve is not recommended,
since this can affect the operation
of the valve.
EXHAUST GAS RECIRCULATION (EGR)
VALVE REPLACEMENT
1••1 REMOVAL
1. Air cleaner duct assembly.
2. Vacuum hoses from EGR valve.
3. EGR pipe
4. Retaining bolts (2) from valve.
5. EGR valve & gasket.
1••1 INSTALLATION
5. EGR valve & New gasket.
4. Retaining bolts to valve.
3. EGR pipe.
2. Vacuum hoses to EGR valve.
1. Air cleaner dust assembly.
EXHAUST GAS RECIRCULATION (EGR)
BACKPRESSURE TRANSDUCER (BPT)
REPLACEMENT
1••1 REMOVAL
1. Vacuum hoses.
2. Back pressure transducer
1••1 INSTALLATION
1. Vacuum hoses
2. Back pressure transducer
EXHAUST GAS RECIRCULATION (EGR)
VACUUM SWITCH VALVE (VSV)
REPLACEMENT
1••1 REMOVAL
1. Electrical connector
2. Vacuum hoses from Vacuum Switch Valve (VSV)
3. Two fasteners hold VSV to intake manifold.
1••1 INSTALLATION
3. VSV and Retaining bolts.
2. Vacuum hoses
1. Electrical connector
Page 857 of 1928
DRIVEABILITV AND EMISSIONS 6E2-161
SECTION C-1 0
AIR CONDITIONING (A/C) COMPRESSOR CLUTCH CONTROL
SYSTEM
CONTENTS
General Description ..................... 6E2-161 On-Vehicle Service ...................... 6E2-161
Operation ........................... 6E2-161 Chart C-10 Air Conditioning (A/C) System
Diagnosis ............................. 6E2-161 Functional Check ...................... 6E2-162
GENERAL DESCRIPTION
OPERATION
This system consists of a high pressure cut-out switch,
Air Conditioning (A/C) compressor
relay, A/C thermo
switch relay, A/C controller and the compressor.
The high pressure cut-out switch
(normally closed),
opens when the head pressure gets too high. This will
disable
the A/C clutch, before damage can occur to the
compressor or other
A/C components.
When
A/C control switch is "ON" and the high pressure
switch and thermo switch are
closed, a request signal
is sent to the Engine Control Module (ECM). The ECM
will then energize the A/C clutch through the A/C
clutch relay. The A/C controller which is separate from
the ECM will then turn the A/C cooling fan "ON".
The A/C controller controls the A/C cooling fan, as well
as sending a signal to the ECM on model equipped with
automatic transmission.
The
ECM will disable the A/C clutch during Wide Open
Throttle,
or high power steering loads. The ECM has a
slight delay for clutch engagement to allow for the idle
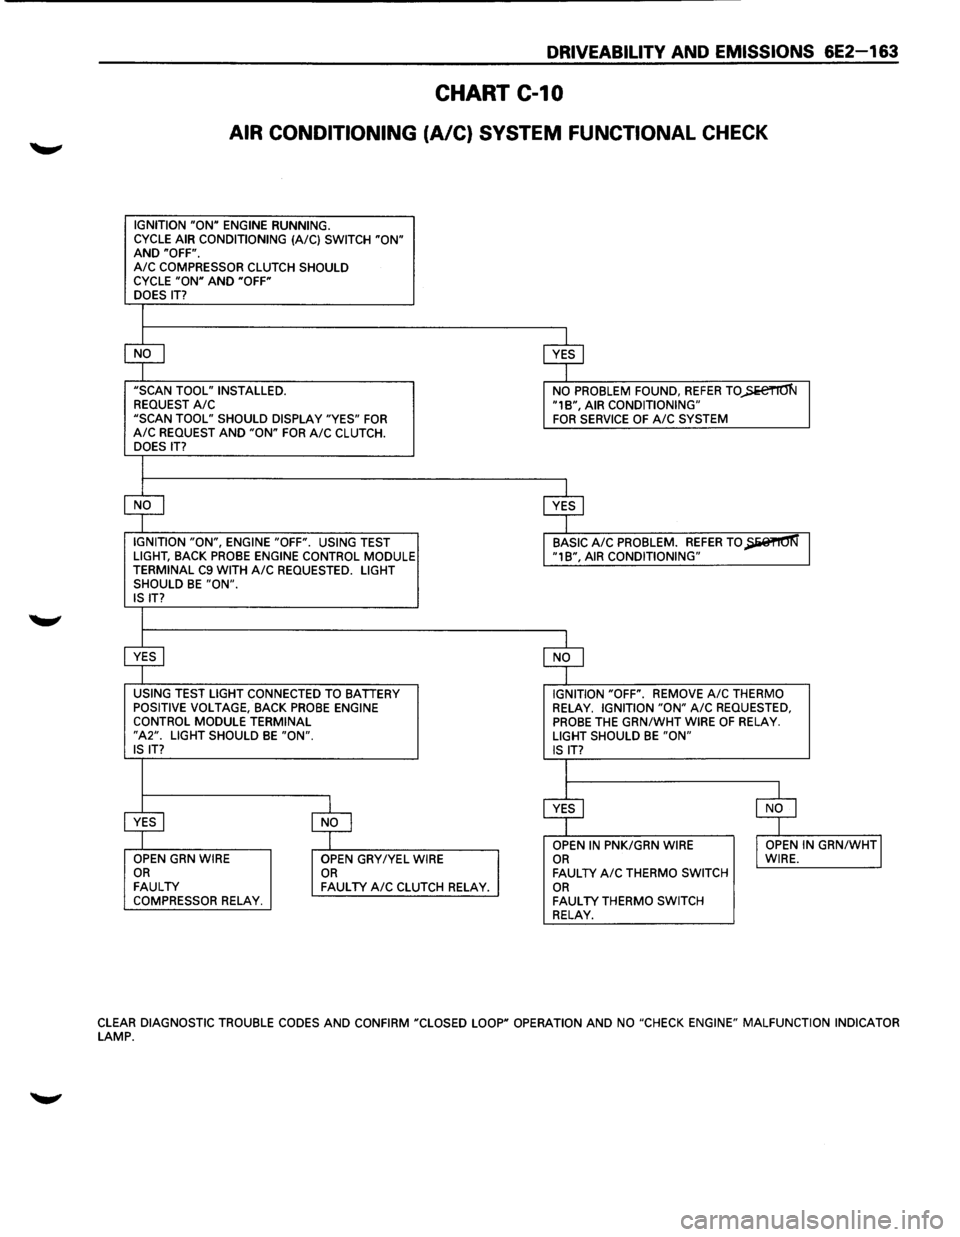
to slightly increase. Refer to CHART C-1 0 for wiring and
circuit description.
DIAGNOSIS
Chart C-10 should be used for the electrical portion of
the A/C circuit. Section 1 B should be used for
diagnosing the refrigerant portion of the system. The
"Scan tool" will be used in diagnosing the system, as it
has the ability to read the A/C request inputto the ECM,
as well as displaying when the ECM has commanded
the
A/C clutch "ON".
ON-VEHICLE SERVICE
For removal and replacement of A/C components,
refer to
A/C (SECTION 1 B) in this Manual.
Page 859 of 1928
DRIVEABILITV AND EMISSIONS 6E2-163
CHART C-10
AIR CONDITIONING (A/C) SYSTEM FUNCTIONAL CHECK
IGNITION "ON" ENGINE RUNNING.
CYCLE AIR CONDITIONING (A/C) SWITCH "ON" AND "OFF". A/C COMPRESSOR CLUTCH SHOULD
CYCLE "ON" AND "OFF"
DOES IT?
$
$
"SCAN TOOL" INSTALLED.
NO PROBLEM FOUND, REFER TO)>e€TIO'N REQUEST A/C "1B", AIR CONDITIONING"
"SCAN TOOL" SHOULD DISPLAY "YES" FOR FOR SERVICE OF A/C SYSTEM A/C REQUEST AND "ON" FOR A/C CLUTCH.
DOES IT?
$
$
IGNITION "ON", ENGINE "OFF". USING TEST BASIC A/C PROBLEM. REFER TO~ LIGHT, BACK PROBE ENGINE CONTROL MODULE "1B", AIR CONDITIONING"
TERMINAL C9 WITH A/C REQUESTED. LIGHT
SHOULD BE "ON". IS IT?
$ $
USING TEST LIGHT CONNECTED TO BATTERY IGNITION "OFF". REMOVE A/C THERMO
POSITIVE VOLTAGE, BACK PROBE ENGINE RELAY. IGNITION "ON" A/C REQUESTED, CONTROL MODULE TERMINAL PROBE THE GRN/WHT WIRE OF RELAY. "A2". LIGHT SHOULD BE "ON". LIGHT SHOULD BE "ON" IS IT?
IS IT?
I
$ $
~ $ OPEN IN PNK/GRN WIRE I OPEN IN GRN/WHTJ OPEN GRN WIRE
OPEN GRY/YEL WIRE OR WIRE. OR OR FAULTY A/C THERMO SWITCH FAULTY FAULTY A/C CLUTCH RELAY. OR COMPRESSOR RELAY. FAULTY THERMO SWITCH RELAY.
CLEAR DIAGNOSTIC TROUBLE CODES AND CONFIRM "CLOSED LOOP" OPERATION AND NO "CHECK ENGINE" MALFUNCTION INDICATOR LAMP.
Page 860 of 1928
6E2 164 DRIVEABILITY AND EMISSIONS
SECTION C-13
POSITIVE CRANKCASE VENTILATION (PCV)
CONTENTS
GENERAL DESCRIPTION ................. 6E2-164 DIAGNOSIS ............................ 6E2-165
PCVValve .......................... 6E2-164 Functional Check of PCV ................ 6E2-165
Results of Incorrect Operation ............ 6E2-165
ON-VEHICLE SERVICE .................... 6E2-165
GENERAL DESCRIPTION
PCV VALVE
A Positive Crankcase Ventilation (PCV) system is used
to consume crankcase vapors in the combustion
process instead
of venting to atmosphere. Fresh air
from the throttle body is supplied to the crankcase,
mixed
with blow-by gases and then passed through a
Positive Crankcase Ventilation (PCV) into the intake
manifold.
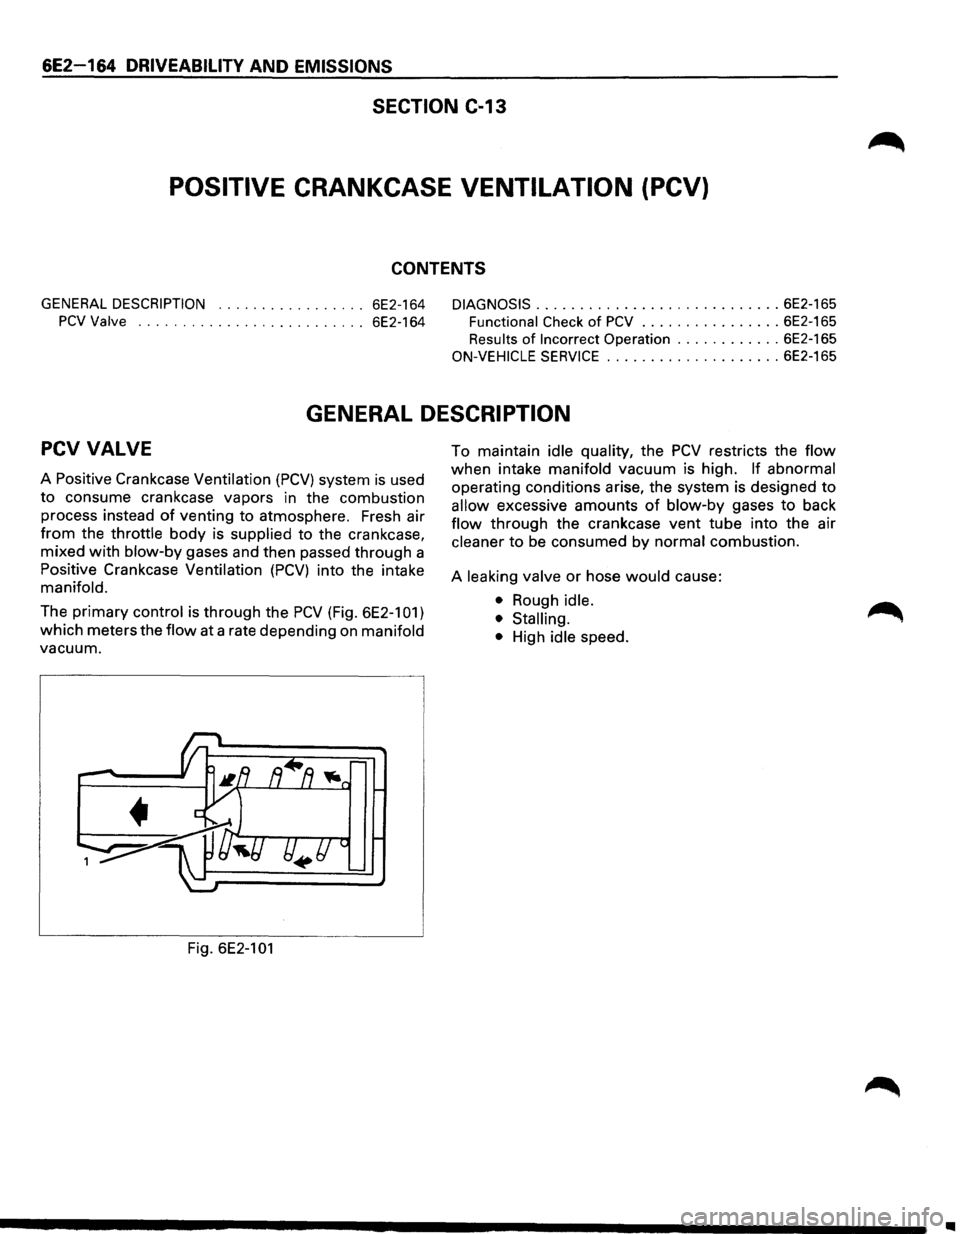
The primary control is through the PCV (Fig. 6E2-101)
which meters the
flow at a rate depending on manifold
vacuum.
Fig.
6E2-101
To maintain idle quality, the PCV restricts the flow
when intake manifold vacuum is high. If abnormal
operating conditions arise, the system is designed to
allow excessive amounts of blow-by gases to back
flow through the crankcase vent tube into the air
cleaner to be consumed by normal combustion.
A
leaking valve or hose would cause:
• Rough idle.
• Stalling.
•
High idle speed.
..
Page 861 of 1928
DRIVEABILITV AND EMISSIONS 6E2-165
DIAGNOSIS
FUNCTIONAL CHECK OF POSITIVE
CRANKCASE VENTILATION (PCV)
If an engine is idling rough, check for a clogged PCV or
plugged hose. Replace as required. Use the following
procedure.
1. Remove PCV from rocker arm cover.
2. Run the engine at idle.
3. If there is no vacuum at valve, check for plugged
hoses or manifold port, or PCV.
Replace plugged or deteriorated hoses.
4. Stop the engine and remove PCV. Remove
PCV hose. Inspect metered orifice for being
restricted or
plugged. If restricted clean orifice.
With this system, any
blow-by in excess of the system
capacity (from a
badly-worn engine, sustained heavy
load, etc.) is exhausted into the intake manifold and is
drawn into the engine. Proper
operation
of the PCV System is dependent
upon a
sealed engine. If oil sledging or dilution is
noted, and the PCV System is functioning properly,
malfunction
indicator lamp for possible cause and
correct to ensure that system
will function as intended.
RESULTS OF INCORRECT OPERATION
A plugged valve or hose may cause:
• Rough idle.
• Stalling
or slow idle speed.
• Oil leaks.
• Oil
in air cleaner.
• Sludge
in engine.
ON-VEHICLE SERVICE
An engine which is operated without any crankcase
ventilation can be damaged. Periodically, inspect the
PCV, hoses
and clamps and replace any showing
signs
of deterioration.
Page 863 of 1928
ENGINE EXHAUST (V6 3.2L) 6F-1
SECTION 6F
ENGINE EXHAUST (V6 3.2L)
\fl CAUTION:
VI Exhaust system components must have enough clearance from the upderbody to prevent overheating the
floor pan and damaging the passenger compartment, insulation
and trim materials.
CONTENTS
General Description . . . . . . . . . . . . . . . . . . . . 6F,....1
Hangers ........................... , ... ..-6f-2
Three Way Catalytic Converter ....• ·; ~. 6F-2
Gasket . . . . . . . . . . . . . . . . . . . . . . . . . . . . . 6F-2
On-Vehicle Service ........ , . . . . . . . . . . . 6F-3
Front Exhaust Pipe ... , " ;< . . . . . . . . . . . . 6F-3
Center Exhaust Pipe.. .. : -. . . . . . . . . . . . . . . . 6F-4
.. .r·
Three Way Catalytic Converter . . . . . . . . . 6F-5
Pre Catalytic Converter . . . . . . . . . . . . . . . 6F-6
Exhaust Silencer . . . . . . . . . . . . . . . . . . . . . 6F-7
Rear Exhaust Pipe . . . . . . . . . . . . . . . . . . . . 6F-8
Exhaust Pipe Mounting Rubber . . . . . . . . 6F-9
Main Data and Specifications ........... 6F-10
Torque Specifications ............... 6F-10
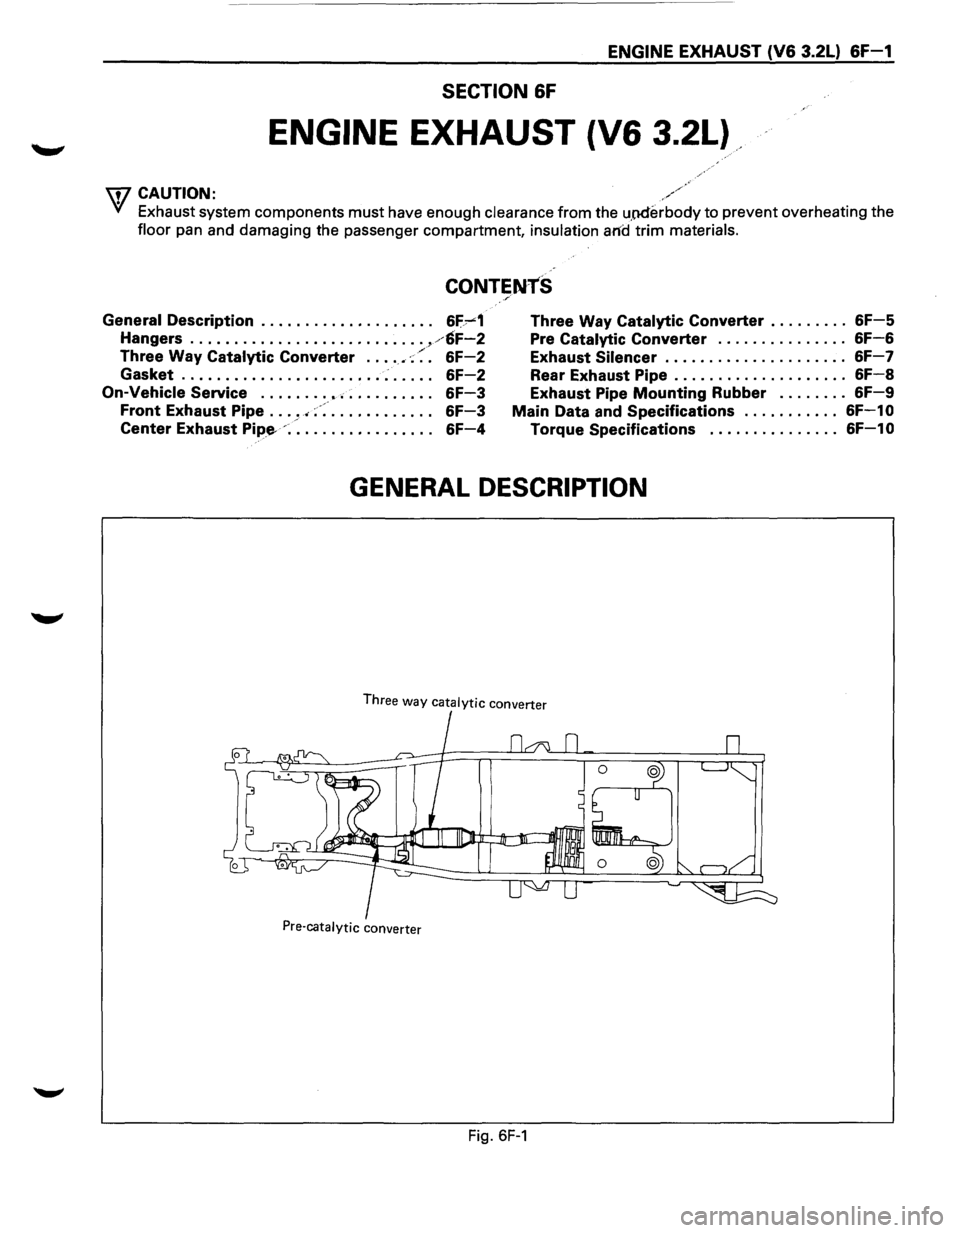
GENERAL DESCRIPTION
Three way catalytic converter
Pre-catalytic converter
Fig. 6F-1
Page 864 of 1928
6F-2 ENGINE EXHAUST (V6 3.2L)
When inspecting or replacing exhaust system
components, make sure there is adequate
clearance
from all points on the underbody to prevent over
heating the
floor pan and possible damage to the
passenger
compartment insulation and trim materials.
Check complete exhaust system and nearby body
areas and rear compartment lid for broken, damaged,
missing
or mispositioned parts, open seams, holes,
loose
connections or other deterioration which could
permit exhaust fumes to seep into the rear
compartment or passenger compartment. Dust or
water in the rear compartment may be an indication of
a problem in one of these areas. Any faulty areas
should be corrected immediately.
HANGERS
Various types of hangers are used to support exhaust
system(s). These
include conventional rubber straps,
rubber rings, and rubber
blocks.
The installation of exhaust system supports is very
important,
as improperly installed supports can cause
annoying vibrations
which can be difficult to diagnose.
THREE WAY CATAL VTIC CONVERTER
The three way catalytic converter is an emission
control device added to the exhaust system to reduce
pollutants from the exhaust gas stream.
W CAUTION:
VI • The catalytic converter requires the use of
unleaded fuel only.
Periodic
maintenance of the exhaust system is not
required. If the vehicle is raised for other service, it is
advisable to check the condition of the complete
exhaust system.
A
dual bed monolith catalytic converter is used in
combination
with three way catalytic converter.
Catalytic Types:
Three
way (Reduction/Oxidation) catalyst
The catalyst coating on the three way (reduction)
converter contains
platinum and rhodium which
lowers the levels of oxide of nitrogen (NOx) as well as
hydrocarbons (HC) and carbon monoxide (Co).
GASKET
The gasket must be replaced whenever a new exhaust
pipe,
muffler or catalytic converter is installed.
Page 865 of 1928
ENGINE EXHAUST (V6 3.2L) &F-3
ON-VEHICLE SERVICE
FRONT EXHAUST PIPE
2
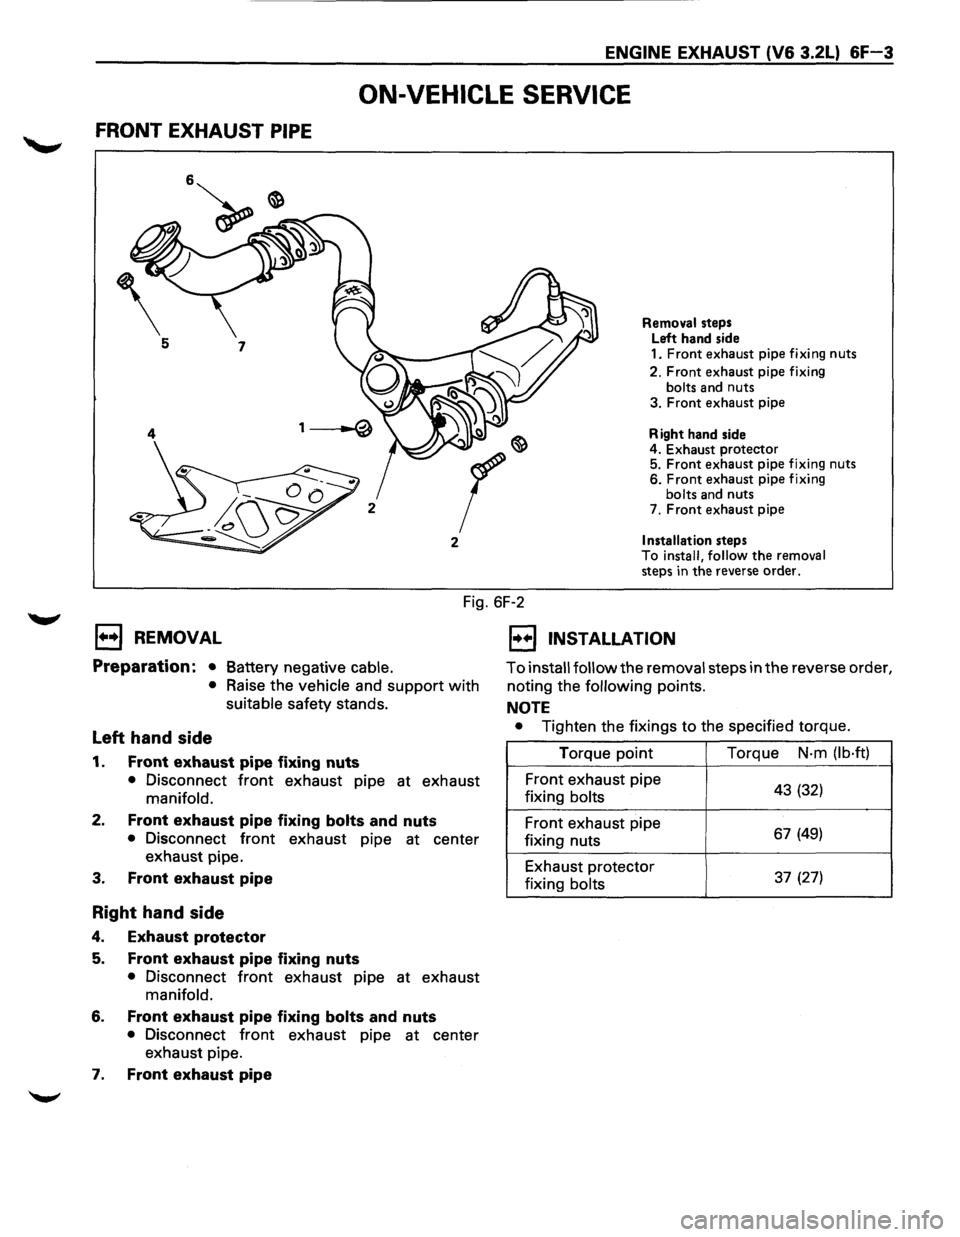
Removal steps
Left hand side
1.
Front exhaust pipe fixing nuts
2. Front exhaust pipe fixing
bolts and nuts
3. Front exhaust pipe
Right hand side
4. Exhaust
protector 5. Front exhaust pipe fixing nuts 6. Front exhaust pipe fixing bolts and nuts
7. Front exhaust pipe
Installation steps
To install, follow the removal steps in the reverse order.
Fig. 6F-2
EJ REMOVAL
Preparation: • Battery negative cable.
•
Raise the vehicle and support with
suitable safety stands.
Left hand side
1. Front exhaust pipe fixing nuts
• Disconnect front exhaust pipe at exhaust
manifold.
2. Front exhaust pipe fixing bolts and nuts
• Disconnect front exhaust pipe at center
exhaust pipe.
3.
Front exhaust pipe
Right hand side
4. Exhaust protector
5. Front exhaust pipe fixing nuts
• Disconnect front exhaust pipe at exhaust
manifold.
6. Front exhaust pipe fixing bolts and nuts
• Disconnect front exhaust pipe at center
exhaust pipe.
1. Front exhaust pipe
1•+1 INSTALLATION
To install follow the removal steps in the reverse order,
noting the
following points.
NOTE
• Tighten the fixings to the specified torque.
Torque point Torque
N·m (lb·ft)
Front exhaust pipe
43 (32) fixing bolts
Front exhaust pipe 67 (49) fixing nuts
Exhaust protector
37 (27) fixing bolts