engine oil ISUZU TROOPER 1995 Workshop Manual
[x] Cancel search | Manufacturer: ISUZU, Model Year: 1995, Model line: TROOPER, Model: ISUZU TROOPER 1995Pages: 1928
Page 799 of 1928
Park/Neutral Position (PNP) Switch (Auto Only)
The Park/Neutral position (PNP) switch indicates to the
Engine Control Module
(ECM) when the transmission
is in park, neutral
or drive. This information is used for
the exhaust gas recirculation, and the idle air control
valve operation.
NOTE:
• Vehicle
should not be driven with PNP switch
disconnected,
as idle quality will be affected and a
possible false diagnostic trouble code
(DTC) 24
(vehicle speed sensor).
DRIVEABILITY AND EMISSIONS 6E2-103
See DIAGNOSIS AND GENERAL SERVICE Section for
more information on the PNP switch. The PNP switch is
part
of the neutral/start and backup light switch
assembly mounted on the transmission.
See CHART C-
1 A for PNP switch check.
DIAGNOSIS
To read the DTC(s), use a "Scan tool" or ground the
diagnostic test terminal,
with the engine not running
and the ignition
"ON". The "Check Engine" malfunction
indicator lamp
will flash DTC 12 three times and then
flash each
DTC stored in memory three times. All
DTC(s) stored in memory will have been read when
DTC 12 is flashed again.
No new
DTC(s) can be stored when in the diagnostics
test mode (diagnostics lead grounded). This
eliminates confusion while the system is being
serviced.
To clear the
DTC(s) from memory:
• Ignition "OFF".
•
Disconnect main fuse located in the under hood
fuse/relay center near the battery.
Since the ECM can have a failure which may affect only
one circuit, following the diagnostic procedures in this
section
will determine which circuit has a problem and
where
it is.
If a diagnostic chart indicates thatthe ECM connections
or ECM is the cause of a problem, and the ECM is
replaced,
but does not correct the problem, one of the
following may be the reason.
• There is a problem with the ECM terminal
connections-The diagnostic chart will say ECM
connections or ECM. The terminals may have to
be removed from the connector in order to check
them properly.
• The ECM is not correct for the Vehicle-Ane
incorrect
ECM may cause a malfunction and may
set a DTC.
• The problem is intermittent -This means that
the problem is
not present at the time the system is
being checked.
In this case, refer to the
"Symptoms" portion of the manual and make a
careful physical inspection
of all portions of the
system involved.
• Shorted solenoid, relay coil, or harness
Solenoid and relays are turned "ON" and "OFF" by
the
ECM, using internal electronic switches called
"drivers".
Each driver is part of a group of four,
called "quad-drivers". Failure of one driver can
damage any other driver in the set. A
shorted solenoid, relay coil, or harness in a l-EFT
SHCI
computer will not damage the ECM, but will
cause the circuit and controlled component to be
inoperative. When the circuit fault is not present or
has been repaired, the "quad-driver" will again
operate in a normal manner due to its fault
protected design. If a fault has been repaired in a
circuit controlled by a "quad-driver", the original
ECM should be reinstalled and the circuit checked
for proper operation. ECM replacement will not be
necessary if the repaired circuit or component now
operates correctly.
J 34636 or BT-8405 testers or equivalent provide a fast,
accurate means
of checking for a shorted coil or a short
to battery positive voltage.
• The replacement ECM may be faulty-After the
ECM is replaced, the system should be re-checked
for proper operation. If the diagnostic chart again
indicates the
ECM is the problem, substitute a
known good
ECM. Although this is a rare
condition,
it could happen.
ENGINE CONTROL MODULE (ECM)
A faulty ECM will be determined in the diagnostic
charts.
ELECTRONICALL V ERASABLE
PROGRAMMABLE READ
ONL V MEMORY
A faulty electrically erasable programmable read only
memory, which is part of the ECM, will set a DTC 51.
ENGINE CONTROL MODULE (ECM)
INPUTS
All of the sensors and input switches can be diagnosed
by the use
of "Scan tool".
Following is a short description of how the sensors and
switches can be diagnosed by the use
"Scan tool". The
"Scan tool" can also be used to compare the values for
a normal running engine with the engine you're
diagnosing.
Page 804 of 1928
6E2-1 08 DRIVEABILITV AND EMISSIONS
CHART C-1A
PARK/NEUTRAL POSITION (PNP} SWITCH DIAGNOSIS
(AUTO TRANSMISSION ONL
V}
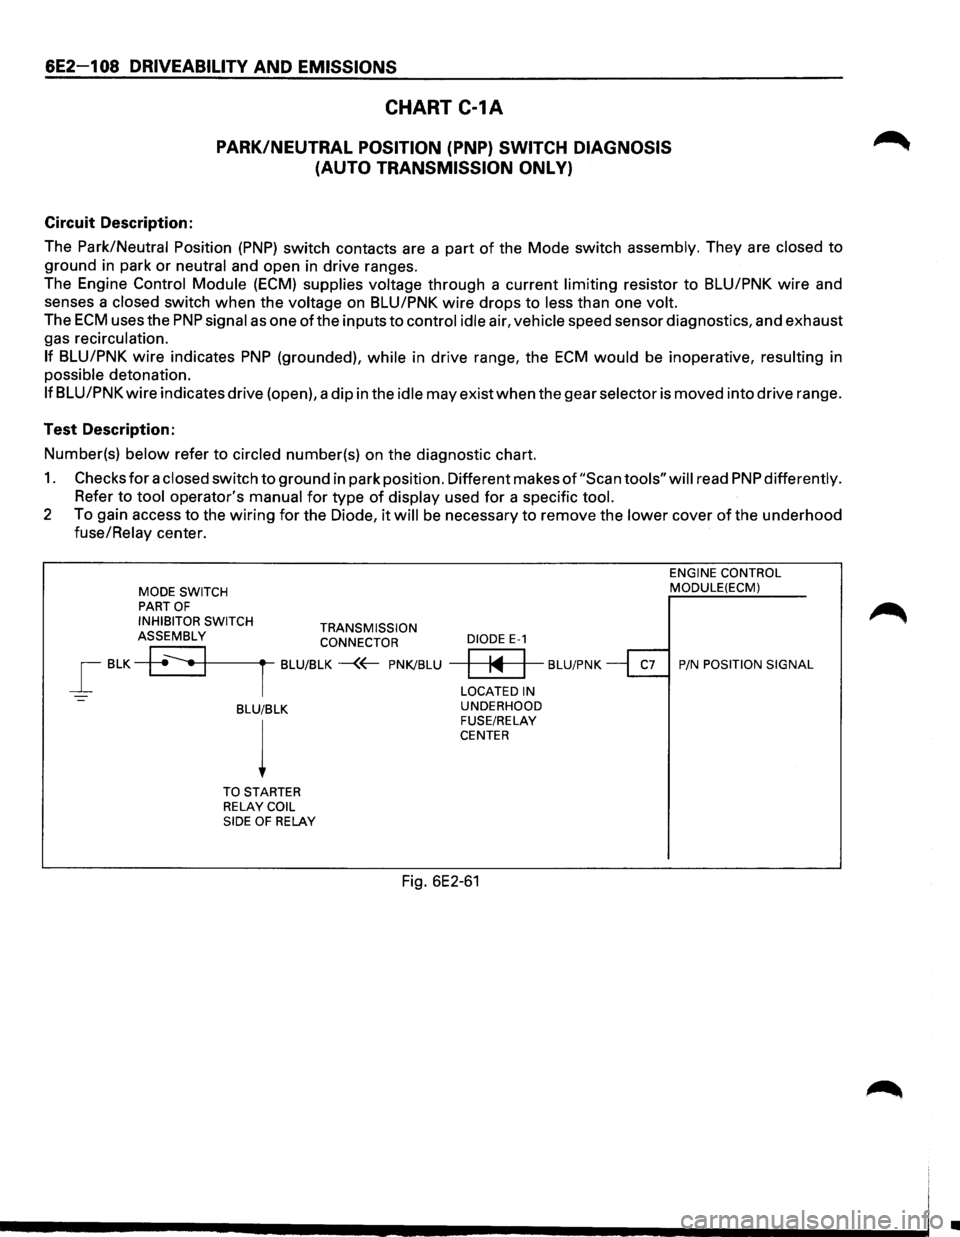
Circuit Description:
The
Park/Neutral Position (PNP) switch contacts are a part of the Mode switch assembly. They are closed to
ground in park or neutral and open in drive ranges.
The Engine
Control Module (ECM) supplies voltage through a current limiting resistor to BLU/PNK wire and
senses a
closed switch when the voltage on BLU/PNK wire drops to less than one volt.
The ECM uses the PNP signal as one ofthe inputs to control idle air, vehicle speed sensor diagnostics, and exhaust
gas recirculation.
If BLU/PNK wire indicates PNP (grounded), while in drive range, the ECM would be inoperative, resulting in
possible detonation.
If BLU/PNK wire indicates drive (open), a dip in the idle may exist when the gear selector is moved into drive range.
Test Description:
Number(s)
below refer to circled number(s) on the diagnostic chart.
1. Checks for a closed switch to ground in park position. Different makes of "Scan tools" will read PNP differently.
Refer to tool operator's manual for type of display used for a specific tool.
2 To gain access to the wiring for the Diode, it will be necessary to remove the lower cover of the underhood
fuse/Relay center.
MODE SWITCH PART OF
INHIBITOR SWITCH TRANSMISSION ASSEMBLY CONNECTOR
_[ BLK +~•+1-------rt--BLU/BLK -{~ PNK/BLU
-BLU/BLK
l
TO STARTER
RELAY COIL
SIDE OF RELAY
DIODE E-1
ENGINE CONTROL MODULE(ECM)
~ BLU/PNK ~ P/N POSITION SIGNAL
LOCATED IN
UNDERHOOD
FUSE/RELAY
CENTER
Fig. 6E2-61
Ill
Page 808 of 1928
6E2-112 DRIVEABILITY AND EMISSIONS
CHART C-1E
POWER STEERING PRESSURE (PSP) SWITCH DIAGNOSIS
Circuit Description:
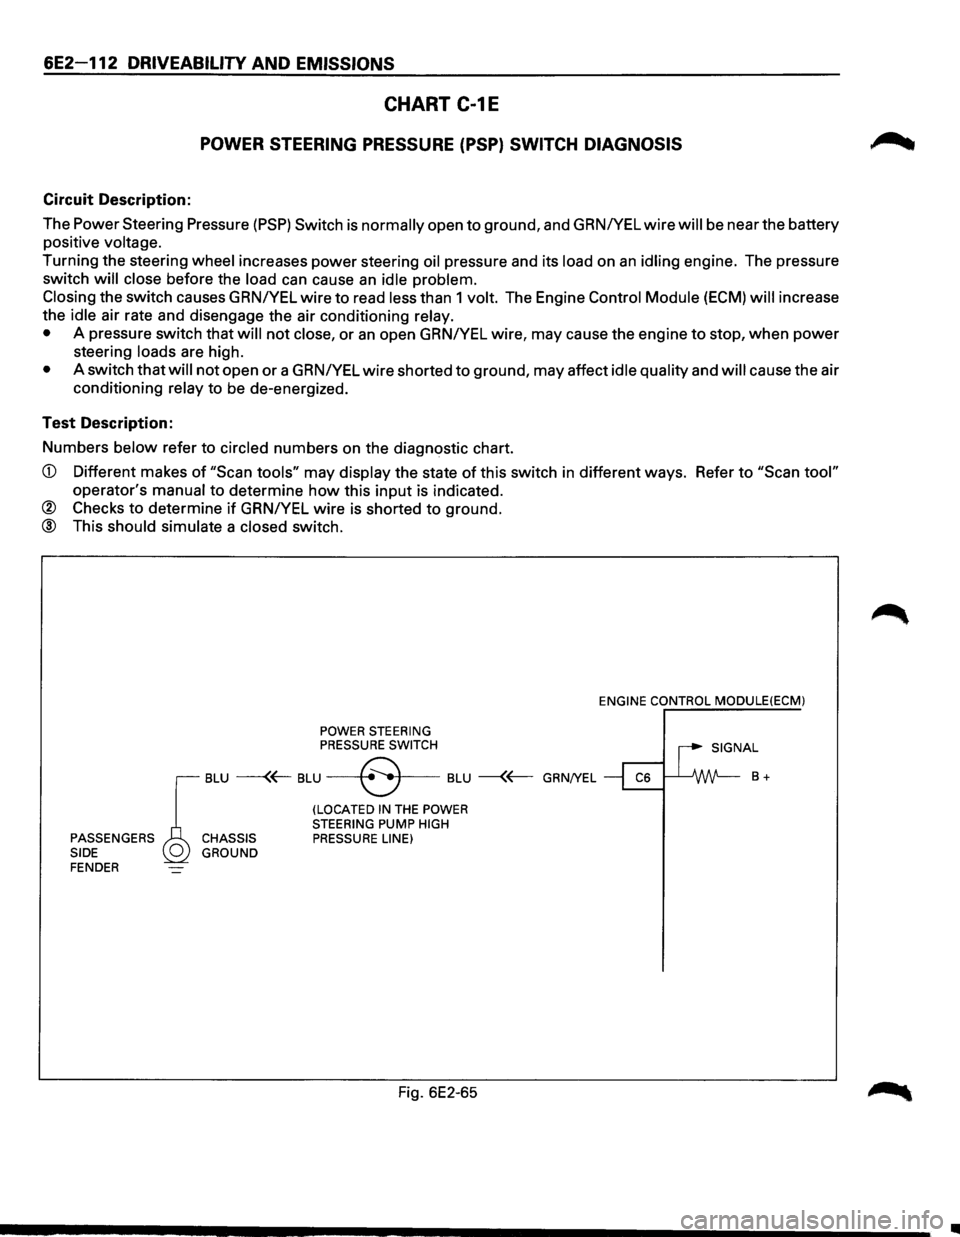
The Power Steering Pressure
(PSP) Switch is normally open to ground, and GRNIYEL wire will be near the battery
positive
voltage.
Turning the steering wheel increases power steering oil pressure and its load on an idling engine. The pressure
switch
will close before the load can cause an idle problem.
Closing
the switch causes GRN/YEL wire to read less than 1 volt. The Engine Control Module (ECM) will increase
the
idle air rate and disengage the air conditioning relay.
•
A pressure switch that will not close, or an open GRNIYEL wire, may cause the engine to stop, when power
steering loads are high.
• A switch that will not open or a GRNIYEL wire shorted to ground, may affect idle quality and will cause the air
conditioning
relay to be de-energized.
Test Description:
Numbers
below refer to circled numbers on the diagnostic chart.
CD Different makes of "Scan tools" may display the state of this switch in different ways. Refer to "Scan tool"
operator's manual to determine how this input is indicated.
® Checks to determine if GRNIYEL wire is shorted to ground.
@ This should simulate a closed switch.
POWER STEERING PRESSURE SWITCH ENGINE
CONTROL
MODULE(ECM)
I SIGNAL
r
BLU ---(~ BLU --+8 .. •f---BLU --{~ GRN/YEL ~ ~ B +
(LOCATED IN THE POWER
STEERING PUMP HIGH PASSENGERS CHASSIS PRESSURE LINE)
SIDE GROUND
FENDER
Fig. 6E2-65
•
Page 820 of 1928
6E2-124 DRIVEABILITV AND EMISSIONS
E) REMOVAL
Preparation: • Engine hood
• Battery negative cable
1.
Air cleaner assy
2.
Accelerator pedal cable
•
Disconnect from throttle body and cable
brackets.
3. Canister vacuum hose
• Disconnect from vacuum switch valve (VSV).
4. Vacuum booster hose
• Disconnect from Common chamber duct.
5. Connectors
• Disconnect idle air control valve, throttle
position sensor, manifold absolute pressure,
canister
VSV, exhaust gas recirculation (EGR)
VSV, intake air temperature and VSV.
6. High tension cable
• Remove from cylinder heads.
7. Electronic ignition (EI) module assy
• Disconnect 3 connector from El module.
• Remove 3 bolts from El bracket and El assy.
8.
Throttle body (TB)
• Remove 4 bolts from TB.
9. Vacuum hoses
• Disconnect canister VSV and EGR VSV vacuum
hose
from TB.
10. Fuel pressure control valve vacuum hose
• Disconnect from common chamber duct.
11.
PCV hose
• Disconnect from common chamber duct.
12.
Evaporate emission canister purge hose
• Disconnect from common chamber duct.
13.
EGR valve assy
• Remove 4 bolts from common chamber duct
and exhaust manifold.
14.
Common chamber duct
• Remove 4 bolts, 4 nuts and 3 duct bracket fixing
bolts.
• Remove ground cable fixing bolt from rear of
common chamber duct.
15.
Common chamber
• Remove 6 bolts and 2 nuts.
• Remove common chamber bracket fixing bolts
from rear of common chamber.
16. Fuel
hose
• Feed and return hose from fuel pipe and 2 fixing
bolts
from cylinder head. 17.
Fuel
rail assembly
• Remove fuel injector connector.
• Remove fuel rail fixing bolts.
• Remove fuel rail assy.
j .. !•l DISASSEMBL V
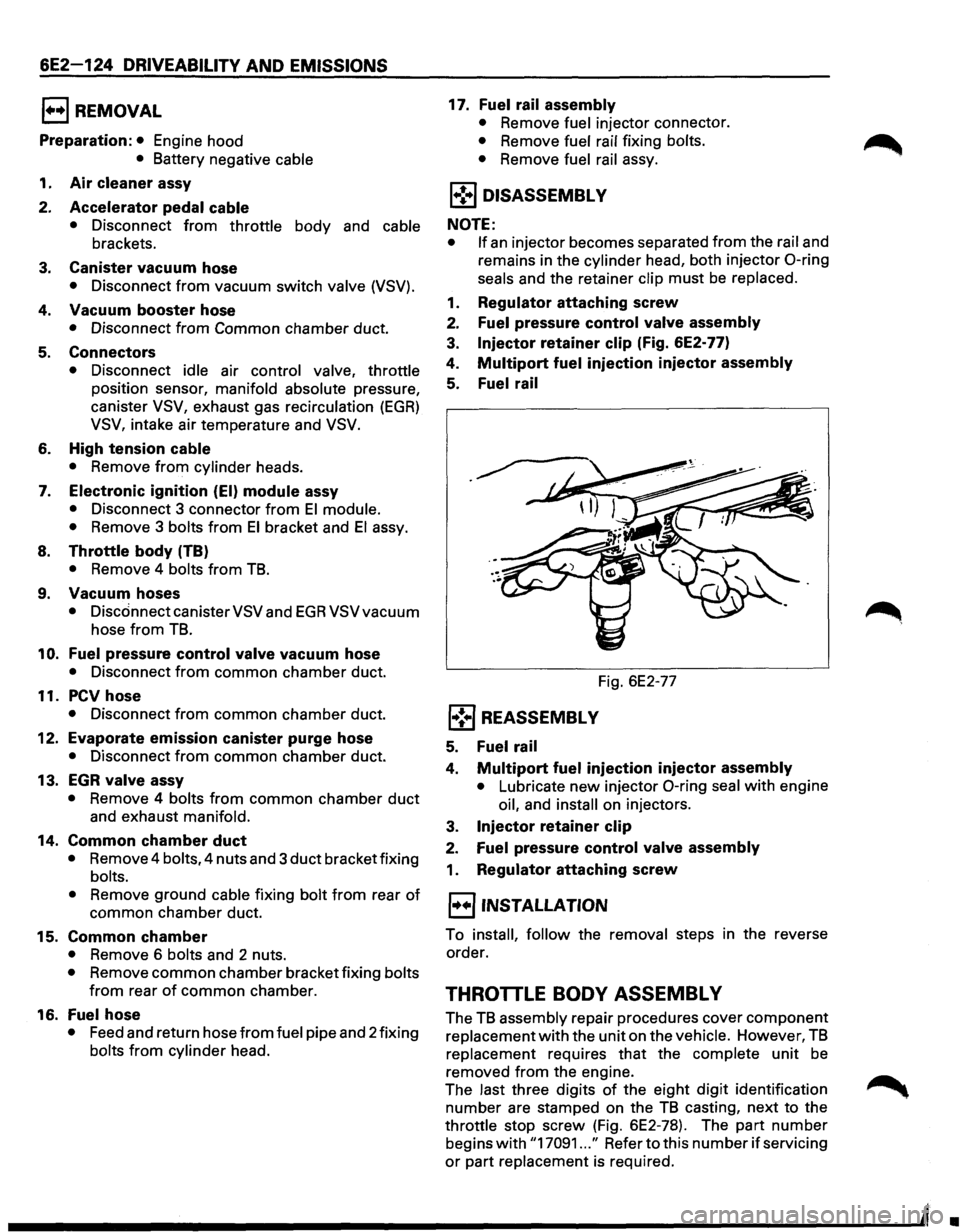
NOTE:
• If
an injector becomes separated from the rail and
remains in the cylinder head, both injector
0-ring
seals and the retainer clip must be replaced.
1.
Regulator attaching screw
2. Fuel pressure control valve assembly
3. Injector retainer clip (Fig. 6E2-77)
4.
Multipart fuel injection injector assembly
5. Fuel rail
Fig. 6E2-77
l•! .. j REASSEMBL V
5. Fuel rail
4. Multipart fuel injection injector assembly
• Lubricate new injector 0-ring seal with engine
oil, and
install on injectors.
3.
Injector retainer clip
2. Fuel pressure control valve assembly
1. Regulator attaching screw
l·u·jiNSTALLATION
To install, follow the removal steps in the reverse
order.
THROTTLE BODY ASSEMBL V
The TB assembly repair procedures cover component
replacement
with the unit on the vehicle. However, TB
replacement requires that the complete unit be
removed from the engine.
The last three digits
of the eight digit identification
number are stamped on the
TB casting, next to the
throttle stop screw (Fig. 6E2-78). The part number
begins
with "17091 ... " Refer to this number if servicing
or part replacement is required.
•
Page 824 of 1928
6E2-128 DRIVEABILITY AND EMISSIONS
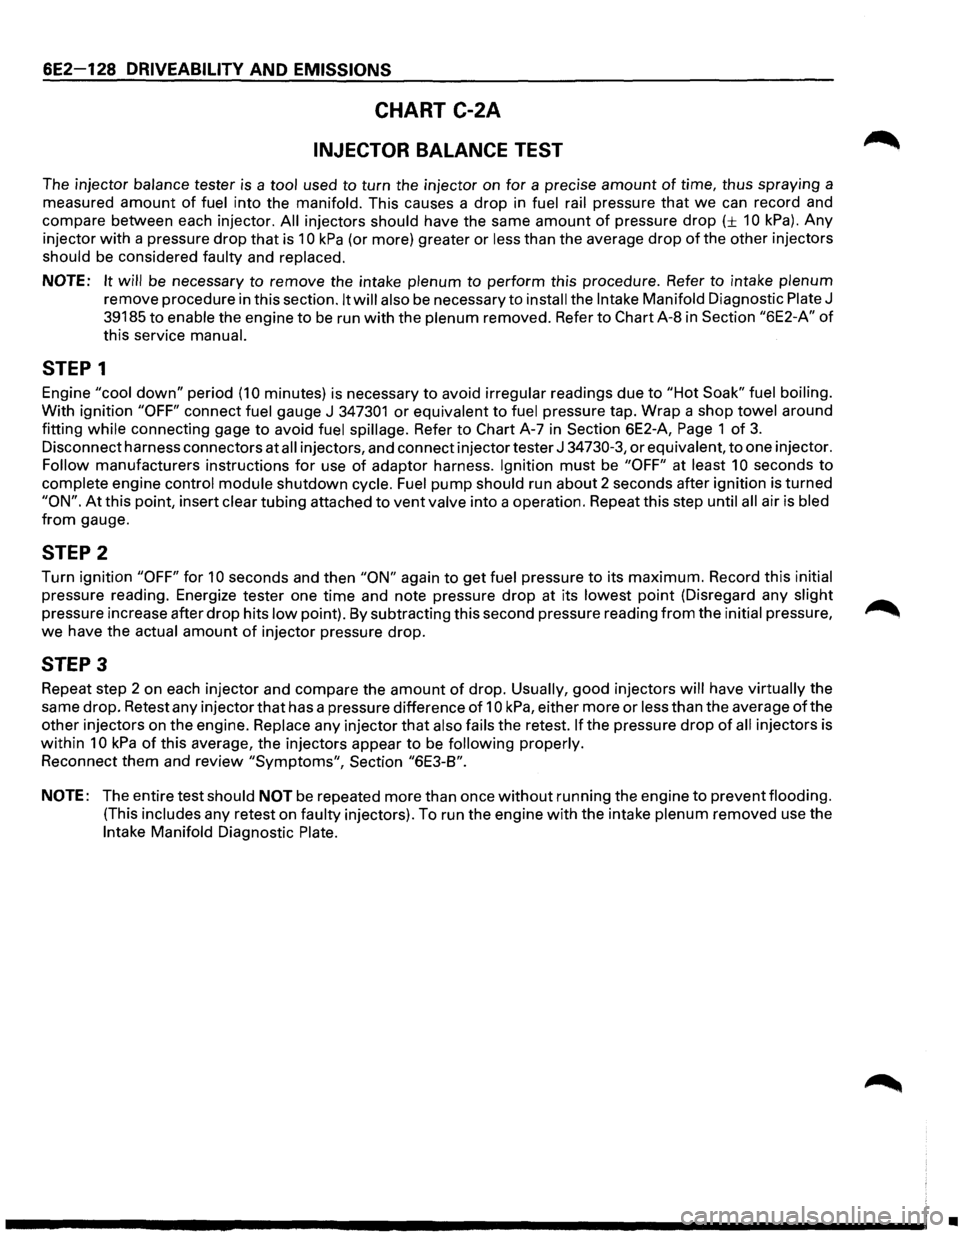
CHART C-2A
INJECTOR BALANCE TEST
The injector balance tester is a tool used to turn the injector on for a precise amount of time, thus spraying a
measured
amount of fuel into the manifold. This causes a drop in fuel rail pressure that we can record and
compare between each injector.
All injectors should have the same amount of pressure drop (± 10 kPa). Any
injector with a pressure drop that is 10 kPa (or more) greater or less than the average drop of the other injectors
should be considered faulty and replaced.
NOTE: It will be necessary to remove the intake plenum to perform this procedure. Refer to intake plenum
remove procedure in this section. It will also be necessary to install the Intake Manifold Diagnostic Plate J
39185 to enable the engine to be run with the plenum removed. Refer to Chart A-8 in Section "6E2-A" of
this service manual.
STEP 1
Engine "cool down" period (10 minutes) is necessary to avoid irregular readings due to "Hot Soak" fuel boiling.
With ignition "OFF" connect fuel gauge J 347301 or equivalent to fuel pressure tap. Wrap a shop towel around
fitting
while connecting gage to avoid fuel spillage. Refer to Chart A-7 in Section 6E2-A, Page 1 of 3.
Disconnect harness connectors at all injectors, and connect injector tester J 34730-3, or equivalent, to one injector.
Follow manufacturers instructions for use of adaptor harness. Ignition must be "OFF" at least 10 seconds to
complete engine control module shutdown cycle. Fuel pump should run about 2 seconds after ignition is turned
"ON". At this point, insert clear tubing attached to vent valve into a operation. Repeat this step until all air is bled
from gauge.
STEP 2
Turn ignition "OFF" for 10 seconds and then "ON" again to get fuel pressure to its maximum. Record this initial
pressure reading. Energize tester one time and note pressure drop at its lowest point (Disregard any slight
pressure increase after drop hits low point). By subtracting this second pressure reading from the initial pressure, ~
we have the actual amount of injector pressure drop.
STEP 3
Repeat step 2 on each injector and compare the amount of drop. Usually, good injectors will have virtually the
same drop. Retest any injector
that has a pressure difference of 10 kPa, either more or less than the average of the
other injectors on the engine.
Replace any injector that also fails the retest. If the pressure drop of all injectors is
within 10 kPa of this average, the injectors appear to be following properly.
Reconnect them and review "Symptoms", Section "6E3-B".
NOTE: The entire test should NOT be repeated more than once without running the engine to prevent flooding.
(This includes any retest on faulty injectors). To run the engine with the intake plenum removed use the
Intake Manifold Diagnostic Plate.
•
Page 827 of 1928
DRIVEABILITY AND EMISSIONS 6E2-131
CHART C-2C
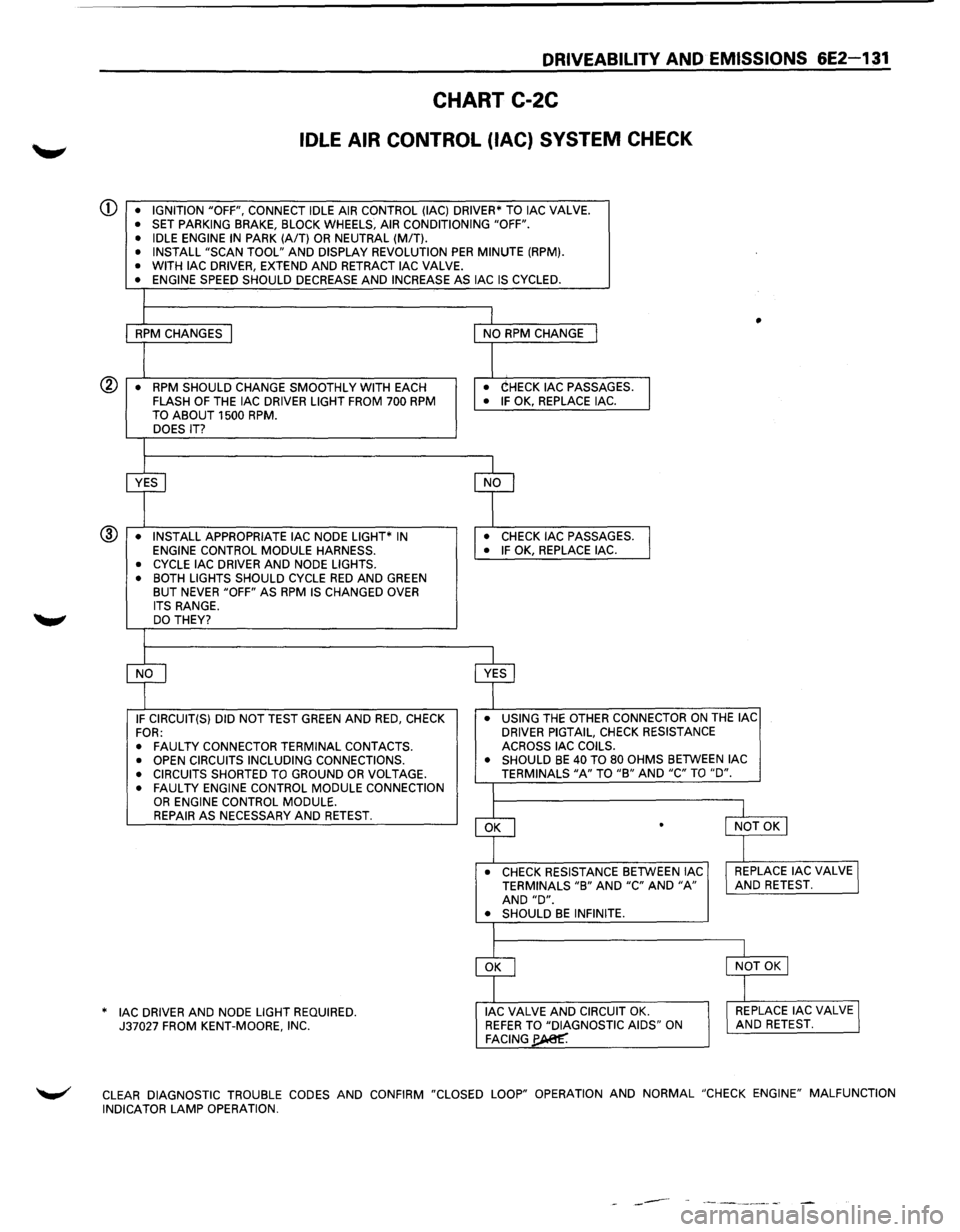
IDLE AIR CONTROL (lAC) SYSTEM CHECK
CD • IGNITION "OFF", CONNECT IDLE AIR CONTROL (lAC) DRIVER* TO lAC VALVE. • SET PARKING BRAKE, BLOCK WHEELS, AIR CONDITIONING "OFF".
• IDLE ENGINE IN PARK (A/T) OR NEUTRAL (MIT). • INSTALL "SCAN TOOL" AND DISPLAY REVOLUTION PER MINUTE (RPM). • WITH lAC DRIVER, EXTEND AND RETRACT lAC VALVE. • ENGINE SPEED SHOULD DECREASE AND INCREASE AS lAC IS CYCLED.
I
1 I • RPM CHANGES I NO RPM CHANGE I
I I • RPM SHOULD CHANGE SMOOTHLY
WITH EACH • CHECK lAC PASSAGES.
I FLASH OF THE lAC DRIVER LIGHT FROM 700 RPM • IF OK, REPLACE lAC.
TO ABOUT 1500 RPM. DOES IT?
I
~ cf
• INSTALL APPROPRIATE lAC NODE LIGHT* IN • CHECK lAC PASSAGES.
l ENGINE CONTROL MODULE HARNESS. • IF OK, REPLACE lAC. ®
• CYCLE lAC
DRIVER AND NODE LIGHTS.
• BOTH LIGHTS SHOULD CYCLE RED AND GREEN BUT NEVER "OFF" AS RPM IS CHANGED OVER
ITS RANGE. DO THEY?
I
cf ~ IF CIRCUIT(S) DID NOT TEST GREEN AND RED, CHECK •
USING THE OTHER CONNECTOR ON THE lAC
FOR: DRIVER
PIGTAIL, CHECK RESISTANCE
•
FAULTY CONNECTOR TERMINAL CONTACTS. ACROSS
lAC COILS.
• OPEN CIRCUITS INCLUDING CONNECTIONS. •
SHOULD BE 40 TO 80 OHMS BETWEEN lAC
• CIRCUITS SHORTED TO GROUND OR VOLTAGE. TERMINALS "A" TO "B" AND "C" TO "D".
• FAULTY ENGINE CONTROL MODULE CONNECTION I OR ENGINE CONTROL MODULE.
~
l REPAIR AS NECESSARY AND RETEST. l NOT OK I .
_l
• CHECK RESISTANCE BETWEEN lAC I REPLACE lAC VALVE I TERMINALS "B" AND "C" AND "A" AND RETEST. AND "D". • SHOULD BE INFINITE.
I
~
l
I NOT OK I
]
AC DRIVER AND NODE LIGHT REQUIRED. * I J lAC VALVE AND CIRCUIT OK. I REPLACE lAC VALVE J 37027 FROM KENT-MOORE, INC. REFER TO "DIAGNOSTIC AIDS" ON AND RETEST. FACING~
~ CLEAR DIAGNOSTIC TROUBLE CODES AND CONFIRM "CLOSED LOOP" OPERATION AND NORMAL "CHECK ENGINE" MALFUNCTION
INDICATOR LAMP OPERATION.
------
Page 834 of 1928
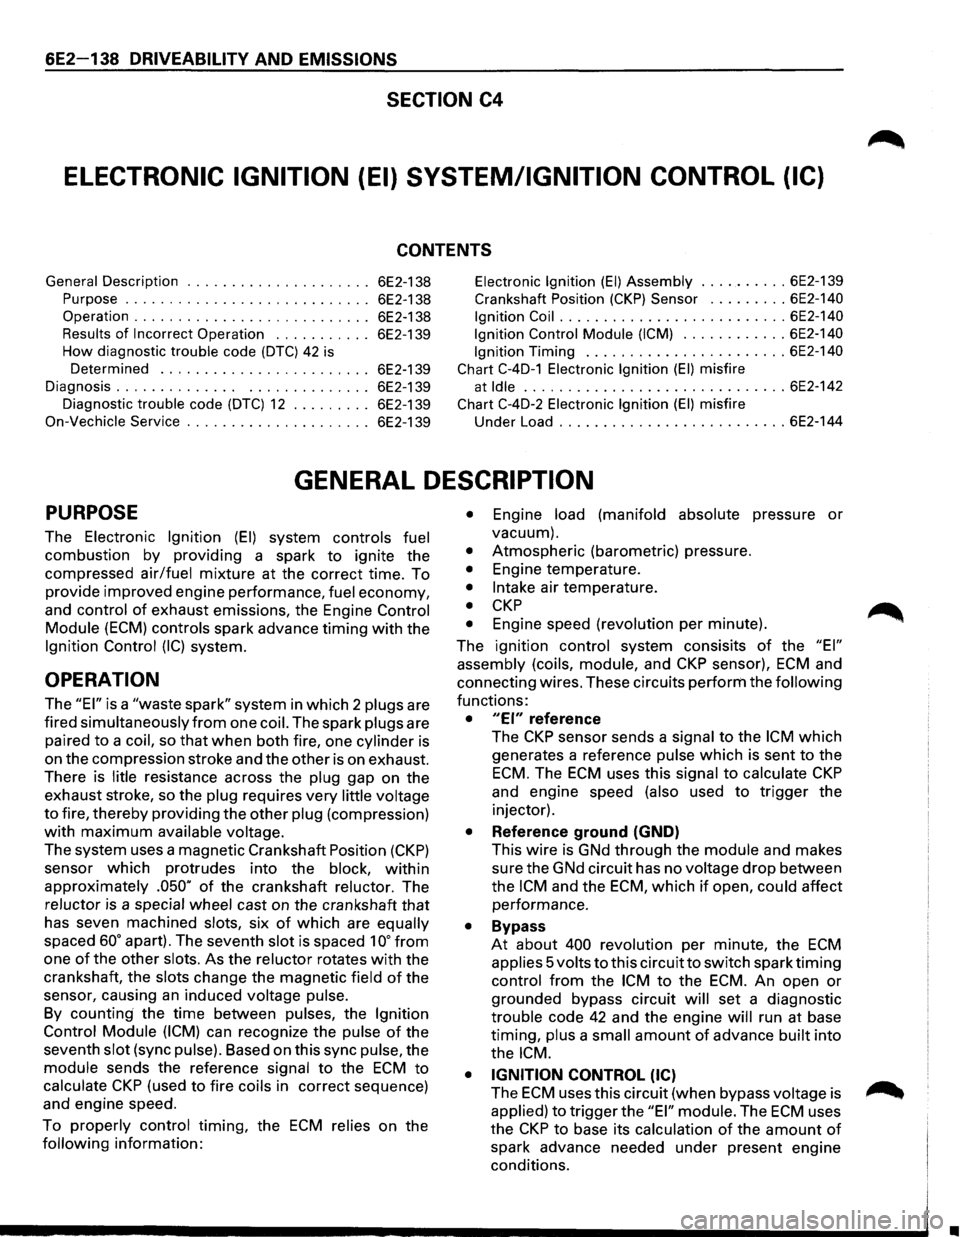
6E2-138 DRIVEABILITY AND EMISSIONS
SECTION C4
ELECTRONIC IGNITION (EI) SYSTEM/IGNITION CONTROL (IC)
CONTENTS
General Description . . . . . . . . . . . . . . . . . . . . . 6E2-138
Purpose
............................ 6E2-138
Operation
........................... 6E2-138
Results of Incorrect Operation . . . . . . . . . . . 6E2-139
How diagnostic trouble code (DTC) 42 is
Determined ........................ 6E2-139
Diagnosis. . . . . . . . . . . . . . . ............. 6E2-139
Diagnostic
trouble code (DTC) 12 . . . . . . . . . 6E2-139
On-Vechicle Service . .
. . . . . . . . . . . . . . . . . . . 6E2-139
Electronic Ignition (EI) Assembly .......... 6E2-139
Crankshaft Position (CKP) Sensor ......... 6E2-140
Ignition Coil
.......................... 6E2-140
Ignition Control
Module (ICM) ............ 6E2-140
Ignition
Timing ....................... 6E2-140
Chart
C-4D-1 Electronic Ignition (EI) misfire
at
Idle .............................. 6E2-142
Chart C-4D-2 Electronic Ignition (EI) misfire
Under Load .......................... 6E2-144
GENERAL DESCRIPTION
PURPOSE
The Electronic Ignition (EI) system controls fuel
combustion by providing a spark to ignite the
compressed
air/fuel mixture at the correct time. To
provide improved engine performance,
fuel economy,
and
control of exhaust emissions, the Engine Control
Module
(ECM) controls spark advance timing with the
Ignition Control (IC) system.
OPERATION
The "EI" is a "waste spark" system in which 2 plugs are
fired
simultaneously from one coil. The spark plugs are
paired
to a coil, so that when both fire, one cylinder is
on the compression stroke and the other is on exhaust.
There is
Iitie resistance across the plug gap on the
exhaust stroke, so the
plug requires very little voltage
to fire, thereby providing the other plug (compression)
with maximum available voltage.
The system uses a magnetic Crankshaft Position (CKP)
sensor which protrudes into the block, within
approximately .050" of the crankshaft reluctor. The
reluctor is a special wheel cast on the crankshaft that
has seven machined
slots, six of which are equally
spaced 60° apart). The seventh slot is spaced 1 oo from
one
of the other slots. As the reluctor rotates with the
crankshaft, the
slots change the magnetic field of the
sensor, causing
an induced voltage pulse.
By counting the time between pulses, the Ignition
Control Module (ICM)
can recognize the pulse of the
seventh
slot (sync pulse). Based on this sync pulse, the
module sends the reference signal to the ECM to
calculate CKP (used to fire coils in correct sequence)
and engine speed.
To
properly control timing, the ECM relies on the
following information:
• Engine load (manifold absolute pressure or
vacuum).
• Atmospheric (barometric) pressure.
• Engine temperature.
• Intake air temperature.
• CKP
• Engine speed (revolution per minute).
The ignition
control system consisits of the "EI"
assembly (coils, module,
and CKP sensor), ECM and
connecting wires. These circuits
perform the following
functions:
• "EI" reference
The CKP sensor sends a signal to the ICM which
generates a reference
pulse which is sent to the
ECM. The ECM uses this signal to calculate CKP
and engine speed (also used to trigger the
injector).
• Reference ground (GND)
This wire is GNd through the module and makes
sure the GNd circuit has no
voltage drop between
the
ICM and the ECM, which if open, could affect
performance.
• Bypass
At about 400 revolution per minute, the ECM
applies 5 volts to this circuit to switch spark timing
control from the ICM to the ECM. An open or
grounded bypass circuit
will set a diagnostic
trouble code 42 and the engine will run at base
timing,
plus a small amount of advance built into
the
ICM.
• IGNITION CONTROL (IC)
The ECM uses this circuit (when bypass voltage is
applied) to trigger the "EI" module. The ECM uses
the
CKP to base its calculation of the amount of
spark advance needed under present engine
conditions.
•
Page 835 of 1928
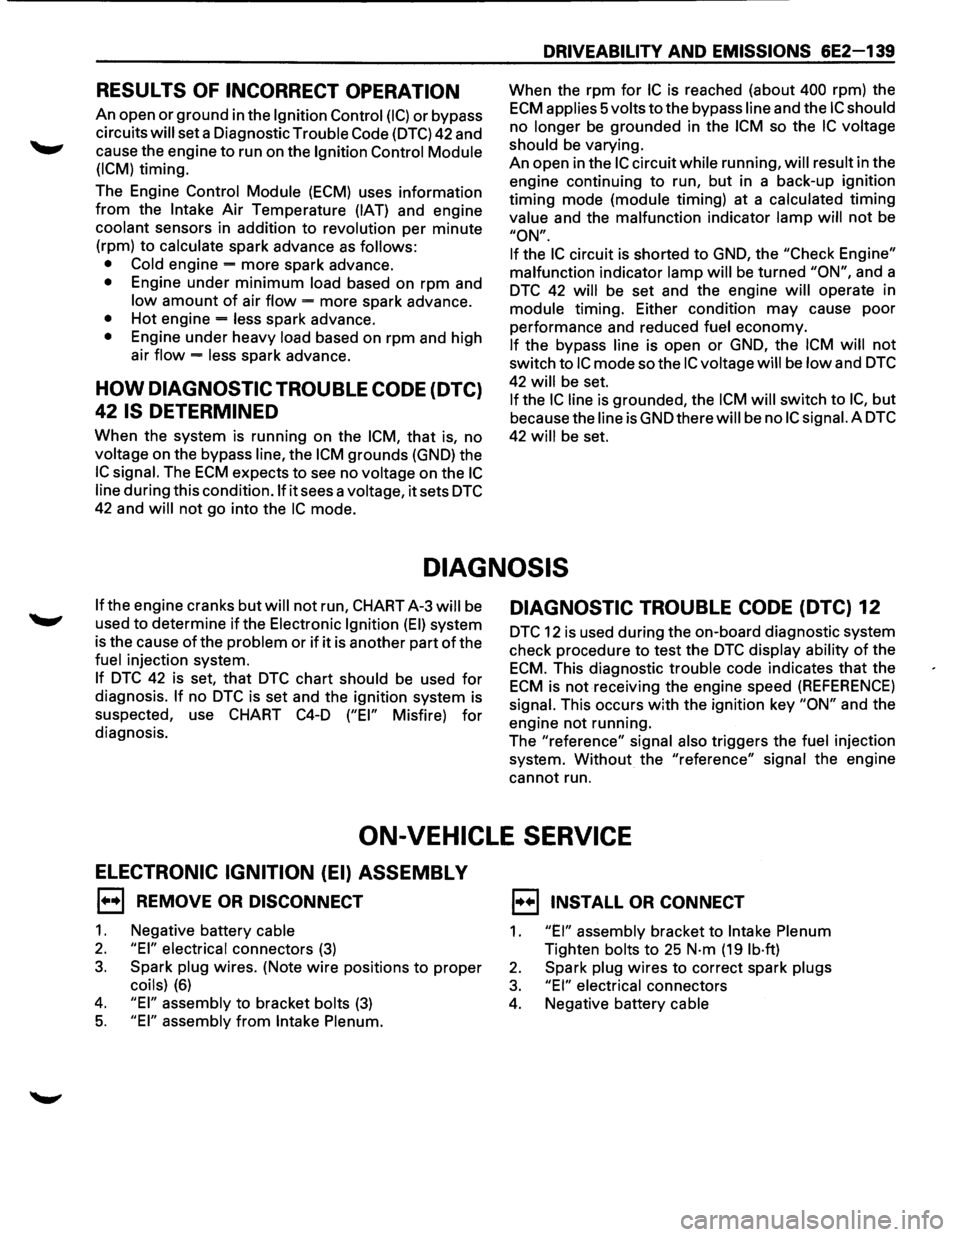
RESULTS OF INCORRECT OPERATION
An open or ground in the Ignition Control (I C) or bypass
circuits
will set a Diagnostic Trouble Code (DTC) 42 and
cause the engine
to run on the Ignition Control Module
(ICM)
timing.
The Engine
Control Module (ECM) uses information
from the Intake Air Temperature (IAT) and engine
coolant sensors in addition to revolution per minute
(rpm) to
calculate spark advance as follows:
• Cold
engine -more spark advance.
• Engine under minimum load based on rpm and
low amount of air flow = more spark advance.
• Hot engine = less spark advance.
• Engine under heavy load based on rpm and high
air
flow = less spark advance.
HOW DIAGNOSTIC TROUBLE CODE (DTC)
42 IS DETERMINED
When the system is running on the ICM, that is, no
voltage on the bypass line, the ICM grounds (GND) the
IC signal. The ECM expects to see no voltage on the IC
line during this condition.lf it sees a voltage, it sets DTC
42 and will not go into the IC mode.
DRIVEABILITY AND EMISSIONS 6E2-139
When the rpm for IC is reached (about 400 rpm) the
ECM applies 5 volts to the bypass line and the IC should
no longer be grounded in the ICM so the IC voltage
should
be varying.
An open in the
IC circuit while running, will result in the
engine continuing to run, but in a back-up
ig~it~on
timing mode (module timing) at a calculated t1mmg
value
and the malfunction indicator lamp will not be
"ON".
If
the IC circuit is shorted to GND, the "Check Engine"
malfunction
indicator lamp will be turned "ON", and a
DTC 42 will be set and the engine will operate in
module timing. Either condition may cause poor
performance and reduced
fuel economy.
If the bypass line is open or GND, the ICM will not
switch to IC mode so the IC voltage will be low and DTC
42 will be set.
If the IC line is grounded, the ICM will switch to IC, but
because the line isGNDtherewill be no ICsignai.A DTC
42 will be set.
DIAGNOSIS
If the engine cranks but will not run, CHART A-3 will be
used to determine if the Electronic Ignition (EI) system
is the cause
of the problem or if it is another part of the
fuel injection system.
If DTC 42 is set, that DTC chart should be used for
diagnosis. If no DTC is set and the ignition system is
suspected, use
CHART C4-D ("EI" Misfire) for
diagnosis.
DIAGNOSTIC TROUBLE CODE (DTC) 12
DTC 12 is used during the on-board diagnostic system
check procedure to test the
DTC display ability of the
ECM. This diagnostic trouble code indicates that the
ECM is not receiving the engine speed (REFERENCE)
signal. This occurs with the ignition key "ON" and the
engine not running.
The "reference"
signal also triggers the fuel injection
system.
Without the "reference" signal the engine
cannot run.
ON-VEHICLE SERVICE
ELECTRONIC IGNITION (EI) ASSEMBLY
1••1 REMOVE OR DISCONNECT
1. Negative battery cable
2. "EI" electrical connectors (3)
3. Spark plug wires. (Note wire positions to proper
coils) (6)
4. "EI" assembly to bracket bolts (3)
5. "EI" assembly from Intake Plenum.
1••1 INSTALL OR CONNECT
1. "EI" assembly bracket to Intake Plenum
Tighten bolts to 25 N·m (19 lb·ft)
2. Spark plug wires to correct spark plugs
3. "EI" electrical connectors
4. Negative battery cable
Page 836 of 1928
6E2-140 DRIVEABILITY AND EMISSIONS
CRANKSHAFT POSITION (CKP) SENSOR
1••1 REMOVE OR DISCONNECT
1. Negative battery cable
2. Sensor electrical connector
3. Sensor bolts
4. Sensor from engine
11!) INSPECT
• Sensor 0-ring for wear, cracks or leakage.
Replace
if necessary. Lube new 0-ring with
engine oil before installing.
1••1 INSTALL OR CONNECT
1. Sensor in engine
2. Sensor bolt tighten to 10 Tighten bolts to 10 N·m
(88 lb·in)
3. Sensor electrical connector
4. Negative battery cable
IGNITION COIL
1••1 REMOVE OR DISCONNECT
1. Coil retaining screws (2 each coil)
2. Coil(s) from module
1••1 INSTALL OR CONNECT
1. Coil(s) to module
2. Coil retaining screws
IGNITION CONTROL MODULE (ICM)
1••1 REMOVE OR DISCONNECT
1. Negative battery cable
2. Electronic ignition assembly from Intake Plenum.
(See previous procedure)
3. Coils from assembly (Se previous procedure)
4. Module from assembly plate
1••1 INSTALL OR CONNECT
1. Module to assembly plate
2. Coils (See previous procedure)
3. "Electronic ignition" assembly to Intake Plenum
(See previous procedure)
4. Negative battery cable
IGNITION TIMING
Because the reluctor is an integral part of the
crankshaft and the crankshaft position sensor is
mounted in a fixed position,
timing adjustment is not
possible .
........................................................................\
........ ;; .
Page 838 of 1928
6E2-142 DRIVEABILITY AND EMISSIONS
CHART C-40-1
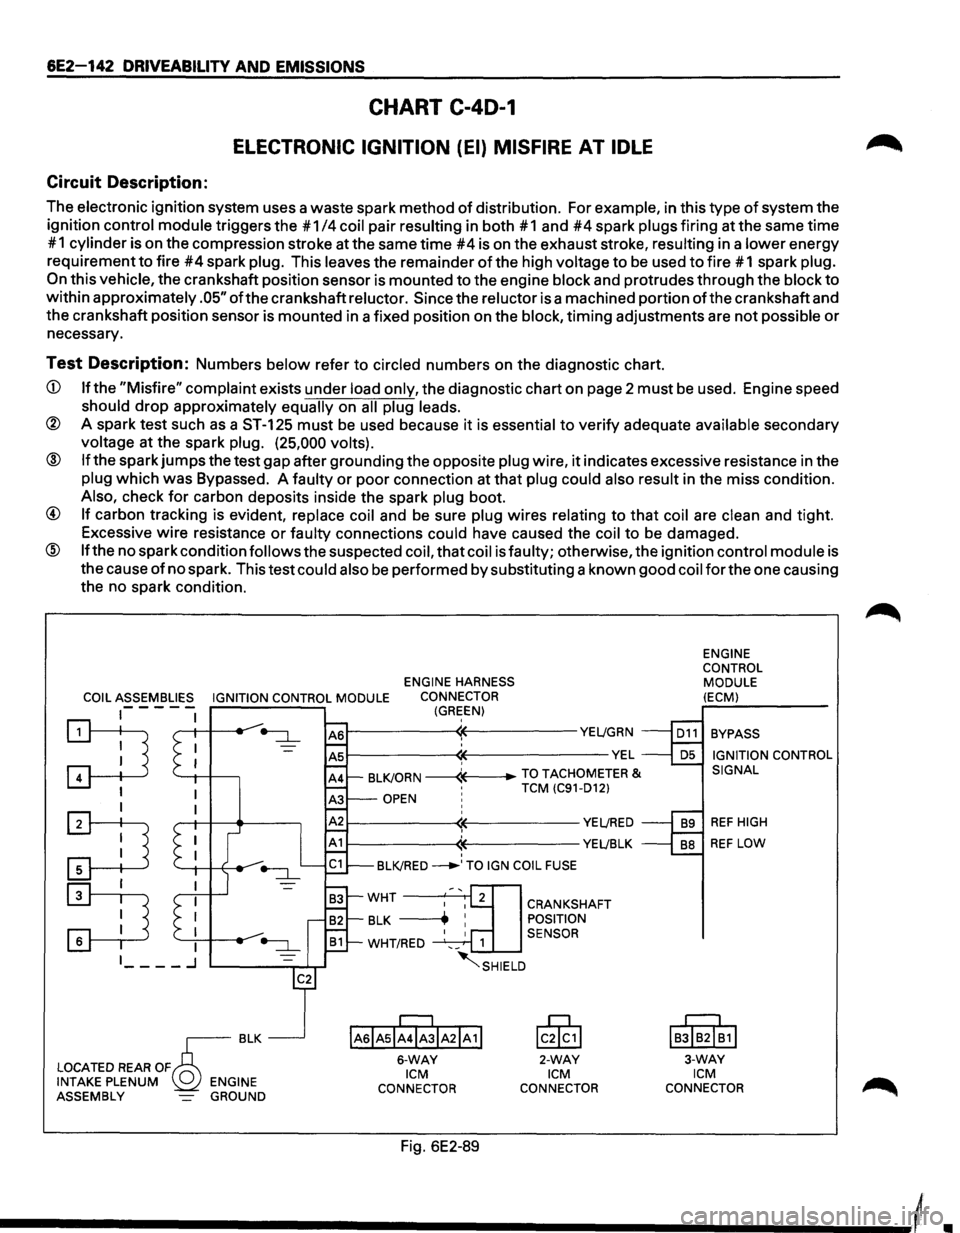
ELECTRONIC IGNITION (EI) MISFIRE AT IDLE
Circuit Description:
The electronic ignition system uses a waste spark method of distribution. For example, in this type of system the
ignition
control module triggers the #1 /4 coil pair resulting in both #1 and #4 spark plugs firing at the same time
# 1
cylinder is on the compression stroke at the same time #4 is on the exhaust stroke, resulting in a lower energy
requirement
to fire #4 spark plug. This leaves the remainder of the high voltage to be used to fire # 1 spark plug.
On this vehicle, the crankshaft position sensor is mounted to the engine block and protrudes through the block to
within approximately .05" ofthe crankshaft reluctor. Since the reluctor is a machined portion ofthe crankshaft and
the crankshaft position sensor is mounted in a fixed position on the
block, timing adjustments are not possible or
necessary.
Test Description: Numbers below refer to circled numbers on the diagnostic chart.
CD If the "Misfire" complaint exists under load only, the diagnostic chart on page 2 must be used. Engine speed
should drop approximately equally on all plug leads.
® A spark test such as a ST-125 must be used because it is essential to verify adequate available secondary
voltage at the spark plug. (25,000 volts).
@ If the spark jumps the test gap after grounding the opposite plug wire, it indicates excessive resistance in the
plug which was Bypassed. A faulty or poor connection at that plug could also result in the miss condition.
Also, check for carbon deposits inside the spark plug boot.
@ If carbon tracking is evident, replace coil and be sure plug wires relating to that coil are clean and tight.
Excessive
wire resistance or faulty connections could have caused the coil to be damaged.
@ If the no spark condition follows the suspected coil, that coil is faulty; otherwise, the ignition control module is
the cause
of no spark. This test could also be performed by substituting a known good coil for the one causing
the no spark condition.
ENGINE HARNESS
COIL ASSEMBLIES IGNITION CONTROL MODULE CONNECTOR
1-- - - -(GREEN)
~ '--1-1 -+---,
I
:TI
:D
r---------~~----------YE~GRN
~--------~~-------------VEL ' BLKJORN -----4---+-TO TACHOMETER & •
TCM (C91-D12) OPEN ! ' r---------~~----------YE~RED
r-----------<1~----------YEL!BLK ' BLKJRED ___..,TO IGN COIL FUSE
IAsiAsl;rJIA21A 1!
6-WAY ICM
CONNECTOR
Fig. 6E2-89
CRANKSHAFT
POSITION
SENSOR
lc0§,1
2-WAY ICM
CONNECTOR ENGINE
CONTROL
MODULE
(ECM)
BYPASS IGNITION CONTROL
SIGNAL
REF HIGH
REF LOW
IB!IB2I~1I
3-WAY ICM CONNECTOR