JAGUAR X308 1998 2.G Workshop Manual
X308 1998 2.G
JAGUAR
JAGUAR
https://www.carmanualsonline.info/img/21/7640/w960_7640-0.png
JAGUAR X308 1998 2.G Workshop Manual
Trending: parking brake ORDER BY 90, dimensions, 12.21.14, coolant temperature, 12.65.63, valve clearance, steering wheel adjustment
Page 1361 of 2490
Automatic Transmission/Transaxle - 4.0L NA V8 - AJ27/3.2L NA V8 - AJ26
- Transmission Fluid Pan Gasket
In-vehicle Repair
Removal
Installation
1.
Raise the vehicle for access and drain the transmission fluid.
2. Remove the fluid pan.
Remove the twenty-two bolts.
3. Discard the fluid pan gasket and clean the mating faces.
4. Remove the magnets from the fluid pan.
Clean the magnets and refit them to the fluid pan.
1. Installation is th e reverse of the re moval procedure:
2. Tighten the fluid pan bolts to the specified torque figure.
3. Refill the transmission fluid. Refer to Operation 44.24.02.
Page 1362 of 2490
Automatic Transmission/Transaxle - 4.0L NA V8 - AJ27/3.2L NA V8 - AJ26
- Transmission Intern al Wiring Harness
In-vehicle Repair
Removal
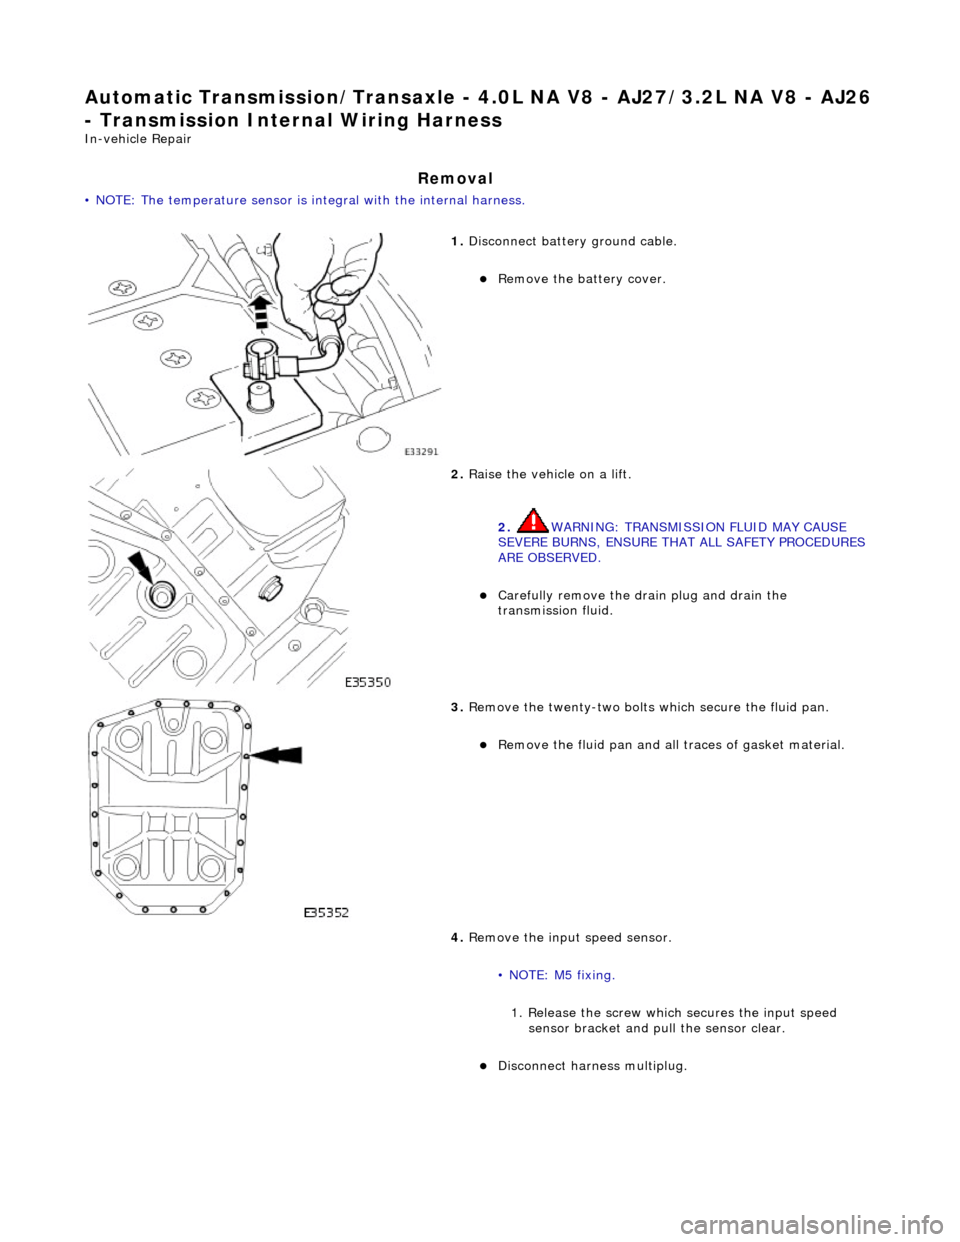
• NOTE: The temperature sensor is integral with the internal harness.
1. Disconnect battery ground cable.
Remove the battery cover.
2. Raise the vehicle on a lift.
2. WARNING: TRANSMISSION FLUID MAY CAUSE
SEVERE BURNS, ENSURE THAT ALL SAFETY PROCEDURES
ARE OBSERVED.
Carefully remove the drain plug and drain the
transmission fluid.
3. Remove the twenty-two bolts which secure the fluid pan.
Remove the fluid pan and all tr aces of gasket material.
4. Remove the input speed sensor.
• NOTE: M5 fixing. 1. Release the screw which secures the input speed sensor bracket and pull the sensor clear.
Disconnect harness multiplug.
Page 1363 of 2490
5. Remove the output speed sensor.
• NOTE: M6 fixing. 1. Release the screw which secures the output speed sensor bracket and pull the sensor clear.
Disconnect harness multiplug.
6. Remove the selector cable abutment bracket fixings and
reposition the bracket for access to the multiplug.
7. Disconnect the transmission harness multiplug.
1. Release the harness locking lever.
2. Disconnect the harness multiplug.
8. Remove harness multiplug retaining clip.
Push the multiplug into the transmission casing to release.
Discard the two 'O' rings.
Page 1364 of 2490
Installation
9. Disconnect the eight soleno id / regulator connectors.
10. Release the internal harness from the retaining clips and
remove the harness.
1. Position the internal harness and fit it to the retaining clips.
2. Connect the eight solenoid / regulator harness connectors.
Page 1365 of 2490
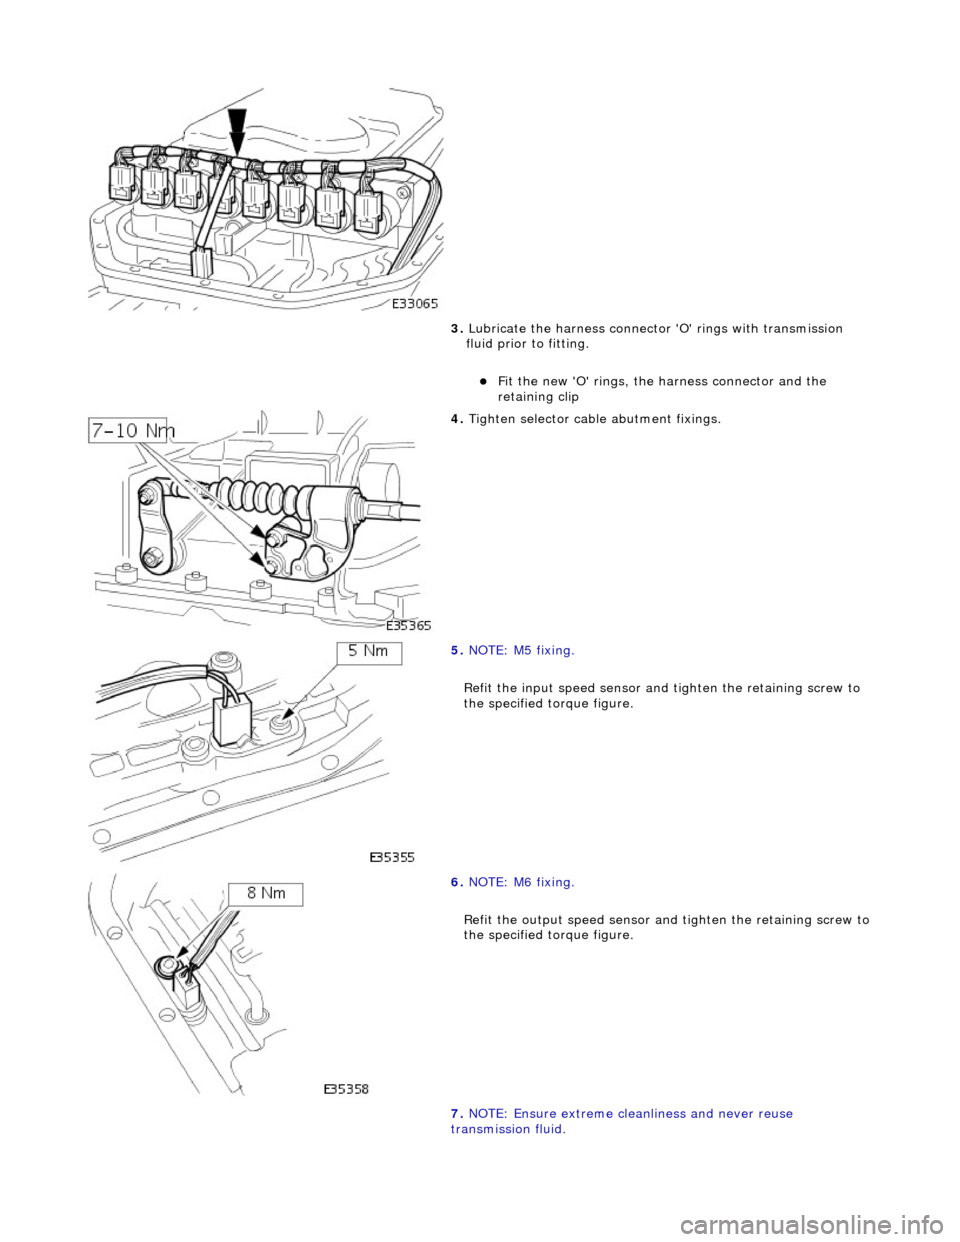
3. Lubricate the harness connector 'O' rings with transmission
fluid prior to fitting.
Fit the new 'O' rings, the harness connector and the
retaining clip
4. Tighten selector cable abutment fixings.
5. NOTE: M5 fixing.
Refit the input speed sensor and tighten the retaining screw to
the specified torque figure.
6. NOTE: M6 fixing.
Refit the output speed sensor and tighten the retaining screw to
the specified torque figure.
7. NOTE: Ensure extreme clea nliness and never reuse
transmission fluid.
Page 1366 of 2490
Using a new gasket, install the fluid pan and tighten the twenty-
two bolts to the specified torque figure.
8. Connect the battery and fit the battery cover..
Reset the radio and the clock.
9. Refer to (44.24.02) for fluid fill procedure.
Page 1367 of 2490
Automatic Transmission/Transaxle - 4.0L NA V8 - AJ27/3.2L NA V8 - AJ26
- Transmission Internal Wiring Harnes s Electrical Connector O-Ring Seals
In-vehicle Repair
Removal
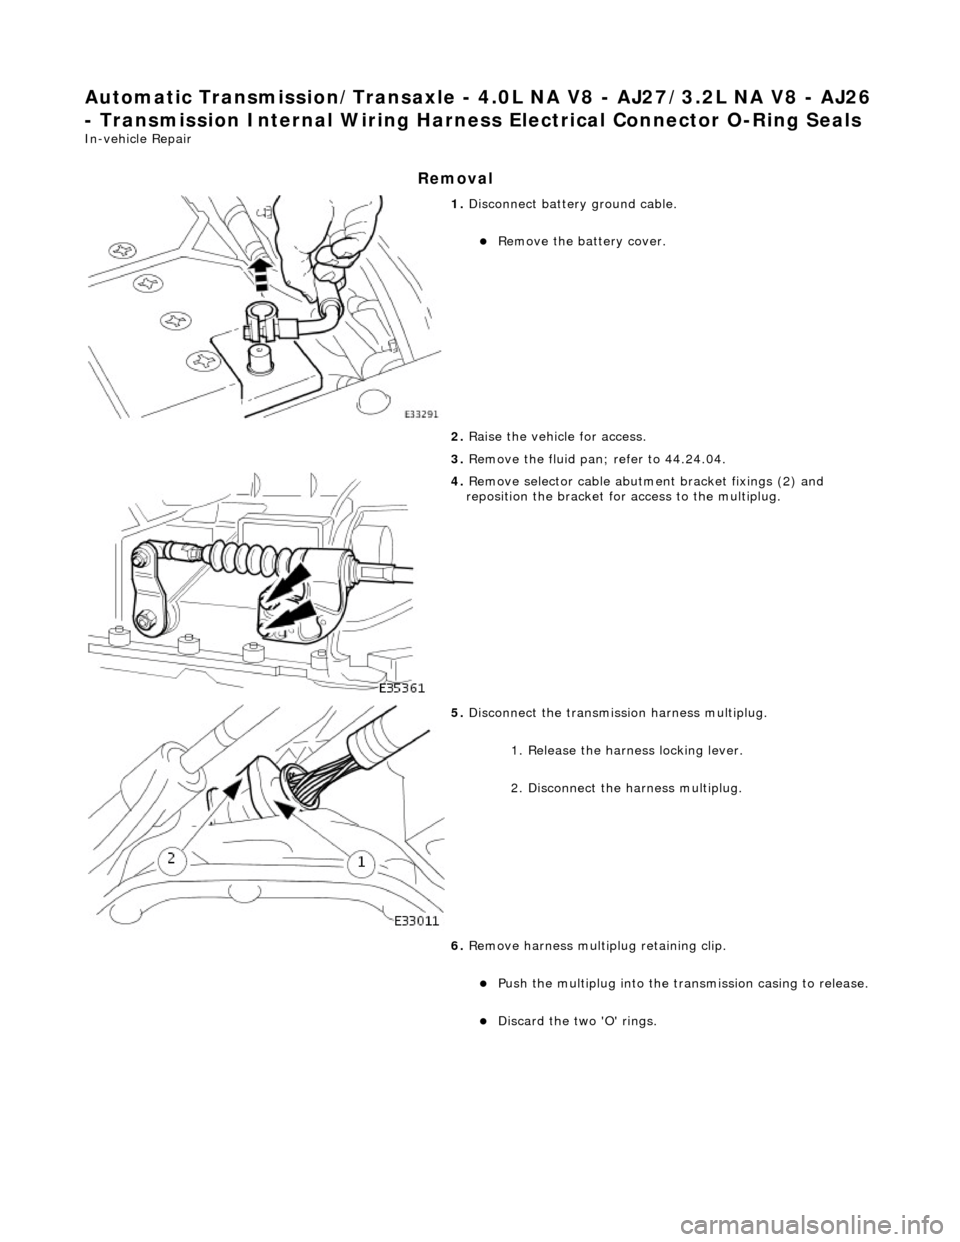
1. Disconnect battery ground cable.
Remove the battery cover.
2. Raise the vehicle for access.
3. Remove the fluid pan; refer to 44.24.04.
4. Remove selector cable abutment bracket fixings (2) and
reposition the bracket for access to the multiplug.
5. Disconnect the transmission harness multiplug.
1. Release the harness locking lever.
2. Disconnect the harness multiplug.
6. Remove harness multiplug retaining clip.
Push the multiplug into the transmission casing to release.
Discard the two 'O' rings.
Page 1368 of 2490
Installation
1. Installation is the reverse of the removal procedure noting
that:
2. Lubricate the new 'O' rings prior to fitting.
3. Tighten the securing bolts, selector cable bracket to
transmission casing, to th e specified torque figure.
4. Connect the battery and fit the battery cover..
Reset the radio and the clock.
5. Refer to (44.24.02) for fluid fill procedure.
Page 1369 of 2490
Automatic Transmission/Transaxle - 4.0L NA V8 - AJ27/3.2L NA V8 - AJ26
- Transmission Range (TR) Sensor
In-vehicle Repair
Removal
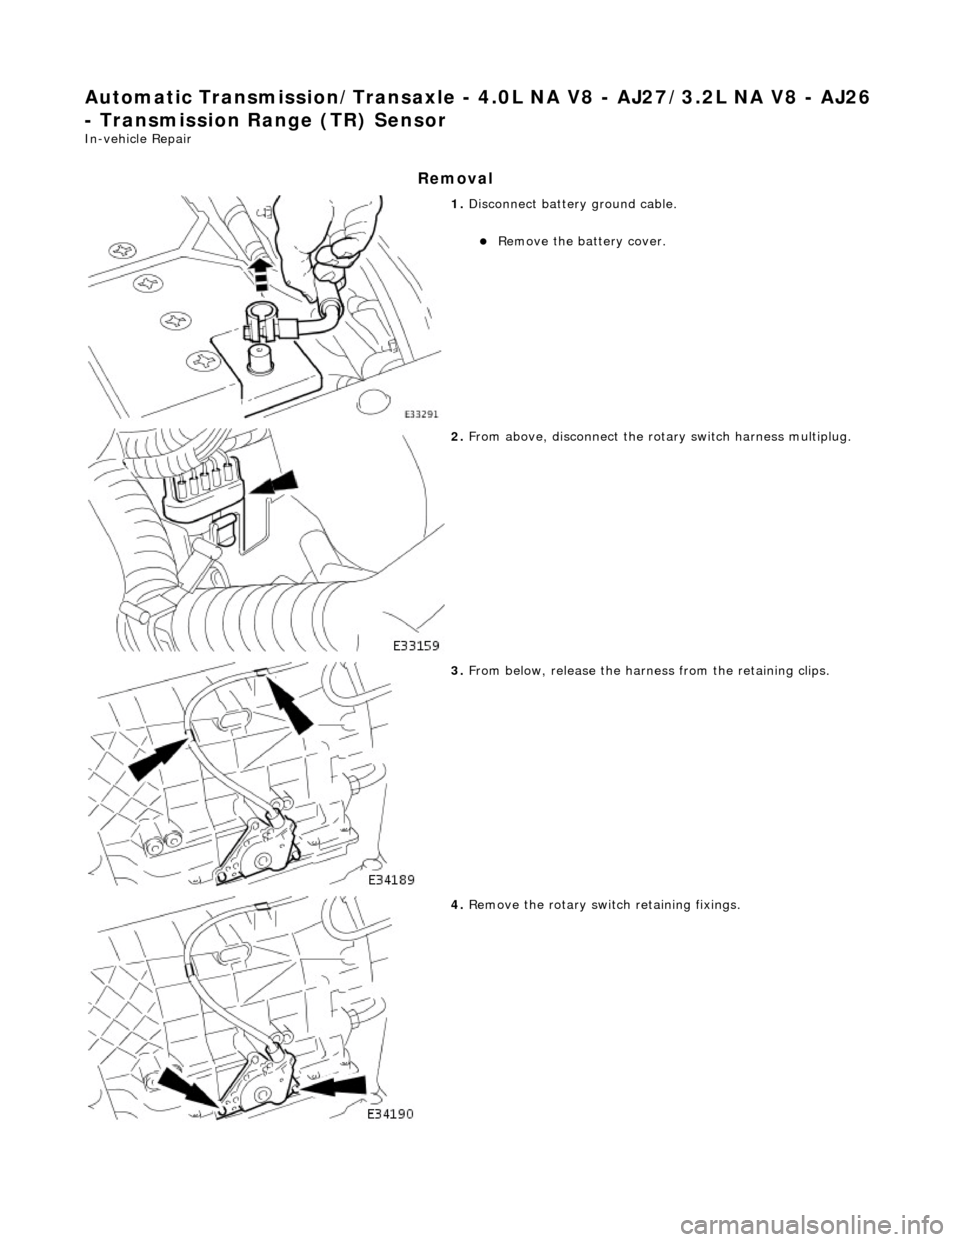
1. Disconnect battery ground cable.
Remove the battery cover.
2. From above, disconnect the rota ry switch harness multiplug.
3. From below, release the harn ess from the retaining clips.
4. Remove the rotary switch retaining fixings.
Page 1370 of 2490
Installation
1. Fitting a new rotary switch is the reverse of the removal
procedure noting that the fixi ngs must be tightened to the
specified torque figure.
2. Connect the battery and fit the battery cover.
Reset the radio and the clock.
Trending: stop start, Key transponder module, wheel size, fuel diagram, fuse diagram, Mass air flow, instrument cluster


