LAND ROVER FRELANDER 2 2006 Repair Manual
FRELANDER 2 2006
LAND ROVER
LAND ROVER
https://www.carmanualsonline.info/img/64/57251/w960_57251-0.png
LAND ROVER FRELANDER 2 2006 Repair Manual
Trending: glove box, wiring diagram, check oil, light, drain bolt, clutch, fuel pump
Page 1011 of 3229
Publi s hed: 11-May-2011
Fuel Charging and Controls - TD4 2.2L Diesel - Fuel Rail
Removal and Inst all ati on
Removal
• W ARNINGS:
Avoid flames , s parks or li ght ed s ubs t ances .
W ai t for a mini mum of 1 minute aft er the engine has s t opped before carryi ng out any repair t o t he fuel inject ions ys t em.
• CAUTIO NS:
Make s ure that t he area around t he component i s cl ean and free of foreign mat eri al .
Make s ure that all openi ngs are s ealed. Us e new bl anking caps .
Bl eed the fuel s ys tem by cranki ng t he engi ne to purge t he air from the s ys tem.
• NOTE: The fuel pres s ure and t emperat ure s ens ors are an int egral part of the fuel rail and mus t not be changeds eparately.
Di sconnect t he bat t ery ground cable.
Refer t o: Specificati ons (414-00 Bat tery and Charging Sys tem -General Informat ion, Specificati ons).
1.
Remove t he engi ne cover.
Refer t o: Engi ne Cover - TD4 2.2L Dies el (501-05 Interior Tri m andOrnament ati on, Removal and Ins tal lat ion).
2.
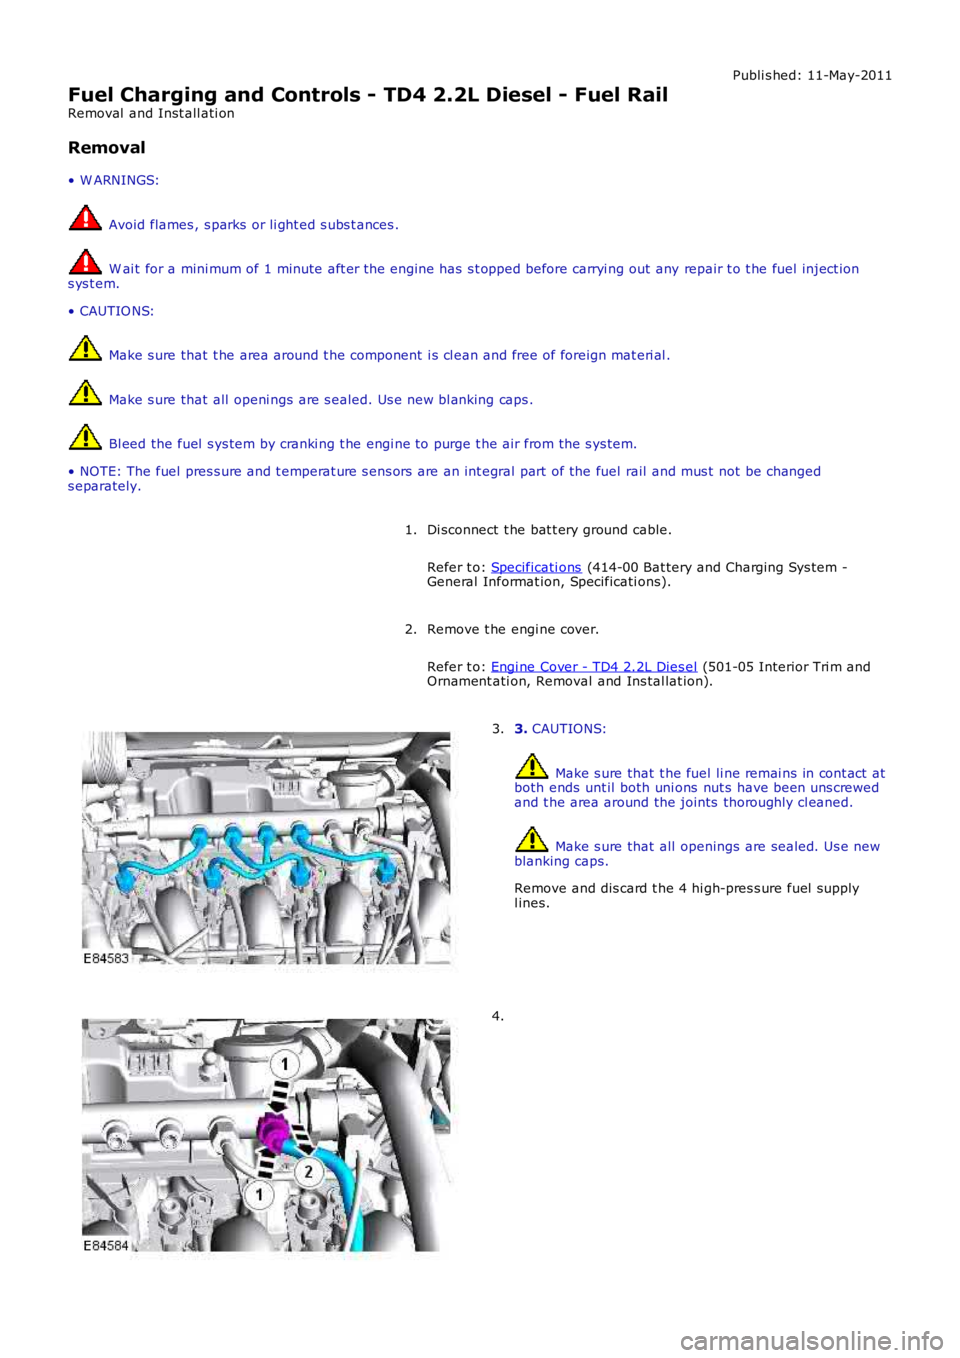
3. CAUTIONS:
Make s ure that t he fuel li ne remai ns in cont act atboth ends unt il both uni ons nut s have been uns crewedand t he area around the joints thoroughly cl eaned.
Make s ure that all openings are sealed. Us e newblanking caps.
Remove and dis card t he 4 hi gh-pres s ure fuel s upplyl ines.
3.
4.
Page 1012 of 3229
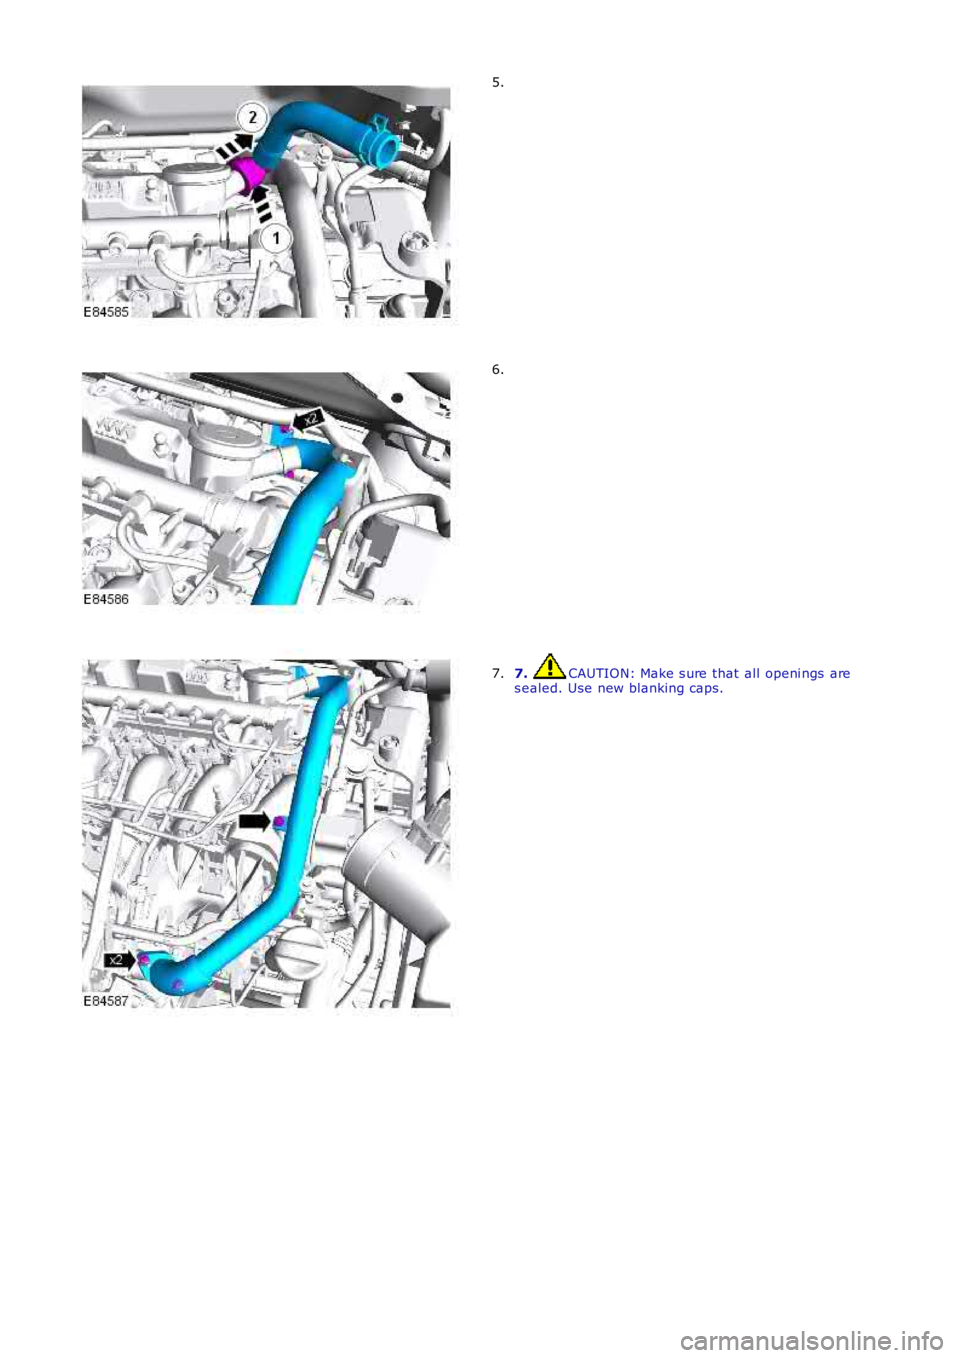
5.
6.
7. CAUTION: Make s ure that all openi ngs ares ealed. Use new blanking caps.7.
Page 1013 of 3229
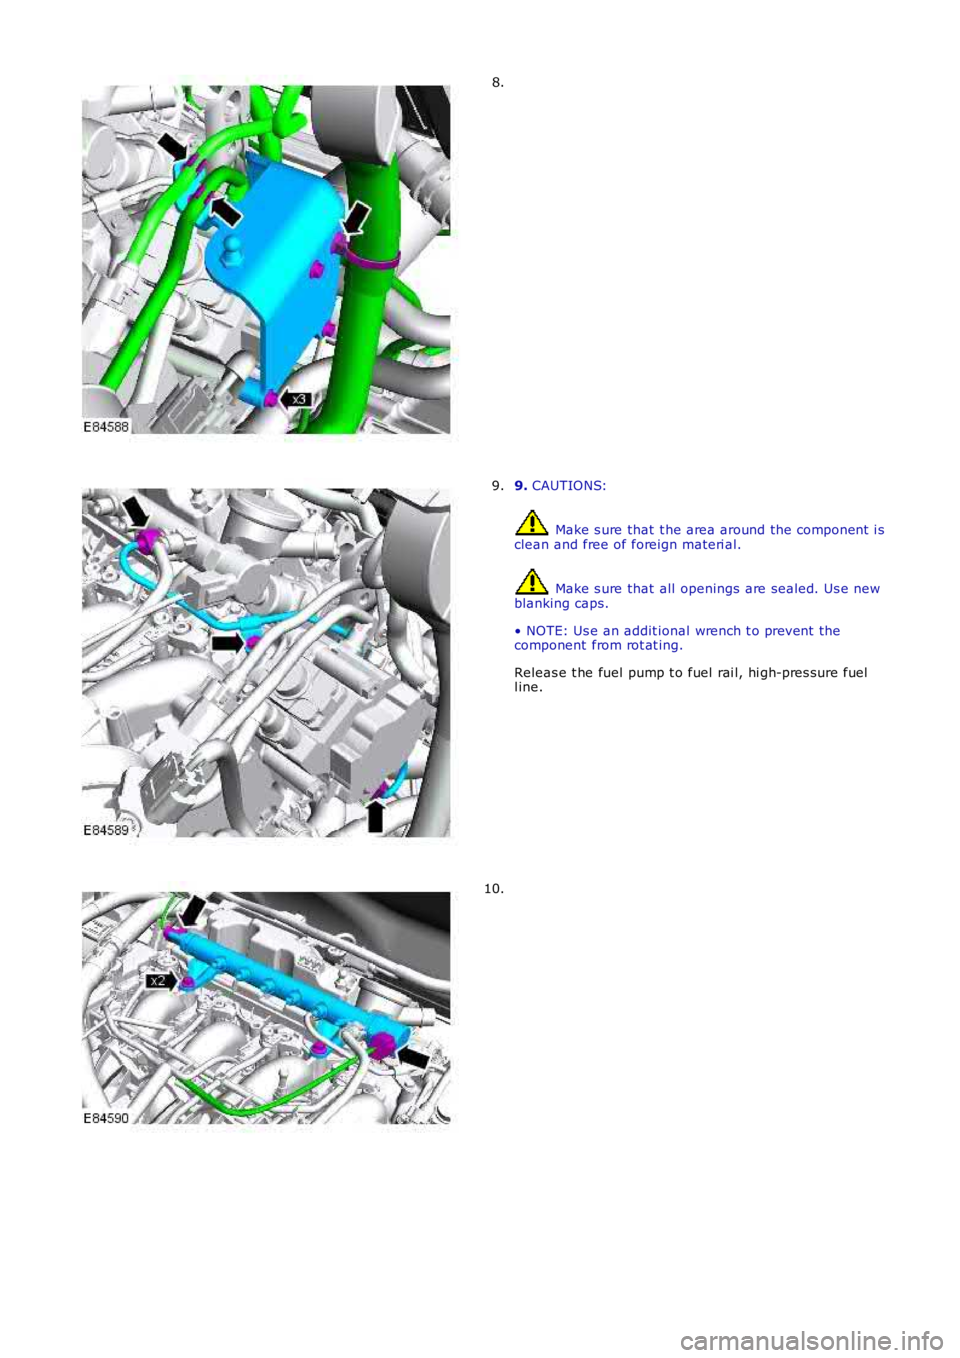
8.
9. CAUTIONS:
Make s ure that t he area around the component i sclean and free of foreign materi al.
Make s ure that all openings are sealed. Us e newblanking caps.
• NOTE: Us e an addit ional wrench t o prevent thecomponent from rot at ing.
Releas e t he fuel pump t o fuel rai l, hi gh-pres sure fuell ine.
9.
10.
Page 1014 of 3229
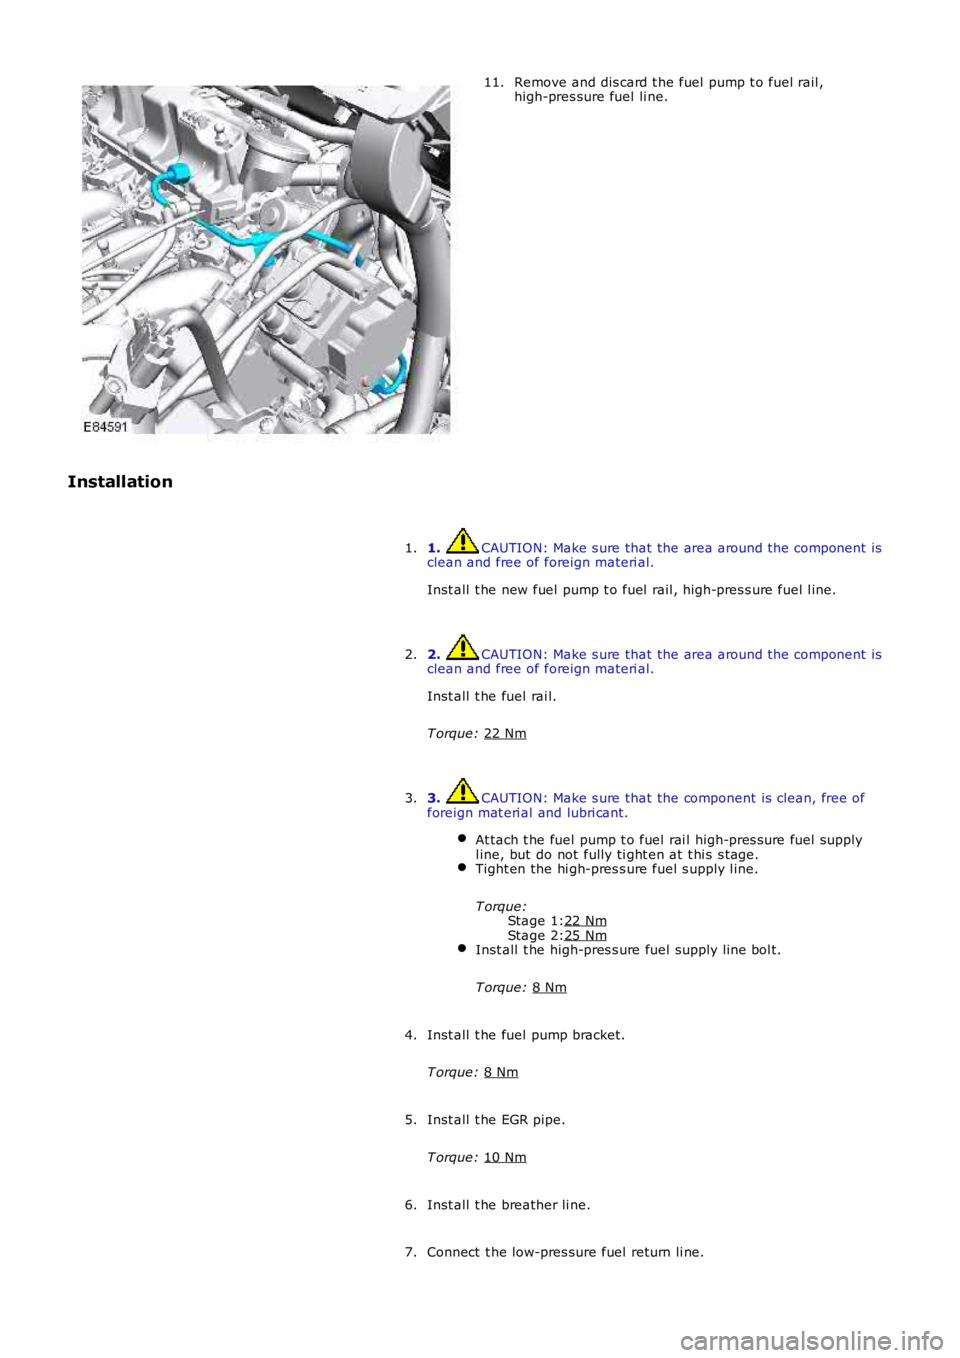
Stage 1:
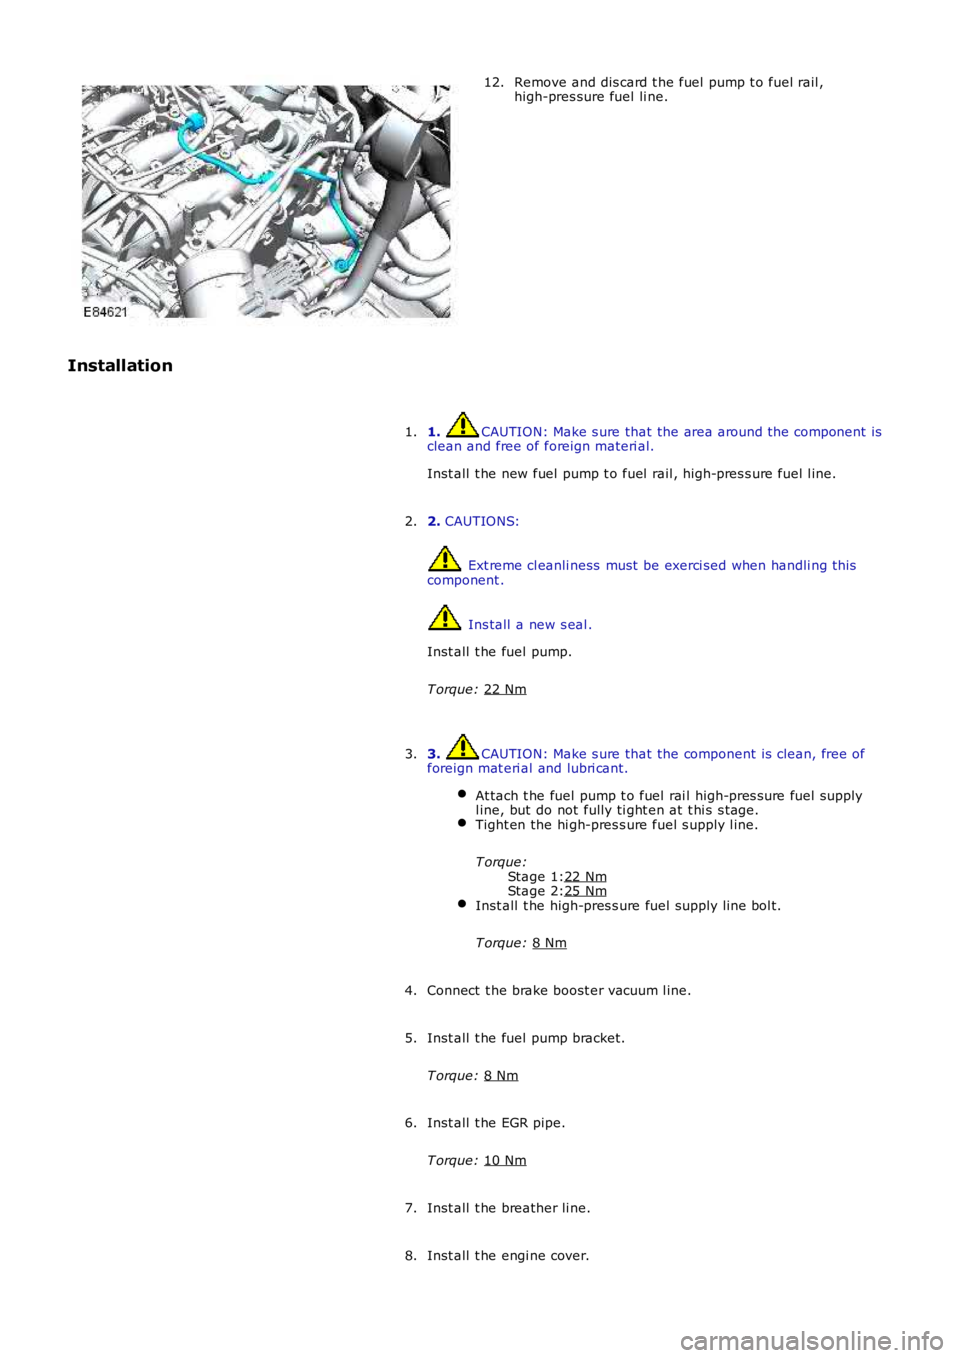
Stage 2: Remove and dis card t he fuel pump t o fuel rail ,
high-pres sure fuel li ne.
11.
Installation 1. CAUTION: Make s ure that the area around t he component is
clean and free of foreign materi al.
Inst all t he new fuel pump t o fuel rail , hi gh-pres s ure fuel l ine.
1.
2. CAUTION: Make s ure that the area around t he component is
clean and free of foreign materi al.
Inst all t he fuel rai l.
T orque: 22 Nm 2.
3. CAUTION: Make s ure that the component is clean, free of
foreign mat eri al and lubri cant.
At tach t he fuel pump t o fuel rai l high-pres s ure fuel supply
l ine, but do not fully ti ght en at t hi s s tage. Tight en the hi gh-pres s ure fuel s upply l ine.
T orque: 22 Nm 25 Nm
Inst all t he high-pres s ure fuel supply line bol t.
T orque: 8 Nm 3.
Inst all t he fuel pump bracket.
T orque: 8 Nm 4.
Inst all t he EGR pipe.
T orque: 10 Nm 5.
Inst all t he breather li ne.
6.
Connect t he low-pres sure fuel return li ne.
7.
Page 1015 of 3229
Stage 1:
Stage 2:
8.
CAUTIONS: Make s ure that t he area around the component i s clean and
free of foreign mat eri al. The fuel i njector high press ure fuel s uppl y li nes should be
i ns t alled in pairs . Inject ors 2 and 3, 1 and 4 res pect ively.
Inst all t he new high-press ure fuel s uppl y li nes , but do not
ful ly ti ght en at thi s s tage. Tight en the new high-pres s ure fuel supply lines .
T orque: 22 Nm 25 Nm8.
Inst all t he engi ne cover.
Refer t o: Engi ne Cover - TD4 2.2L Dies el (501-05 Interior Tri m and
Ornament ati on, Removal and Ins tal lat ion).
9.
Connect t he batt ery ground cable.
Refer t o: Specificati ons (414-00 Bat tery and Charging Sys tem -
General Informat ion, Specificati ons).
10.
11. CAUTION: Bleed t he fuel s yst em by cranki ng the engi ne to
purge t he air from t he s ys t em.
Bleed t he fuel s ys tem.
11.
Page 1016 of 3229
Publi s hed: 11-May-2011
Fuel Charging and Controls - TD4 2.2L Diesel - Fuel Pump
Removal and Inst all ati on
Removal
• W ARNINGS:
Avoid flames , s parks or li ght ed s ubs t ances .
W ai t for a mini mum of 1 minute aft er the engine has s t opped before carryi ng out any repair t o t he fuel inject ions ys t em.
• CAUTIO NS:
Make s ure that t he area around t he component i s cl ean and free of foreign mat eri al .
Make s ure that all openi ngs are s ealed. Us e new bl anking caps .
Bl eed the fuel s ys tem by cranki ng t he engi ne to purge t he air from the s ys tem.
Di sconnect t he bat t ery ground cable.
Refer t o: Specificati ons (414-00 Bat tery and Charging Sys tem -General Informat ion, Specificati ons).
1.
Remove t he engi ne cover.
Refer t o: Engi ne Cover - TD4 2.2L Dies el (501-05 Interior Tri m andOrnament ati on, Removal and Ins tal lat ion).
2.
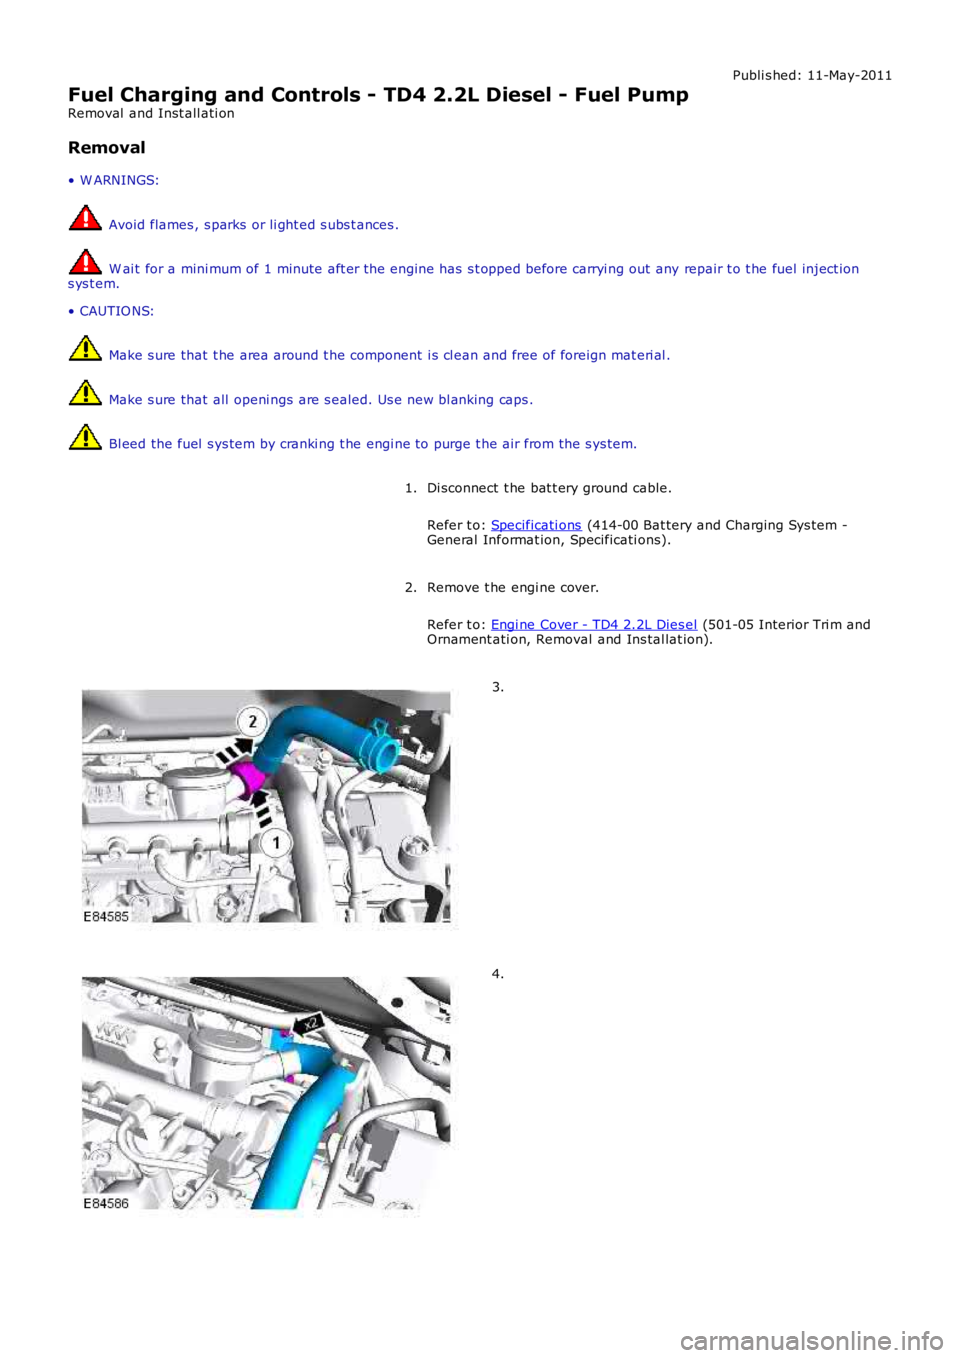
3.
4.
Page 1017 of 3229
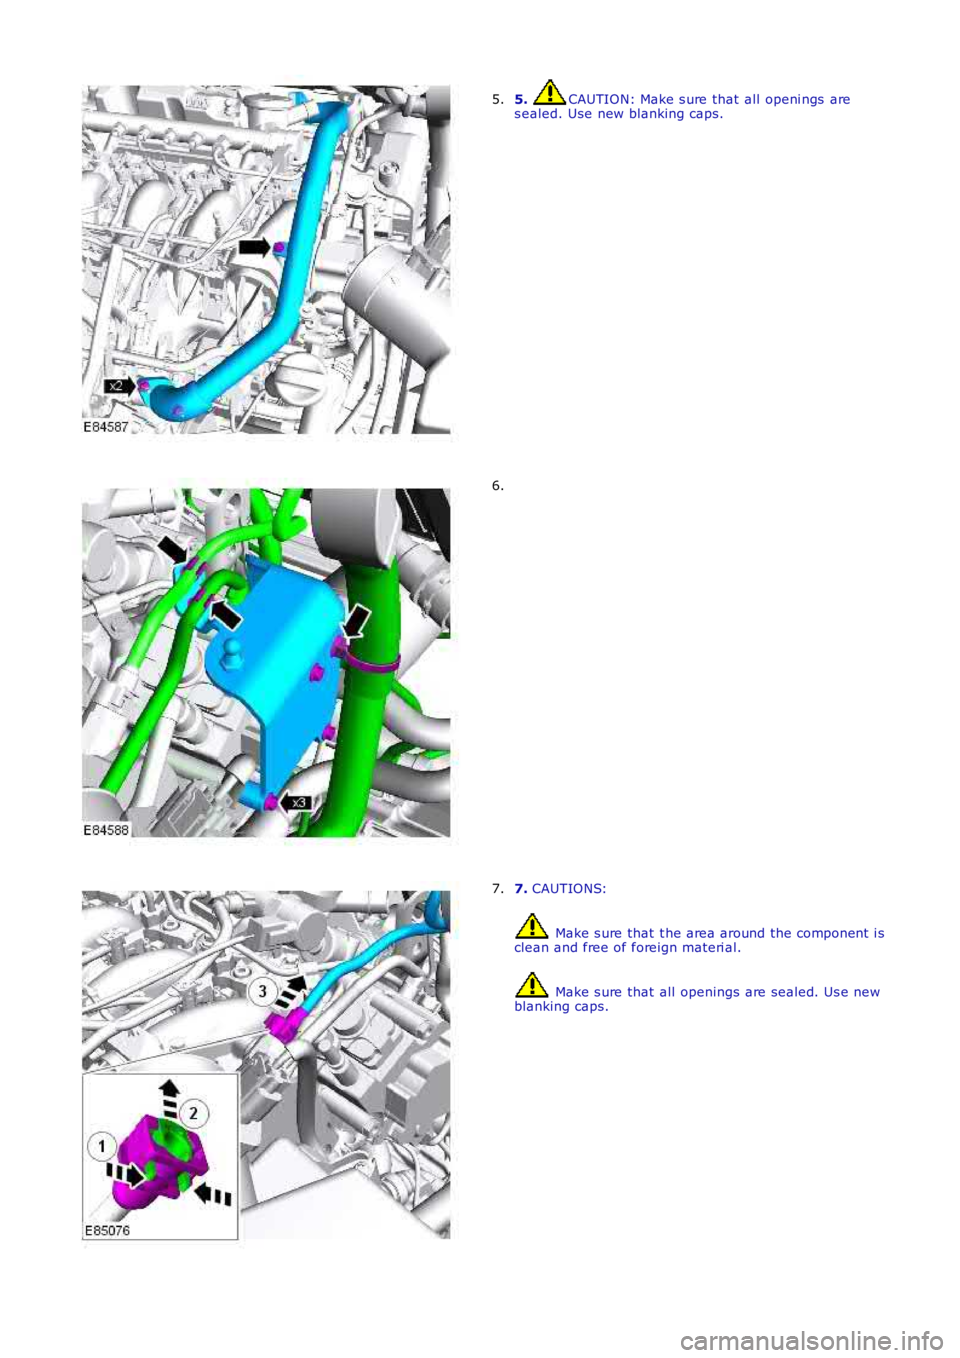
5. CAUTION: Make s ure that all openi ngs ares ealed. Use new blanking caps.5.
6.
7. CAUTIONS:
Make s ure that t he area around the component i sclean and free of foreign materi al.
Make s ure that all openings are sealed. Us e newblanking caps.
7.
Page 1018 of 3229
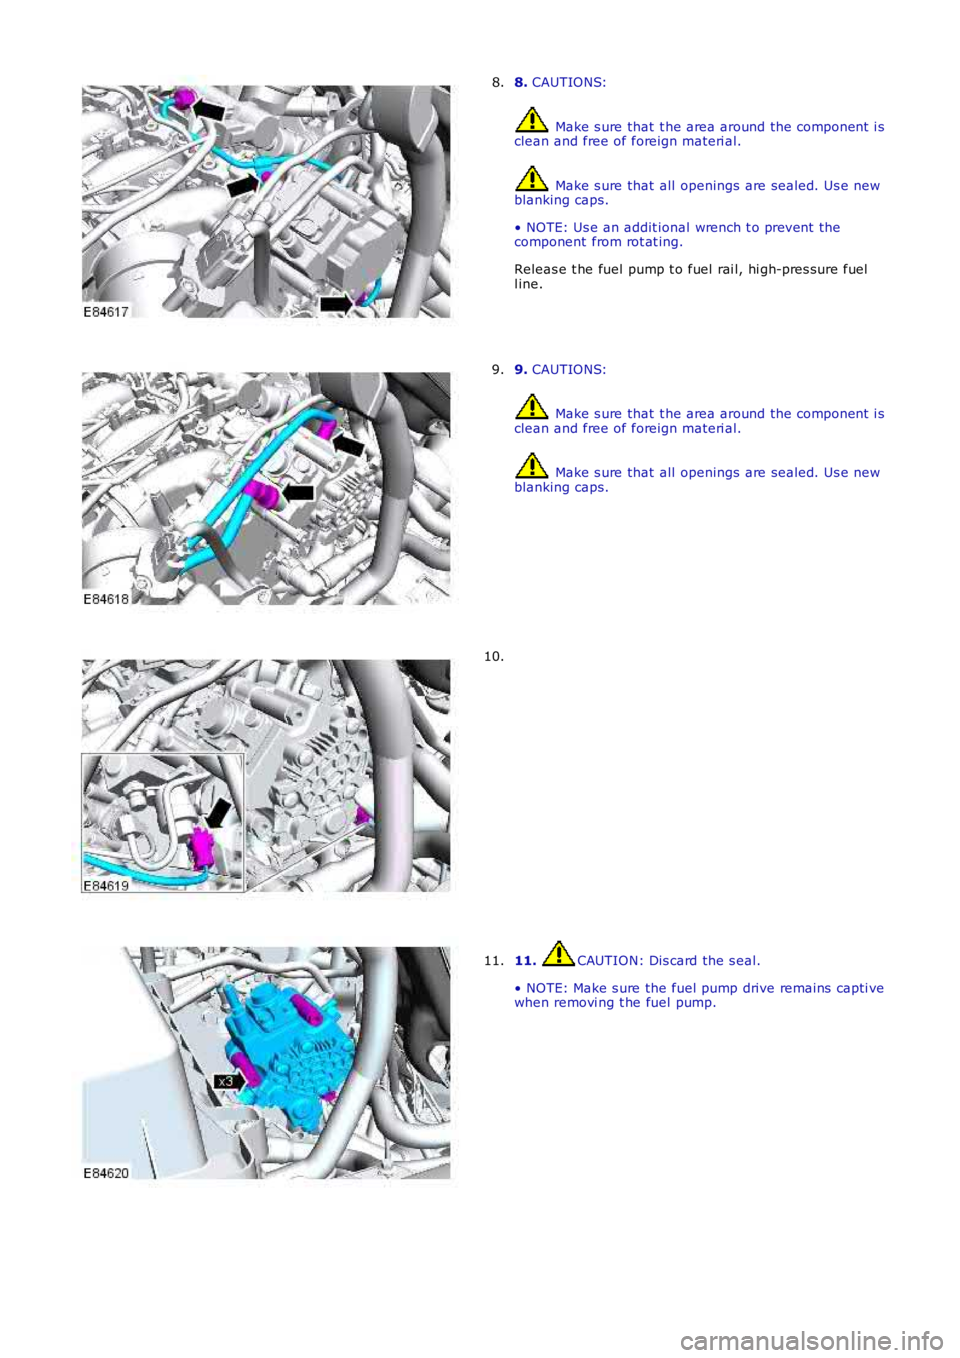
8. CAUTIONS:
Make s ure that t he area around the component i sclean and free of foreign materi al.
Make s ure that all openings are sealed. Us e newblanking caps.
• NOTE: Us e an addit ional wrench t o prevent thecomponent from rot at ing.
Releas e t he fuel pump t o fuel rai l, hi gh-pres sure fuell ine.
8.
9. CAUTIONS:
Make s ure that t he area around the component i sclean and free of foreign materi al.
Make s ure that all openings are sealed. Us e newblanking caps.
9.
10.
11. CAUTION: Dis card the s eal.
• NOTE: Make s ure the fuel pump drive remains capti vewhen removi ng t he fuel pump.
11.
Page 1019 of 3229
Stage 1:
Stage 2: Remove and dis card t he fuel pump t o fuel rail ,
high-pres sure fuel li ne.
12.
Installation 1. CAUTION: Make s ure that the area around t he component is
clean and free of foreign materi al.
Inst all t he new fuel pump t o fuel rail , hi gh-pres s ure fuel l ine.
1.
2. CAUTIONS: Ext reme cl eanli ness must be exerci sed when handli ng t hi s
component . Ins tall a new s eal .
Inst all t he fuel pump.
T orque: 22 Nm 2.
3. CAUTION: Make s ure that the component is clean, free of
foreign mat eri al and lubri cant.
At tach t he fuel pump t o fuel rai l high-pres s ure fuel supply
l ine, but do not fully ti ght en at t hi s s tage. Tight en the hi gh-pres s ure fuel s upply l ine.
T orque: 22 Nm 25 Nm
Inst all t he high-pres s ure fuel supply line bol t.
T orque: 8 Nm 3.
Connect t he brake boost er vacuum l ine.
4.
Inst all t he fuel pump bracket.
T orque: 8 Nm 5.
Inst all t he EGR pipe.
T orque: 10 Nm 6.
Inst all t he breather li ne.
7.
Inst all t he engi ne cover.
8.
Page 1020 of 3229
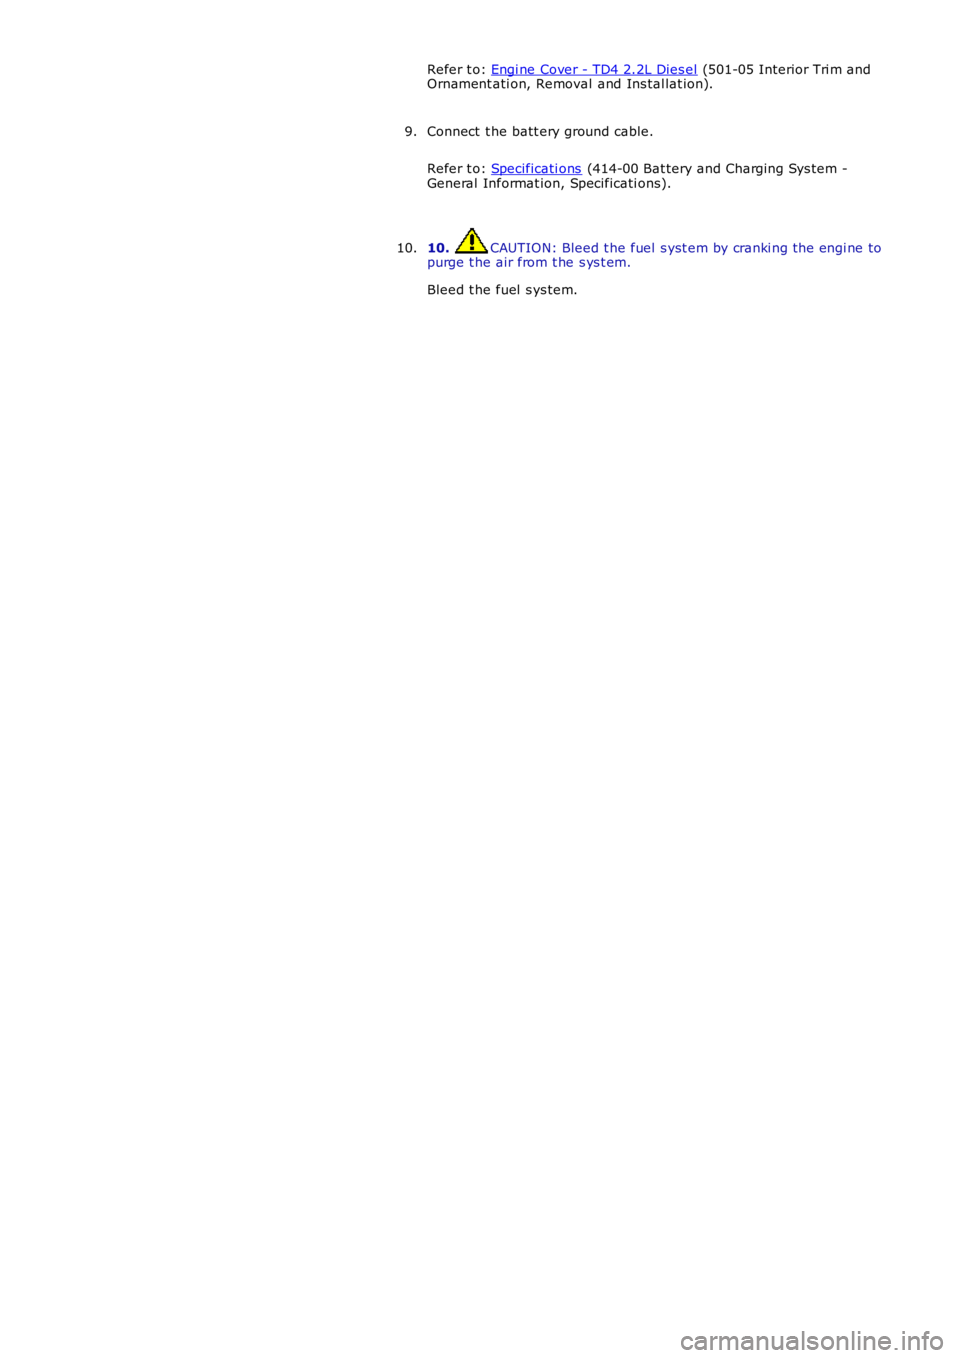
Refer t o: Engi ne Cover - TD4 2.2L Dies el (501-05 Interior Tri m andOrnament ati on, Removal and Ins tal lat ion).
Connect t he batt ery ground cable.
Refer t o: Specificati ons (414-00 Bat tery and Charging Sys tem -General Informat ion, Specificati ons).
9.
10. CAUTION: Bleed t he fuel s yst em by cranki ng the engi ne topurge t he air from t he s ys t em.
Bleed t he fuel s ys tem.
10.
Trending: service interval, wheel alignment, check engine, hood release, fuel pressure, oil additives, load capacity

