LAND ROVER FRELANDER 2 2006 Repair Manual
FRELANDER 2 2006
LAND ROVER
LAND ROVER
https://www.carmanualsonline.info/img/64/57251/w960_57251-0.png
LAND ROVER FRELANDER 2 2006 Repair Manual
Trending: overheating, gearbox, brake, automatic transmission, engine oil, parking sensors, fuel cap release
Page 921 of 3229
Publi s hed: 11-May-2011
Engine Cooling - I6 3.2L Petrol - Coolant Pump
Removal and Inst all ati on
Removal
Remove t he cover and dis connect the bat tery ground cabl e.
Refer t o: Specificati ons (414-00 Bat tery and Charging Sys tem -General Informat ion, Specificati ons).
1.
Remove t he engi ne cover.
Refer t o: Engi ne Cover - I6 3.2L Pet rol (501-05 Int eri or Trim andOrnament ati on, Removal and Ins tal lat ion).
2.
Remove t he bat t ery t ray.
Refer t o: Bat t ery Tray (414-01 Bat tery, Mount ing and Cables ,Removal and Ins tall ati on).
3.
Remove t he air cleaner as s embly.
Refer t o: Air Cleaner (303-12A Intake Ai r Dis tribut ion and Fil tering -I6 3.2L Pet rol, Removal and Ins t al lat ion).
4.
Drai n t he cool ant .
Refer t o: Cool ing Sys tem Drai ni ng, Fi lli ng and Bleeding (303-03AEngine Cooli ng - I6 3.2L Petrol, General Procedures).
5.
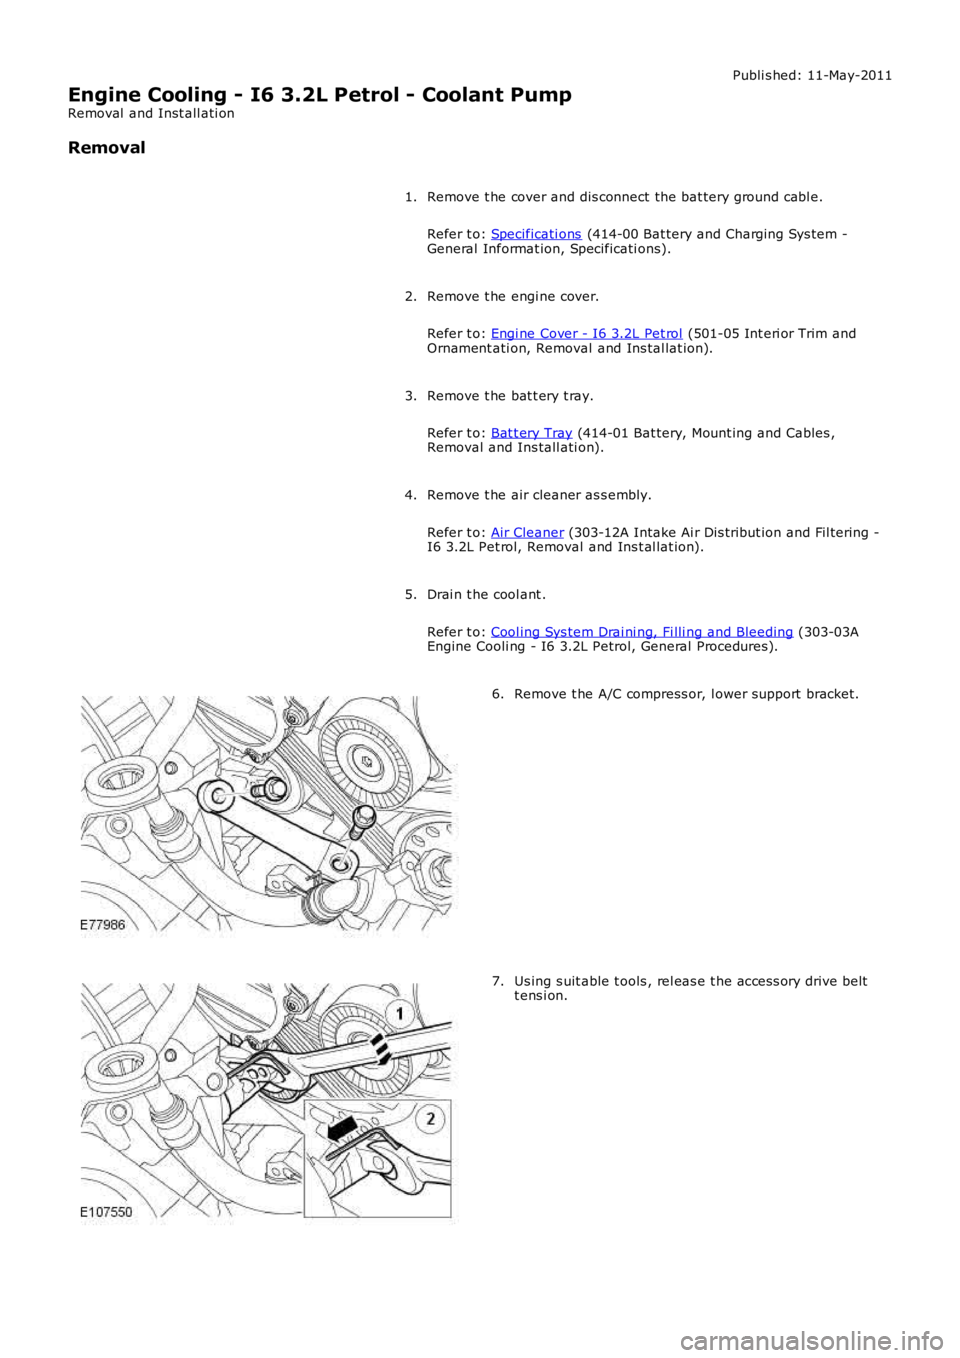
Remove t he A/C compress or, l ower support bracket.6.
Us ing s uit able t ools , rel eas e t he acces s ory drive beltt ens i on.7.
Page 922 of 3229
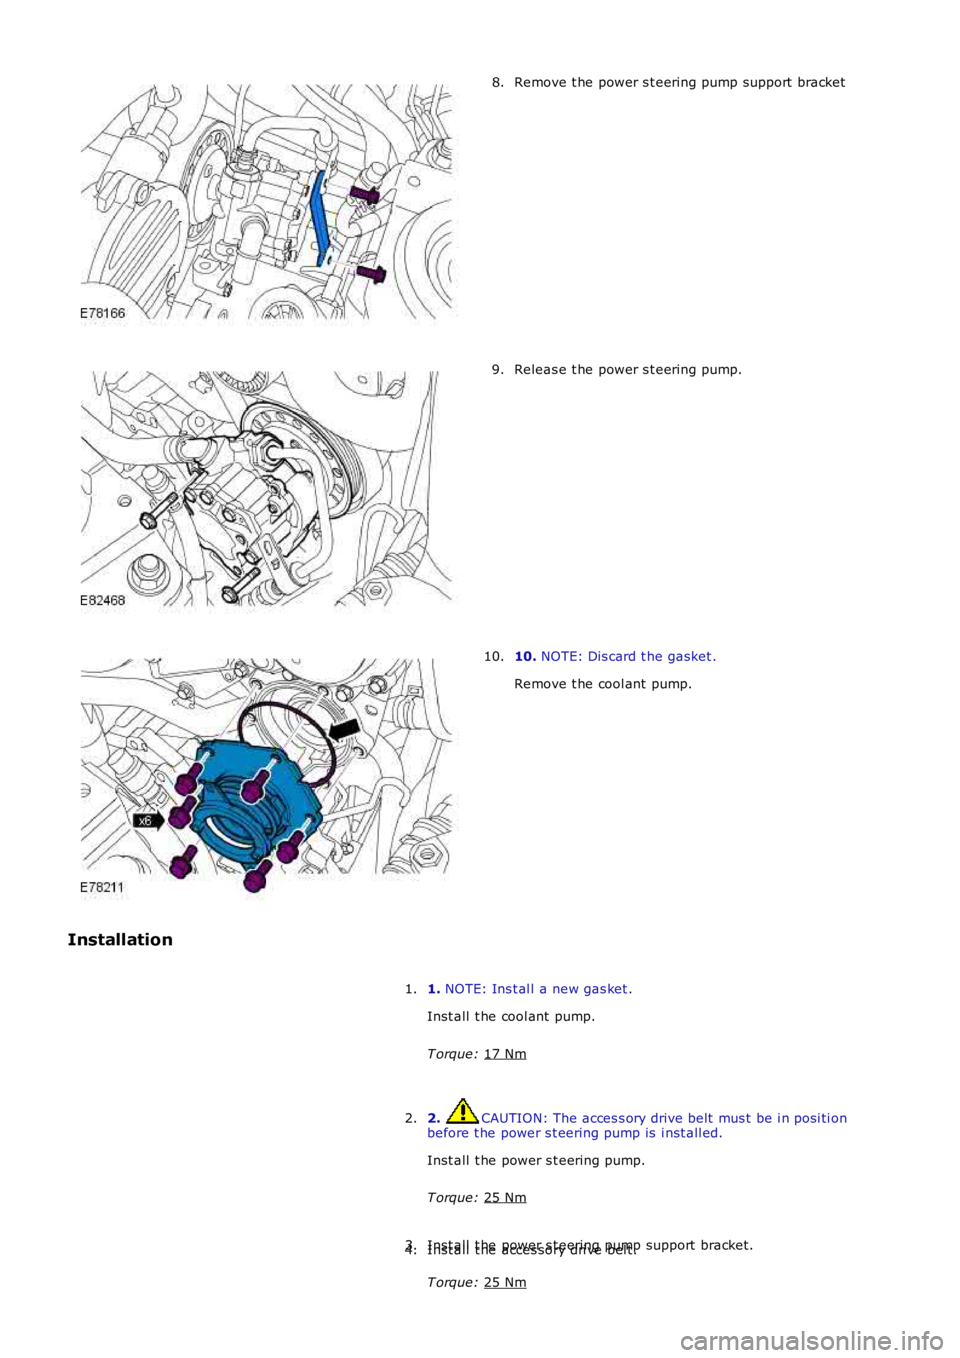
Remove t he power s t eering pump support bracket
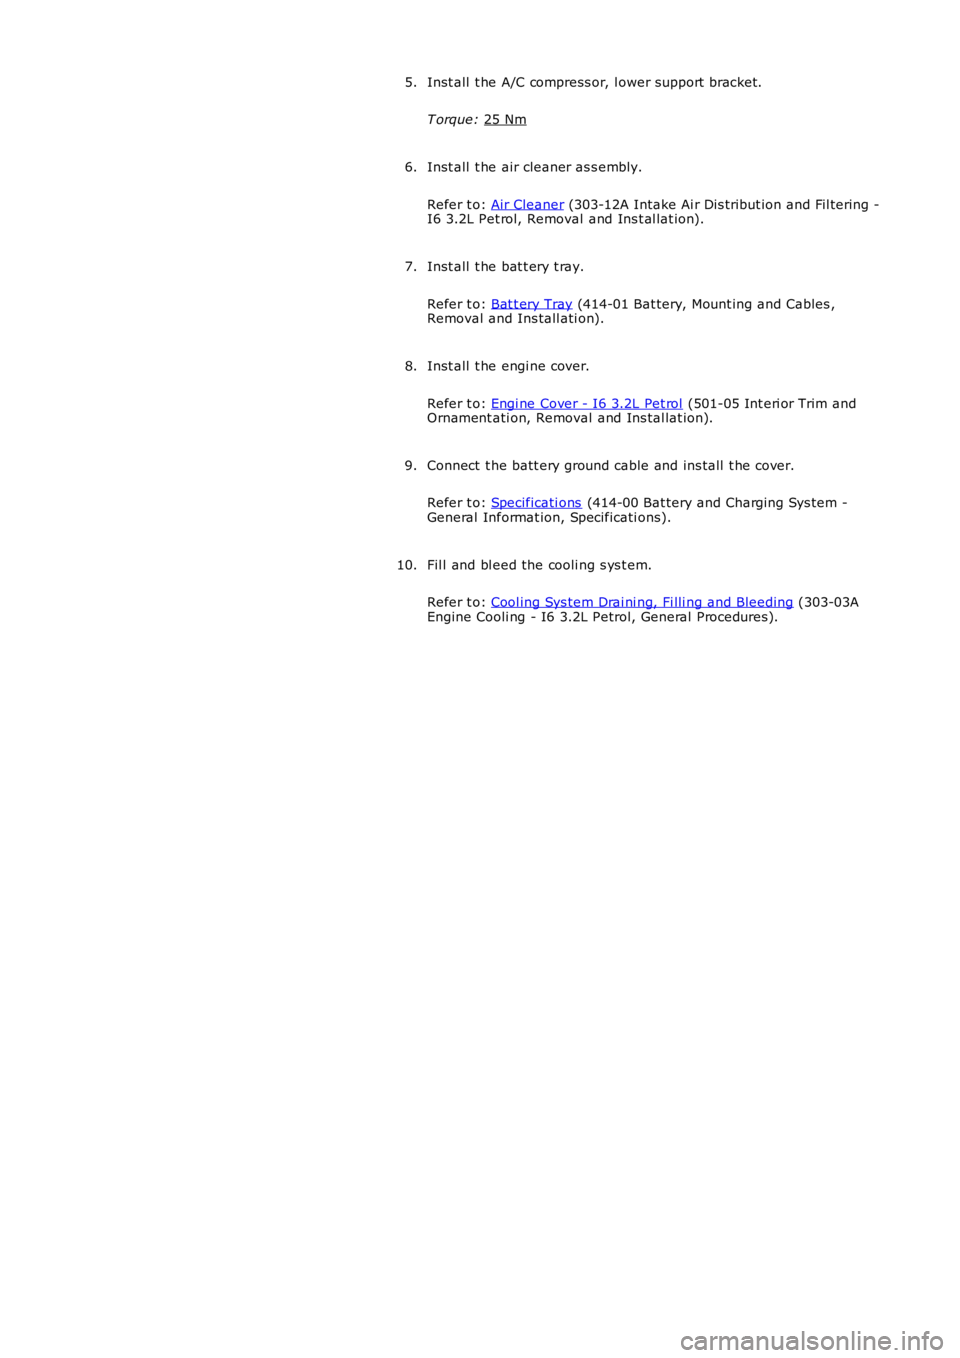
8. Releas e t he power s t eering pump.
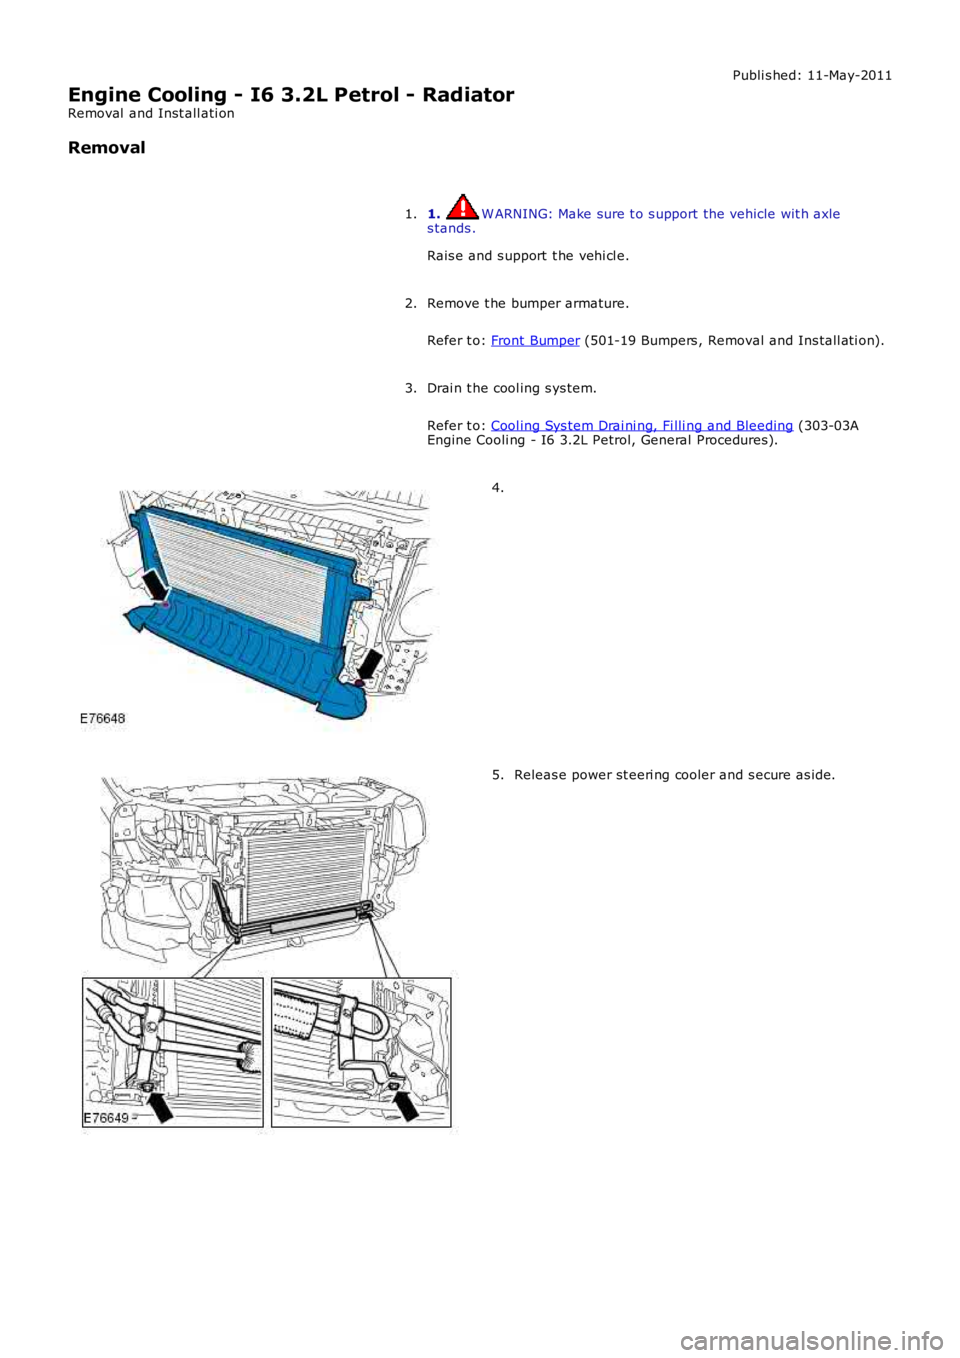
9. 10.
NOTE: Dis card t he gasket .
Remove t he cool ant pump.
10.
Installation 1. NOTE: Ins t al l a new gas ket .
Inst all t he cool ant pump.
T orque: 17 Nm 1.
2. CAUTION: The acces s ory drive belt mus t be i n posi ti on
before t he power s t eering pump is i nst all ed.
Inst all t he power s t eering pump.
T orque: 25 Nm 2.
Inst all t he power s t eering pump support bracket.
T orque: 25 Nm 3.
Inst all t he acces sory dri ve bel t.
4.
Page 923 of 3229
Inst all t he A/C compress or, l ower support bracket.
T orque: 25 Nm 5.
Inst all t he air cleaner as s embly.
Refer t o: Air Cleaner (303-12A Intake Ai r Dis tribut ion and Fil tering -
I6 3.2L Pet rol, Removal and Ins t al lat ion).
6.
Inst all t he bat t ery t ray.
Refer t o: Bat t ery Tray (414-01 Bat tery, Mount ing and Cables ,
Removal and Ins tall ati on).
7.
Inst all t he engi ne cover.
Refer t o: Engi ne Cover - I6 3.2L Pet rol (501-05 Int eri or Trim and
Ornament ati on, Removal and Ins tal lat ion).
8.
Connect t he batt ery ground cable and ins tall t he cover.
Refer t o: Specificati ons (414-00 Bat tery and Charging Sys tem -
General Informat ion, Specificati ons).
9.
Fil l and bl eed the cooli ng s ys t em.
Refer t o: Cool ing Sys tem Drai ni ng, Fi lli ng and Bleeding (303-03A
Engine Cooli ng - I6 3.2L Petrol, General Procedures).
10.
Page 924 of 3229
Publi s hed: 11-May-2011
Engine Cooling - I6 3.2L Petrol - Radiator
Removal and Inst all ati on
Removal
1. W ARNING: Make sure t o s upport the vehicle wit h axles tands .
Rais e and s upport t he vehi cl e.
1.
Remove t he bumper armature.
Refer t o: Front Bumper (501-19 Bumpers , Removal and Ins tall ati on).
2.
Drai n t he cool ing s ys tem.
Refer t o: Cool ing Sys tem Drai ni ng, Fi lli ng and Bleeding (303-03AEngine Cooli ng - I6 3.2L Petrol, General Procedures).
3.
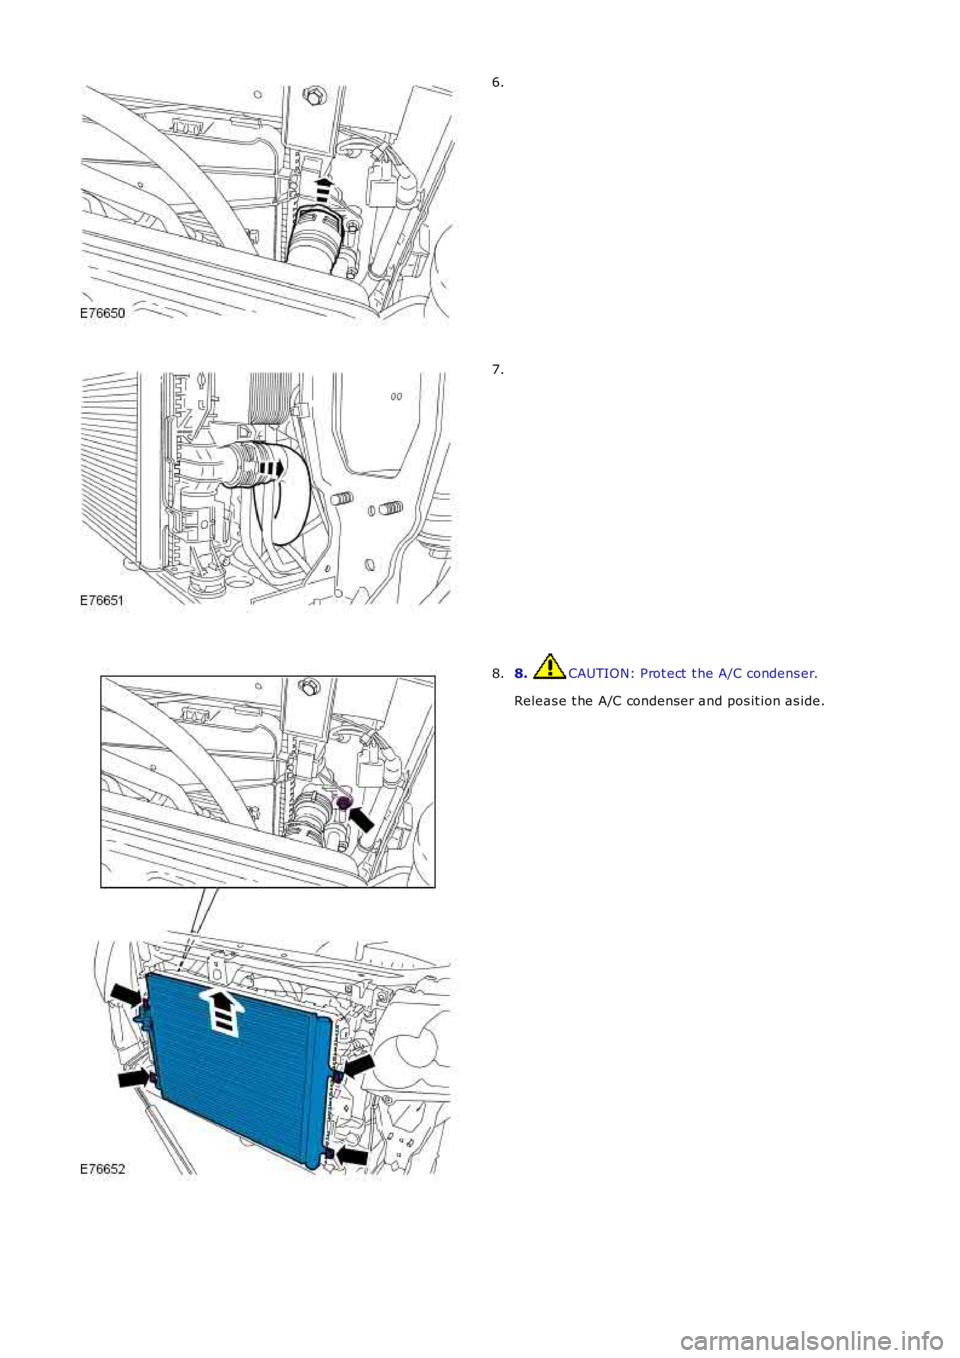
4.
Releas e power st eeri ng cooler and s ecure as ide.5.
Page 925 of 3229
6.
7.
8. CAUTION: Prot ect t he A/C condens er.
Releas e t he A/C condenser and pos it ion as ide.
8.
Page 926 of 3229
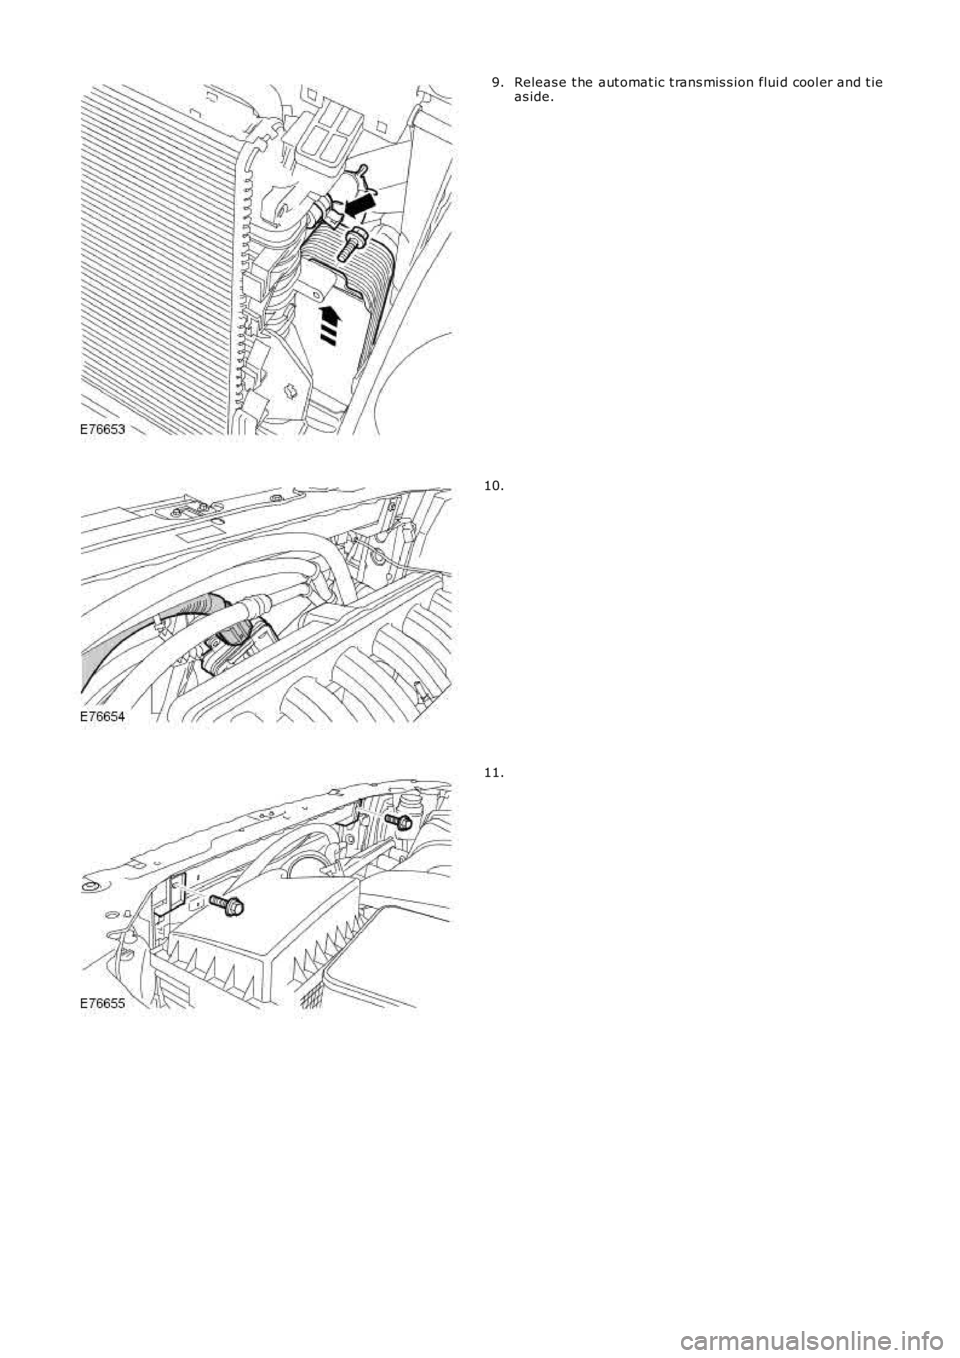
Releas e t he aut omat ic t rans mis s ion flui d cool er and t ieas ide.9.
10.
11.
Page 927 of 3229
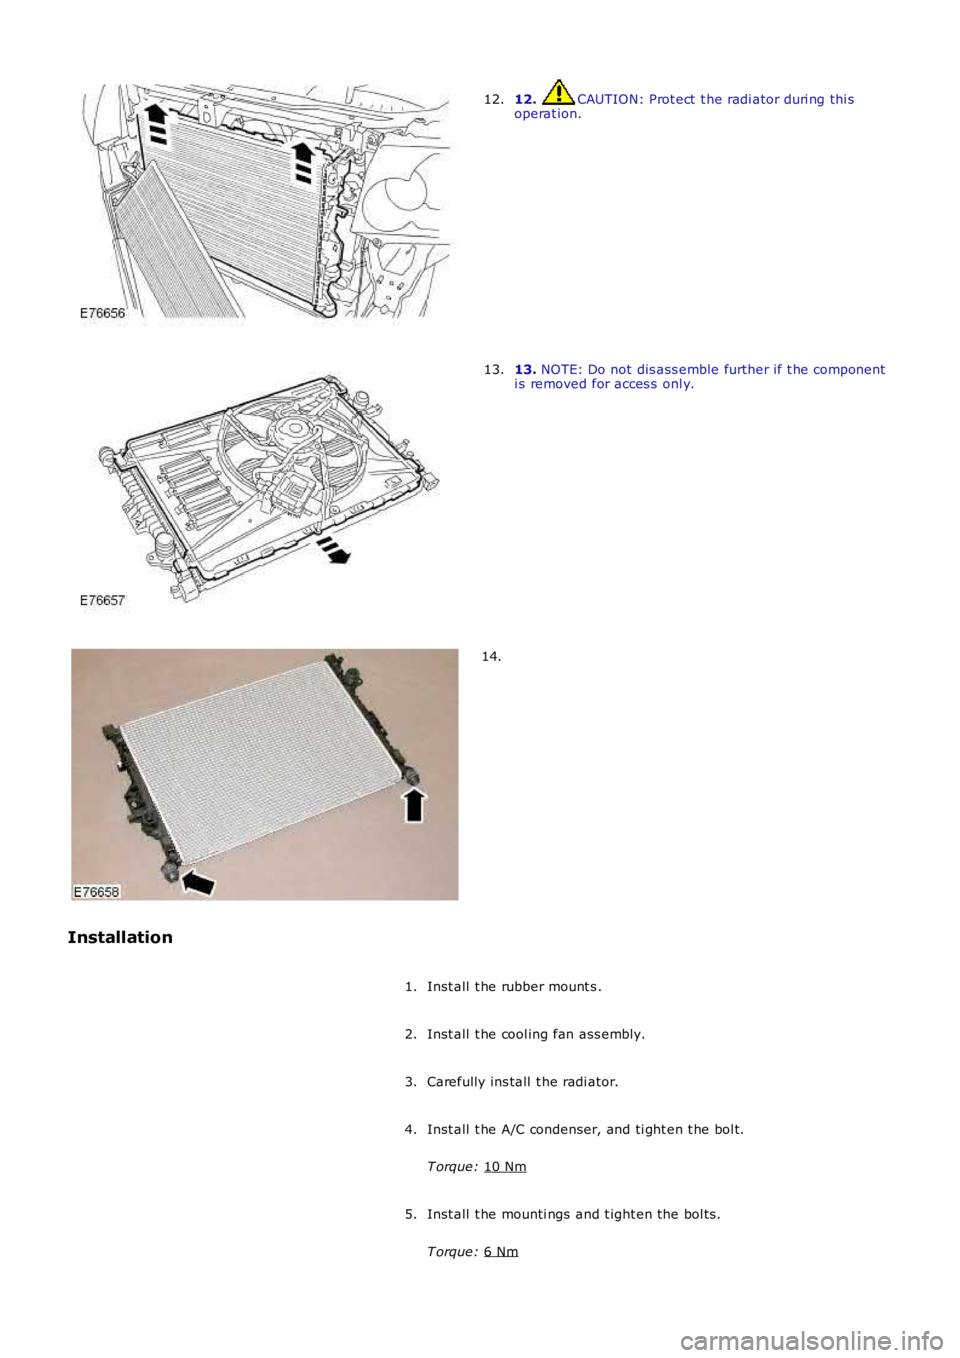
12. CAUTION: Prot ect t he radi ator duri ng thi s
operat ion.
12. 13.
NOTE: Do not dis ass emble further if t he component
i s removed for acces s onl y.
13. 14.
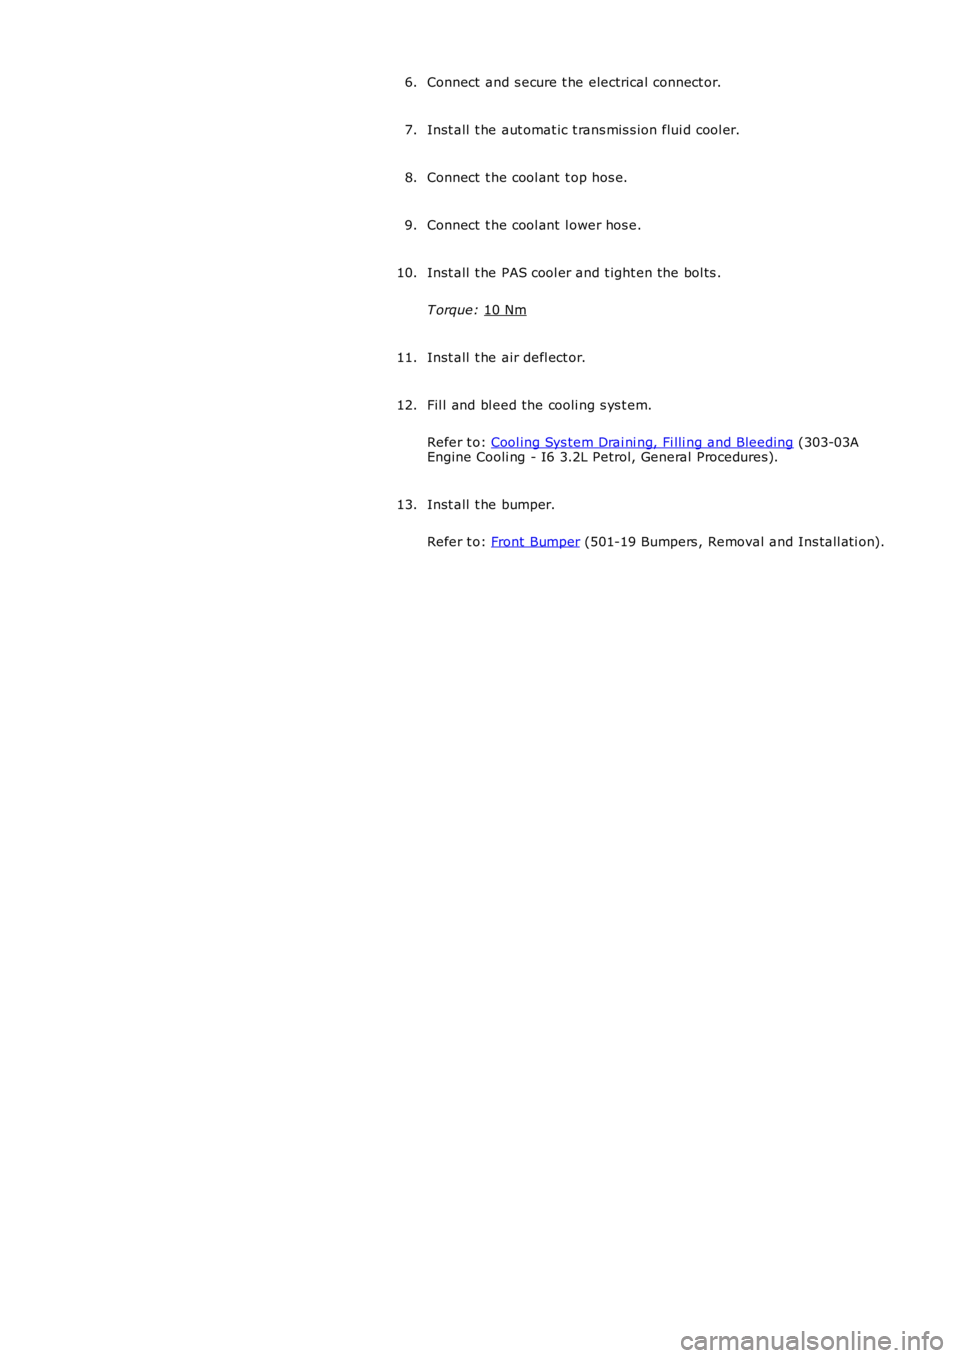
Installation Inst all t he rubber mount s .
1.
Inst all t he cool ing fan ass embly.
2.
Carefully ins tall t he radi ator.
3.
Inst all t he A/C condenser, and ti ght en t he bol t.
T orque: 10 Nm 4.
Inst all t he mounti ngs and t ight en the bol ts .
T orque: 6 Nm 5.
Page 928 of 3229
Connect and s ecure t he electrical connect or.
6.
Inst all t he aut omat ic t rans mis s ion flui d cool er.
7.
Connect t he cool ant t op hos e.
8.
Connect t he cool ant l ower hos e.
9.
Inst all t he PAS cool er and t ight en the bol ts .
T orque: 10 Nm 10.
Inst all t he air defl ect or.
11.
Fil l and bl eed the cooli ng s ys t em.
Refer t o: Cool ing Sys tem Drai ni ng, Fi lli ng and Bleeding (303-03A
Engine Cooli ng - I6 3.2L Petrol, General Procedures).
12.
Inst all t he bumper.
Refer t o: Front Bumper (501-19 Bumpers , Removal and Ins tall ati on).
13.
Page 929 of 3229
Publi s hed: 11-May-2011
Engine Cooling - I6 3.2L Petrol - Cooling Fan
Removal and Inst all ati on
Removal
1. W ARNING: Make sure t o s upport the vehicle wit h axle
s tands .
Rais e and s upport t he vehi cl e.
1.
2. CAUTION: After s wit chi ng off t he ignit ion, wait for 2 mi nutes
before dis connecti ng the bat tery. Fail ure to wai t for 2 minutes will
damage t he navi gat ion computer.
Di sconnect t he bat t ery ground cable.
Refer t o: Specificati ons (414-00 Bat tery and Charging Sys tem -
General Informat ion, Specificati ons).
2.
Remove t he int ake mani fol d.
Refer t o: Int ake Mani fol d (303-01A Engi ne - I6 3.2L Petrol, Removal
and Inst all at ion).
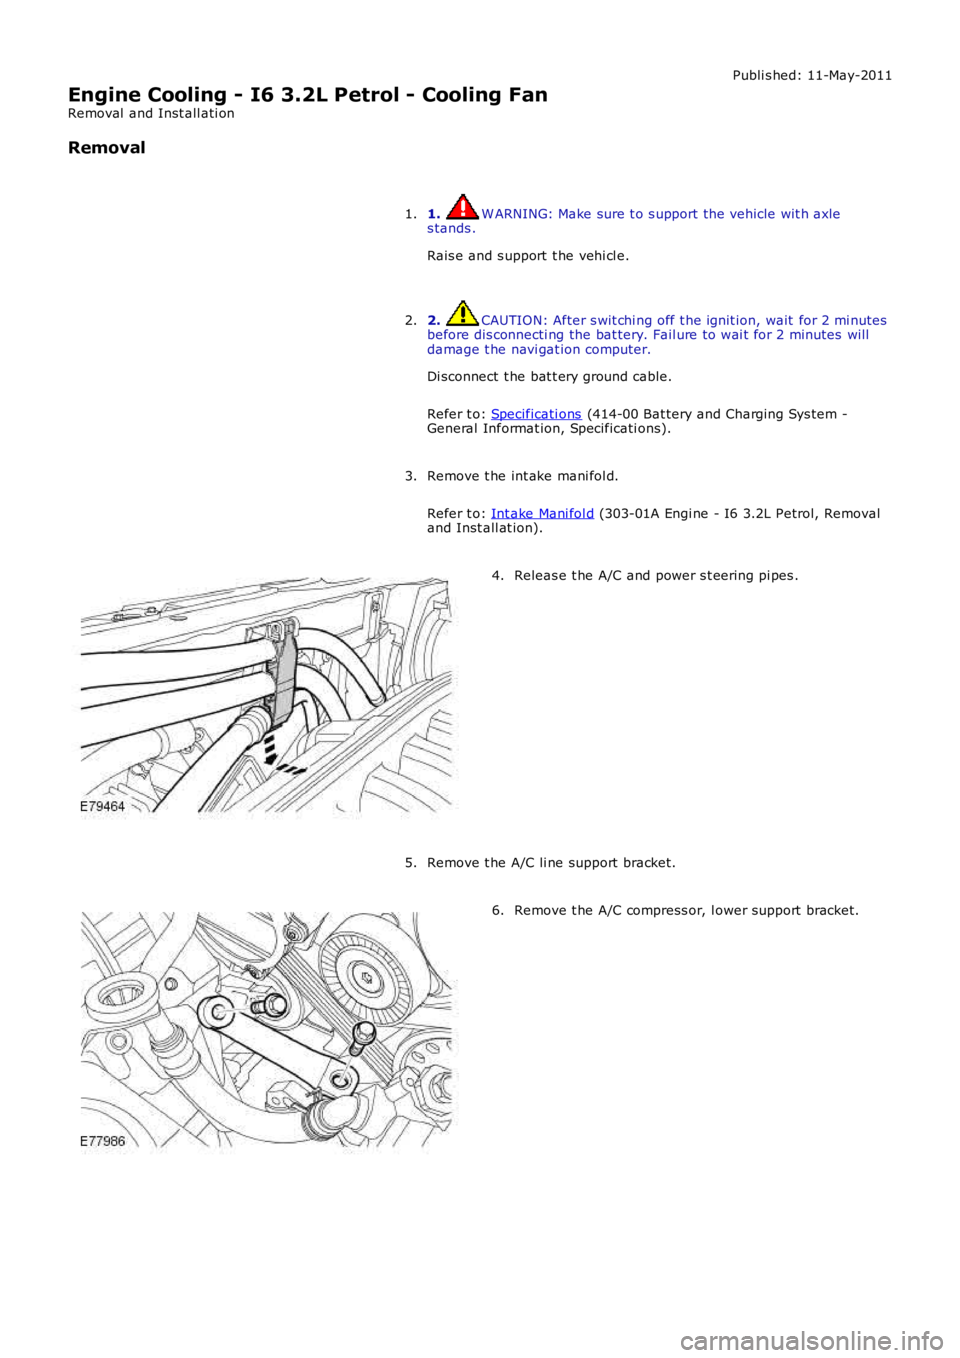
3. Releas e t he A/C and power s t eering pi pes .
4.
Remove t he A/C li ne support bracket.
5. Remove t he A/C compress or, l ower support bracket.
6.
Page 930 of 3229
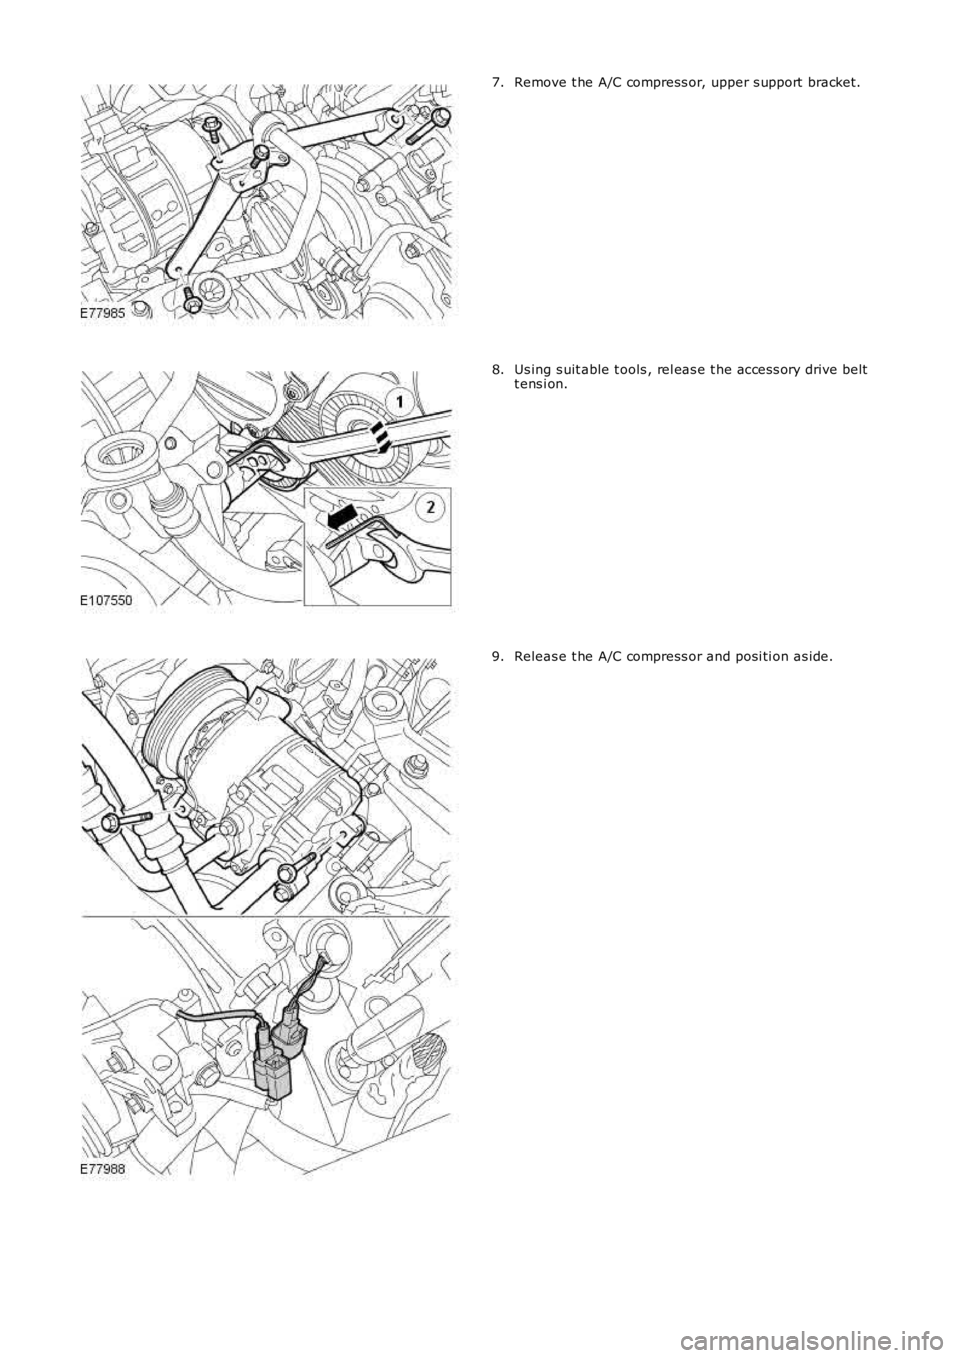
Remove t he A/C compress or, upper s upport bracket.
7. Us ing s uit able t ools , rel eas e t he acces s ory drive belt
t ens i on.
8. Releas e t he A/C compress or and posi ti on as ide.
9.
Trending: wiring diagram, height adjustment, catalytic converter, belt, fan, airbag disable, brake sensor

