LAND ROVER FRELANDER 2 2006 Repair Manual
Manufacturer: LAND ROVER, Model Year: 2006, Model line: FRELANDER 2, Model: LAND ROVER FRELANDER 2 2006Pages: 3229, PDF Size: 78.5 MB
Page 911 of 3229
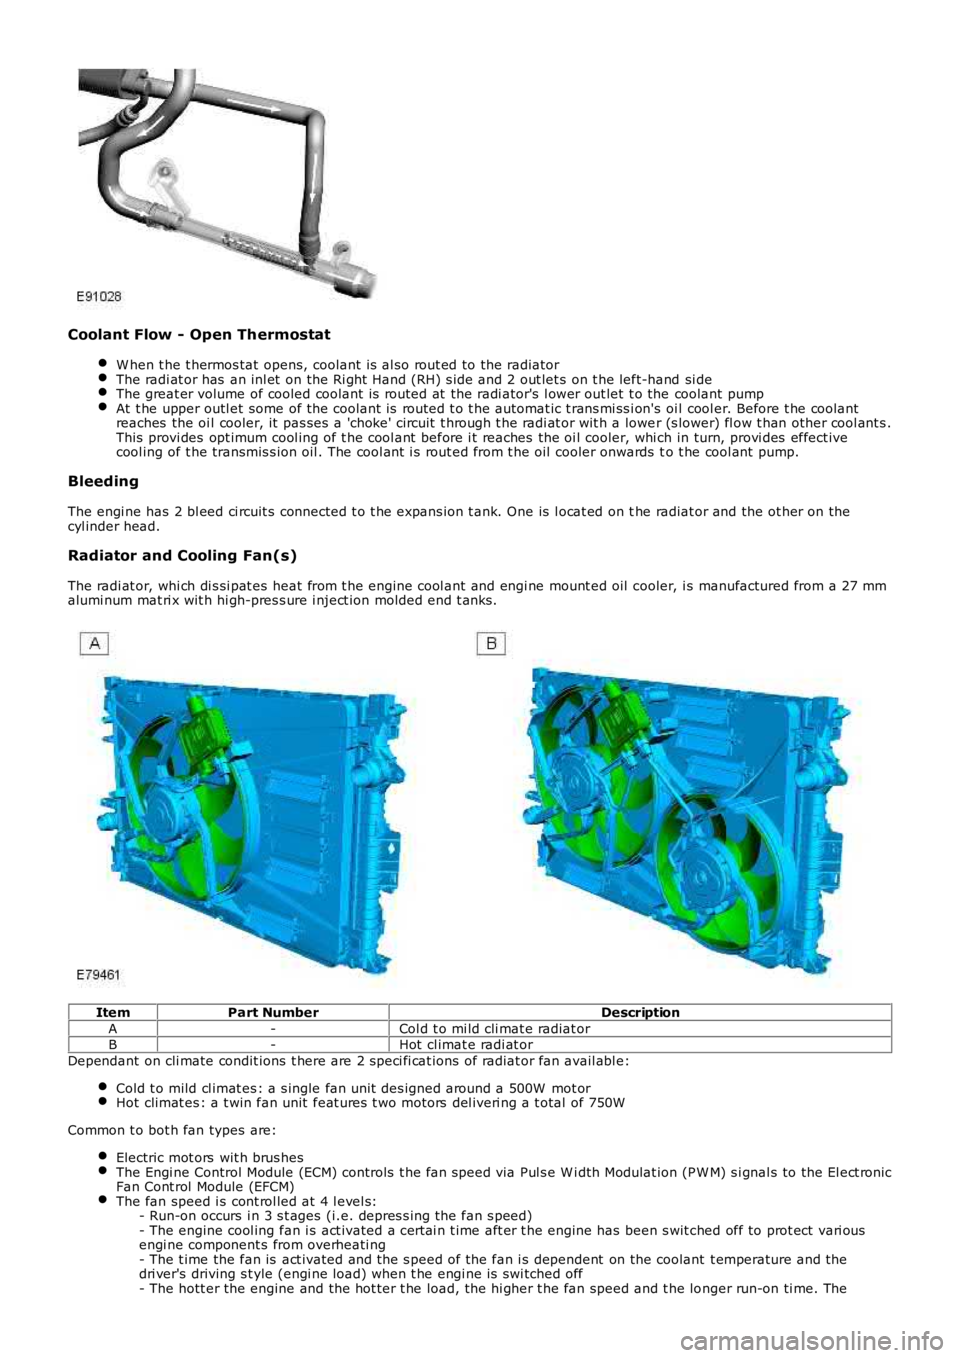
Coolant Flow - Open Thermostat
W hen t he t hermos tat opens, coolant is al so rout ed to the radiatorThe radi at or has an inl et on the Ri ght Hand (RH) s ide and 2 out let s on t he left-hand si deThe great er volume of cooled coolant is routed at the radi ator's l ower out let t o the coolant pumpAt t he upper outl et some of the coolant is routed t o t he automat ic t rans mi ss i on's oil cool er. Before t he coolantreaches the oi l cooler, it pas ses a 'choke' circuit t hrough t he radi at or wit h a lower (s lower) fl ow t han other cool ant s .This provi des opt imum cool ing of t he cool ant before i t reaches the oi l cooler, whi ch in turn, provi des effect ivecool ing of t he transmis s ion oil . The cool ant i s rout ed from t he oil cooler onwards to t he cool ant pump.
Bleeding
The engi ne has 2 bl eed ci rcuit s connected t o t he expans ion t ank. One is l ocat ed on the radiat or and the ot her on thecyl inder head.
Radiator and Cooling Fan(s)
The radi at or, whi ch di s si pat es heat from t he engine cool ant and engi ne mount ed oil cooler, i s manufactured from a 27 mmalumi num mat ri x wit h hi gh-pres s ure i nject ion molded end t anks .
ItemPart NumberDescription
A-Col d t o mi ld cli mat e radiat orB-Hot cl imat e radi at or
Dependant on cli mate condit ions t here are 2 s peci fi cat ions of radiat or fan avail abl e:
Cold t o mild cl imat es : a s ingle fan unit des igned around a 500W mot orHot climat es : a t win fan unit feat ures t wo motors del iveri ng a t otal of 750W
Common t o bot h fan types are:
Electric mot ors wit h brus hesThe Engi ne Control Module (ECM) controls t he fan speed via Pul s e W i dth Modulat ion (PW M) s i gnal s to the El ect ronicFan Cont rol Module (EFCM)The fan speed i s cont rol led at 4 l evel s:- Run-on occurs i n 3 s t ages (i.e. depres s ing the fan s peed)- The engine cool ing fan i s act ivated a cert ai n t ime aft er t he engine has been s wit ched off to prot ect vari ousengi ne component s from overheati ng- The t ime the fan is act ivated and the s peed of the fan i s dependent on the coolant t emperature and thedri ver's driving s t yle (engi ne load) when t he engi ne is swi tched off- The hott er the engine and the hot ter t he load, the hi gher t he fan speed and t he longer run-on ti me. The
Page 912 of 3229
maximum t ime of run-on i s 360 s econdsThe EFCM can, by modul at ing the PW M control s i gnal, i nform t he ECM about the fan's st at us and any faul ts .
PW M cont rol of the fan mot or provides variabl e cont rol of fan speed t o ensure mi nimum fan noi se and reduced energycons umpt ion when fan operati on is required. The cont rol module is mount ed above the wade wat er ent ry li nesFor addit ional informat ion, refer t o: Electroni c Engi ne Controls (303-14A Electroni c Engine Controls - I6 3.2L Pet rol ,Des cript ion and Operat ion).
The cool ant expansi on tank provi des an expans ion volume and permit s eas y in-s ervice bleeding of t he cool ing s ys tem.Coolant level s ens ing i s precis e t o provide early warning i n t he event of low cool ant l evel . To prevent i ntrusi on int o t heexpans ion t ank's cas i ng, whi ch could be a potent ial leak path, a magnet ic float wi thin the t ank act ivat es a s wit ch locatedouts ide the t ank.
Page 913 of 3229
Publi s hed: 11-May-2011
Engine Cooling - I6 3.2L Petrol - Engine Cooling
Diagnosi s and Tes ti ng
Principles of Operation
For a detail ed descripti on of the cooli ng s ys t em, refer t o t he rel evant Des cript ion and Operat ion secti on in the workshopmanual.REFER to: Engine Cooli ng (303-03A Engi ne Cool ing - I6 3.2L Pet rol , Descri pti on and Operat ion).
Inspection and Verification
CAUTION: Di agnos is by s ubs ti tut ion from a donor vehicle is NO T acceptabl e. Subs ti tut ion of cont rol modules doesnot guarant ee confirmat ion of a faul t, and may als o caus e addit ional fault s i n t he vehi cl e being t est ed and/or t he donorvehi cl e.
1. Verify t he cus t omer concern.1.
2. Vis ually ins pect for obvious s igns of mechani cal or electrical damage.2.
Visual InspectionMechanicalElectrical
Coolant leaksCoolant expans ion t ankElectric fanRadiat or
FuseW i ri ng harnessLoos e or corroded connect or(s )Engi ne Coolant Temperature (ECT) s ensor
3. If an obvious cause for an obs erved or report ed concern is found, correct t he caus e (if pos s ible) beforeproceeding t o t he next s t ep3.
4. If t he caus e is not vis ually evi dent , verify t he sympt om and refer t o t he Sympt om Chart, al ternat ively, check forDi agnos ti c Trouble Codes (DTCs) and refer t o t he DTC Index.4.
Symptom Chart
SymptomPossible CauseActionCoolant los sHosesHose connect ionsRadi atorCool ant pumpHeat er coreGasketsEngi ne cas t ing cracksEngi ne block core plugs
GO t o Pinpoint Test A.
Engine overheati ngEngi ne cool ant (level/condit ion)Thermos tatFan motorFan motor fus es and/or circui tsECT s ens orEngi ne cont rol module (ECM)Fan speed module
GO t o Pinpoint Test B.
Engine not reaching normal operat ing t emperat ureThermos tatElect ric fanFan speed module
GO t o Pinpoint Test C.
DTC Index
• NOTE: If the control modul e or a component i s s us pect and the vehicle remains under manufacturer warrant y, refer t o theW arranty Pol icy and Procedures manual (s ect ion B1.2), or determine i f any pri or approval programme is in operat ion, pri ort o the ins tall ati on of a new module/component.
• NOTE: Generic scan t ool s may not read the codes li st ed, or may read only fi ve digit codes . Mat ch the five di git s from t hes can tool to the firs t fi ve di git s of the seven digi t code l is ted to ident ify t he faul t (t he las t t wo digi ts gi ve ext rainformat ion read by the manufact urer approved diagnos t ic s ys tem).
• NOTE: W hen performing volt age or res is t ance t est s , always use a digi tal mult imeter (DMM) accurat e t o t hree deci malplaces, and wi th a current cali brati on cert ifi cat e. W hen t est ing res is tance, al ways take t he res is t ance of t he DMM leadsint o account.
• NOTE: Check and recti fy bas ic faul ts before beginni ng diagnos t ic rout ines i nvol vi ng pinpoint t es t s.
• NOTE: If DTCs are recorded and, aft er performi ng the pi npoi nt tes ts , a fault is not present , an int ermi tt ent concern maybe t he caus e. Always check for loose connect ions and corroded terminals .
DT CDescriptionPossible CauseAction
P011600Engine coolant temperature s ens or 1circui t range/performanceEngi ne cool ant t emperat ure(ECT) s ens or 1 circui t: hi ghCheck t he ECT s ensor and circui ts .Refer to the el ect ri cal guides . Ins tal l a
Page 914 of 3229
1
2
DT CDescriptionPossible CauseAction
res is t anceEngi ne cool ant t emperat ure(ECT) s ens or fai lure
new s ens or as requi red.REFER to: Engine Coolant Temperature(ECT) Sensor (303-14A Electroni cEngi ne Cont rol s - I6 3.2L Pet rol,Removal and Inst all at ion).
P011621Engine coolant temperature s ens or 1circui t range/performance - s ignalampl it ude les s than minimum
Engi ne cool ant t emperat ure(ECT) s ens or 1 circui t: shortci rcuit t o groundEngi ne cool ant t emperat ure(ECT) s ens or 1 circui t: openci rcuitEngi ne cool ant t emperat ure(ECT) s ens or fai lure
Check t he ECT s ensor and circui ts .Refer to the el ect ri cal guides . Ins tal l anew s ens or as requi red.REFER to: Engine Coolant Temperature(ECT) Sensor (303-14A Electroni cEngi ne Cont rol s - I6 3.2L Pet rol,Removal and Inst all at ion).
P011622Engine coolant temperature s ens or 1circui t range/performance - s ignalampl it ude greater t han maxi mum
Engi ne cool ant t emperat ure(ECT) s ens or 1 circui t: shortci rcuit t o powerEngi ne cool ant t emperat ure(ECT) s ens or fai lure
Check t he ECT s ensor and circui ts .Refer to the el ect ri cal guides . Ins tal l anew s ens or as requi red.REFER to: Engine Coolant Temperature(ECT) Sensor (303-14A Electroni cEngi ne Cont rol s - I6 3.2L Pet rol,Removal and Inst all at ion).
P011700Engine coolant temperature s ens or 1circui t lowEngi ne cool ant t emperat ure(ECT) s ens or 1 circui t: shortci rcuit t o groundEngi ne cool ant t emperat ure(ECT) s ens or 1 circui t: openci rcuitEngi ne cool ant t emperat ure(ECT) s ens or fai lure
Check t he ECT s ensor and circui ts .Refer to the el ect ri cal guides . Ins tal l anew s ens or as requi red.REFER to: Engine Coolant Temperature(ECT) Sensor (303-14A Electroni cEngi ne Cont rol s - I6 3.2L Pet rol,Removal and Inst all at ion).
P011800Engine coolant temperature s ens or 1circui t highEngi ne cool ant t emperat ure(ECT) s ens or 1 circui t: shortci rcuit t o powerEngi ne cool ant t emperat ure(ECT) s ens or 1 circui t: openci rcuitEngi ne cool ant t emperat ure(ECT) s ens or fai lure
Check t he ECT s ensor and circui ts .Refer to the el ect ri cal guides . Ins tal l anew s ens or as requi red.REFER to: Engine Coolant Temperature(ECT) Sensor (303-14A Electroni cEngi ne Cont rol s - I6 3.2L Pet rol,Removal and Inst all at ion).
P012500Insuffi ci ent coolant t emperature forclos ed-l oop fuel cont rolDamaged/Faul ty coolantthermost atCool ing fan faul tEngi ne cool ant t emperat ures ens or ci rcuit : highres is t anceEngi ne cool ant t emperat ures ens or fai lure
Check t he cool ing s ys tem operati on.Rect ify as neces s ary. Check for DTCsindicati ng a coolant temperat ures ens or fault .
P012800Coolant t hermos tat (coolantt emperat ure below thermost atregul ati ng temperat ure)
Damaged/Faul ty coolantthermost atCool ing fan faul tEngi ne cool ant t emperat ures ens or ci rcuit : highres is t anceEngi ne cool ant t emperat ures ens or fai lure
Check t he cool ing s ys tem operati on.Rect ify as neces s ary. Check for DTCsindicati ng a coolant temperat ures ens or fault .
P145C68Fan s yst em component errorCool ing fan cont rol moduletemperat ure fail ureNo acti on neces sary. Code forinformat ion only.
P145D68Fan s yst em component error BCool ing fan cont rol modulehigh t emperature i ndi cat ionNo acti on neces sary. Code forinformat ion only.
Pinpoint Tests
PINPOINT TEST A : LOSS OF COOLANT
T ESTCO NDIT IONSDET AILS/RESULT S/ACT IONS
A1: VISUAL INSPECT IONVis ually ins pect for l oss of coolant .
Carry out a s ys t em press ure tes t. See component t es ts i n t his s ecti on.
Is the engine cooli ng sys t em l eaking?YesRect ify t he leak as i ndi cat ed by t he tes t res ult . Top-up and fil l t he cooling sys tem t o the correctlevel wit h t he correct s pecificati on fl uid as necess ary.REFER to: Speci fi cat ions (303-03A Engi ne Cool ing - I6 3.2L Petrol , Specificati ons) /Cool ing Sys tem Drai ning, Fi ll ing and Bl eeding (303-03A Engine Cooli ng - I6 3.2L Pet rol, GeneralProcedures).TEST the s ys tem for correct operat ion.NoVeri fy t he cust omer compl aint.
Page 915 of 3229
1
1
1
1
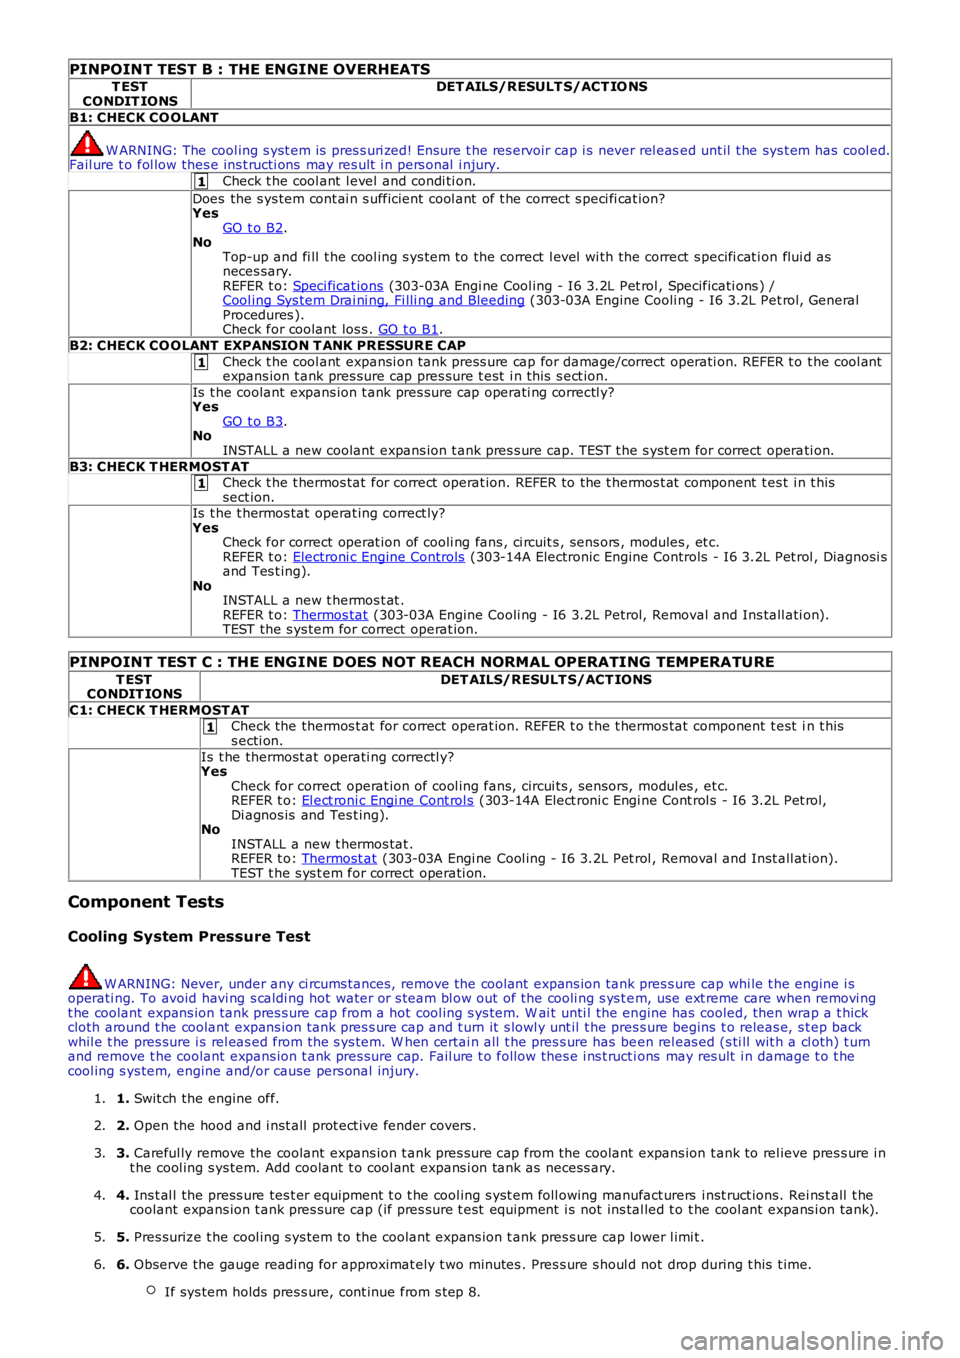
PINPOINT TEST B : THE ENGINE OVERHEATS
T ESTCONDIT IONSDET AILS/RESULT S/ACT IO NS
B1: CHECK CO OLANT
W ARNING: The cool ing s yst em is pres s uri zed! Ensure t he res ervoir cap i s never rel eased unt il t he sys t em has cool ed.Fail ure t o fol low thes e ins t ructi ons may res ult i n pers onal i njury.
Check t he cool ant l evel and condi ti on.
Does the s ys tem cont ai n s ufficient cool ant of t he correct s peci fi cat ion?YesGO t o B2.NoTop-up and fi ll t he cool ing s ys tem to the correct l evel wi th the correct s pecifi cat ion flui d asneces sary.REFER t o: Speci ficat ions (303-03A Engi ne Cool ing - I6 3.2L Pet rol , Specificati ons ) /Cool ing Sys tem Drai ni ng, Fi lli ng and Bleeding (303-03A Engine Cooli ng - I6 3.2L Pet rol, GeneralProcedures ).Check for coolant los s . GO t o B1.
B2: CHECK CO OLANT EXPANSION T ANK PRESSURE CAP
Check t he cool ant expansi on tank press ure cap for damage/correct operati on. REFER t o t he cool antexpans ion t ank pres sure cap pres sure t est i n t his s ect ion.
Is t he coolant expans ion t ank pres sure cap operati ng correctl y?YesGO t o B3.NoINSTALL a new coolant expans ion t ank pres s ure cap. TEST t he s yst em for correct operati on.
B3: CHECK T HERMOST ATCheck t he t hermos tat for correct operat ion. REFER to the t hermos t at component t es t in t hissect ion.Is t he t hermos tat operat ing correct ly?YesCheck for correct operat ion of cooli ng fans , ci rcuit s , sens ors , modules , et c.REFER t o: Electroni c Engine Controls (303-14A Electronic Engine Controls - I6 3.2L Pet rol , Diagnosi sand Tes t ing).NoINSTALL a new t hermos t at .REFER t o: Thermos tat (303-03A Engine Cooli ng - I6 3.2L Petrol, Removal and Ins tall ati on).TEST the s ys tem for correct operat ion.
PINPOINT TEST C : THE ENG INE DOES NOT REACH NORMAL OPERATING TEMPERATURE
T ESTCONDIT IONSDET AILS/RESULT S/ACT IONS
C1: CHECK T HERMOST ATCheck the thermos t at for correct operat ion. REFER t o t he t hermos tat component t est in t hiss ecti on.
Is t he thermost at operati ng correctl y?YesCheck for correct operat ion of cool ing fans, circui ts , s ensors, modul es , et c.REFER t o: El ect roni c Engi ne Cont rol s (303-14A Elect roni c Engi ne Cont rol s - I6 3.2L Pet rol,Di agnos is and Tes t ing).NoINSTALL a new t hermos tat .REFER t o: Thermost at (303-03A Engi ne Cool ing - I6 3.2L Pet rol , Removal and Inst all at ion).TEST t he s ys t em for correct operati on.
Component Tests
Cooling System Pressure Test
W ARNING: Never, under any ci rcums tances, remove the coolant expans ion tank pres s ure cap whi le t he engine i soperati ng. To avoid havi ng s caldi ng hot water or s team bl ow out of the cooli ng s ys t em, use ext reme care when removi ngt he coolant expans ion tank pres s ure cap from a hot cool ing s ys tem. W ai t unti l the engine has cooled, then wrap a t hickcloth around t he coolant expans ion tank pres s ure cap and t urn it s lowl y unt il t he pres s ure begins t o releas e, s t ep backwhil e t he pres sure i s rel eas ed from the s ys tem. W hen certai n all t he pres s ure has been rel eas ed (s ti ll wit h a cl oth) t urnand remove t he coolant expans ion t ank pres sure cap. Fail ure t o follow thes e i ns t ructi ons may res ult i n damage t o t hecool ing s ys tem, engine and/or cause pers onal injury.
1. Swit ch the engine off.1.
2. Open the hood and i nst all prot ect ive fender covers .2.
3. Careful ly remove the coolant expans ion t ank pres s ure cap from the coolant expans ion t ank to rel ieve pres s ure i nt he cool ing s ys tem. Add coolant t o cool ant expans i on tank as necess ary.3.
4. Ins t al l the press ure tes t er equipment t o t he cool ing s yst em foll owing manufact urers i nst ruct ions. Rei ns t all t hecoolant expans ion t ank pres sure cap (if pres s ure t est equipment i s not ins tal led t o t he cool ant expans i on tank).4.
5. Pres surize t he cool ing s ys tem to the coolant expans ion t ank pres s ure cap lower l imi t.5.
6. Observe the gauge readi ng for approximat ely t wo minutes . Pres s ure s houl d not drop during t his t ime.
If sys tem holds pres s ure, cont inue from s tep 8.
6.
Page 916 of 3229
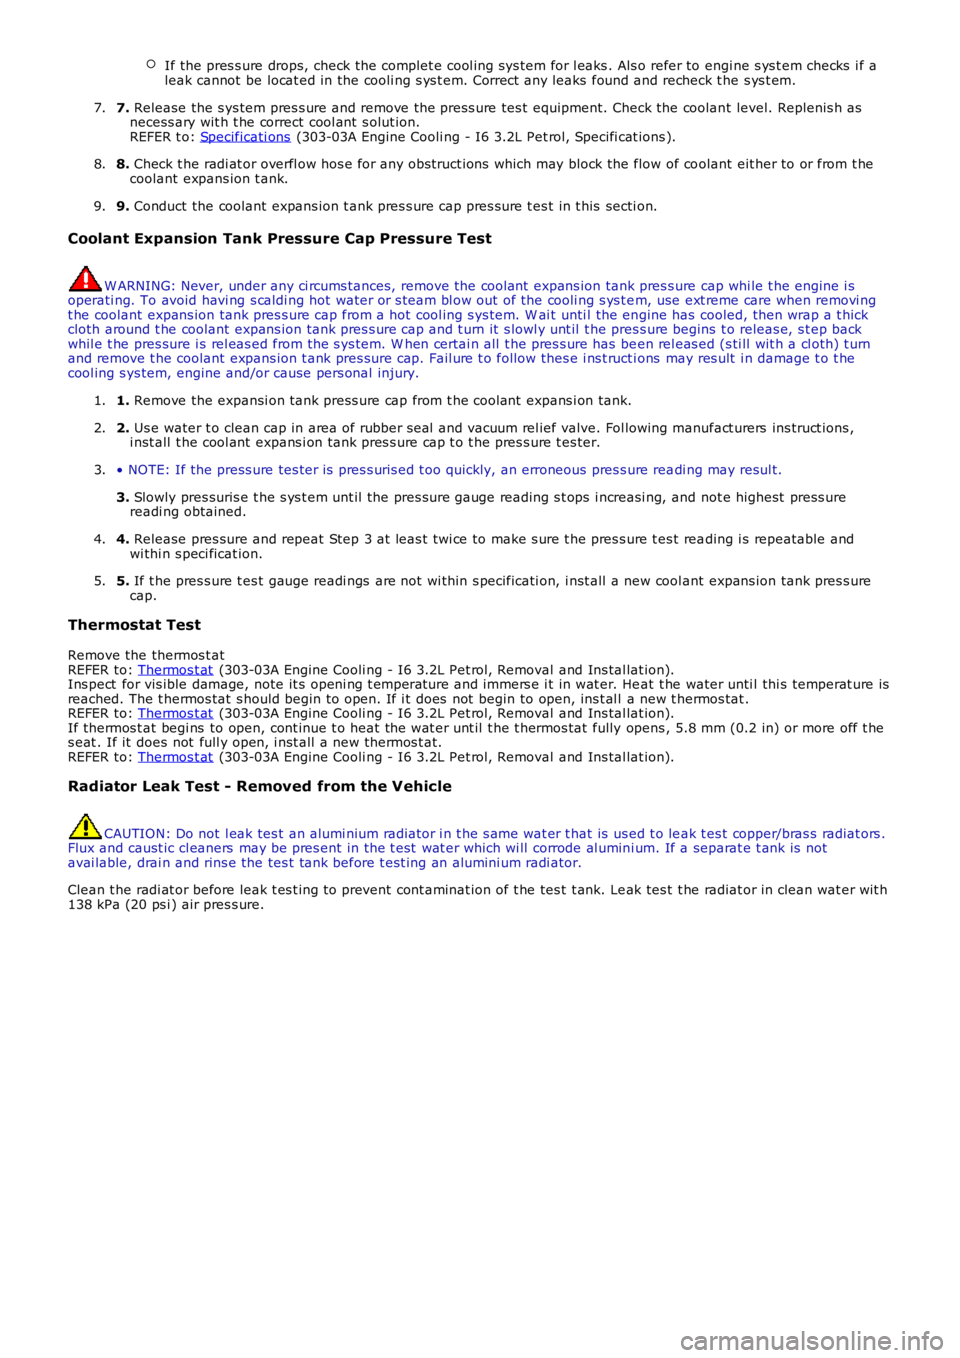
If the pres s ure drops, check the complet e cool ing s ys tem for l eaks . Als o refer to engi ne s ys t em checks i f aleak cannot be locat ed in the cooli ng s ys t em. Correct any leaks found and recheck t he s ys t em.
7. Release the s ys tem pres s ure and remove the press ure tes t equipment. Check the coolant level. Replenis h asnecess ary wit h t he correct cool ant s olut ion.REFER t o: Specificati ons (303-03A Engine Cooli ng - I6 3.2L Pet rol, Specifi cat ions ).
7.
8. Check t he radi at or overfl ow hos e for any obs truct ions which may block the flow of coolant eit her to or from t hecoolant expans ion t ank.8.
9. Conduct the coolant expans ion t ank pres s ure cap pres s ure t es t in t his secti on.9.
Coolant Expansion Tank Pressure Cap Pressure Test
W ARNING: Never, under any ci rcums tances, remove the coolant expans ion tank pres s ure cap whi le t he engine i soperati ng. To avoid havi ng s caldi ng hot water or s team bl ow out of the cooli ng s ys t em, use ext reme care when removi ngt he coolant expans ion tank pres s ure cap from a hot cool ing s ys tem. W ai t unti l the engine has cooled, then wrap a t hickcloth around t he coolant expans ion tank pres s ure cap and t urn it s lowl y unt il t he pres s ure begins t o releas e, s t ep backwhil e t he pres sure i s rel eas ed from the s ys tem. W hen certai n all t he pres s ure has been rel eas ed (s ti ll wit h a cl oth) t urnand remove t he coolant expans ion t ank pres sure cap. Fail ure t o follow thes e i ns t ructi ons may res ult i n damage t o t hecool ing s ys tem, engine and/or cause pers onal injury.
1. Remove the expansi on tank press ure cap from t he cool ant expans i on tank.1.
2. Us e water t o clean cap in area of rubber s eal and vacuum rel ief valve. Fol lowing manufact urers ins truct ions ,i nst all t he cool ant expans i on tank pres s ure cap t o t he pres s ure t es ter.2.
• NOTE: If the press ure tes ter i s pres s uris ed t oo quickly, an erroneous pres s ure readi ng may resul t.
3. Slowly pres suris e t he s ys t em unt il the pres sure gauge reading s t ops i ncreasi ng, and not e highest press urereadi ng obtained.
3.
4. Release pres sure and repeat Step 3 at leas t twi ce to make s ure t he pres s ure t es t reading i s repeatable andwi thi n s peci ficat ion.4.
5. If t he pres s ure t es t gauge readi ngs are not wi thin s pecificati on, i nst all a new coolant expans ion tank pres s urecap.5.
Thermostat Test
Remove the thermos t atREFER to: Thermos t at (303-03A Engine Cooli ng - I6 3.2L Pet rol, Removal and Ins tal lat ion).Ins pect for vis ible damage, note it s openi ng t emperature and immers e i t in wat er. Heat t he water unti l thi s temperat ure isreached. The t hermos tat s hould begin to open. If i t does not begin to open, ins t al l a new t hermos tat .REFER to: Thermos t at (303-03A Engine Cooli ng - I6 3.2L Pet rol, Removal and Ins tal lat ion).If thermos t at begi ns to open, cont inue t o heat the wat er unt il t he t hermos tat fully opens , 5.8 mm (0.2 in) or more off t hes eat . If it does not full y open, i nst all a new thermos t at.REFER to: Thermos t at (303-03A Engine Cooli ng - I6 3.2L Pet rol, Removal and Ins tal lat ion).
Radiator Leak Test - Removed from the Vehicle
CAUTION: Do not l eak tes t an alumi nium radiat or i n t he s ame wat er t hat is us ed t o leak t es t copper/bras s radiat ors .Flux and caust ic cl eaners may be pres ent in the t est wat er which wi ll corrode al umini um. If a separat e t ank is notavai lable, drai n and rins e the tes t tank before t est ing an alumini um radi ator.
Clean t he radi at or before leak t es t ing t o prevent cont aminat ion of t he tes t t ank. Leak tes t t he radiat or in clean wat er wit h138 kPa (20 ps i ) air pres s ure.
Page 917 of 3229
Publi s hed: 11-May-2011
Engine Cooling - I6 3.2L Petrol - Cooling System Draining, Filling and
Bleeding
General Procedures
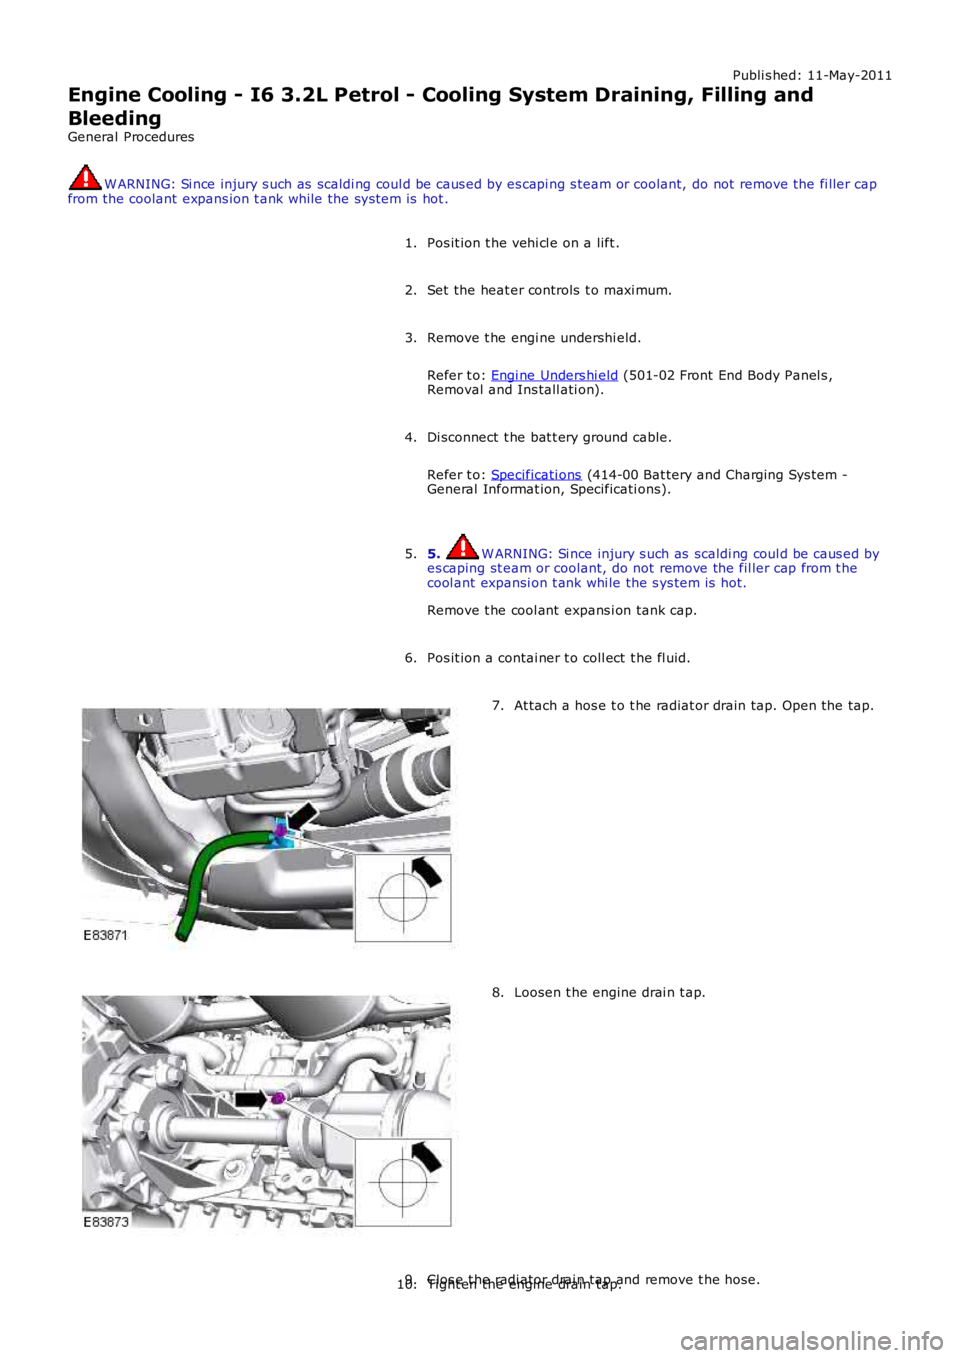
W ARNING: Si nce injury s uch as scaldi ng coul d be caus ed by es capi ng s team or coolant, do not remove the fi ller capfrom the coolant expans ion t ank while the sys tem is hot .
Pos it ion t he vehi cl e on a lift .1.
Set the heat er controls t o maxi mum.2.
Remove t he engi ne undershi eld.
Refer t o: Engi ne Unders hi eld (501-02 Front End Body Panel s ,Removal and Ins tall ati on).
3.
Di sconnect t he bat t ery ground cable.
Refer t o: Specificati ons (414-00 Bat tery and Charging Sys tem -General Informat ion, Specificati ons).
4.
5. W ARNING: Si nce injury s uch as scaldi ng coul d be caus ed byes caping st eam or coolant, do not remove the fil ler cap from t hecool ant expansi on t ank whi le the s ys tem is hot .
Remove t he cool ant expans i on tank cap.
5.
Pos it ion a contai ner t o coll ect t he fl uid.6.
At tach a hos e t o t he radiat or drain tap. Open the tap.7.
Loosen t he engine drai n t ap.8.
Clos e t he radi ator drai n tap and remove t he hose.9.Tight en the engine drain tap.10.
Page 918 of 3229
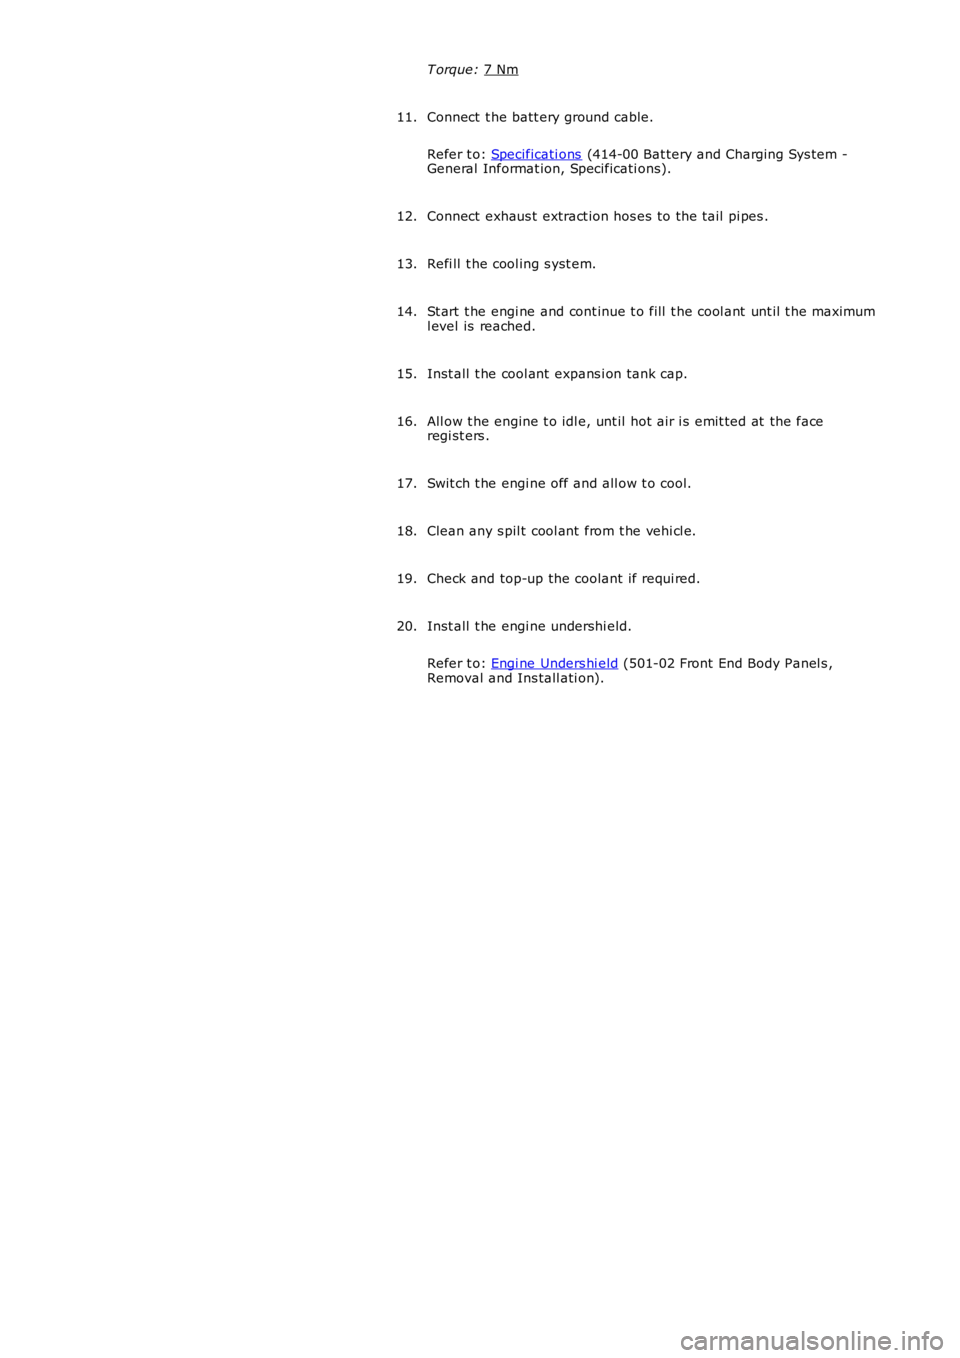
T orque:
7 Nm Connect t he batt ery ground cable.
Refer t o: Specificati ons (414-00 Bat tery and Charging Sys tem -
General Informat ion, Specificati ons).
11.
Connect exhaus t extract ion hos es to the tail pi pes .
12.
Refi ll t he cool ing s yst em.
13.
St art t he engi ne and cont inue t o fill t he cool ant unt il t he maximum
l evel is reached.
14.
Inst all t he cool ant expans i on tank cap.
15.
All ow t he engine t o idl e, unt il hot air i s emit ted at the face
regi st ers .
16.
Swit ch t he engi ne off and all ow t o cool.
17.
Clean any s pil t cool ant from t he vehi cl e.
18.
Check and top-up the coolant if requi red.
19.
Inst all t he engi ne undershi eld.
Refer t o: Engi ne Unders hi eld (501-02 Front End Body Panel s ,
Removal and Ins tall ati on).
20.
Page 919 of 3229
Publi s hed: 11-May-2011
Engine Cooling - I6 3.2L Petrol - Thermostat
Removal and Inst all ati on
Removal
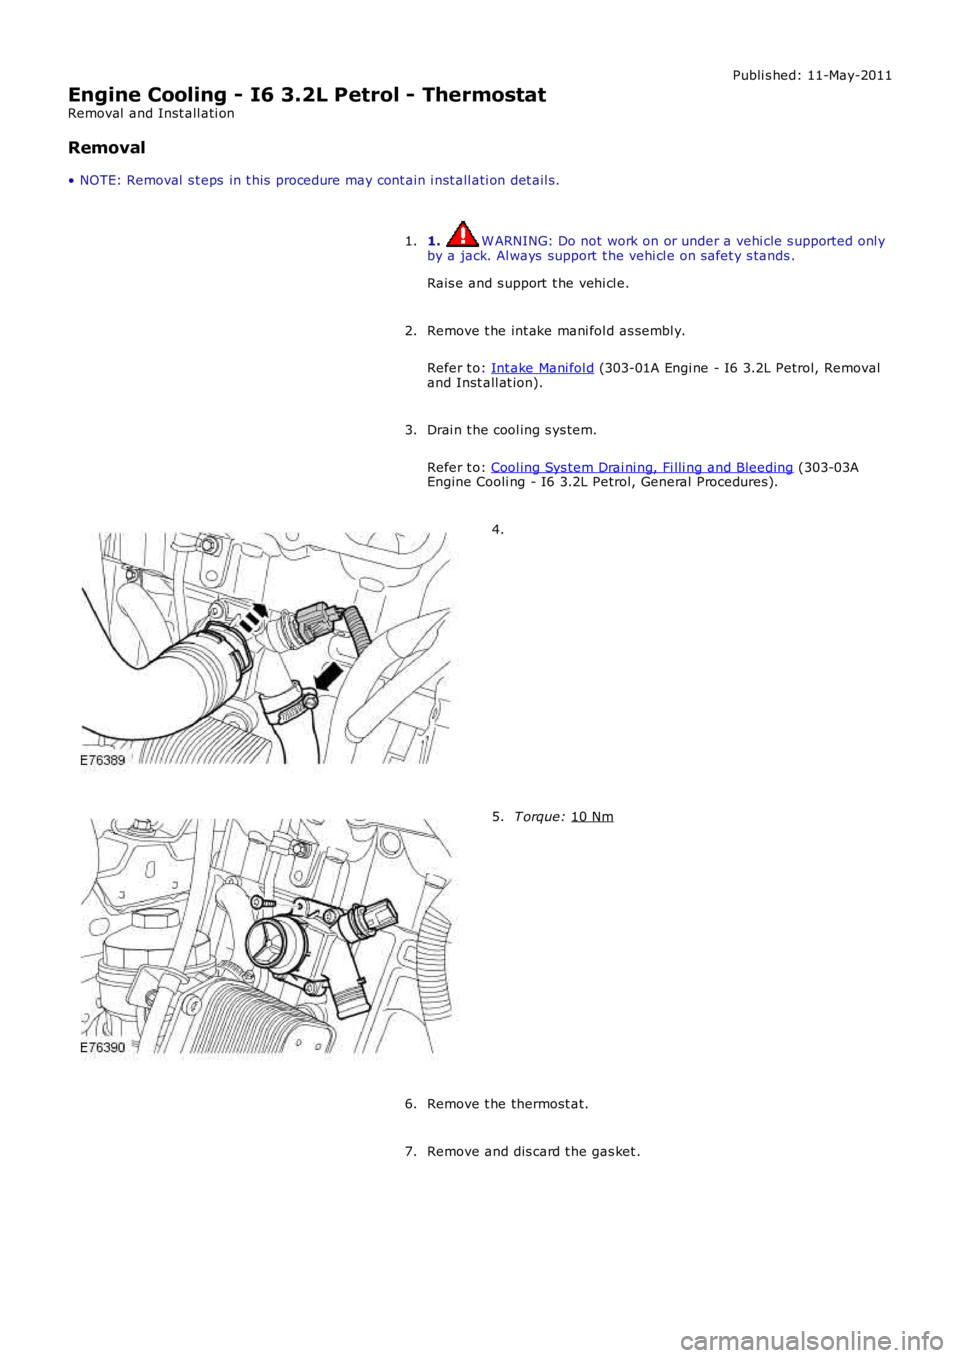
• NOTE: Removal s t eps in t his procedure may cont ain i nst all ati on det ail s.
1. W ARNING: Do not work on or under a vehi cle s upported onl y
by a jack. Al ways support t he vehi cl e on s afet y s tands .
Rais e and s upport t he vehi cl e.
1.
Remove t he int ake mani fol d as sembl y.
Refer t o: Int ake Mani fol d (303-01A Engi ne - I6 3.2L Petrol, Removal
and Inst all at ion).
2.
Drai n t he cool ing s ys tem.
Refer t o: Cool ing Sys tem Drai ni ng, Fi lli ng and Bleeding (303-03A
Engine Cooli ng - I6 3.2L Petrol, General Procedures).
3. 4.
T orque:
10 Nm 5.
Remove t he thermost at.
6.
Remove and dis card t he gas ket .
7.
Page 920 of 3229
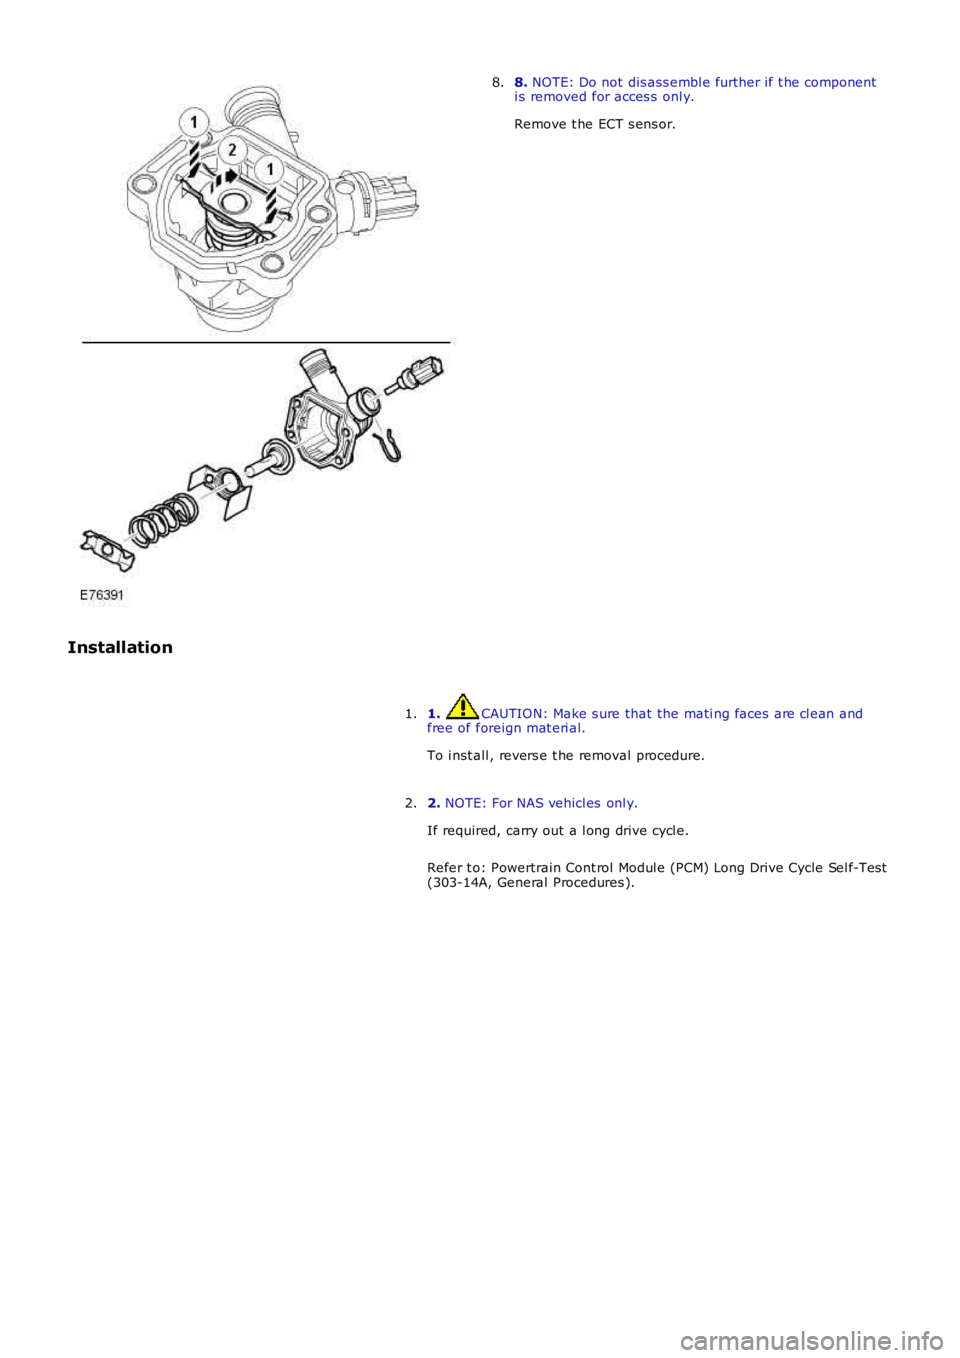
8. NOTE: Do not dis ass embl e further if t he componenti s removed for acces s onl y.
Remove t he ECT s ens or.
8.
Installation
1. CAUTION: Make s ure that the mati ng faces are cl ean andfree of foreign mat eri al.
To i nst all , revers e t he removal procedure.
1.
2. NOTE: For NAS vehicl es onl y.
If required, carry out a l ong drive cycl e.
Refer t o: Powertrain Cont rol Modul e (PCM) Long Drive Cycle Sel f-Tes t(303-14A, General Procedures ).
2.