LEXUS LS430 2003 Factory Repair Manual
Manufacturer: LEXUS, Model Year: 2003,
Model line: LS430,
Model: LEXUS LS430 2003
Pages: 4500, PDF Size: 87.45 MB
LEXUS LS430 2003 Factory Repair Manual
LS430 2003
LEXUS
LEXUS
https://www.carmanualsonline.info/img/36/57050/w960_57050-0.png
LEXUS LS430 2003 Factory Repair Manual
Trending: belt, wiring diagram, fuel filter, automatic transmission fluid, Skid, lane assist, sensor
Page 181 of 4500
Fig. 129: Identifying Skid Control ECU Terminals
Courtesy of TOYOTA MOTOR SALES, U.S.A., INC.
OK: Go to next step
6.INSPECT COMBINATION METER ASSEMBLY (SEE PROBLEM SYMPTOMS TABLE
)
NG: REPAIR OR REPLACE COMBINATION METER ASSEMBLY
OK: REPLACE ABS & TRACTION ACTUATOR ASSY (SEE REPLACEMENT
)
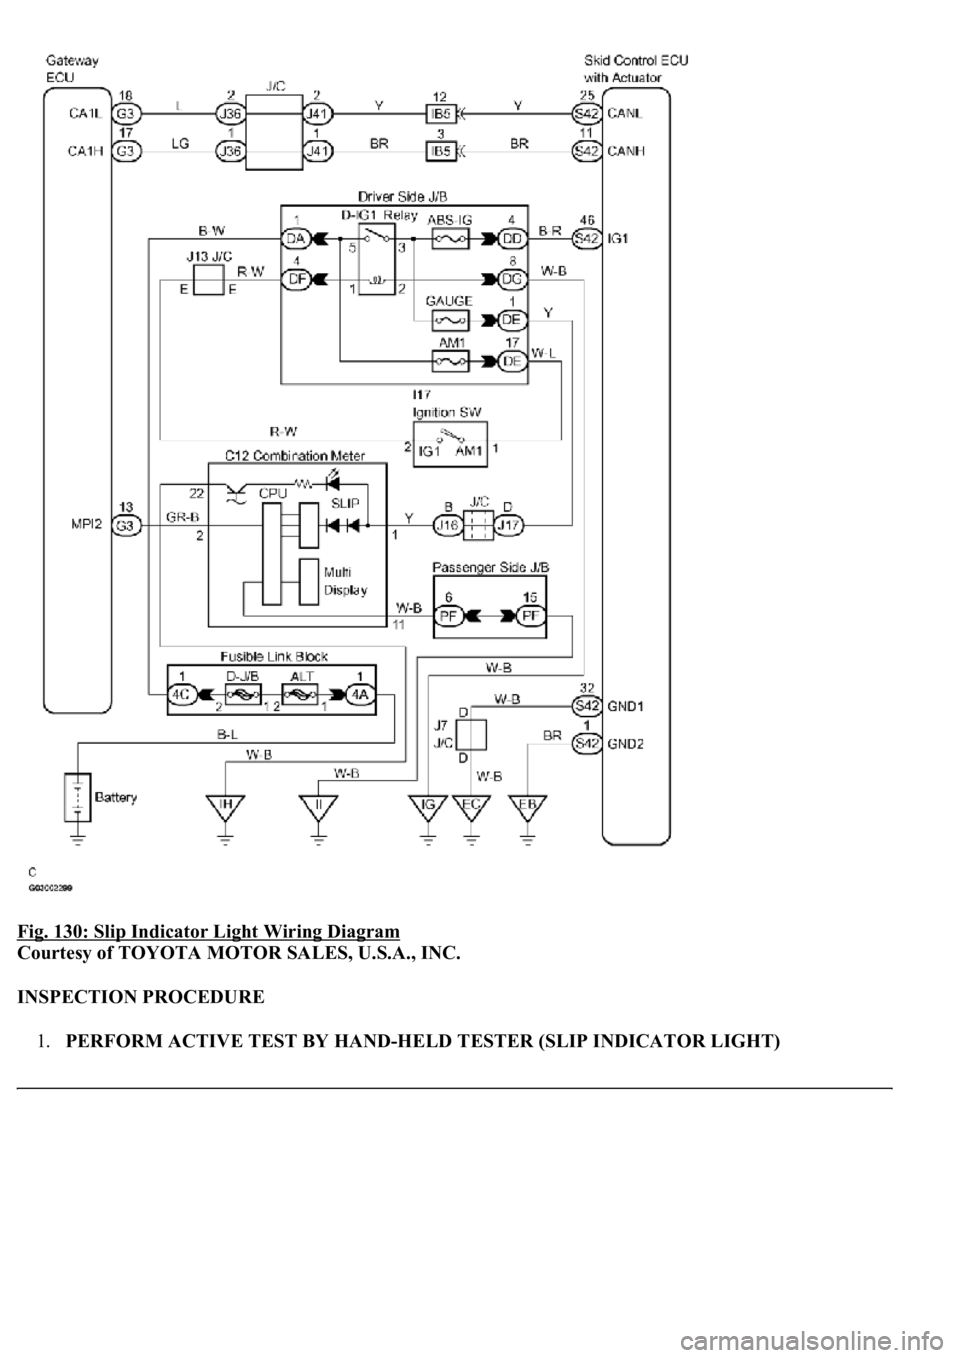
CIRCUIT DESCRIPTION
The SLIP indicator blinks during TRAC & VSC operation.
The skid control ECU is connected to the combination meter via CAN and MPX communications.
WIRING DIAGRAM
Page 182 of 4500
Fig. 130: Slip Indicator Light Wiring Diagram
Courtesy of TOYOTA MOTOR SALES, U.S.A., INC.
INSPECTION PROCEDURE
1.PERFORM ACTIVE TEST BY HAND-HELD TESTER (SLIP INDICATOR LIGHT)
Page 183 of 4500

a. Connect the hand-held tester to the DLC3.
b. Start the engine.
c. Select the item "SLIP INDI LIGHT" in the ACTIVE TEST and operate the SLIP indicator light on
the hand-held tester.
VEHICLE CONDITION / TEST DETAILS
d. Check that "ON" and "OFF" of the SLIP indicator light are indicated on the combination meter
when using the hand-held tester.
OK: Go to next step
Turn the SLIP indicator light on or off in accordance with the hand-held tester.
NG: Go to step 2
OK: REPLACE ABS & TRACTION ACTUATOR ASSY (SEE REPLACEMENT
)
2.INSPECT MULTIPLEX COMMUNICATION SYSTEM
a. Is the DTC output for Multiplex communication system?
Result:
DTC OUTPUT DESCRIPTION
B: REPAIR MULTIPLEX COMMUNICATION SYSTEM (SEE DIAGNOSTIC TROUBLE
CODE CHART )
A: Go to next step
3.INSPECT CAN COMMUNICATION SYSTEM
a. Is the DTC output for CAN communication system?
Result:
DTC OUTPUT DESCRIPTION
ItemVehicle Condition / Test DetailsDiagnostic Note
SLIP INDI LIGHTTurns SLIP indicator light ON / OFFObserve combination meter
DTC is not outputA
DTC is outputB
DTC is not outputA
Page 184 of 4500
B: REPAIR CAN COMMUNICATION SYSTEM (SEE PRECAUTION )
A: Go to next step
4.INSPECT COMBINATION METER ASSEMBLY (SLIP INDICATOR LIGHT) (SEE PROBLEM
SYMPTOMS TABLE )
NG: REPAIR OR REPLACE COMBINATION METER ASSEMBLY
OK: REPLACE ABS & TRACTION ACTUATOR ASSY (SEE REPLACEMENT
)
CIRCUIT DESCRIPTION
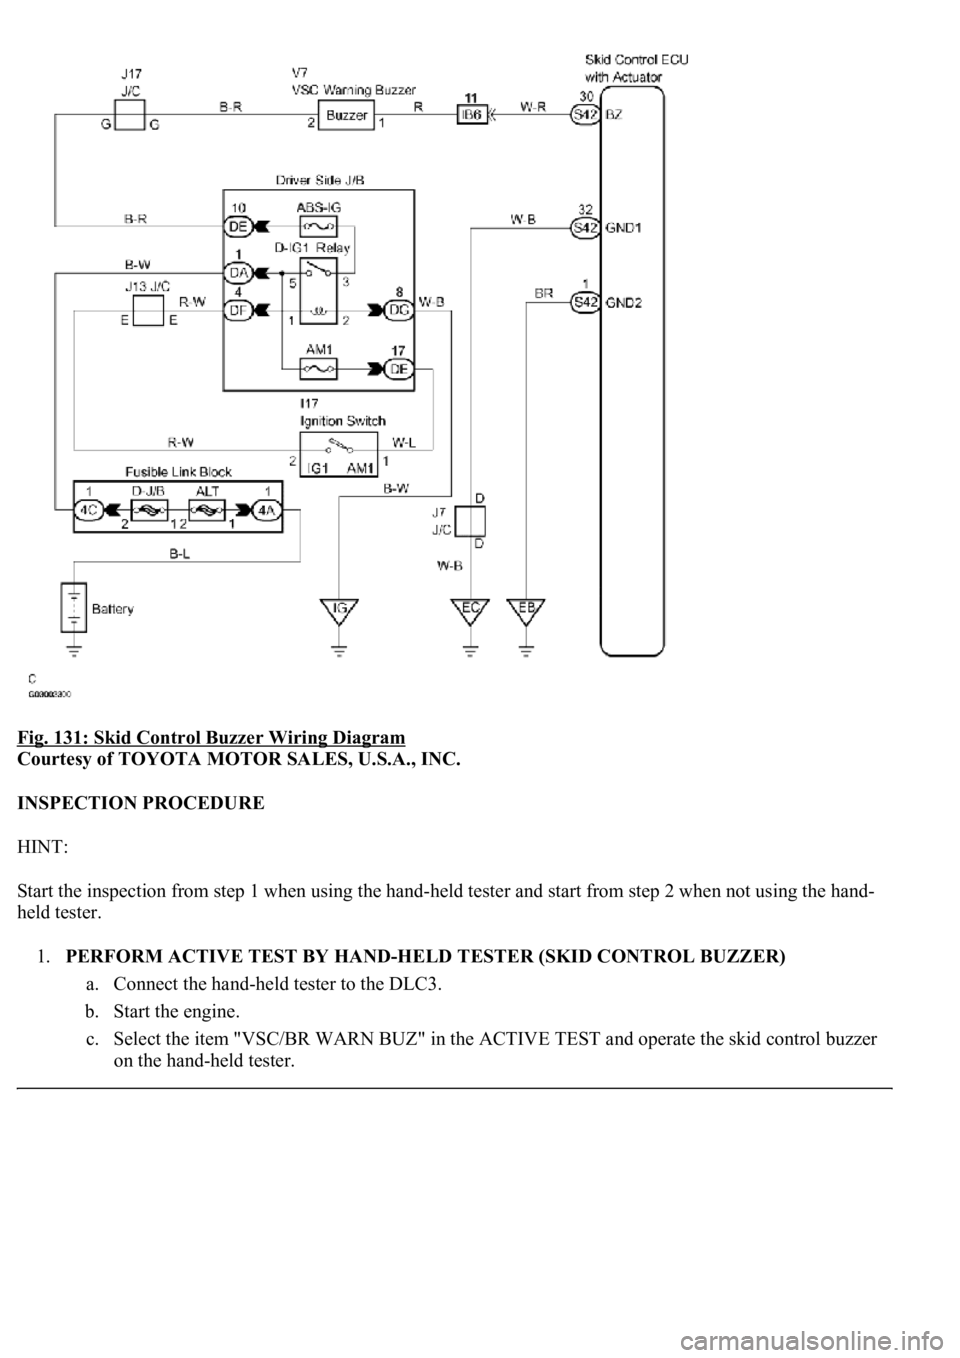
The skid control buzzer sounds and VSC warning (Multi-information display) comes ON during VSC
operation.
WIRING DIAGRAM
DTC is outputB
Page 185 of 4500
Fig. 131: Skid Control Buzzer Wiring Diagram
Courtesy of TOYOTA MOTOR SALES, U.S.A., INC.
INSPECTION PROCEDURE
HINT:
Start the inspection from step 1 when using the hand-held tester and start from step 2 when not using the hand-
held tester.
1.PERFORM ACTIVE TEST BY HAND-HELD TESTER (SKID CONTROL BUZZER)
a. Connect the hand-held tester to the DLC3.
b. Start the engine.
c. Select the item "VSC/BR WARN BUZ" in the ACTIVE TEST and operate the skid control buzzer
on the han
d-held tester.
Page 186 of 4500
VEHICLE CONDITION / TEST DETAILS
d. Check that skid control buzzer sounds by operating with the hand-held tester.
OK: Go to next step
The skid control buzzer sounds in accordance with operation of the hand-held tester.
NG: Go to step 2
OK: REPLACE ABS & TRACTION ACTUATOR ASSY (SEE REPLACEMENT
)
2.INSPECT SKID CONTROL BUZZER
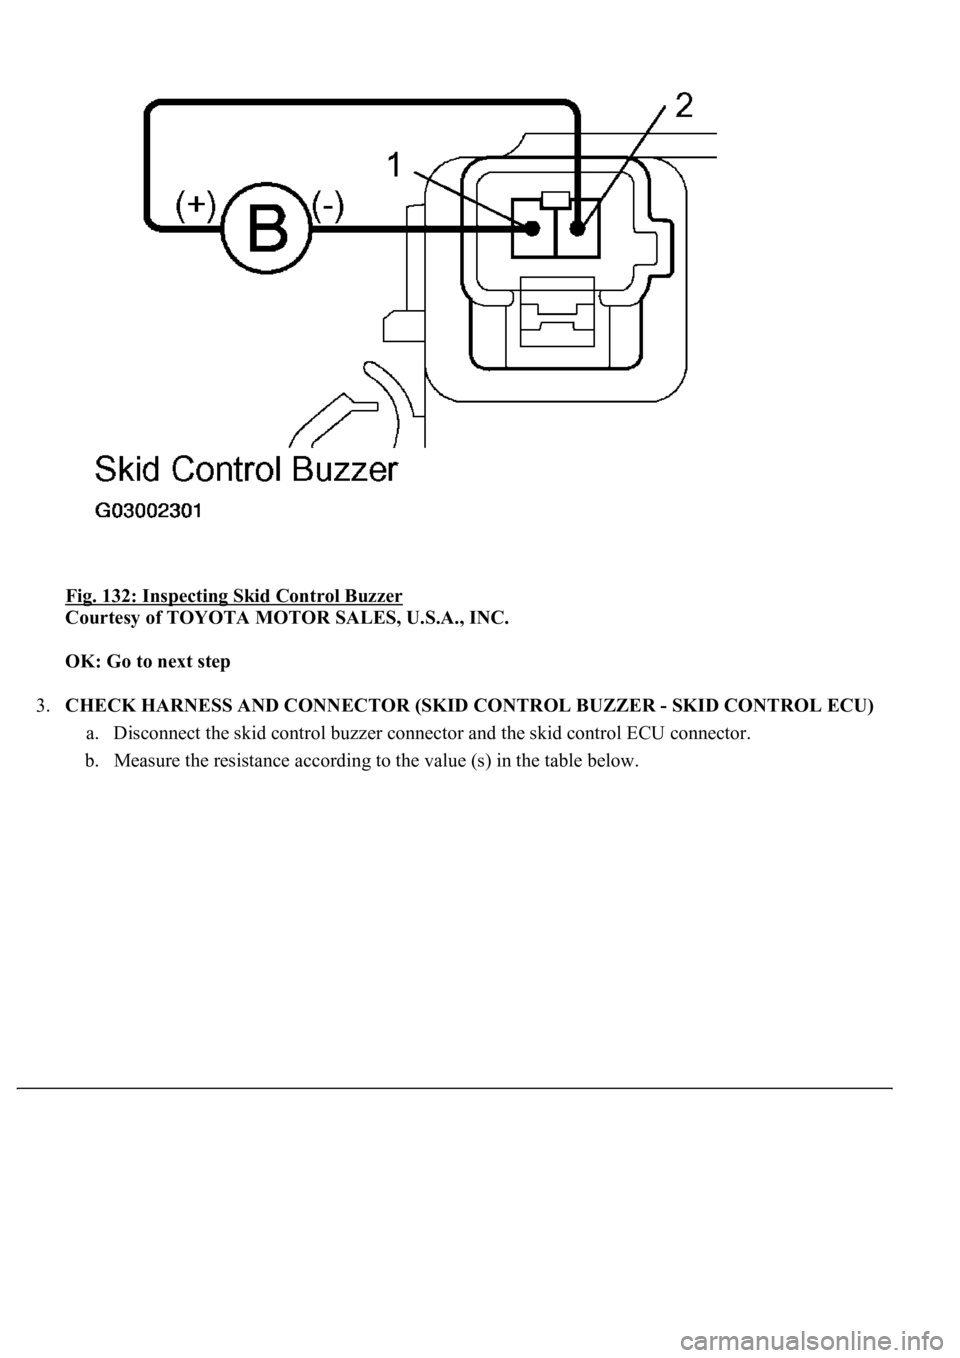
a. Disconnect the skid control buzzer connector.
b. Apply a battery positive voltage to terminals 1 and 2 of the skid control buzzer connector, and
check that the buzzer sounds.
OK: Go to next step
The skid control buzzer sound is heard.
NG: REPLACE SKID CONTROL BUZZER
ItemVehicle Condition / Test DetailsDiagnostic Note
VSC / BR WARN BUZTurns VSC / BRAKE warning buzzer ON / OFFBuzzer can be heard
Page 187 of 4500
Fig. 132: Inspecting Skid Control Buzzer
Courtesy of TOYOTA MOTOR SALES, U.S.A., INC.
OK: Go to next step
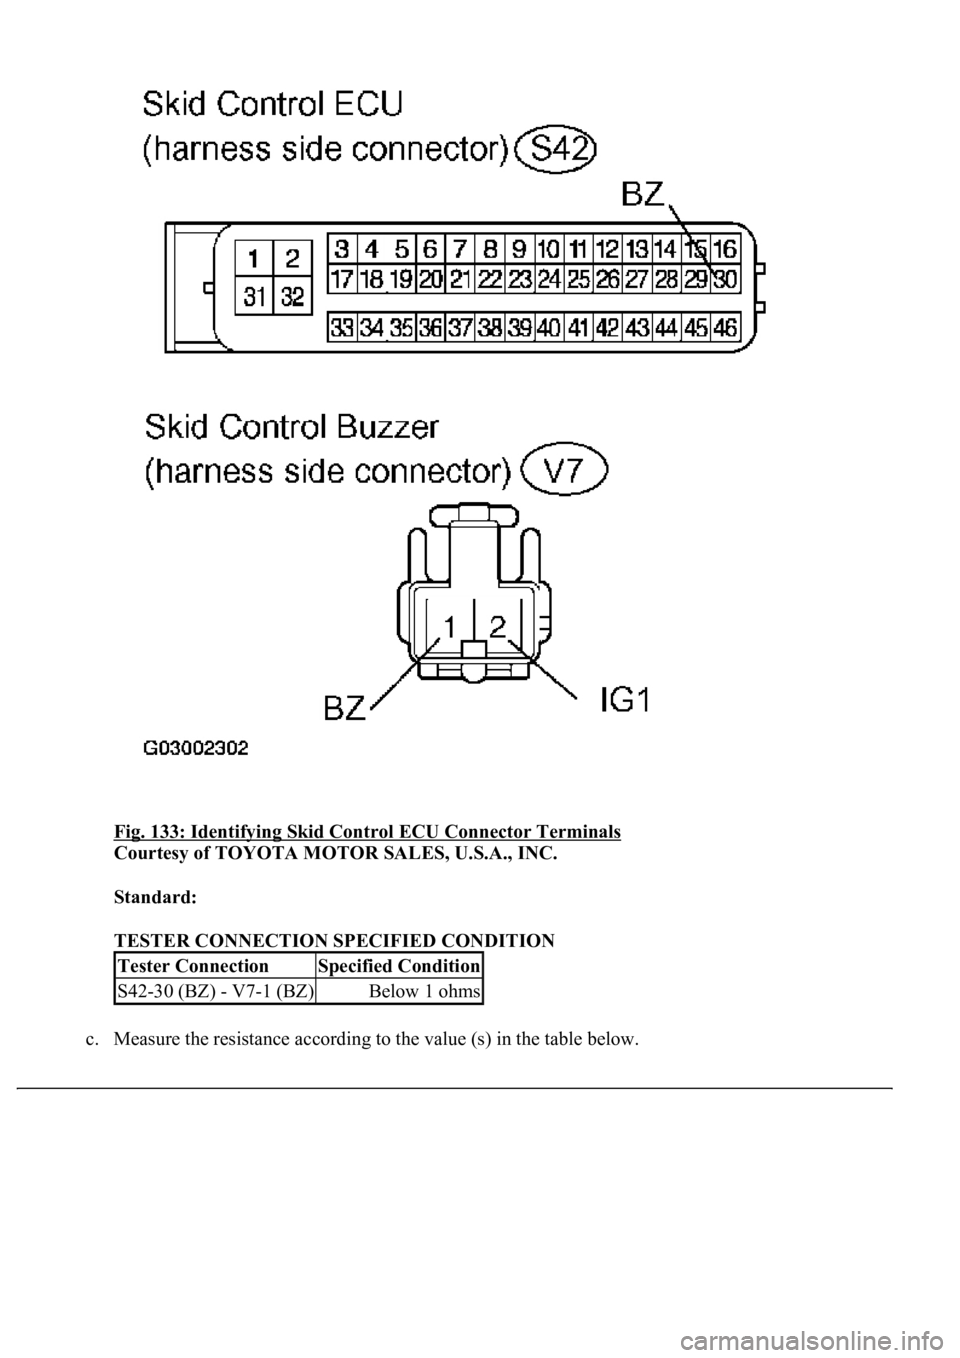
3.CHECK HARNESS AND CONNECTOR (SKID CONTROL BUZZER - SKID CONTROL ECU)
a. Disconnect the skid control buzzer connector and the skid control ECU connector.
b. Measure the resistance according to the value (s) in the table below.
Page 188 of 4500
Fig. 133: Identifying Skid Control ECU Connector Terminals
Courtesy of TOYOTA MOTOR SALES, U.S.A., INC.
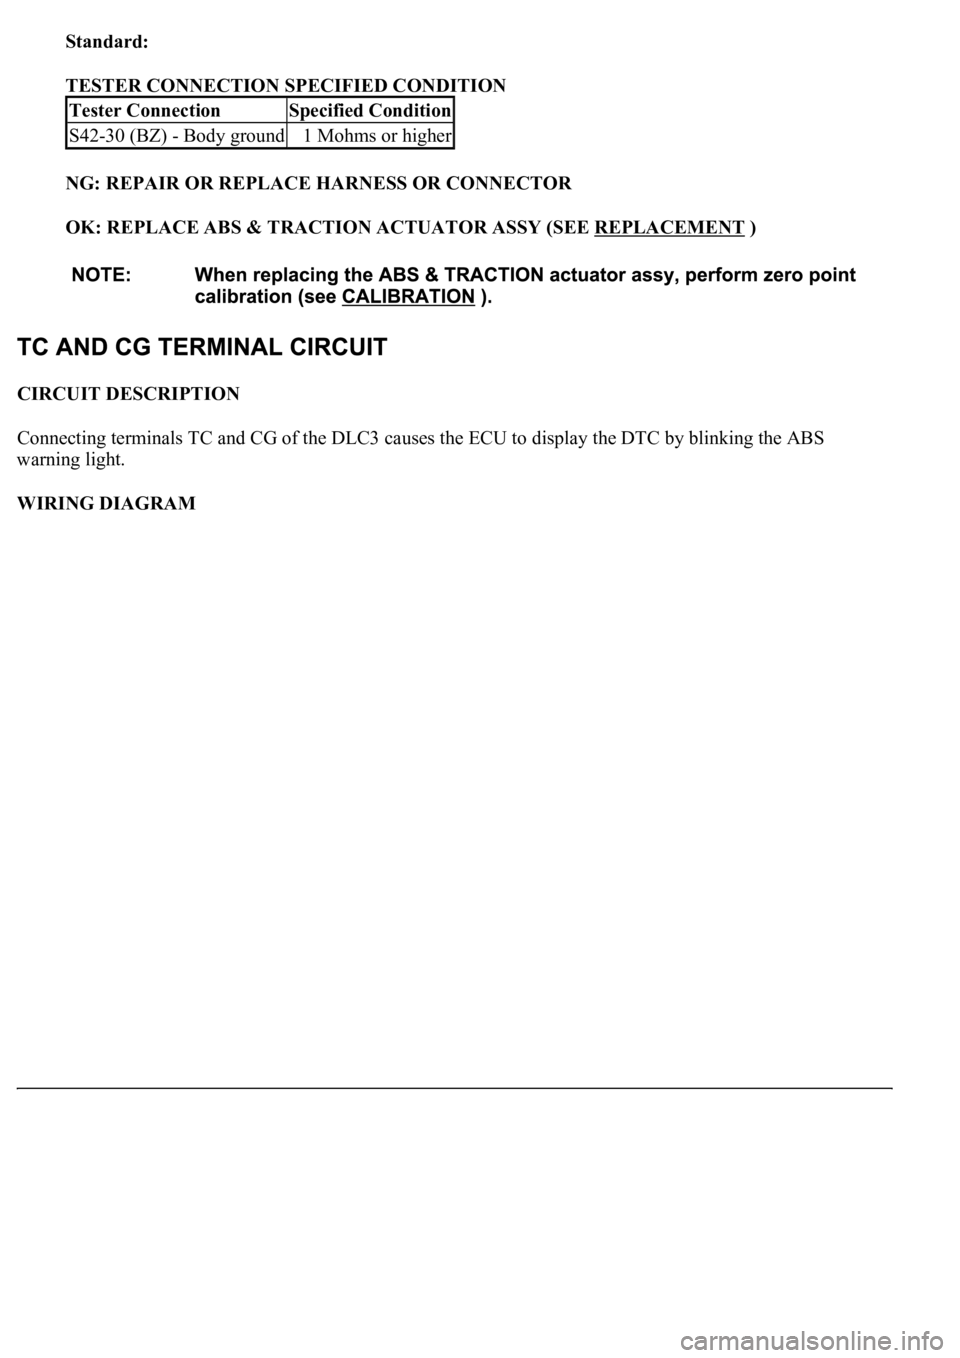
Standard:
TESTER CONNECTION SPECIFIED CONDITION
c. Measure the resistance accordin
g to the value (s) in the table below.
Tester ConnectionSpecified Condition
S42-30 (BZ) - V7-1 (BZ)Below 1 ohms
Page 189 of 4500
Standard:
TESTER CONNECTION SPECIFIED CONDITION
NG: REPAIR OR REPLACE HARNESS OR CONNECTOR
OK: REPLACE ABS & TRACTION ACTUATOR ASSY (SEE REPLACEMENT
)
CIRCUIT DESCRIPTION
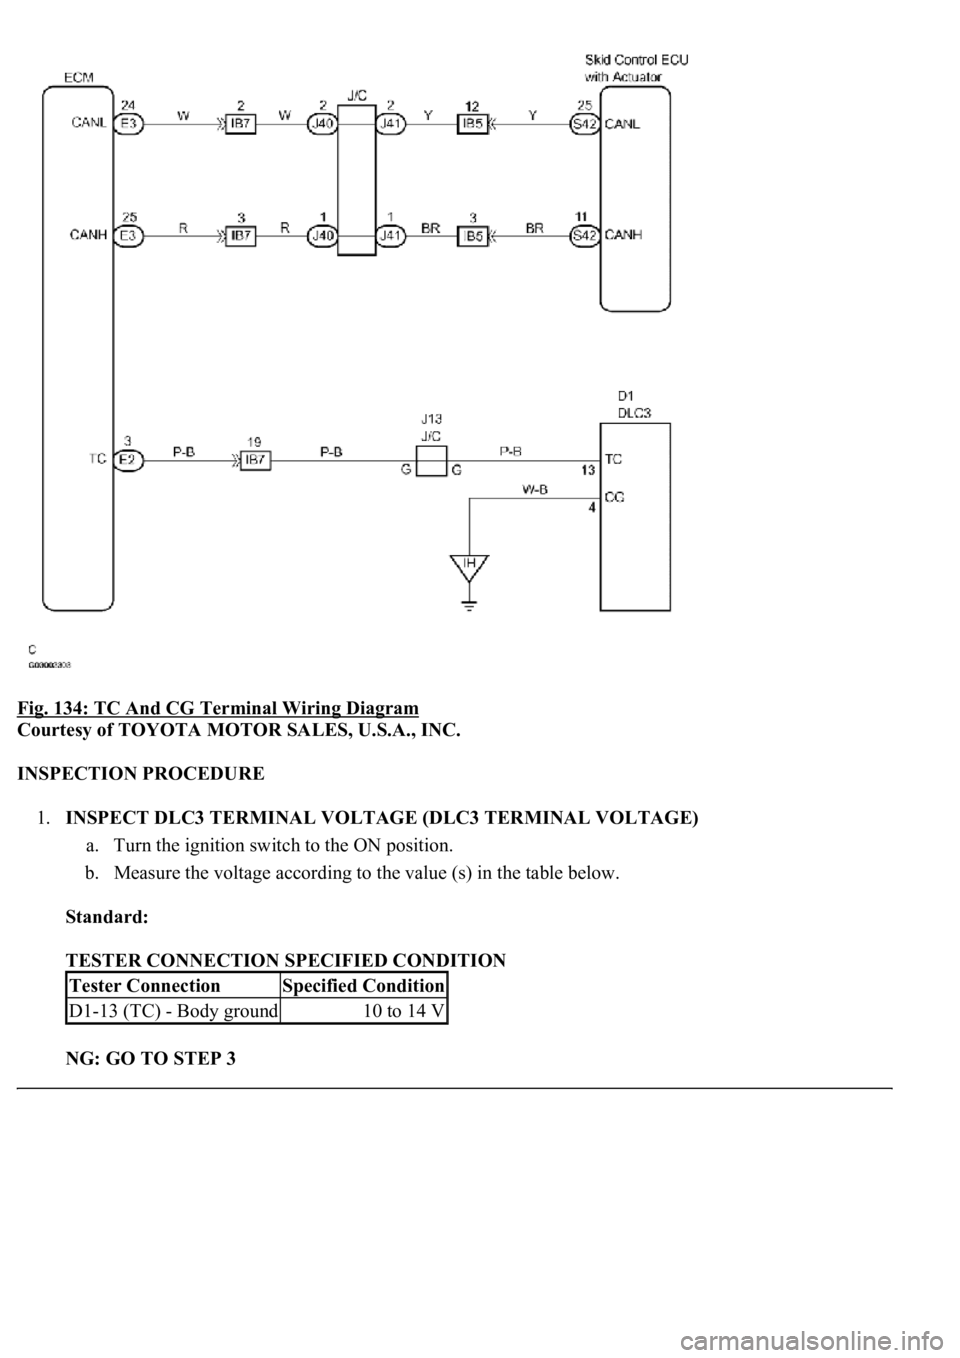
Connecting terminals TC and CG of the DLC3 causes the ECU to display the DTC by blinking the ABS
warning light.
WIRING DIAGRAM
Tester ConnectionSpecified Condition
S42-30 (BZ) - Body ground1 Mohms or higher
Page 190 of 4500
Fig. 134: TC And CG Terminal Wiring Diagram
Courtesy of TOYOTA MOTOR SALES, U.S.A., INC.
INSPECTION PROCEDURE
1.INSPECT DLC3 TERMINAL VOLTAGE (DLC3 TERMINAL VOLTAGE)
a. Turn the ignition switch to the ON position.
b. Measure the voltage according to the value (s) in the table below.
Standard:
TESTER CONNECTION SPECIFIED CONDITION
NG: GO TO STEP 3
Tester ConnectionSpecified Condition
D1-13 (TC) - Body ground10 to 14 V
Trending: oil capacity, warning light, clutch, wipers, service indicator, fuel filter, brake fluid

