LEXUS LS430 2003 Factory Repair Manual
Manufacturer: LEXUS, Model Year: 2003,
Model line: LS430,
Model: LEXUS LS430 2003
Pages: 4500, PDF Size: 87.45 MB
LEXUS LS430 2003 Factory Repair Manual
LS430 2003
LEXUS
LEXUS
https://www.carmanualsonline.info/img/36/57050/w960_57050-0.png
LEXUS LS430 2003 Factory Repair Manual
Trending: wheel, steering interlock cable, Skid, keys, window, Sp2, oil filter
Page 3021 of 4500
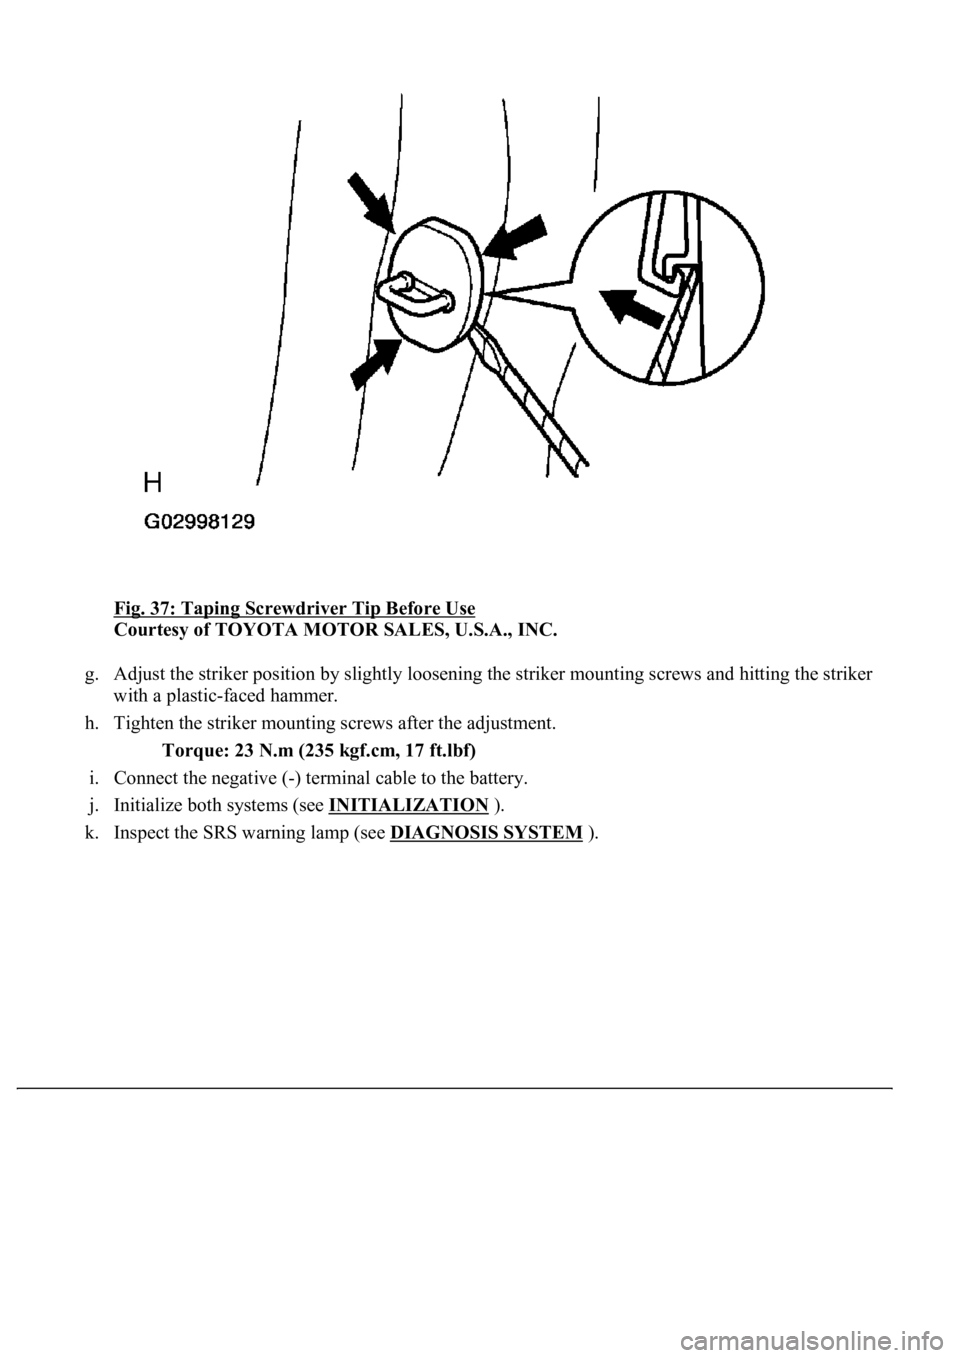
Fig. 37: Taping Screwdriver Tip Before Use
Courtesy of TOYOTA MOTOR SALES, U.S.A., INC.
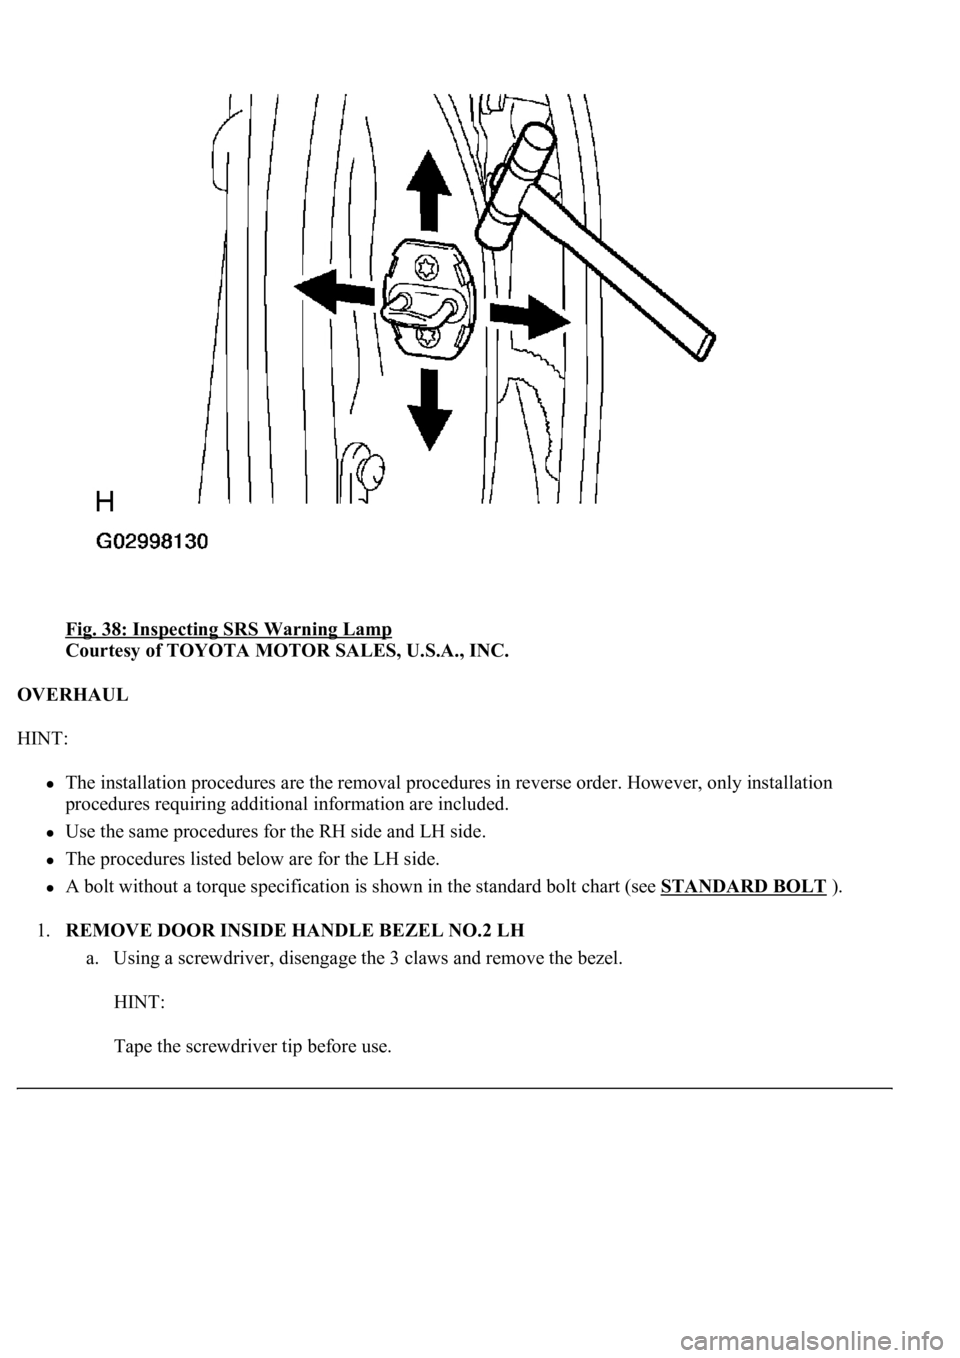
g. Adjust the striker position by slightly loosening the striker mounting screws and hitting the striker
with a plastic-faced hammer.
h. Tighten the striker mounting screws after the adjustment.
Torque: 23 N.m (235 kgf.cm, 17 ft.lbf)
i. Connect the negative (-) terminal cable to the battery.
j. Initialize both systems (see INITIALIZATION
).
k. Inspect the SRS warning lamp (see DIAGNOSIS SYSTEM
).
Page 3022 of 4500
Fig. 38: Inspecting SRS Warning Lamp
Courtesy of TOYOTA MOTOR SALES, U.S.A., INC.
OVERHAUL
HINT:
The installation procedures are the removal procedures in reverse order. However, only installation
procedures requiring additional information are included.
Use the same procedures for the RH side and LH side.
The procedures listed below are for the LH side.
A bolt without a torque specification is shown in the standard bolt chart (see STANDARD BOLT ).
1.REMOVE DOOR INSIDE HANDLE BEZEL NO.2 LH
a. Using a screwdriver, disengage the 3 claws and remove the bezel.
HINT:
Tape the screwdriver tip before use.
Page 3023 of 4500
Fig. 39: Disengaging Claws
Courtesy of TOYOTA MOTOR SALES, U.S.A., INC.
b. Driver's side:
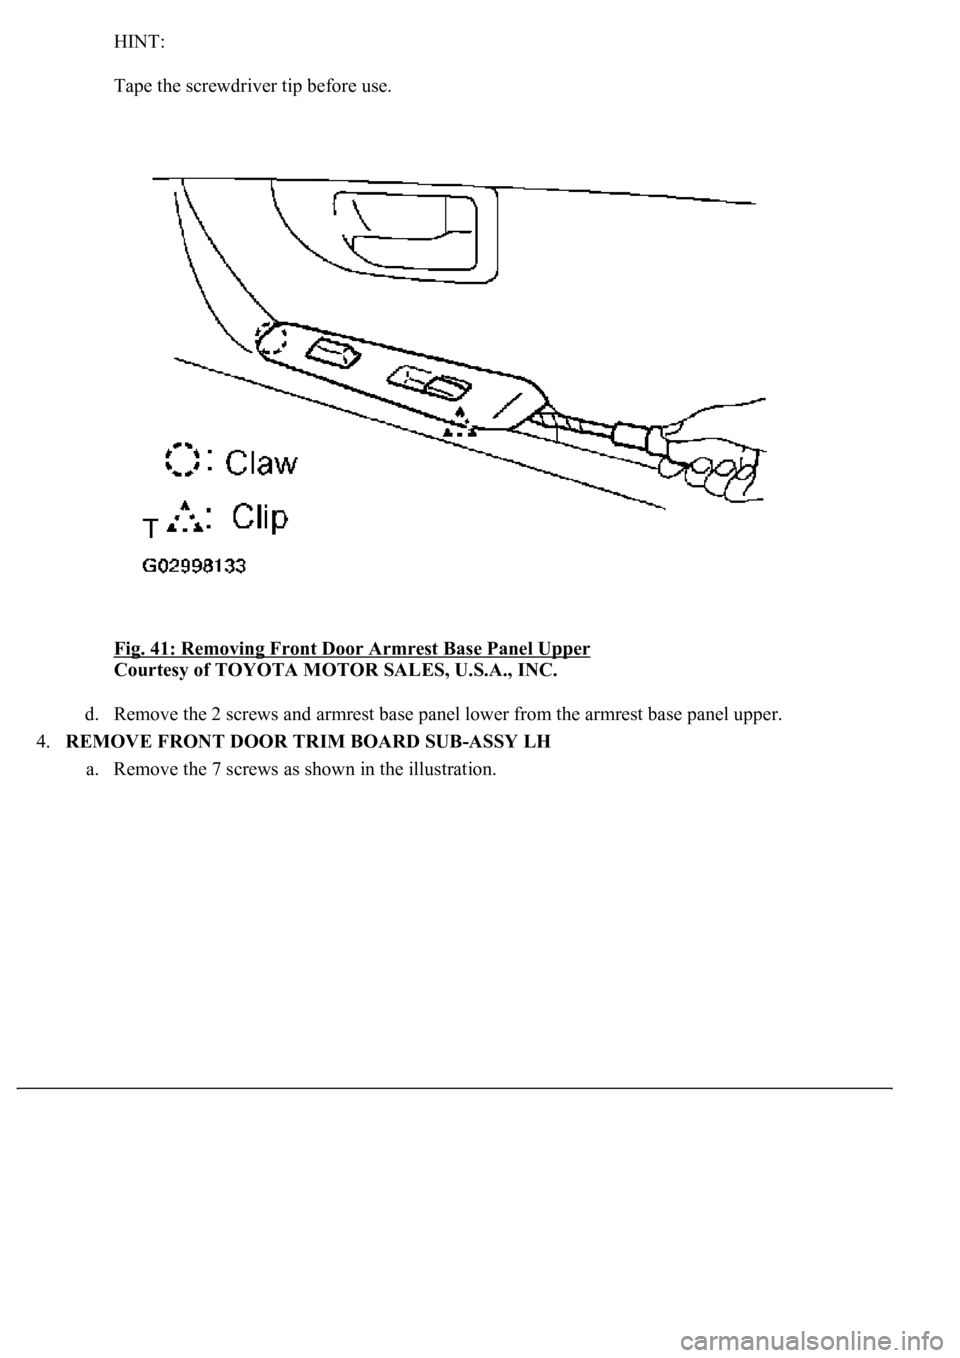
2.REMOVE FRONT DOOR ARMREST BASE PANEL UPPER
a. Using a screwdriver, pry the armrest panel assembly.
HINT:
Tape the screwdriver tip before use.
b. Remove the 3 screws and power window regulator master switch.
c. Remove the 2 screws and armrest base panel lower from the armrest base panel upper.
Page 3024 of 4500
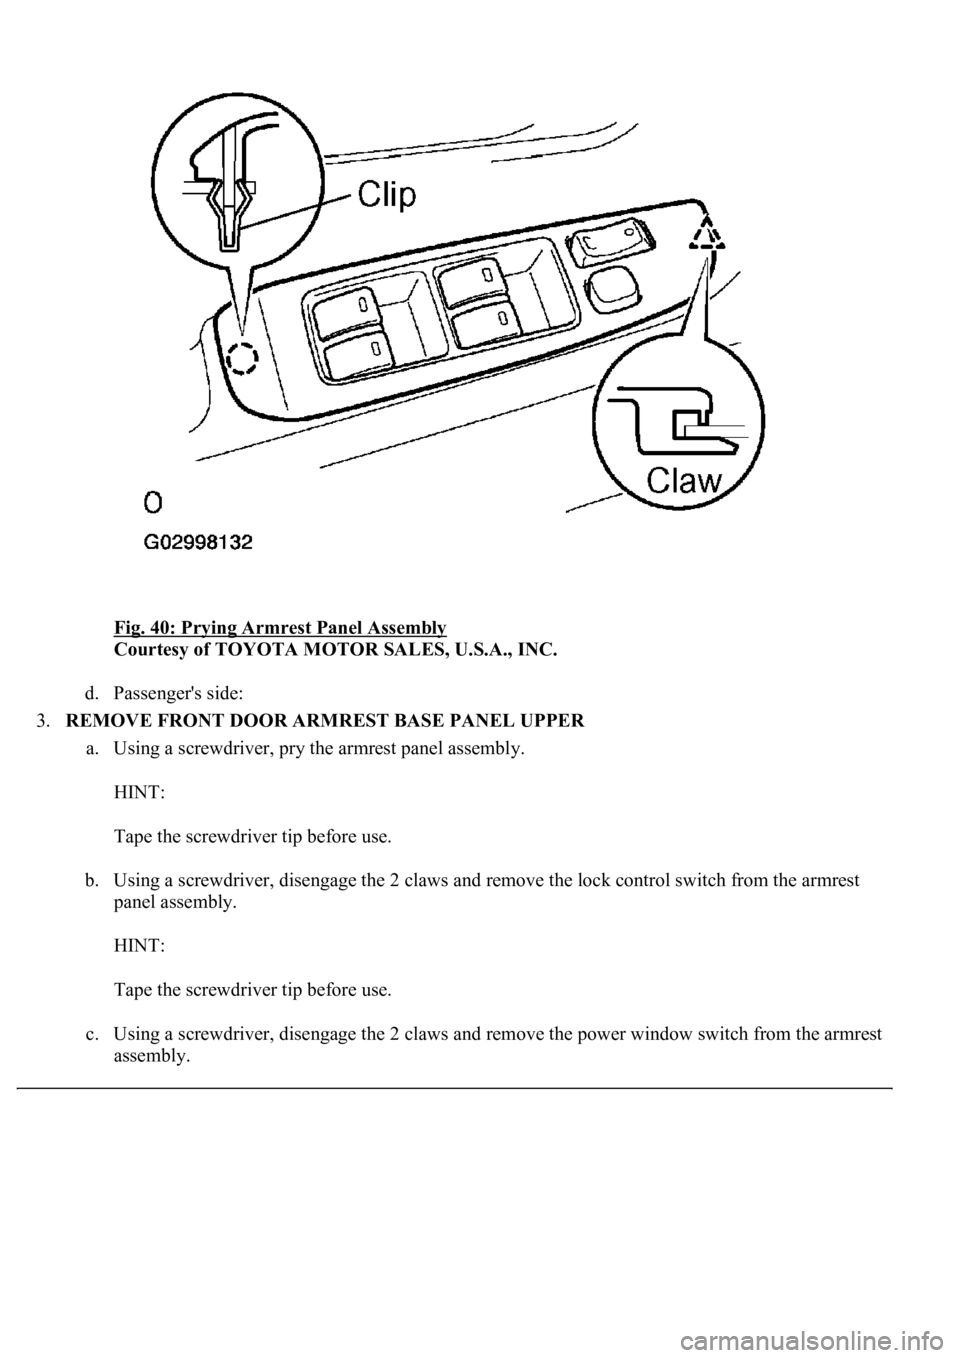
Fig. 40: Prying Armrest Panel Assembly
Courtesy of TOYOTA MOTOR SALES, U.S.A., INC.
d. Passenger's side:
3.REMOVE FRONT DOOR ARMREST BASE PANEL UPPER
a. Using a screwdriver, pry the armrest panel assembly.
HINT:
Tape the screwdriver tip before use.
b. Using a screwdriver, disengage the 2 claws and remove the lock control switch from the armrest
panel assembly.
HINT:
Tape the screwdriver tip before use.
c. Using a screwdriver, disengage the 2 claws and remove the power window switch from the armrest
assembl
y.
Page 3025 of 4500
HINT:
Tape the screwdriver tip before use.
Fig. 41: Removing Front Door Armrest Base Panel Upper
Courtesy of TOYOTA MOTOR SALES, U.S.A., INC.
d. Remove the 2 screws and armrest base panel lower from the armrest base panel upper.
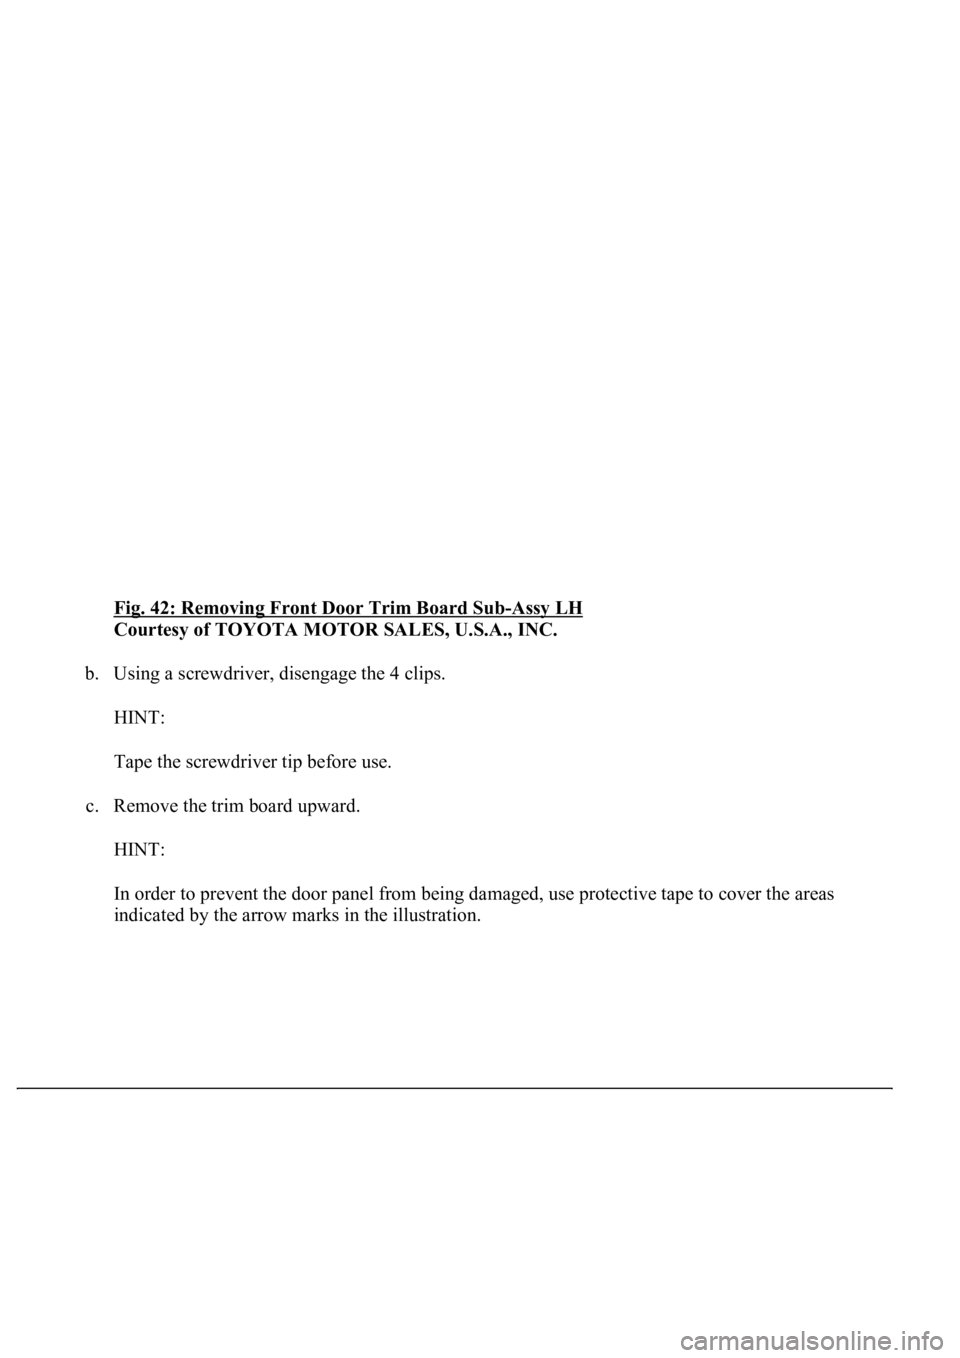
4.REMOVE FRONT DOOR TRIM BOARD SUB-ASSY LH
a. Remove the 7 screws as shown in the illustration.
Page 3026 of 4500
Fig. 42: Removing Front Door Trim Board Sub-Assy LH
Courtesy of TOYOTA MOTOR SALES, U.S.A., INC.
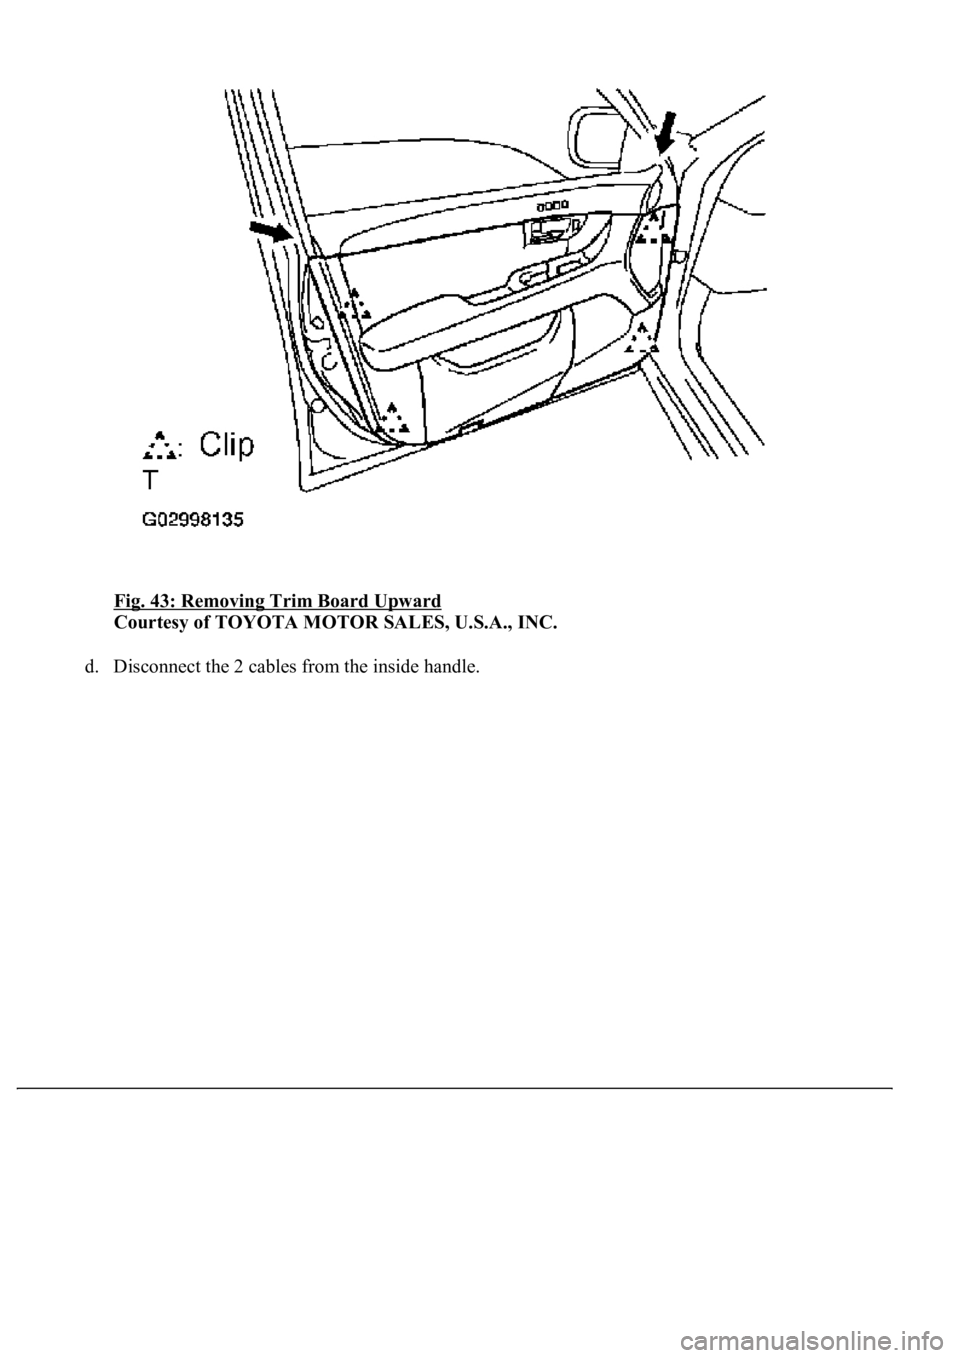
b. Using a screwdriver, disengage the 4 clips.
HINT:
Tape the screwdriver tip before use.
c. Remove the trim board upward.
HINT:
In order to prevent the door panel from being damaged, use protective tape to cover the areas
indicated b
y the arrow marks in the illustration.
Page 3027 of 4500
Fig. 43: Removing Trim Board Upward
Courtesy of TOYOTA MOTOR SALES, U.S.A., INC.
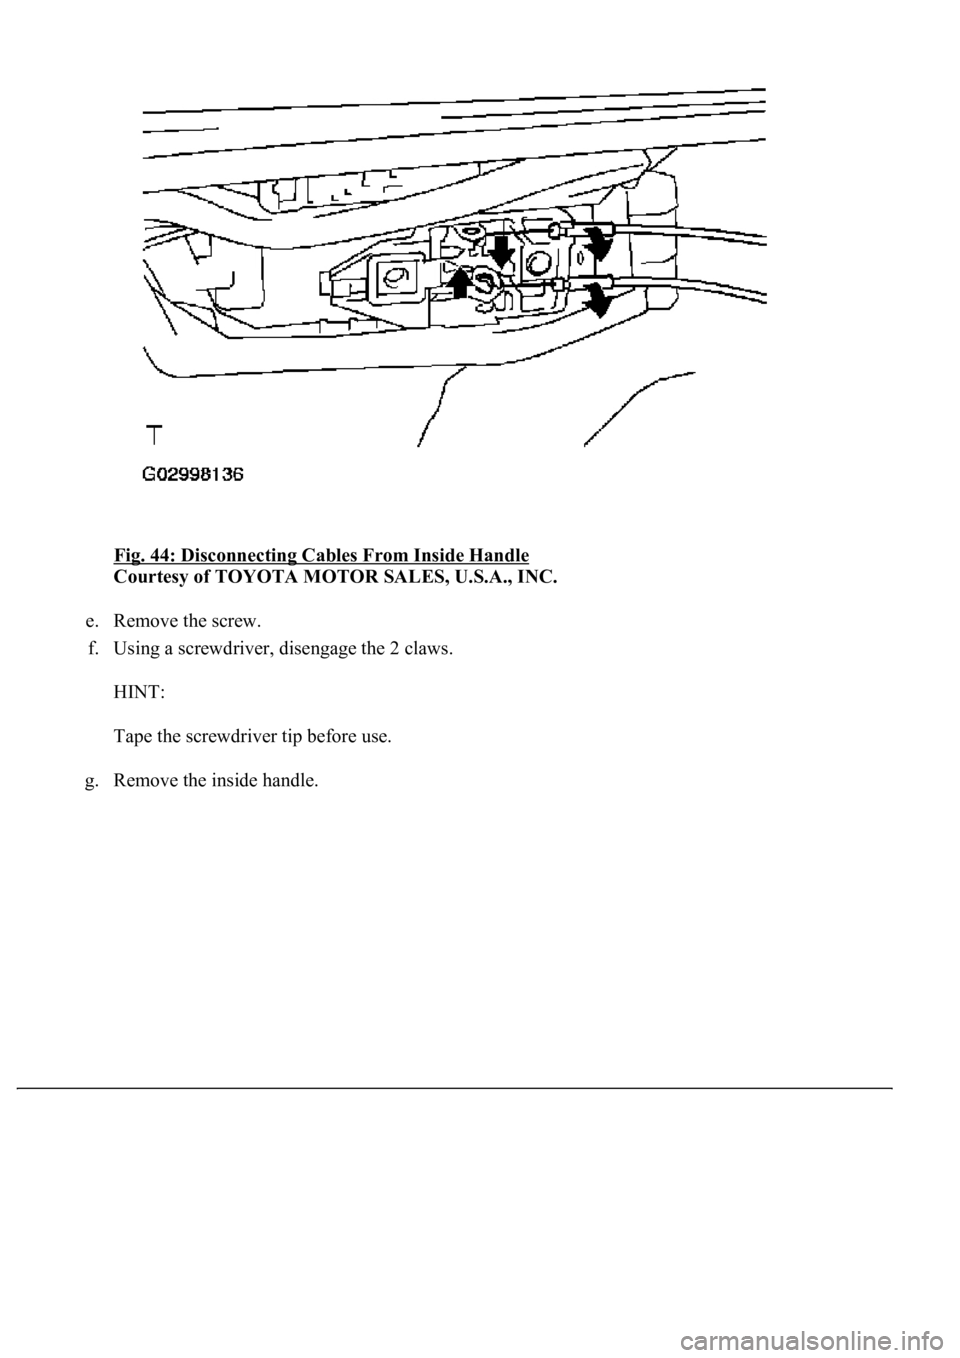
d. Disconnect the 2 cables from the inside handle.
Page 3028 of 4500
Fig. 44: Disconnecting Cables From Inside Handle
Courtesy of TOYOTA MOTOR SALES, U.S.A., INC.
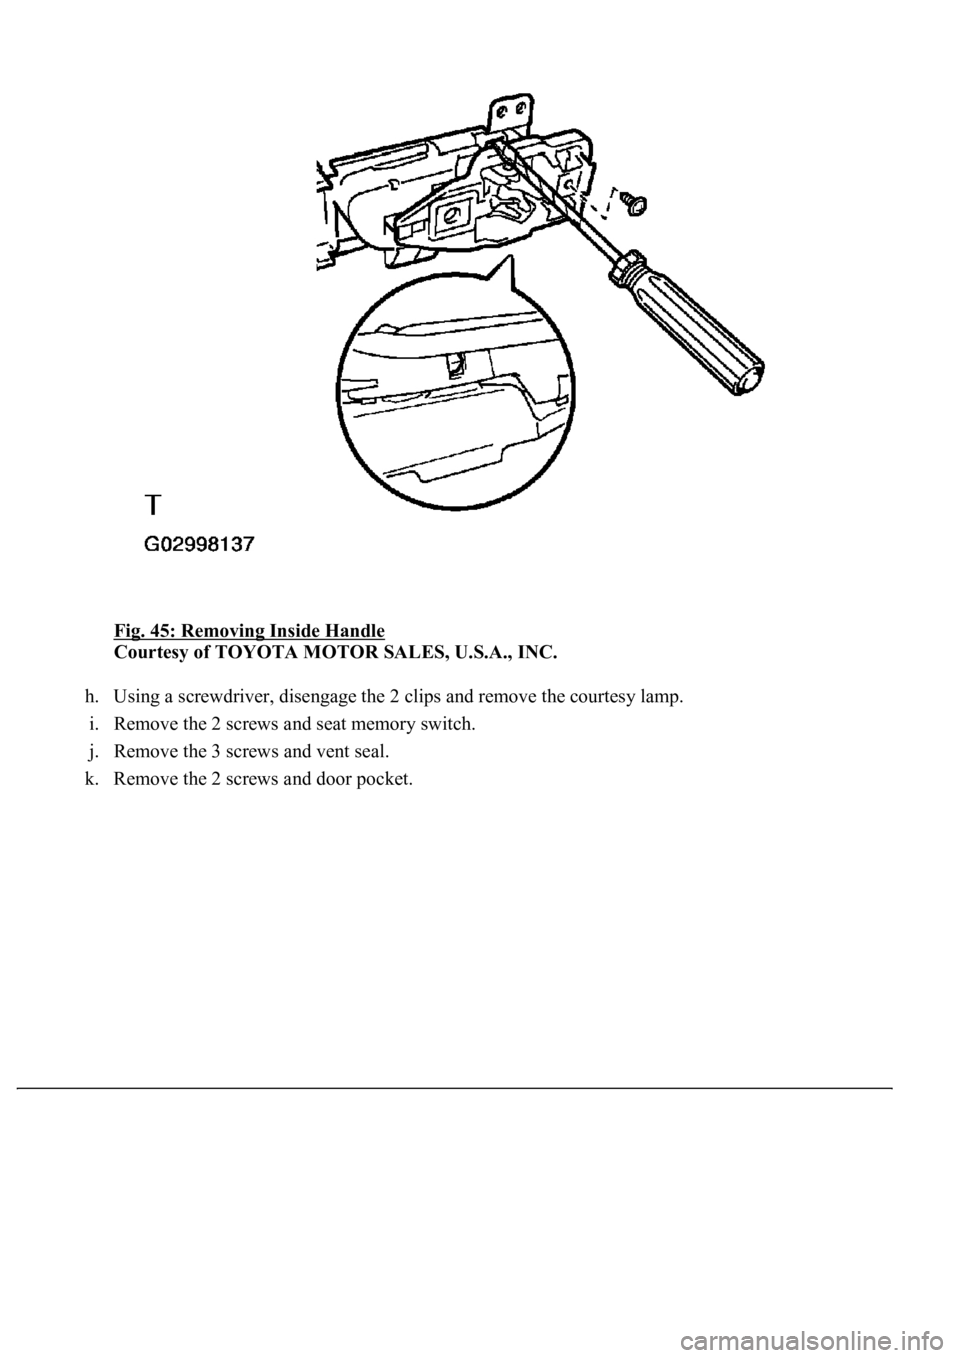
e. Remove the screw.
f. Using a screwdriver, disengage the 2 claws.
HINT:
Tape the screwdriver tip before use.
g. Remove the inside handle.
Page 3029 of 4500
Fig. 45: Removing Inside Handle
Courtesy of TOYOTA MOTOR SALES, U.S.A., INC.
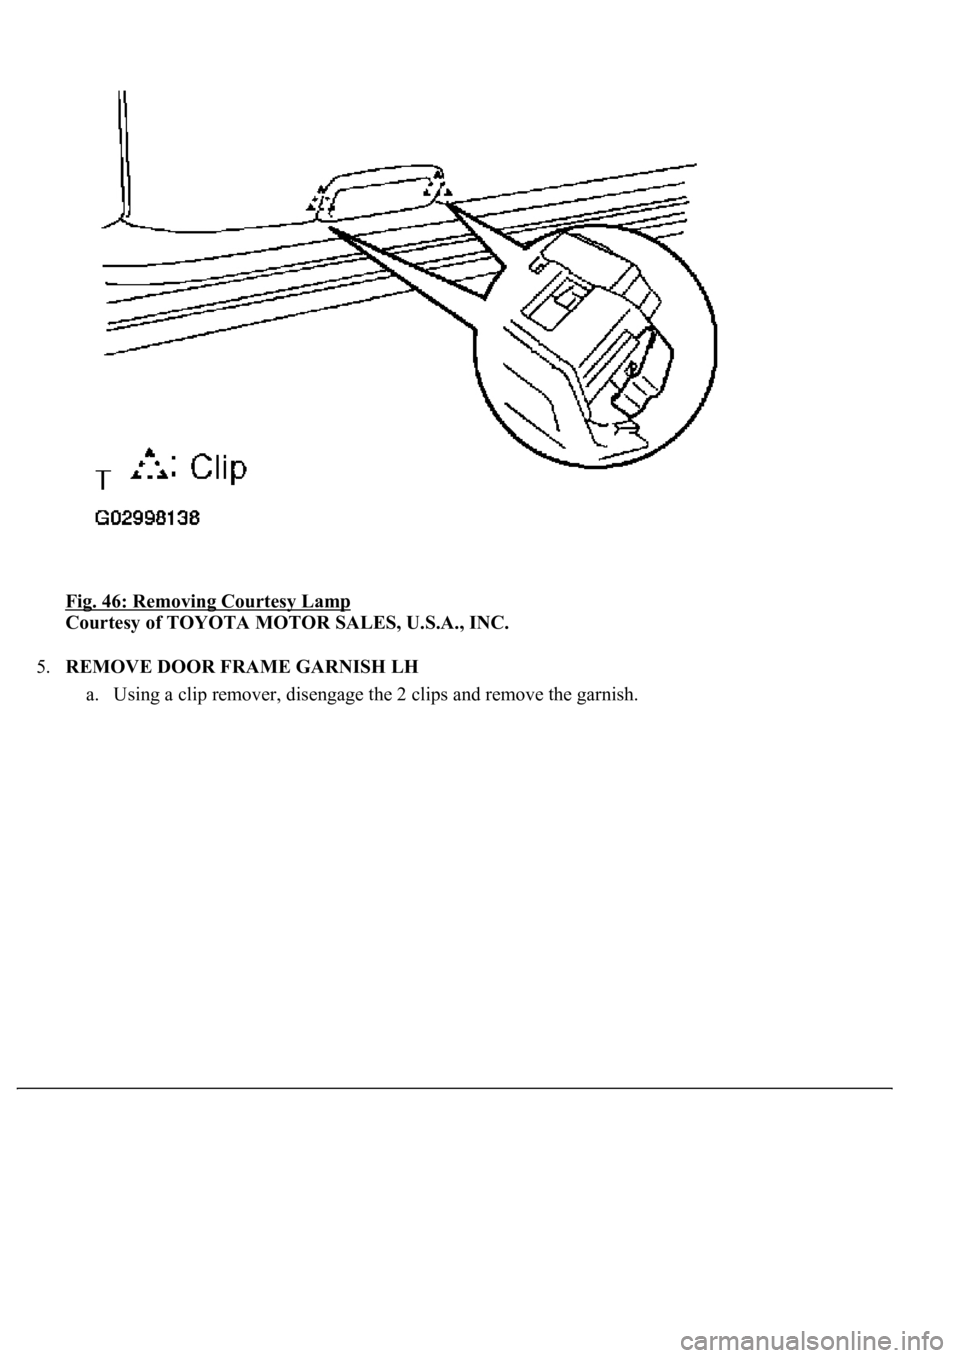
h. Using a screwdriver, disengage the 2 clips and remove the courtesy lamp.
i. Remove the 2 screws and seat memory switch.
j. Remove the 3 screws and vent seal.
k. Remove the 2 screws and door pocket.
Page 3030 of 4500
Fig. 46: Removing Courtesy Lamp
Courtesy of TOYOTA MOTOR SALES, U.S.A., INC.
5.REMOVE DOOR FRAME GARNISH LH
a. Usin
g a clip remover, disengage the 2 clips and remove the garnish.
Trending: navigation, roof, alternator, alarm, cooling, airbag, Lock actuator
