LEXUS LS430 2003 Factory Repair Manual
Manufacturer: LEXUS, Model Year: 2003,
Model line: LS430,
Model: LEXUS LS430 2003
Pages: 4500, PDF Size: 87.45 MB
LEXUS LS430 2003 Factory Repair Manual
LS430 2003
LEXUS
LEXUS
https://www.carmanualsonline.info/img/36/57050/w960_57050-0.png
LEXUS LS430 2003 Factory Repair Manual
Trending: Door lock actuator, evaporator, oil level, head, heating, set clock, Ecu
Page 3041 of 4500
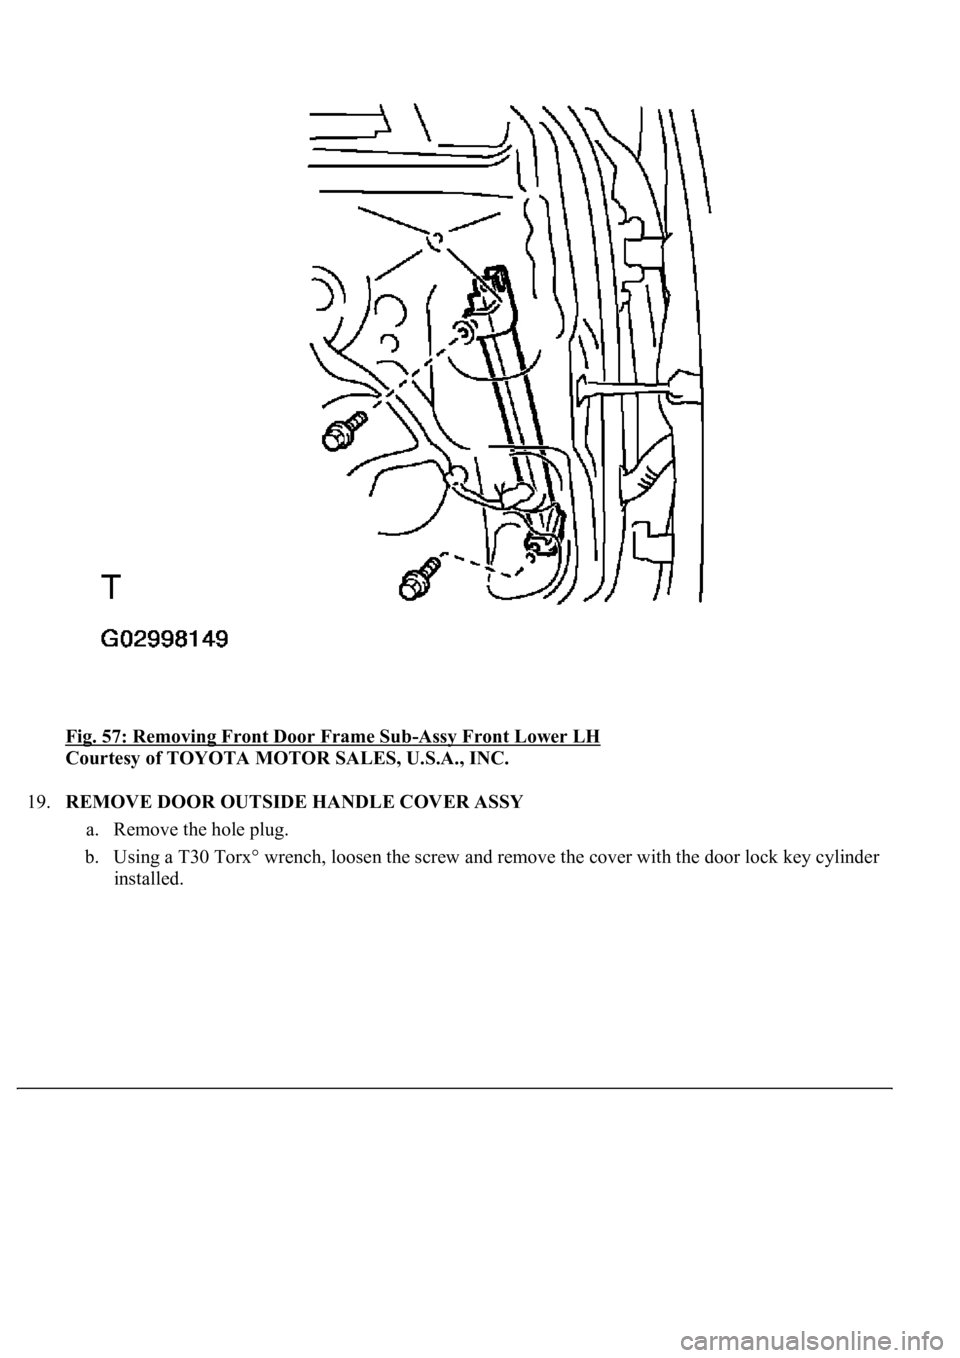
Fig. 57: Removing Front Door Frame Sub-Assy Front Lower LH
Courtesy of TOYOTA MOTOR SALES, U.S.A., INC.
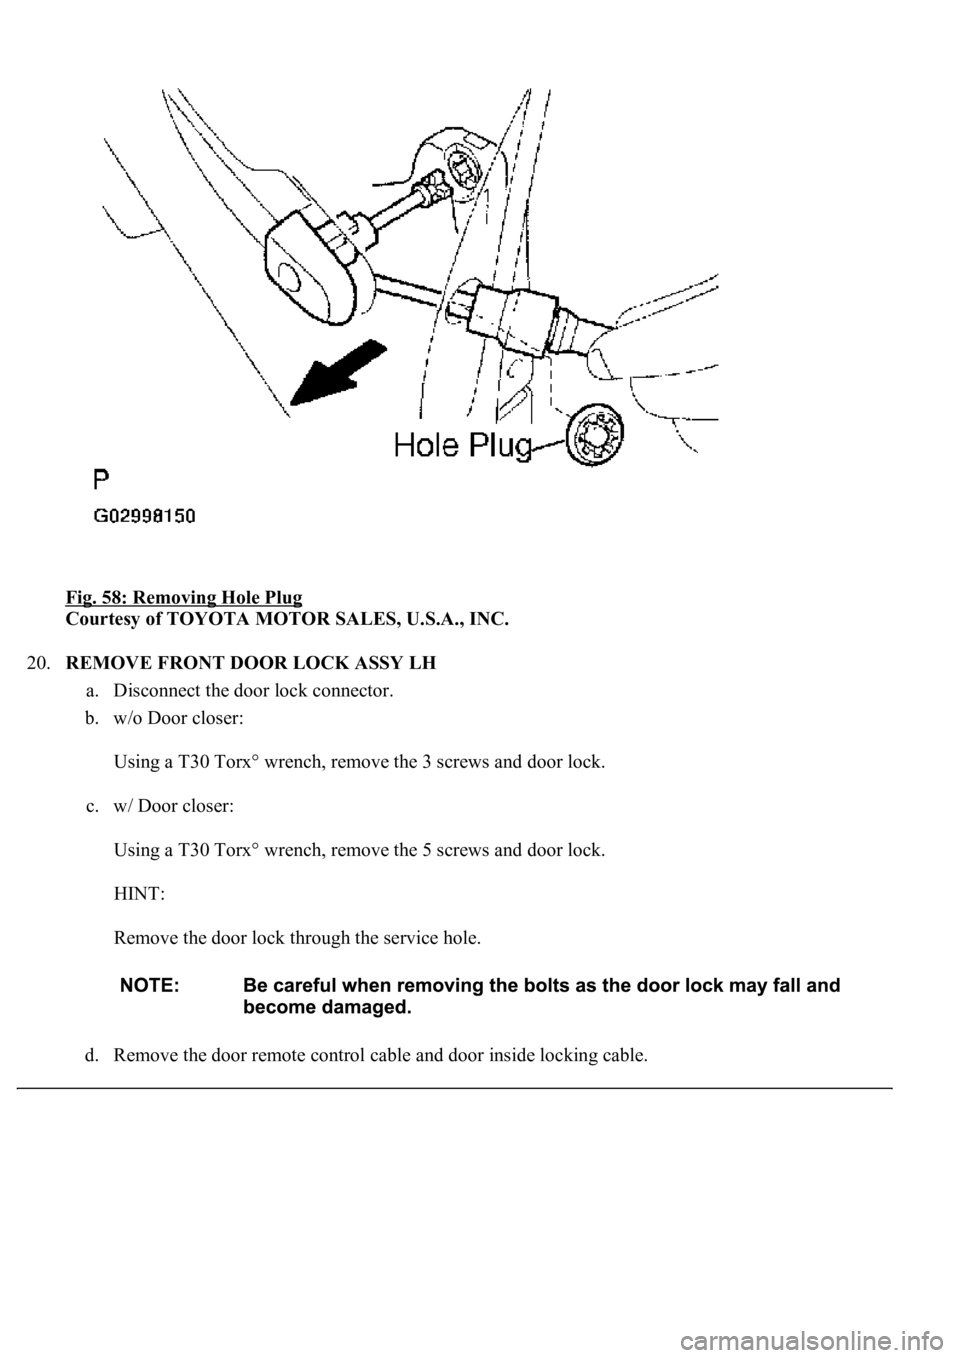
19.REMOVE DOOR OUTSIDE HANDLE COVER ASSY
a. Remove the hole plug.
b. Using a T30 Torx° wrench, loosen the screw and remove the cover with the door lock key cylinder
installed.
Page 3042 of 4500
Fig. 58: Removing Hole Plug
Courtesy of TOYOTA MOTOR SALES, U.S.A., INC.
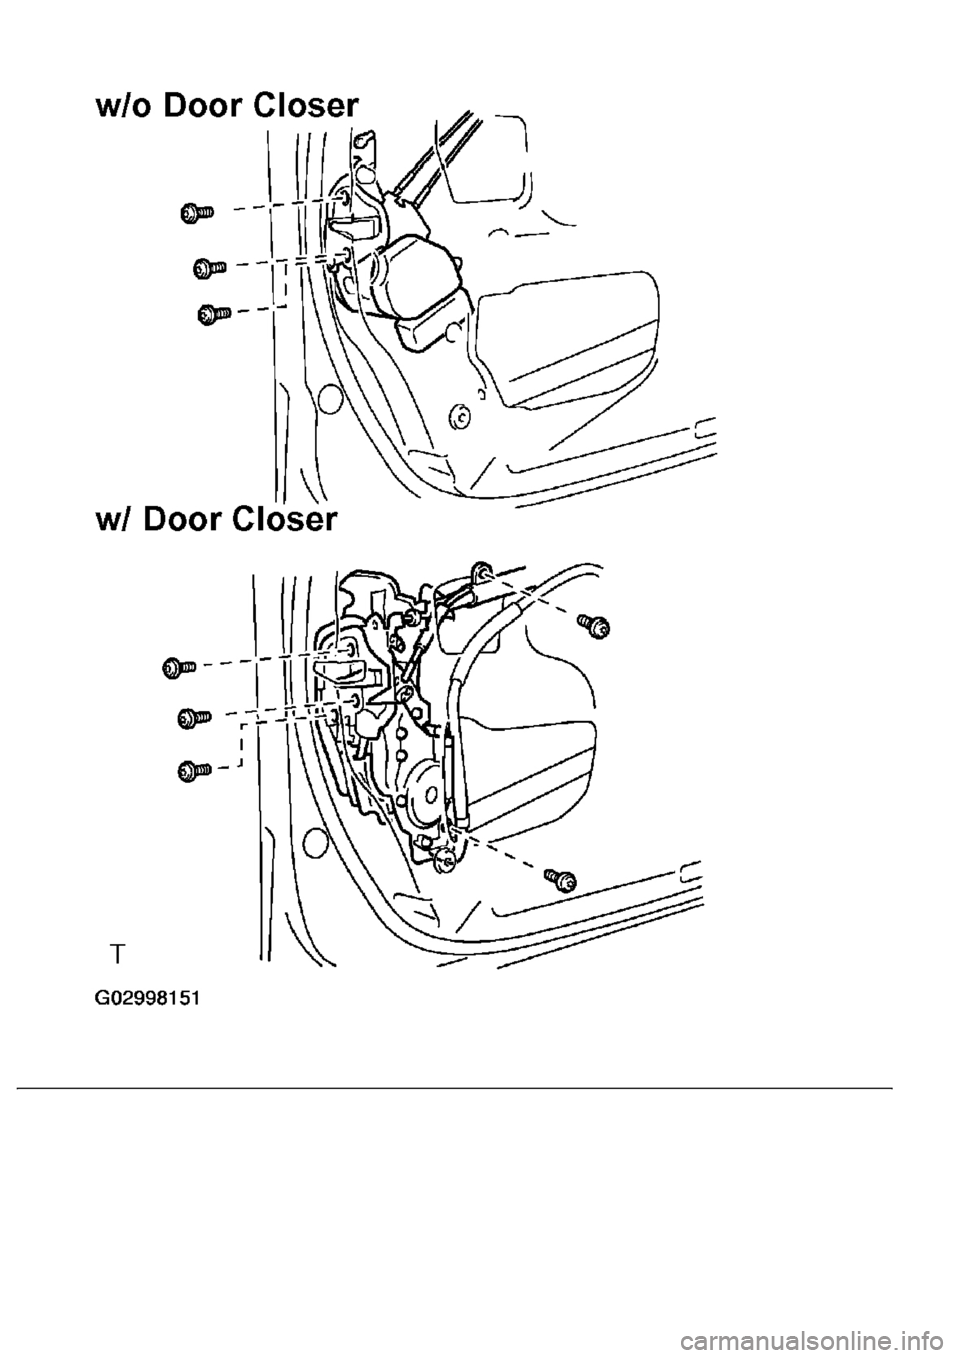
20.REMOVE FRONT DOOR LOCK ASSY LH
a. Disconnect the door lock connector.
b. w/o Door closer:
Using a T30 Torx° wrench, remove the 3 screws and door lock.
c. w/ Door closer:
Using a T30 Torx° wrench, remove the 5 screws and door lock.
HINT:
Remove the door lock through the service hole.
d. Remove the door remote control cable and door inside lockin
g cable.
Page 3043 of 4500
Page 3044 of 4500
Fig. 59: Removing Door Remote Control Cable And Door Inside Locking Cable
Courtesy of TOYOTA MOTOR SALES, U.S.A., INC.
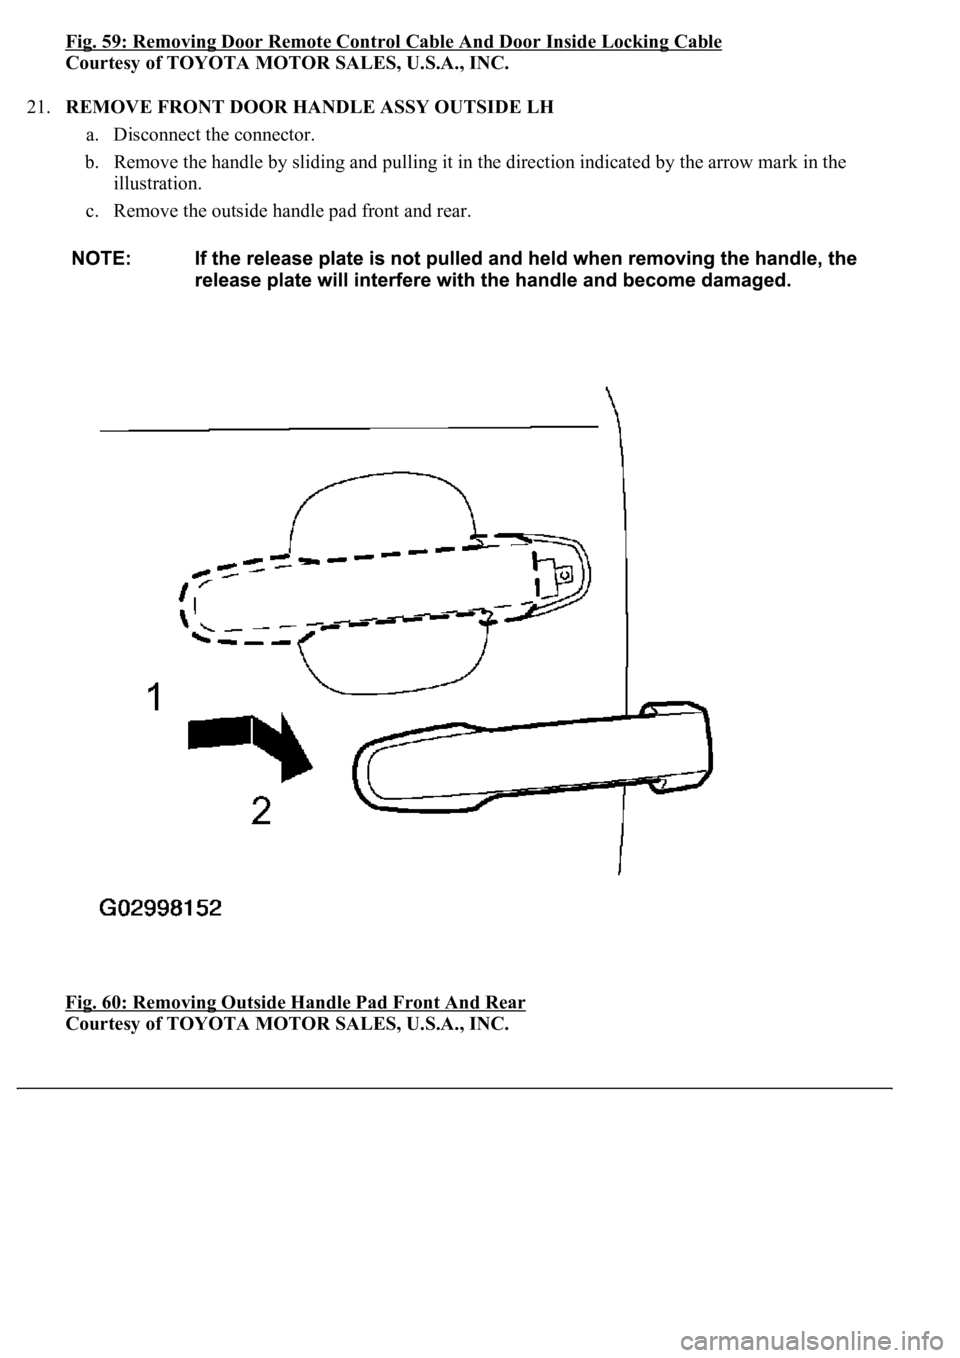
21.REMOVE FRONT DOOR HANDLE ASSY OUTSIDE LH
a. Disconnect the connector.
b. Remove the handle by sliding and pulling it in the direction indicated by the arrow mark in the
illustration.
c. Remove the outside handle pad front and rear.
<0029004c004a0011000300190013001d000300350048005000520059004c0051004a00030032005800570056004c004700480003002b004400510047004f004800030033004400470003002900550052005100570003002400510047000300350048004400
55[
Courtesy of TOYOTA MOTOR SALES, U.S.A., INC.
Page 3045 of 4500
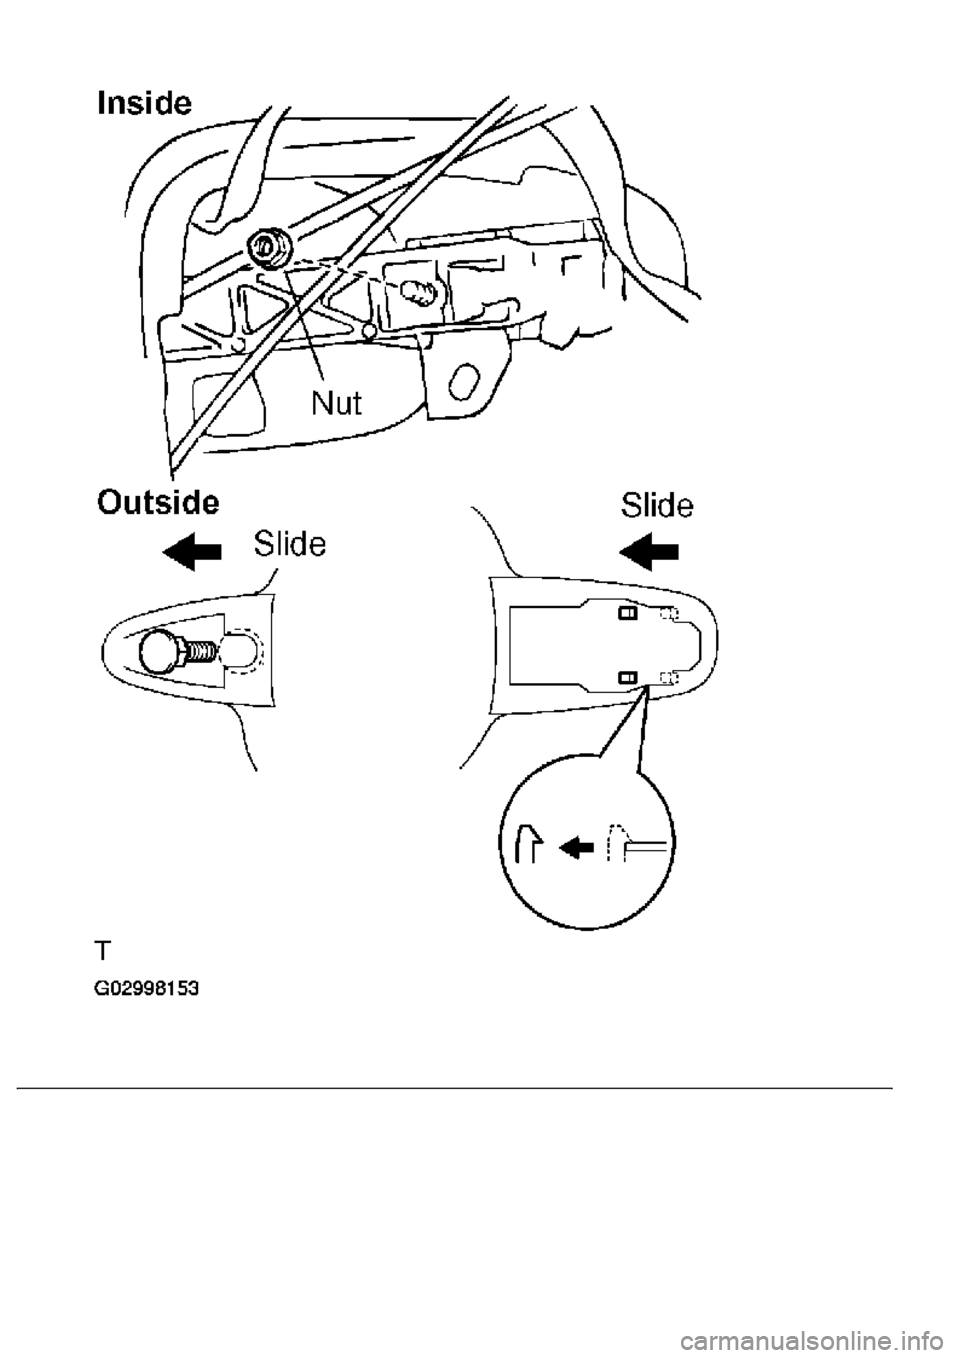
22.REMOVE FRONT DOOR OUTSIDE HANDLE FRAME SUB-ASSY LH
a. Remove the nut.
b. Slide the outside handle frame to remove it.
HINT:
Remove the outside handle frame through the service hole.
c. Remove the lock open rod from the outside handle frame.
Page 3046 of 4500
Page 3047 of 4500
Fig. 61: Removing Lock Open Rod From Outside Handle Frame
Courtesy of TOYOTA MOTOR SALES, U.S.A., INC.
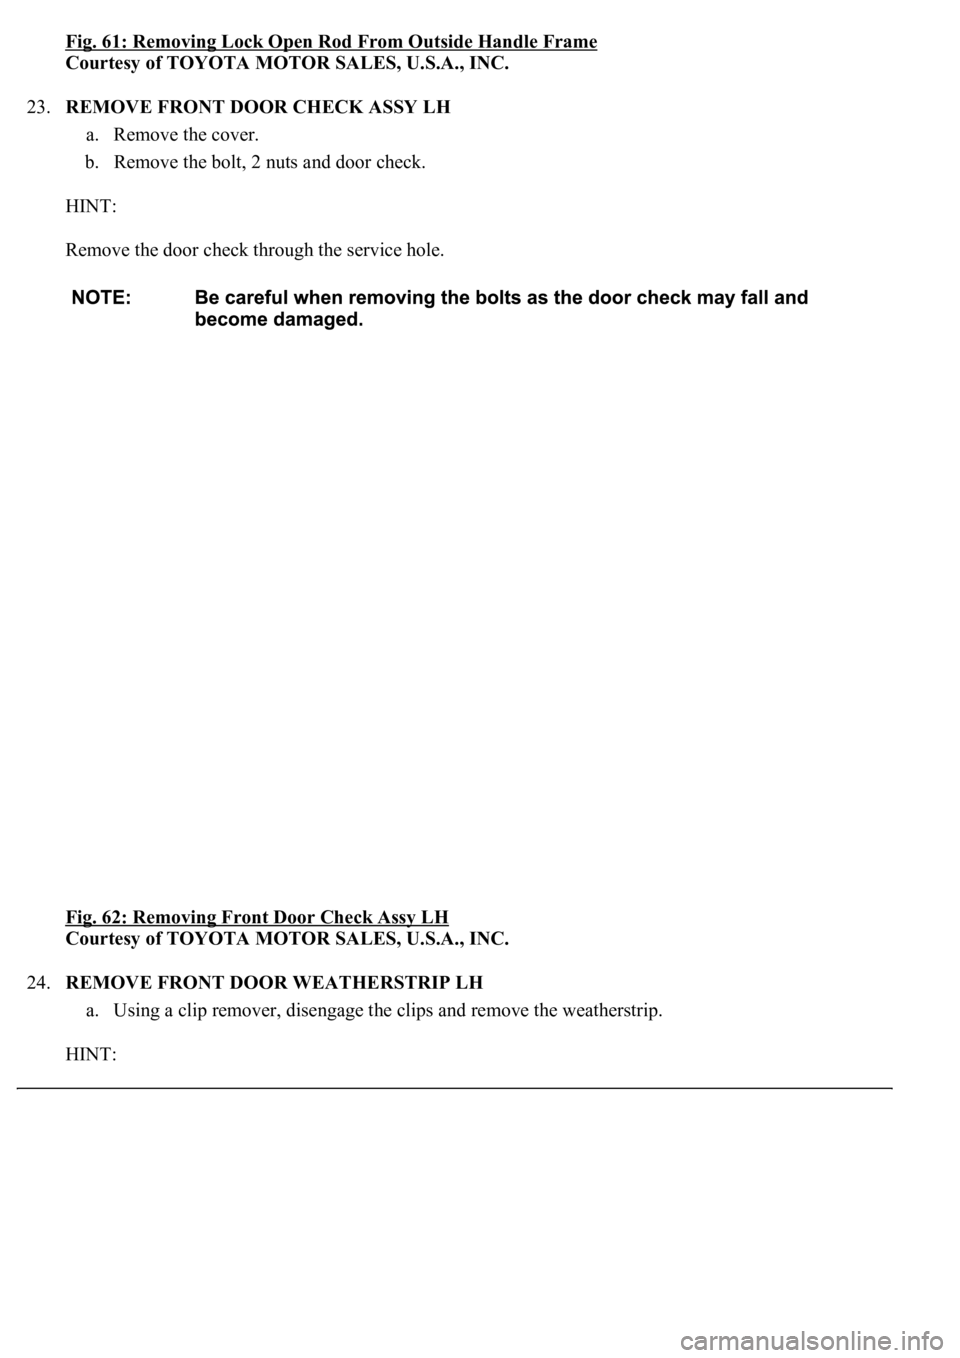
23.REMOVE FRONT DOOR CHECK ASSY LH
a. Remove the cover.
b. Remove the bolt, 2 nuts and door check.
HINT:
Remove the door check through the service hole.
Fig. 62: Removing Front Door Check Assy LH
Courtesy of TOYOTA MOTOR SALES, U.S.A., INC.
24.REMOVE FRONT DOOR WEATHERSTRIP LH
a. Using a clip remover, disengage the clips and remove the weatherstrip.
HINT:
Page 3048 of 4500
If clips are damaged during removal, replace them.
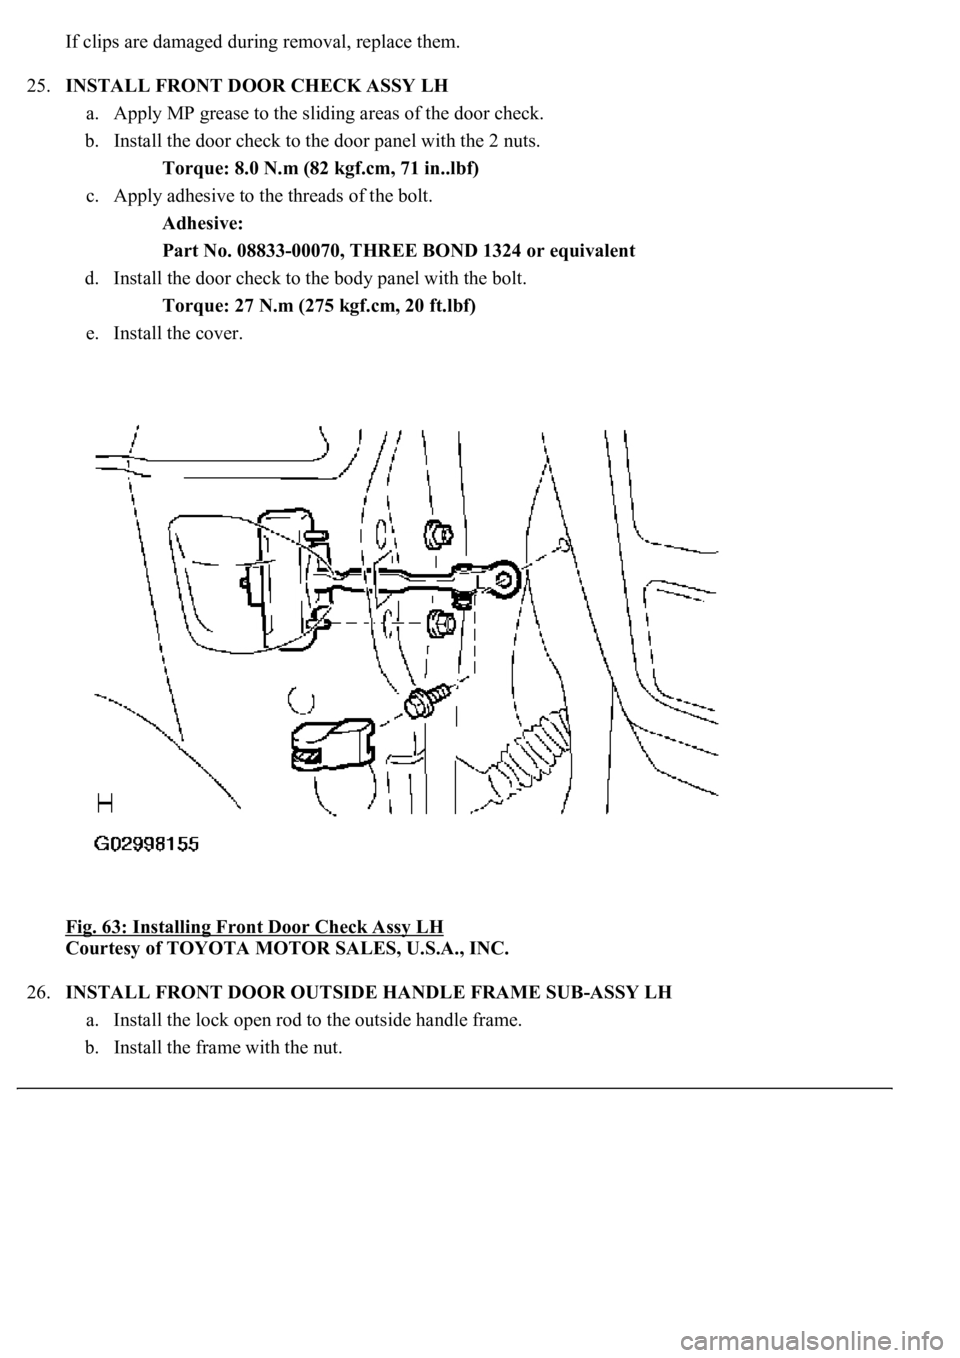
25.INSTALL FRONT DOOR CHECK ASSY LH
a. Apply MP grease to the sliding areas of the door check.
b. Install the door check to the door panel with the 2 nuts.
Torque: 8.0 N.m (82 kgf.cm, 71 in..lbf)
c. Apply adhesive to the threads of the bolt.
Adhesive:
Part No. 08833-00070, THREE BOND 1324 or equivalent
d. Install the door check to the body panel with the bolt.
Torque: 27 N.m (275 kgf.cm, 20 ft.lbf)
e. Install the cover.
Fig. 63: Installing Front Door Check Assy LH
Courtesy of TOYOTA MOTOR SALES, U.S.A., INC.
26.INSTALL FRONT DOOR OUTSIDE HANDLE FRAME SUB-ASSY LH
a. Install the lock open rod to the outside handle frame.
b. Install the frame with the nut.
Page 3049 of 4500
Torque: 7.0 N.m (71 kgf.cm, 62 in..lbf)
Page 3050 of 4500
Trending: ABS, diagnostic menu, cylinder head, rear view mirror, dlc3, airbag off, ECO mode
