LEXUS LS430 2003 Factory Repair Manual
Manufacturer: LEXUS, Model Year: 2003,
Model line: LS430,
Model: LEXUS LS430 2003
Pages: 4500, PDF Size: 87.45 MB
LEXUS LS430 2003 Factory Repair Manual
LS430 2003
LEXUS
LEXUS
https://www.carmanualsonline.info/img/36/57050/w960_57050-0.png
LEXUS LS430 2003 Factory Repair Manual
Trending: set clock, Rear, belt, odometer, tow, window regulator, tow bar
Page 4271 of 4500
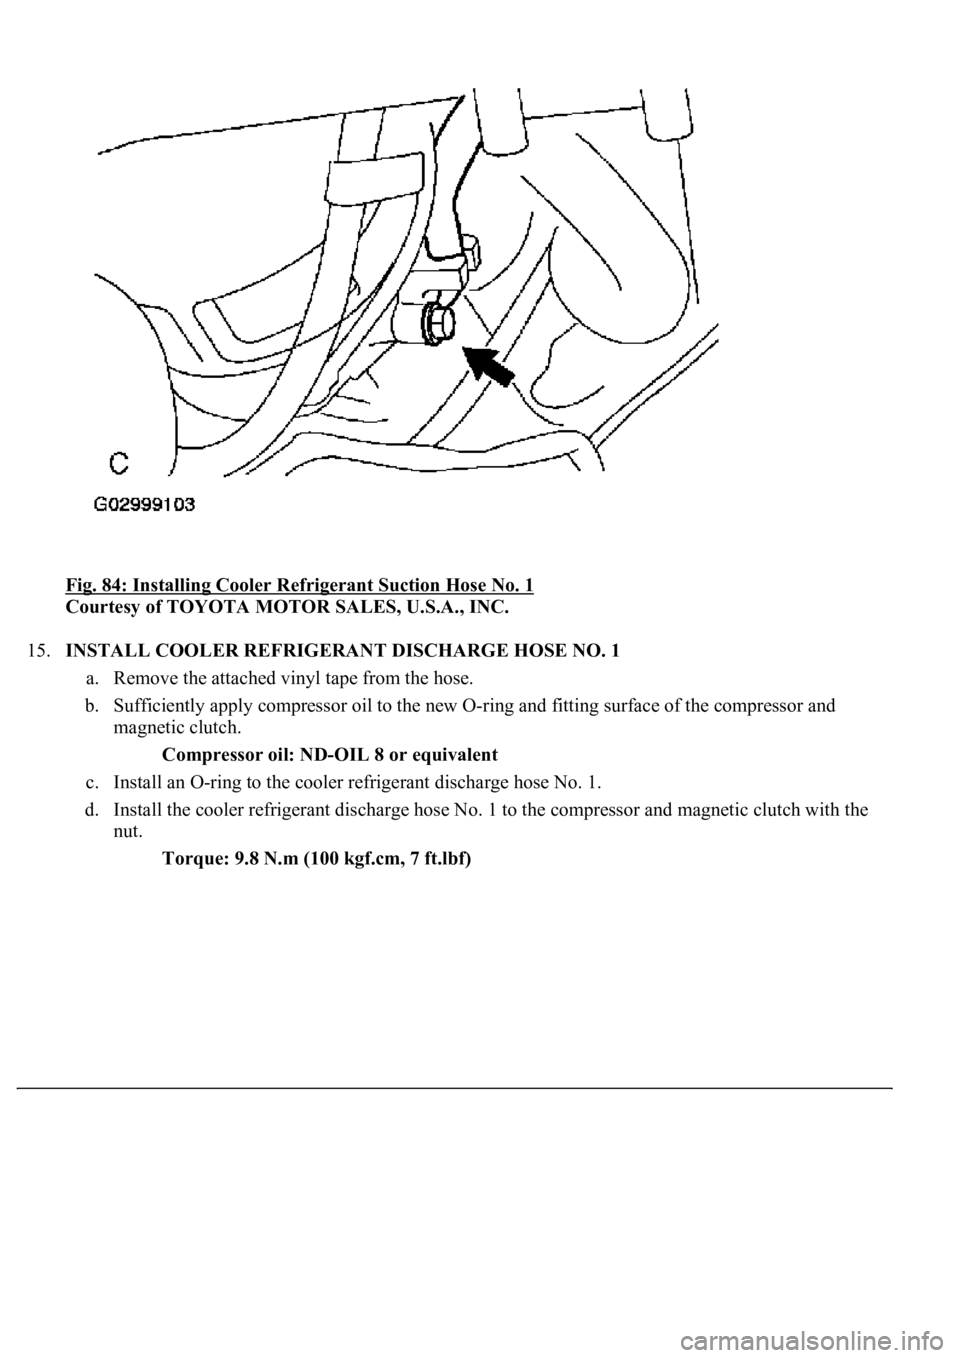
Fig. 84: Installing Cooler Refrigerant Suction Hose No. 1
Courtesy of TOYOTA MOTOR SALES, U.S.A., INC.
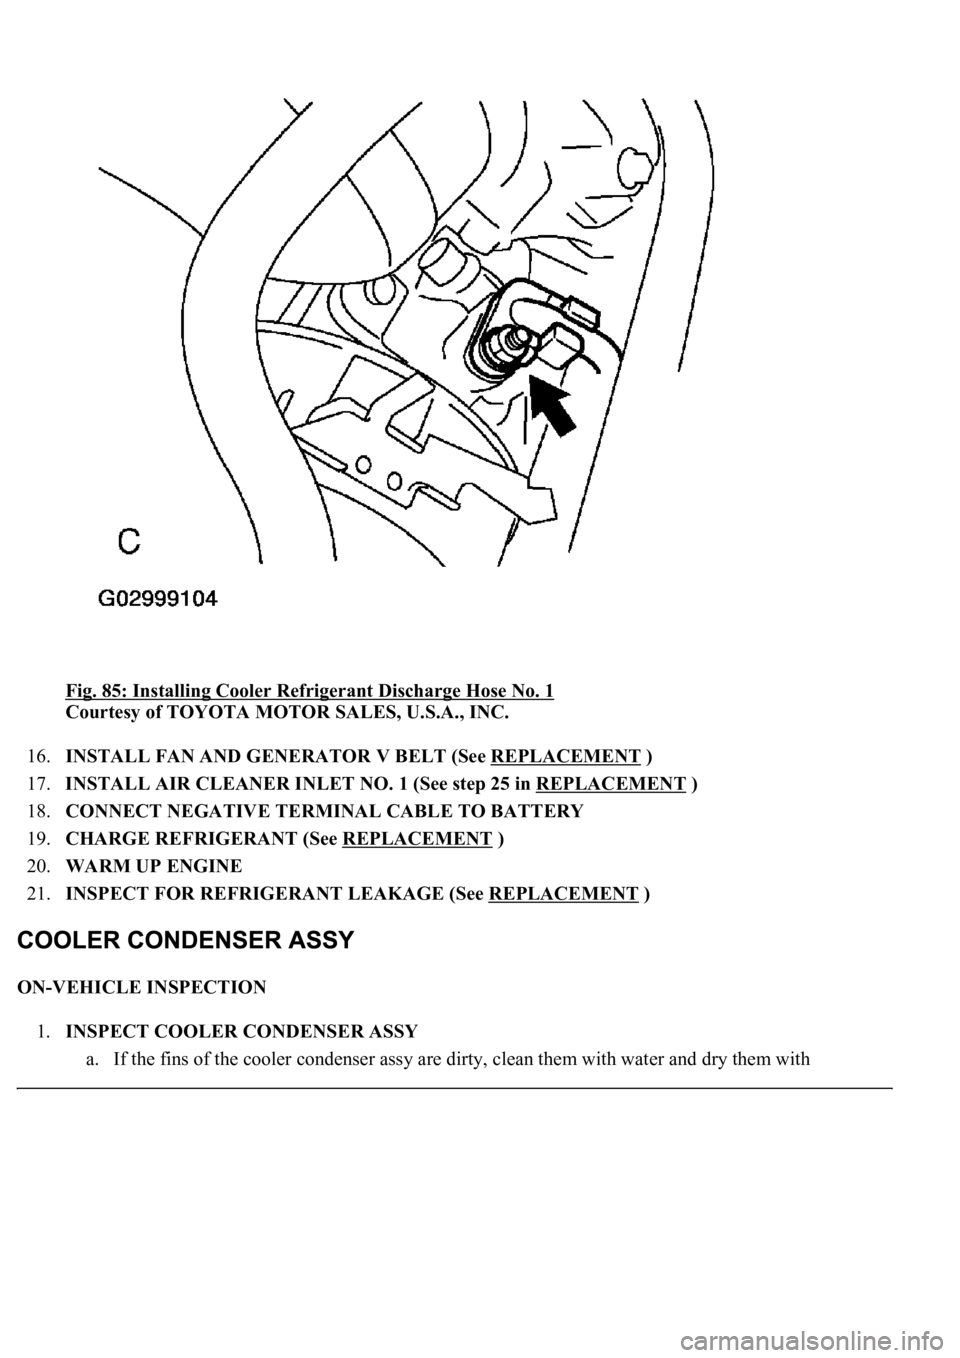
15.INSTALL COOLER REFRIGERANT DISCHARGE HOSE NO. 1
a. Remove the attached vinyl tape from the hose.
b. Sufficiently apply compressor oil to the new O-ring and fitting surface of the compressor and
magnetic clutch.
Compressor oil: ND-OIL 8 or equivalent
c. Install an O-ring to the cooler refrigerant discharge hose No. 1.
d. Install the cooler refrigerant discharge hose No. 1 to the compressor and magnetic clutch with the
nut.
Torque: 9.8 N.m (100 kgf.cm, 7 ft.lbf)
Page 4272 of 4500
Fig. 85: Installing Cooler Refrigerant Discharge Hose No. 1
Courtesy of TOYOTA MOTOR SALES, U.S.A., INC.
16.INSTALL FAN AND GENERATOR V BELT (See REPLACEMENT
)
17.INSTALL AIR CLEANER INLET NO. 1 (See step 25 in REPLACEMENT
)
18.CONNECT NEGATIVE TERMINAL CABLE TO BATTERY
19.CHARGE REFRIGERANT (See REPLACEMENT
)
20.WARM UP ENGINE
21.INSPECT FOR REFRIGERANT LEAKAGE (See REPLACEMENT
)
ON-VEHICLE INSPECTION
1.INSPECT COOLER CONDENSER ASSY
a. If the fins of the cooler condenser assy are dirty, clean them with water and dry them with
Page 4273 of 4500
compressed air.
b. If the fins of the cooler condenser assy are bent, straighten them using a screwdriver or pliers.
2.INSPECT CONDENSER FOR REFRIGERANT LEAKAGE
a. Using a halogen leak detector, check the pipe joints for refrigerant leakage.
b. If refrigerant leakage is detected in a joint, check the torque of the joint.
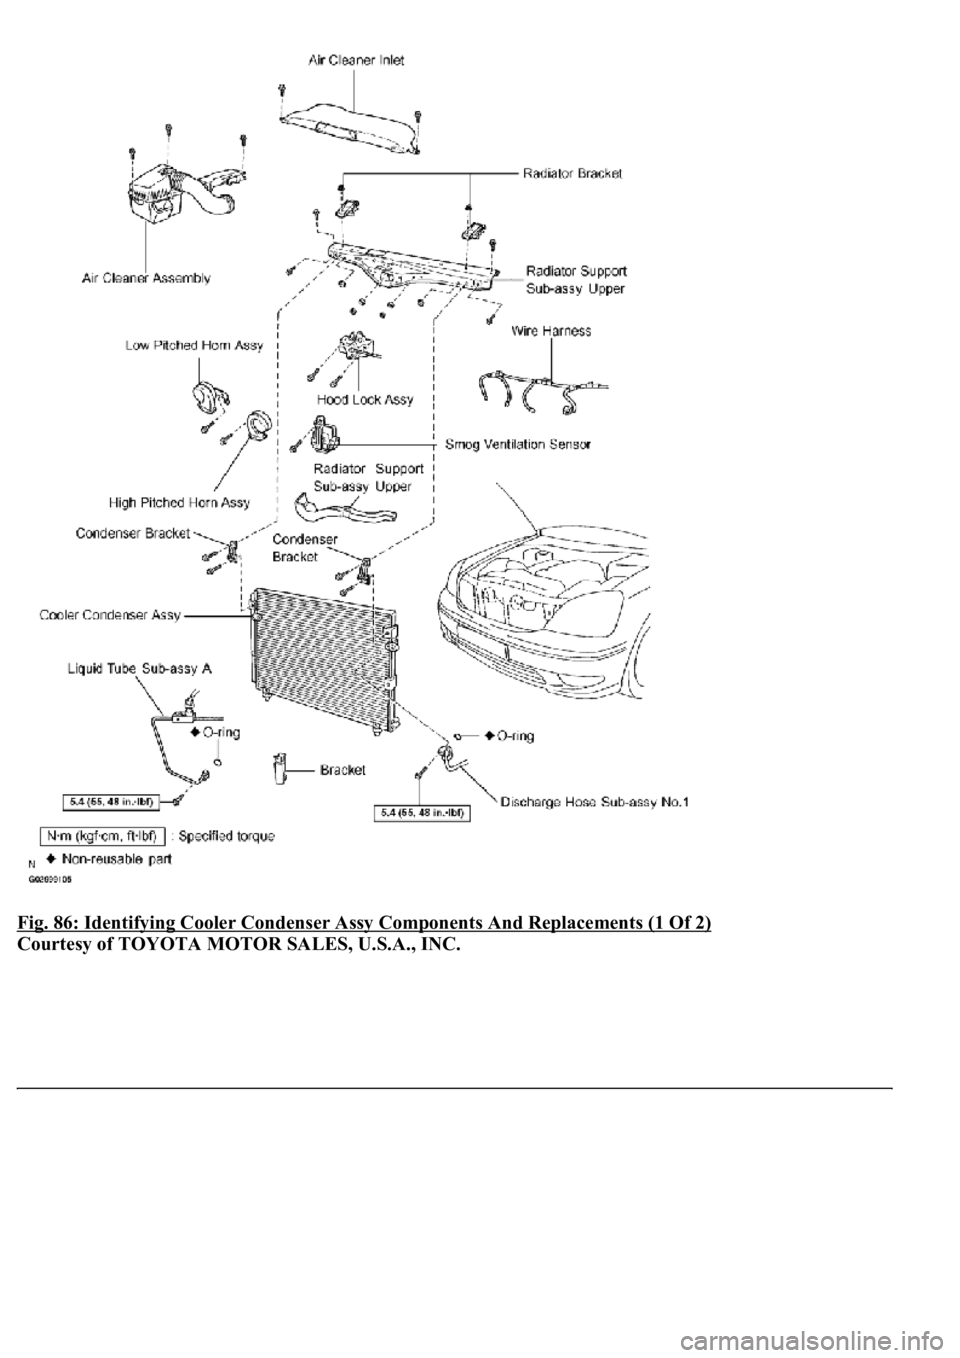
COMPONENTS
Page 4274 of 4500
Fig. 86: Identifying Cooler Condenser Assy Components And Replacements (1 Of 2)
Courtesy of TOYOTA MOTOR SALES, U.S.A., INC.
Page 4275 of 4500
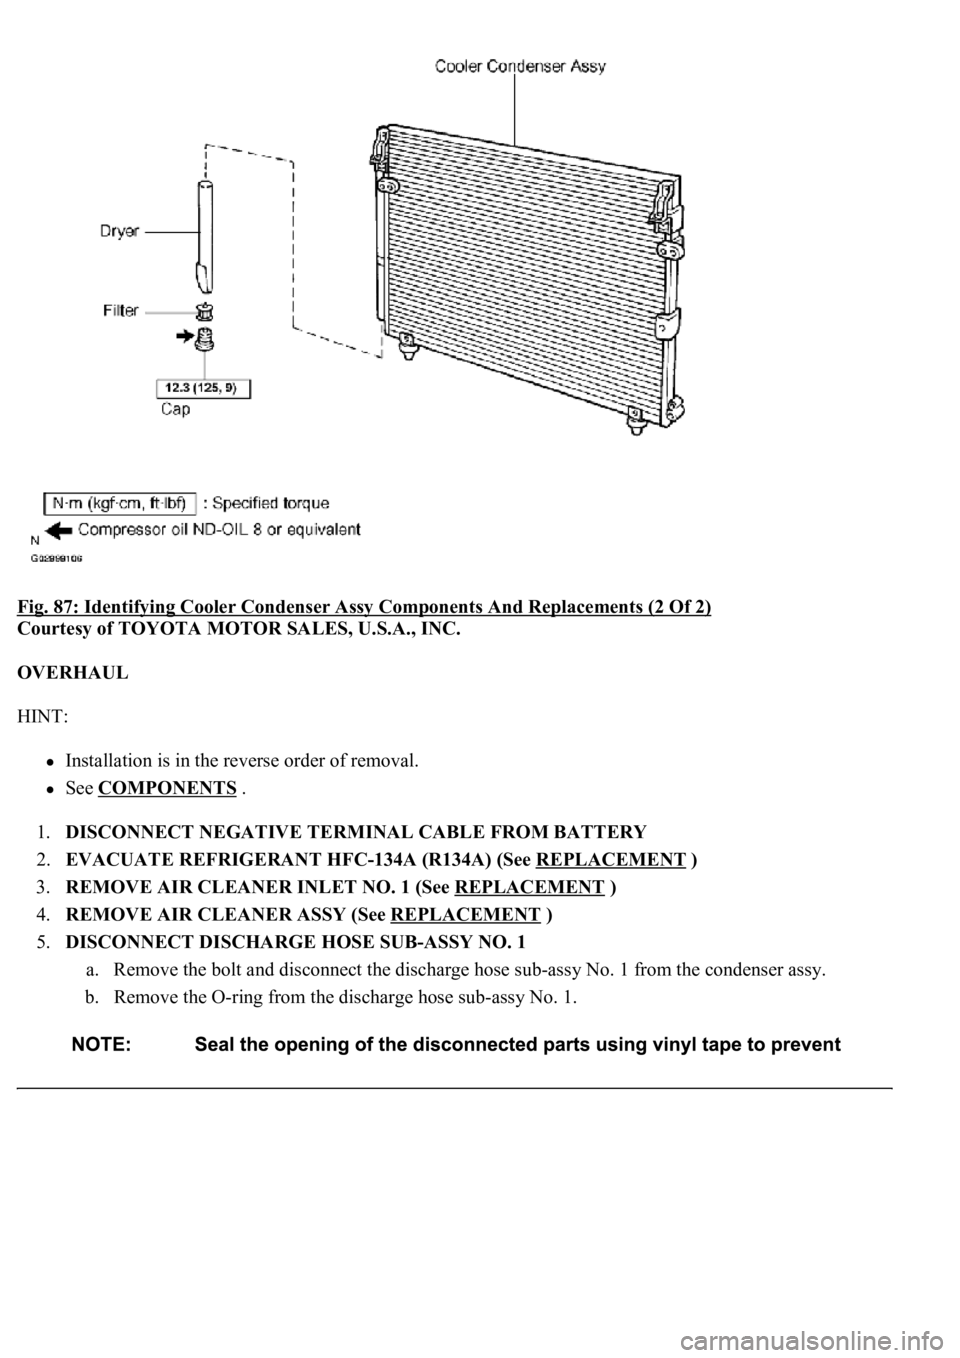
Fig. 87: Identifying Cooler Condenser Assy Components And Replacements (2 Of 2)
Courtesy of TOYOTA MOTOR SALES, U.S.A., INC.
OVERHAUL
HINT:
Installation is in the reverse order of removal.
See COMPONENTS .
1.DISCONNECT NEGATIVE TERMINAL CABLE FROM BATTERY
2.EVACUATE REFRIGERANT HFC-134A (R134A) (See REPLACEMENT
)
3.REMOVE AIR CLEANER INLET NO. 1 (See REPLACEMENT
)
4.REMOVE AIR CLEANER ASSY (See REPLACEMENT
)
5.DISCONNECT DISCHARGE HOSE SUB-ASSY NO. 1
a. Remove the bolt and disconnect the discharge hose sub-assy No. 1 from the condenser assy.
b. Remove the O-ring from the discharge hose sub-assy No. 1.
Page 4276 of 4500
Fig. 88: Disconnecting Discharge Hose Sub-Assy No. 1
Courtesy of TOYOTA MOTOR SALES, U.S.A., INC.
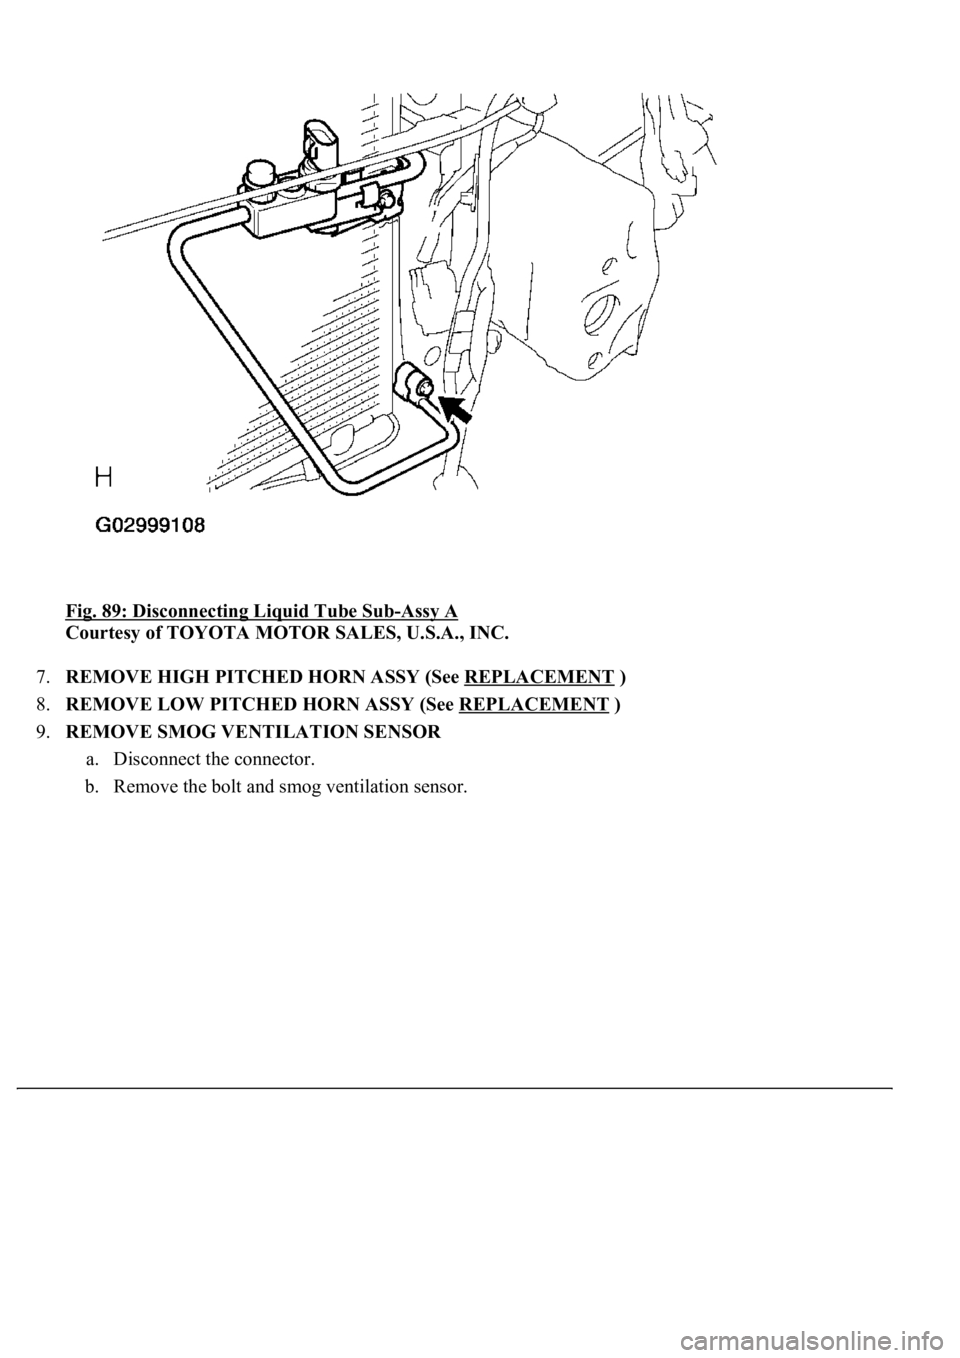
6.DISCONNECT LIQUID TUBE SUB-ASSY A
a. Remove the bolt and disconnect the liquid tube sub-assy A from the cooler condenser assy.
b. Remove the O-ring from the liquid tube sub-assy A.
Page 4277 of 4500
Fig. 89: Disconnecting Liquid Tube Sub-Assy A
Courtesy of TOYOTA MOTOR SALES, U.S.A., INC.
7.REMOVE HIGH PITCHED HORN ASSY (See REPLACEMENT
)
8.REMOVE LOW PITCHED HORN ASSY (See REPLACEMENT
)
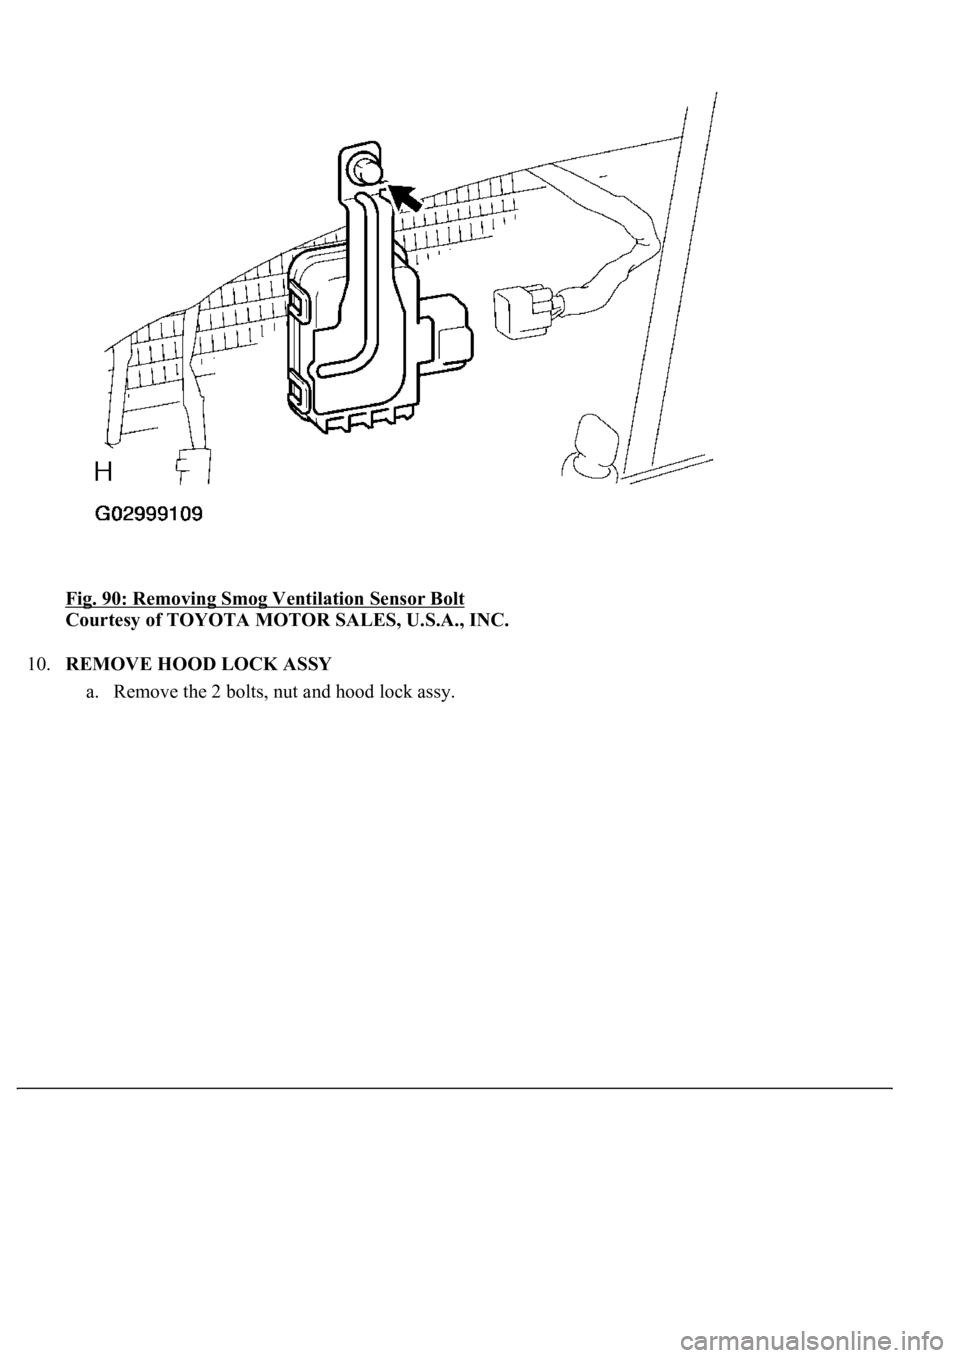
9.REMOVE SMOG VENTILATION SENSOR
a. Disconnect the connector.
b. Remove the bolt and smog ventilation sensor.
Page 4278 of 4500
Fig. 90: Removing Smog Ventilation Sensor Bolt
Courtesy of TOYOTA MOTOR SALES, U.S.A., INC.
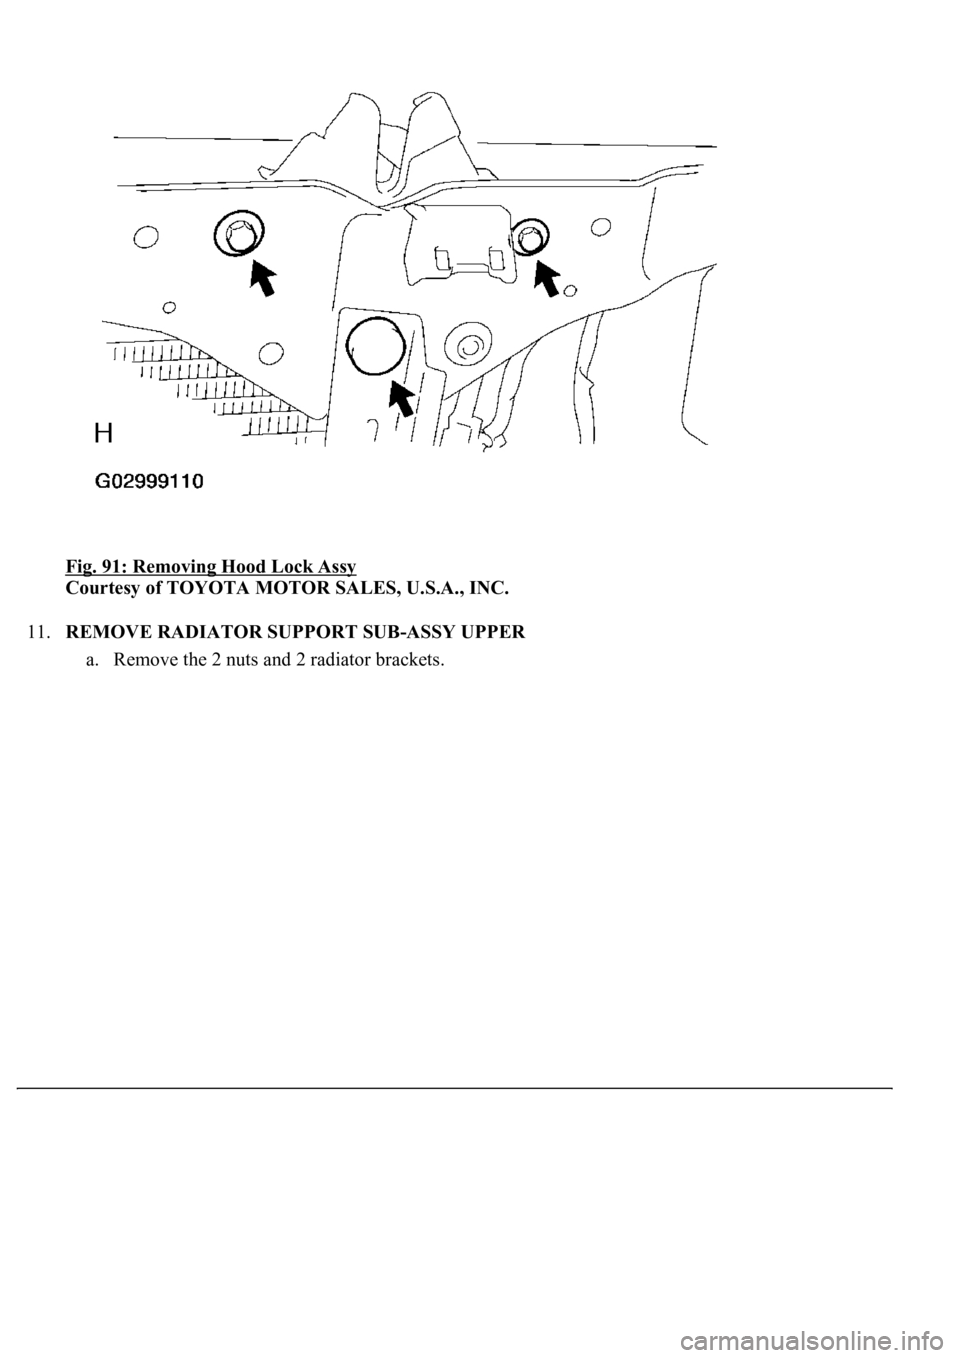
10.REMOVE HOOD LOCK ASSY
a. Remove the 2 bolts, nut and hood lock ass
y.
Page 4279 of 4500
Fig. 91: Removing Hood Lock Assy
Courtesy of TOYOTA MOTOR SALES, U.S.A., INC.
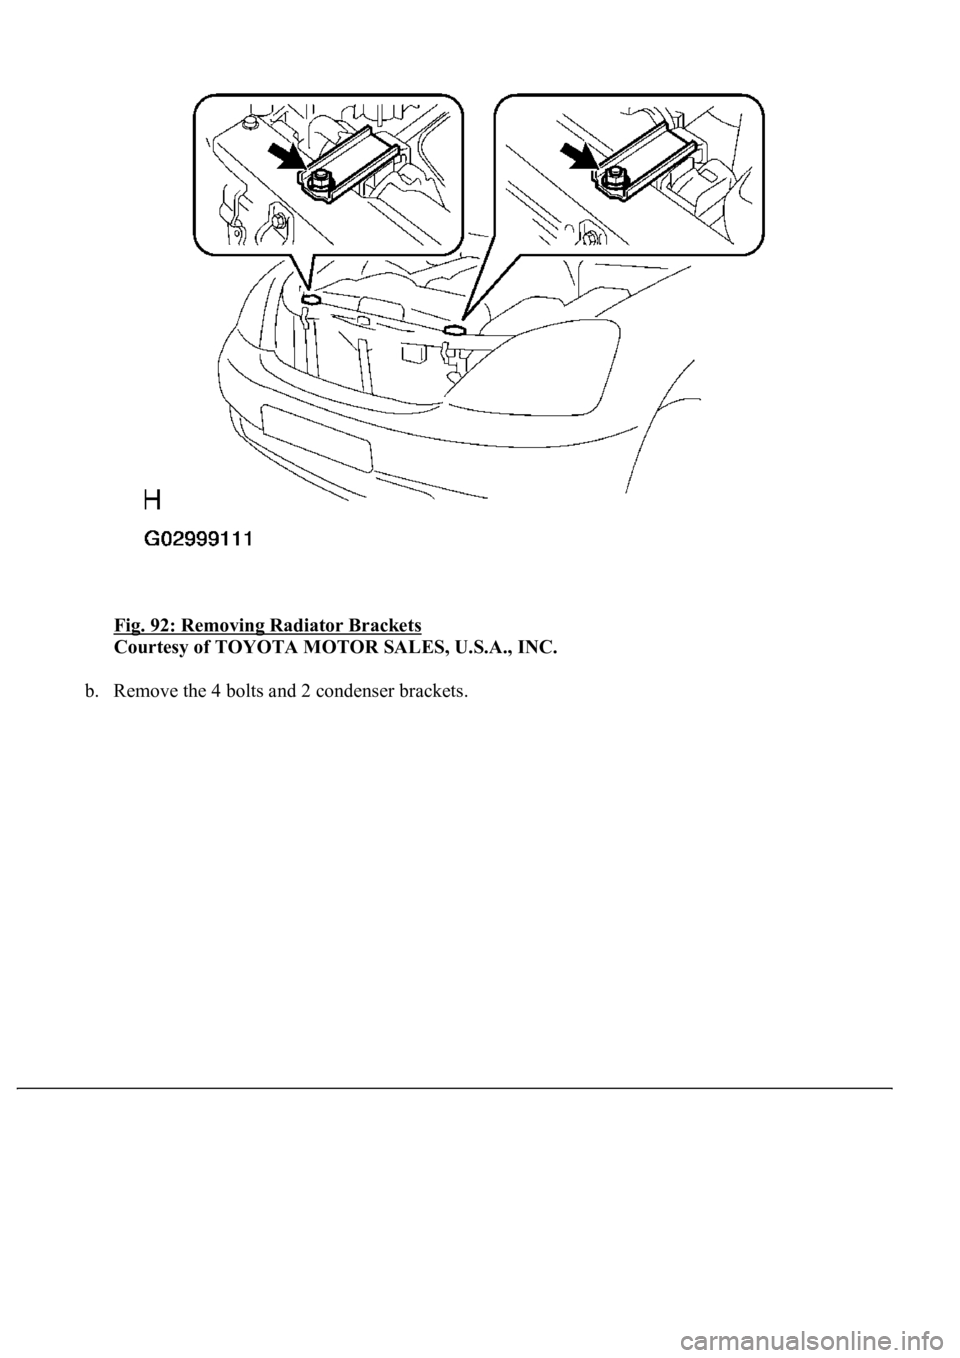
11.REMOVE RADIATOR SUPPORT SUB-ASSY UPPER
a. Remove the 2 nuts and 2 radiator brackets.
Page 4280 of 4500
Fig. 92: Removing Radiator Brackets
Courtesy of TOYOTA MOTOR SALES, U.S.A., INC.
b. Remove the 4 bolts and 2 condenser brackets.
Trending: trailer, mirror, manual transmission, roof, wheel bolts, buttons, v belt tensioner pulley
