LEXUS LS430 2003 Factory Repair Manual
Manufacturer: LEXUS, Model Year: 2003,
Model line: LS430,
Model: LEXUS LS430 2003
Pages: 4500, PDF Size: 87.45 MB
LEXUS LS430 2003 Factory Repair Manual
LS430 2003
LEXUS
LEXUS
https://www.carmanualsonline.info/img/36/57050/w960_57050-0.png
LEXUS LS430 2003 Factory Repair Manual
Trending: evaporator removal, Intake manifold, zero point calibration, Lock actuator, wheel size, fog light, B2620
Page 4281 of 4500
Fig. 93: Removing Condenser Brackets
Courtesy of TOYOTA MOTOR SALES, U.S.A., INC.
c. Remove the 3 wire harness clamps.
Page 4282 of 4500
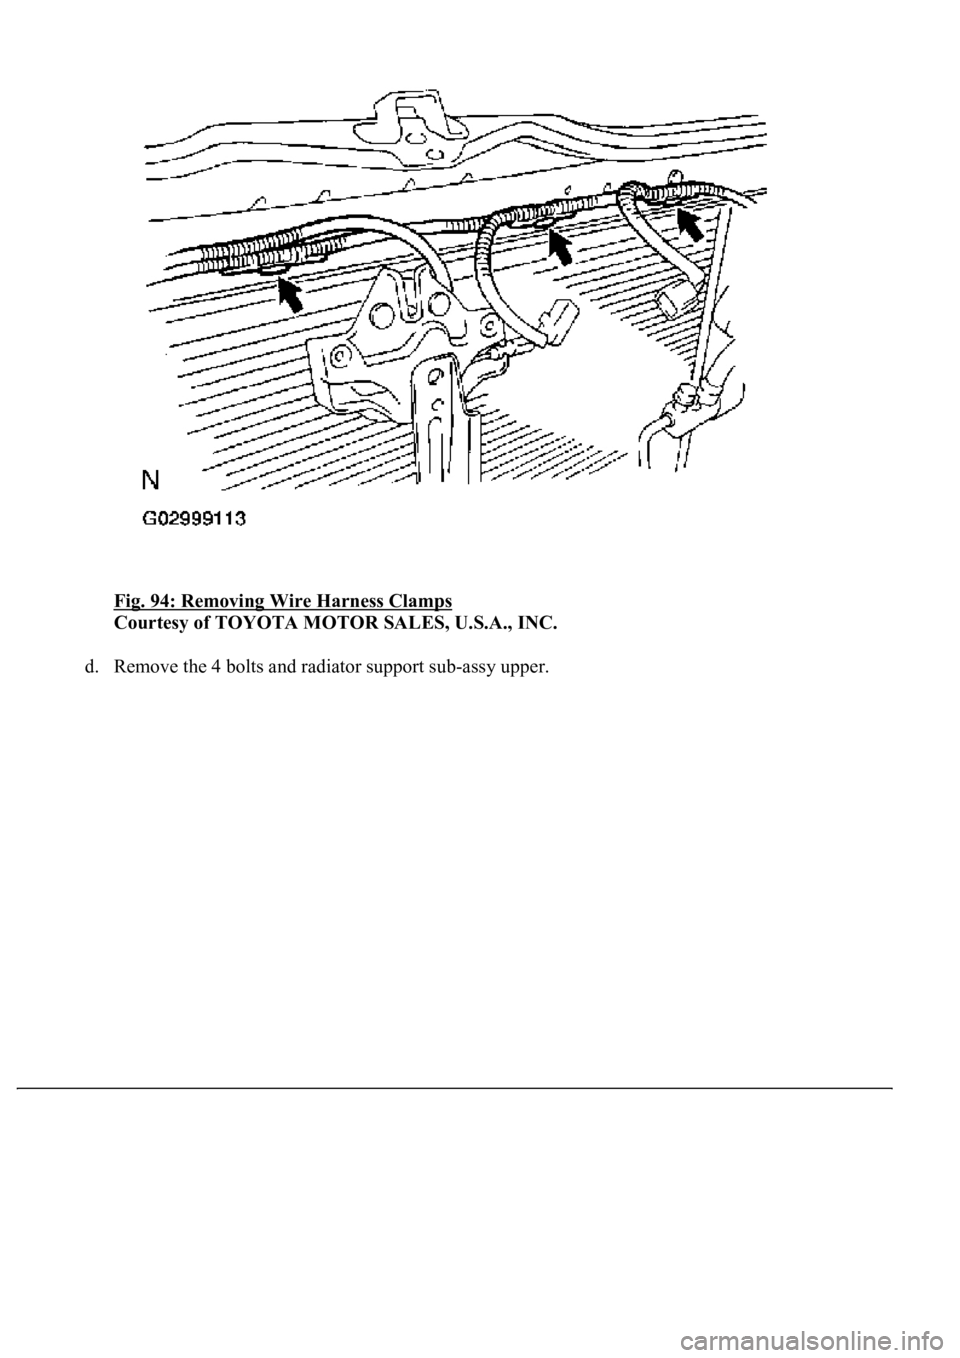
Fig. 94: Removing Wire Harness Clamps
Courtesy of TOYOTA MOTOR SALES, U.S.A., INC.
d. Remove the 4 bolts and radiator support sub-assy upper.
Page 4283 of 4500
Fig. 95: Removing Radiator Support Sub-Assy Upper
Courtesy of TOYOTA MOTOR SALES, U.S.A., INC.
12.REMOVE COOLER CONDENSER ASSY
a. Push down the 2 condenser brackets.
b. Push the radiator toward the engine.
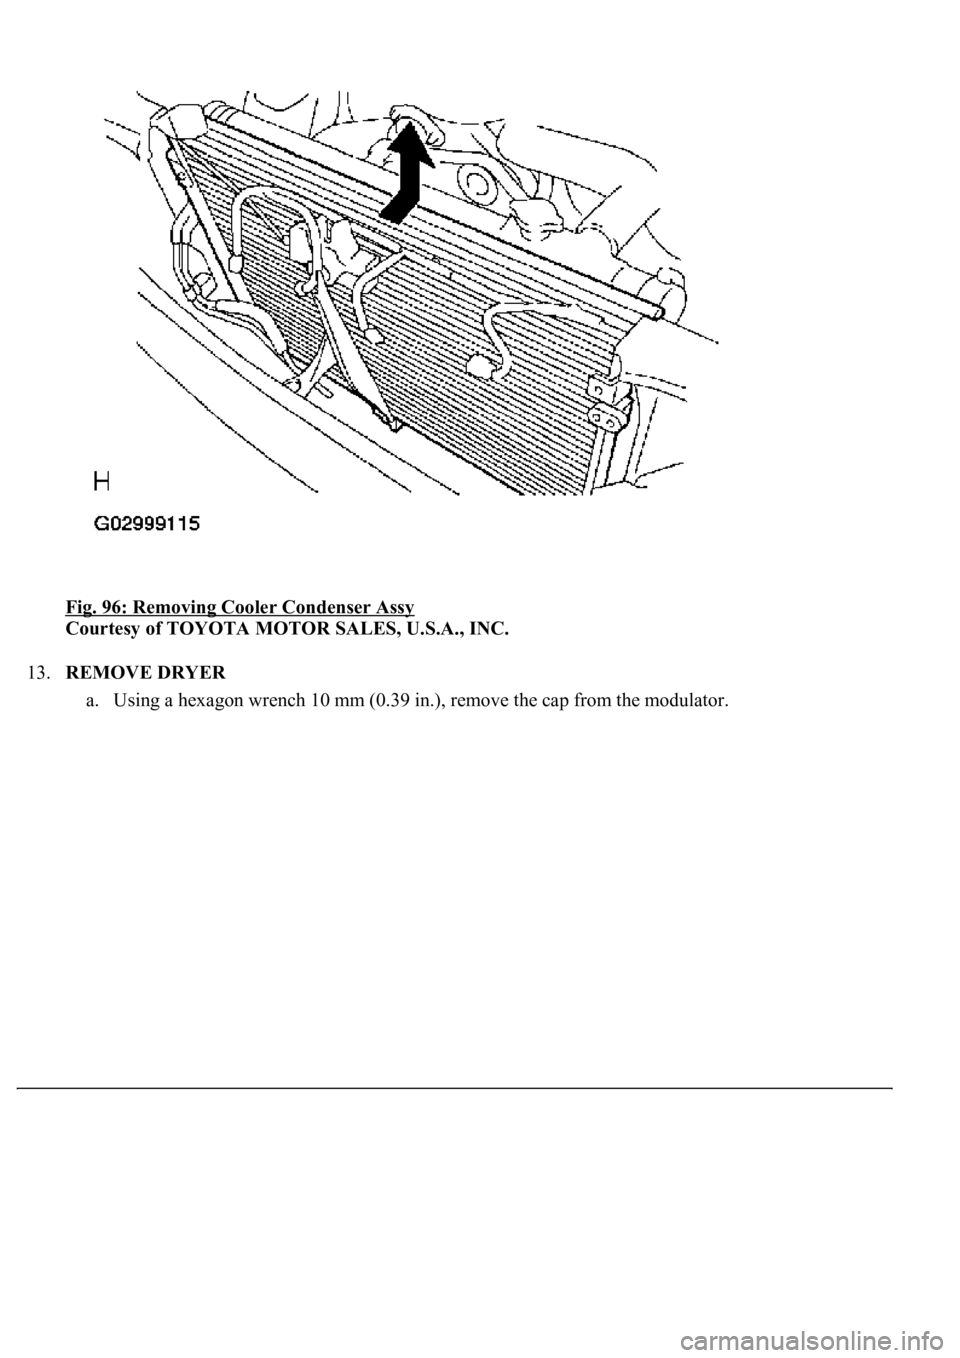
c. Push the condenser toward the radiator and then pull it upward as shown in Fig. 96
.
Page 4284 of 4500
Fig. 96: Removing Cooler Condenser Assy
Courtesy of TOYOTA MOTOR SALES, U.S.A., INC.
13.REMOVE DRYER
a. Usin
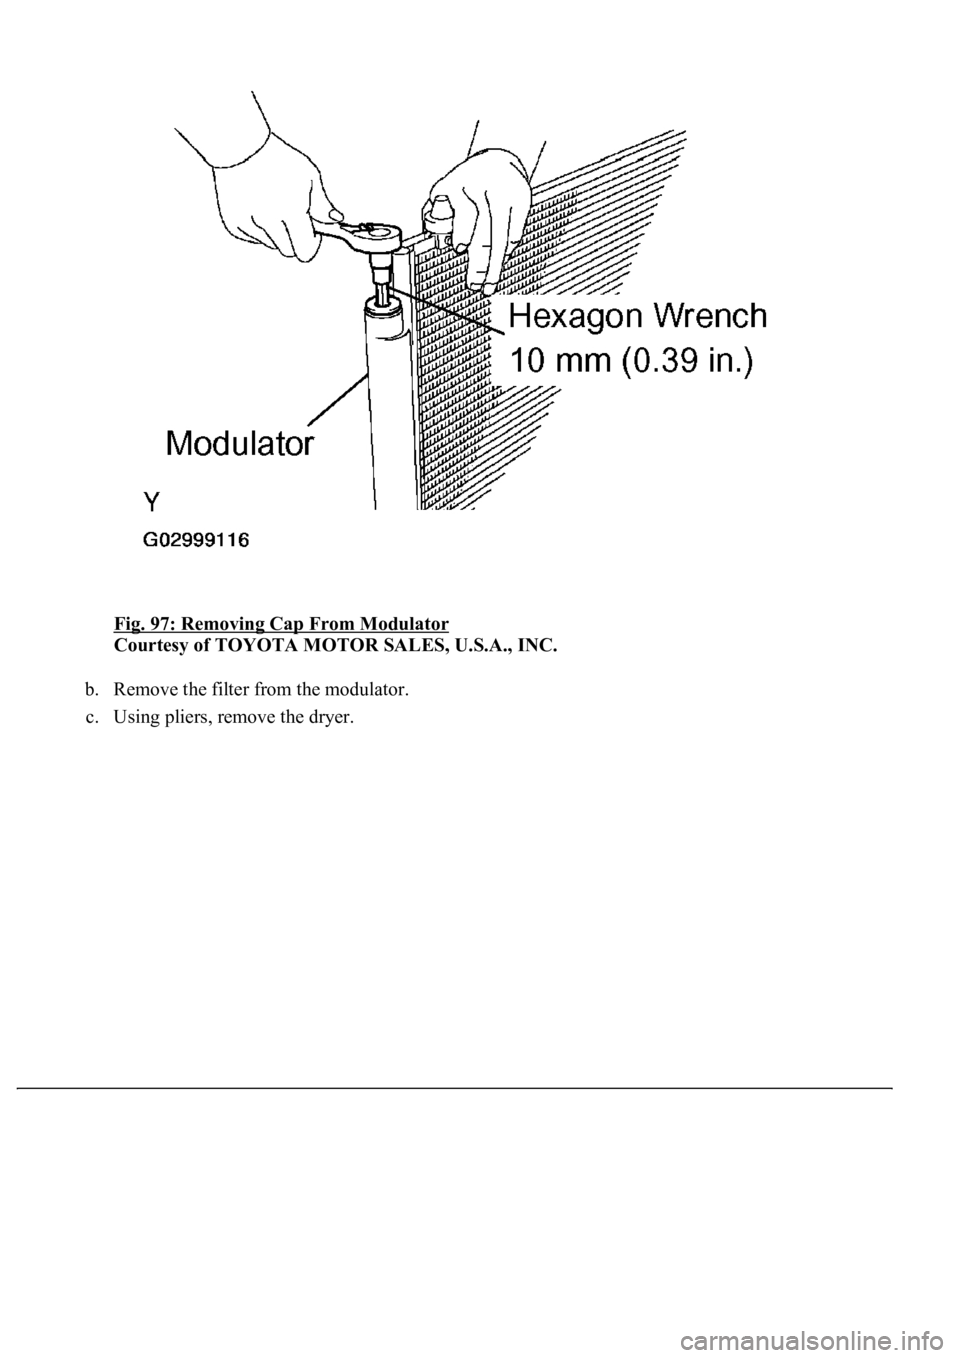
g a hexagon wrench 10 mm (0.39 in.), remove the cap from the modulator.
Page 4285 of 4500
Fig. 97: Removing Cap From Modulator
Courtesy of TOYOTA MOTOR SALES, U.S.A., INC.
b. Remove the filter from the modulator.
c. Usin
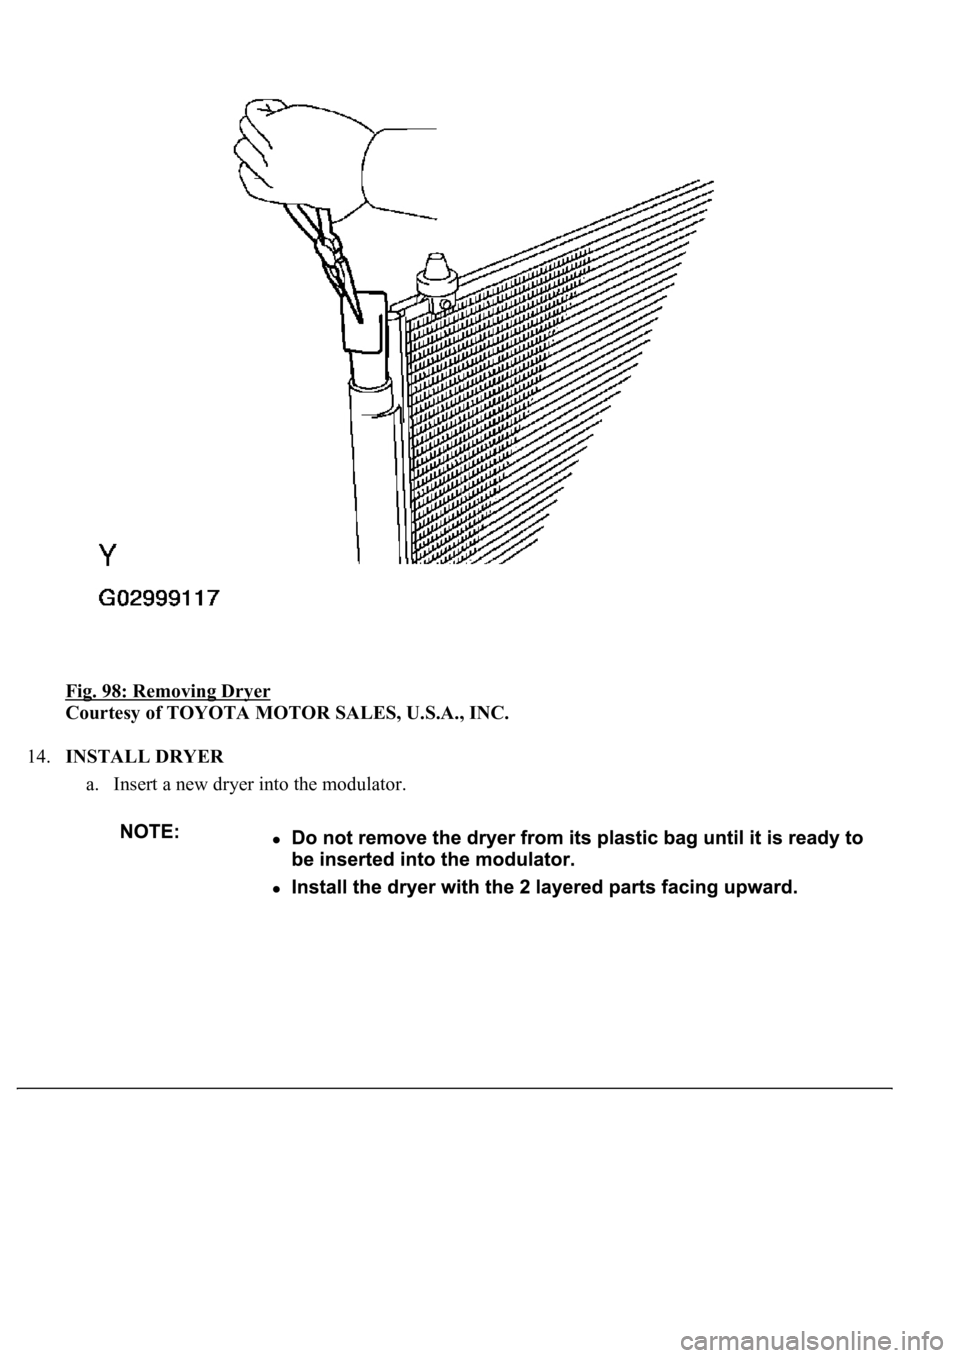
g pliers, remove the dryer.
Page 4286 of 4500
Fig. 98: Removing Dryer
Courtesy of TOYOTA MOTOR SALES, U.S.A., INC.
14.INSTALL DRYER
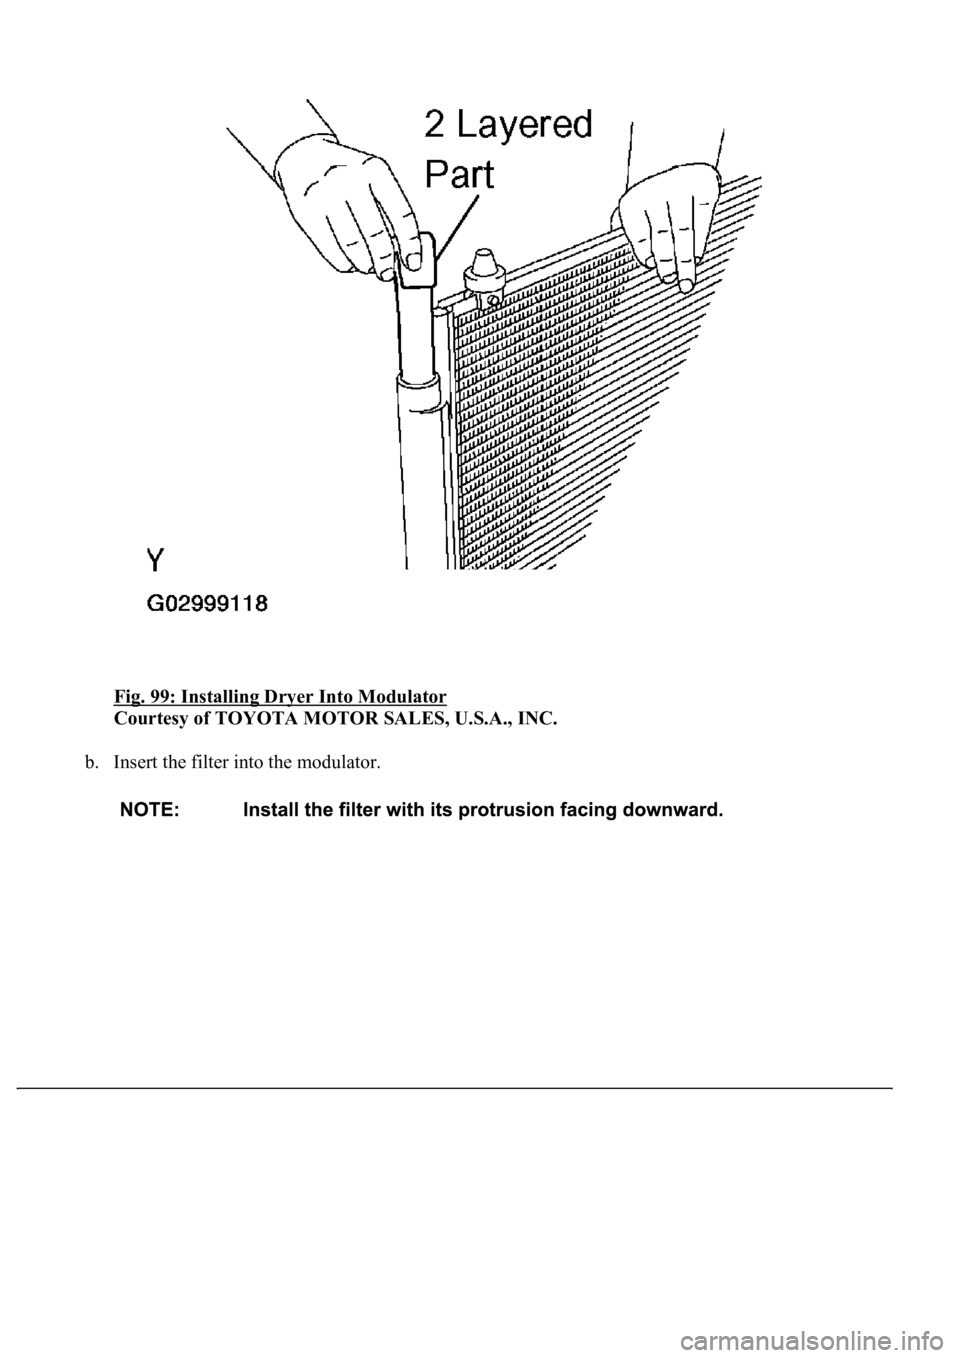
a. Insert a new dryer into the modulator.
Page 4287 of 4500
Fig. 99: Installing Dryer Into Modulator
Courtesy of TOYOTA MOTOR SALES, U.S.A., INC.
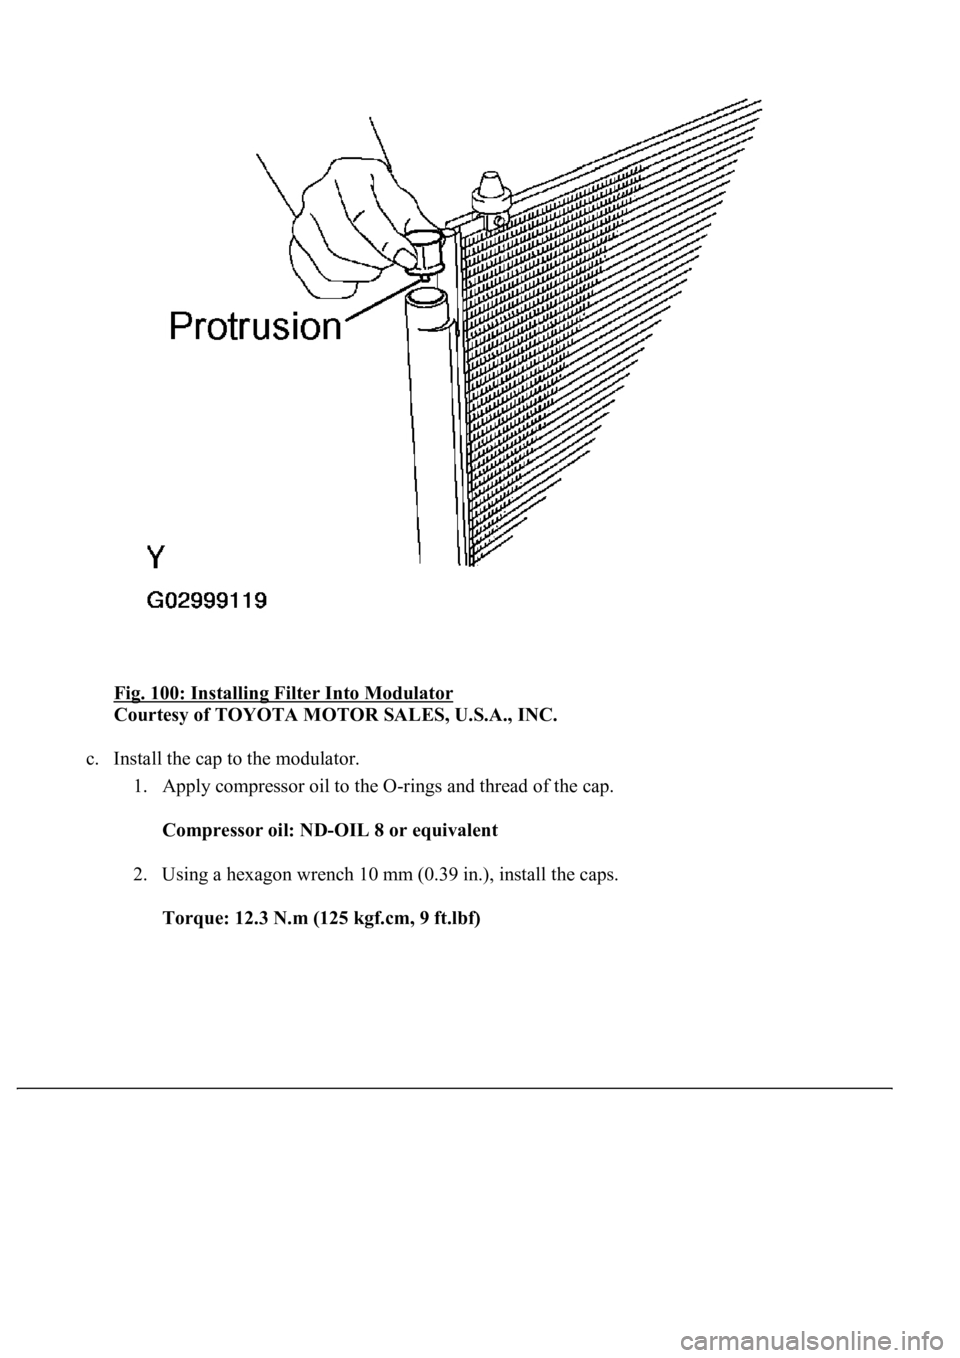
b. Insert the filter into the modulator.
Page 4288 of 4500
Fig. 100: Installing Filter Into Modulator
Courtesy of TOYOTA MOTOR SALES, U.S.A., INC.
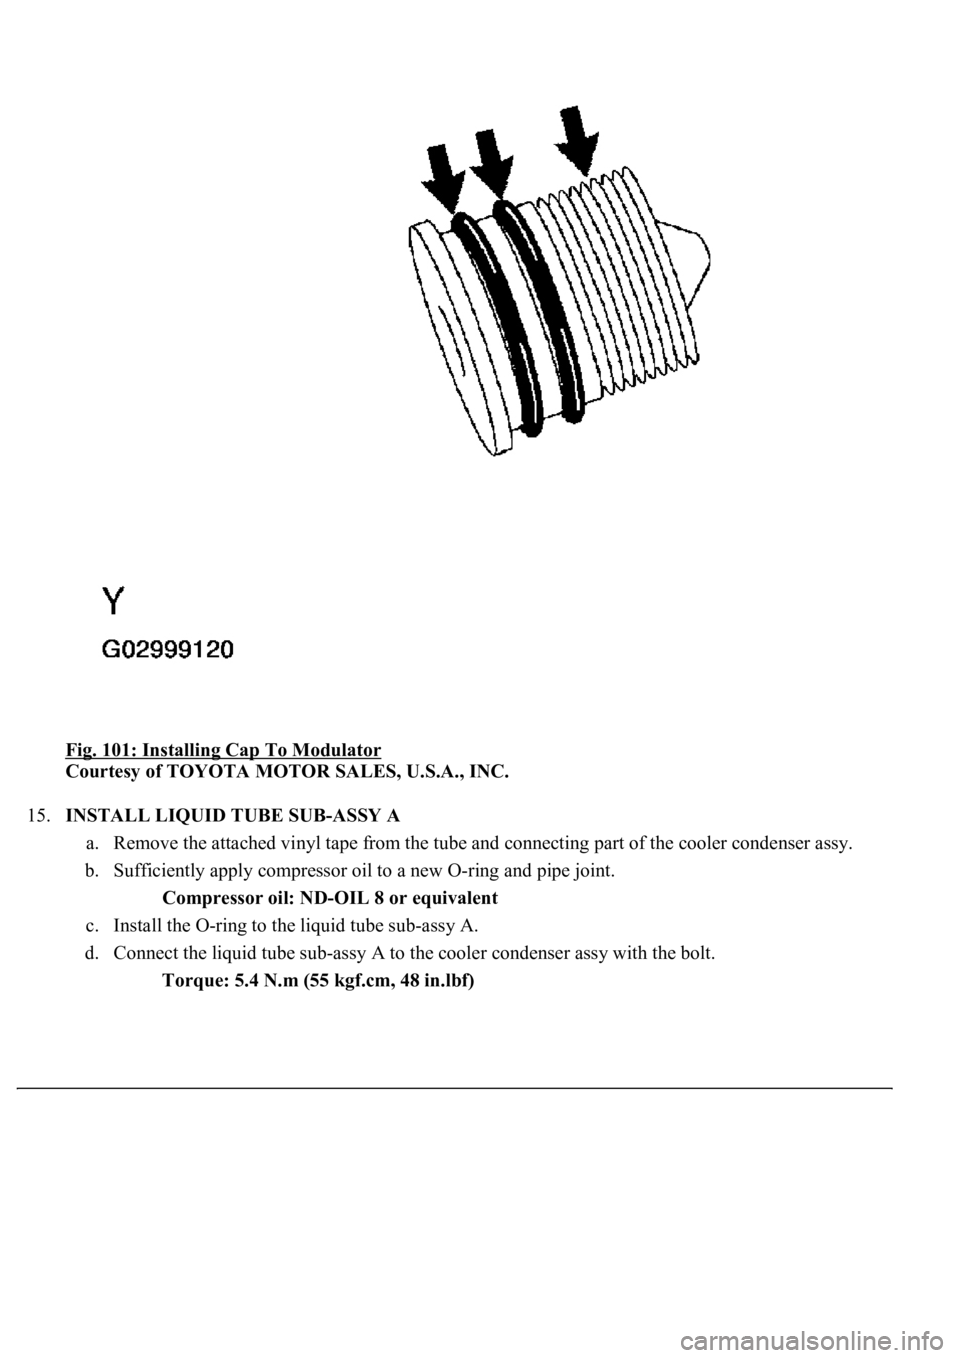
c. Install the cap to the modulator.
1. Apply compressor oil to the O-rings and thread of the cap.
Compressor oil: ND-OIL 8 or equivalent
2. Using a hexagon wrench 10 mm (0.39 in.), install the caps.
Torque: 12.3 N.m (125 kgf.cm, 9 ft.lbf)
Page 4289 of 4500
Fig. 101: Installing Cap To Modulator
Courtesy of TOYOTA MOTOR SALES, U.S.A., INC.
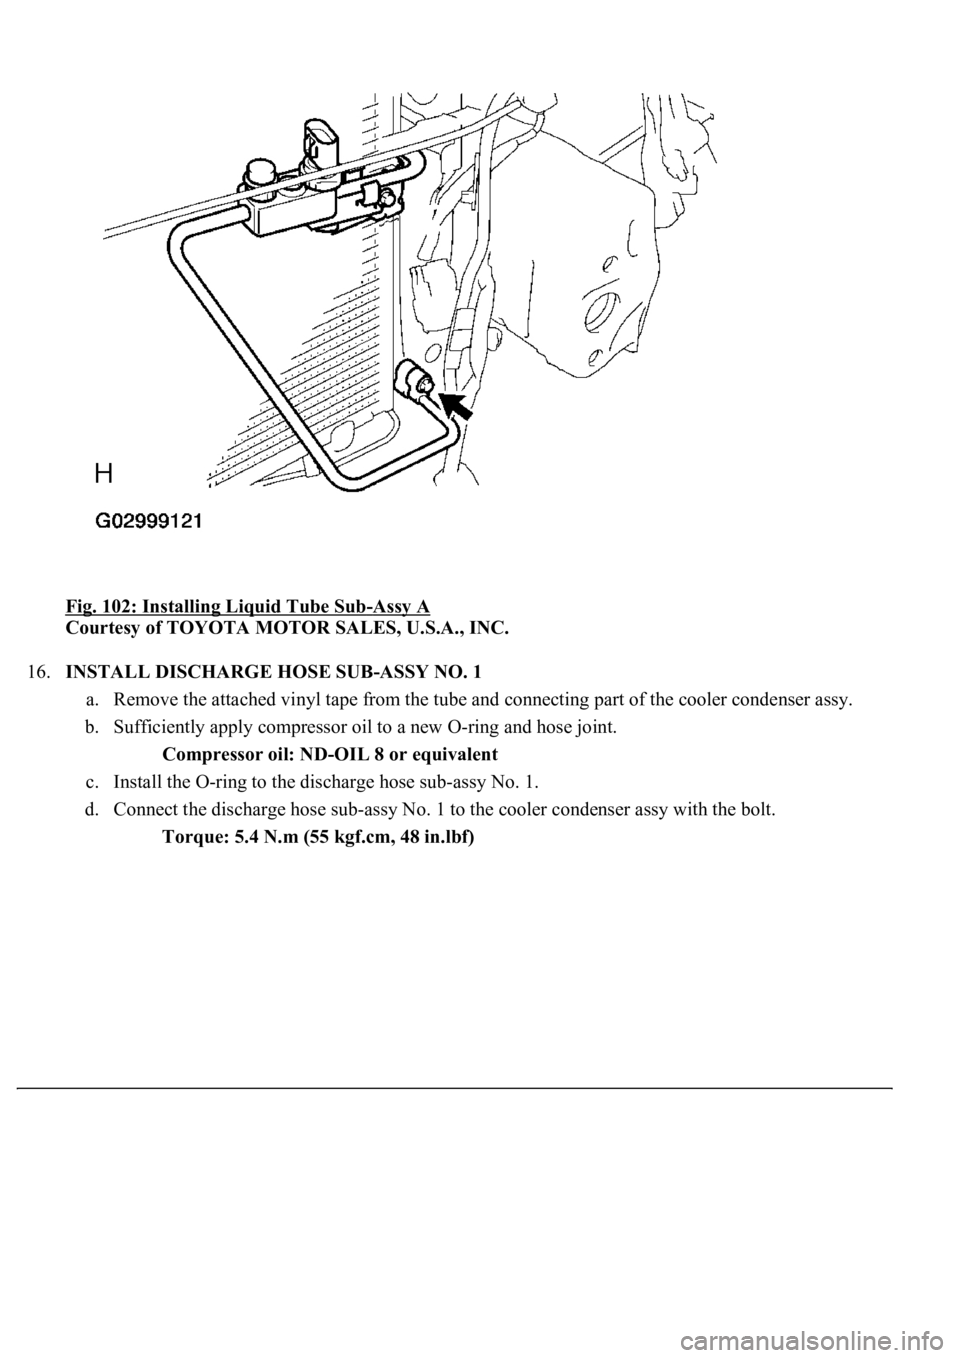
15.INSTALL LIQUID TUBE SUB-ASSY A
a. Remove the attached vinyl tape from the tube and connecting part of the cooler condenser assy.
b. Sufficiently apply compressor oil to a new O-ring and pipe joint.
Compressor oil: ND-OIL 8 or equivalent
c. Install the O-ring to the liquid tube sub-assy A.
d. Connect the liquid tube sub-assy A to the cooler condenser assy with the bolt.
Torque: 5.4 N.m (55 kgf.cm, 48 in.lbf)
Page 4290 of 4500
Fig. 102: Installing Liquid Tube Sub-Assy A
Courtesy of TOYOTA MOTOR SALES, U.S.A., INC.
16.INSTALL DISCHARGE HOSE SUB-ASSY NO. 1
a. Remove the attached vinyl tape from the tube and connecting part of the cooler condenser assy.
b. Sufficiently apply compressor oil to a new O-ring and hose joint.
Compressor oil: ND-OIL 8 or equivalent
c. Install the O-ring to the discharge hose sub-assy No. 1.
d. Connect the discharge hose sub-assy No. 1 to the cooler condenser assy with the bolt.
Torque: 5.4 N.m (55 kgf.cm, 48 in.lbf)
Trending: air filter, alternator, oxygen sensor, tow bar, transmission oil, Speedometer, tow
