MITSUBISHI ENDEAVOR 2004 Service Repair Manual
ENDEAVOR 2004
MITSUBISHI
MITSUBISHI
https://www.carmanualsonline.info/img/19/57105/w960_57105-0.png
MITSUBISHI ENDEAVOR 2004 Service Repair Manual
Trending: crankshaft pulley, air condition compressor, Coils, radiator, wiper fluid, trunk, engine overheat
Page 3071 of 3870
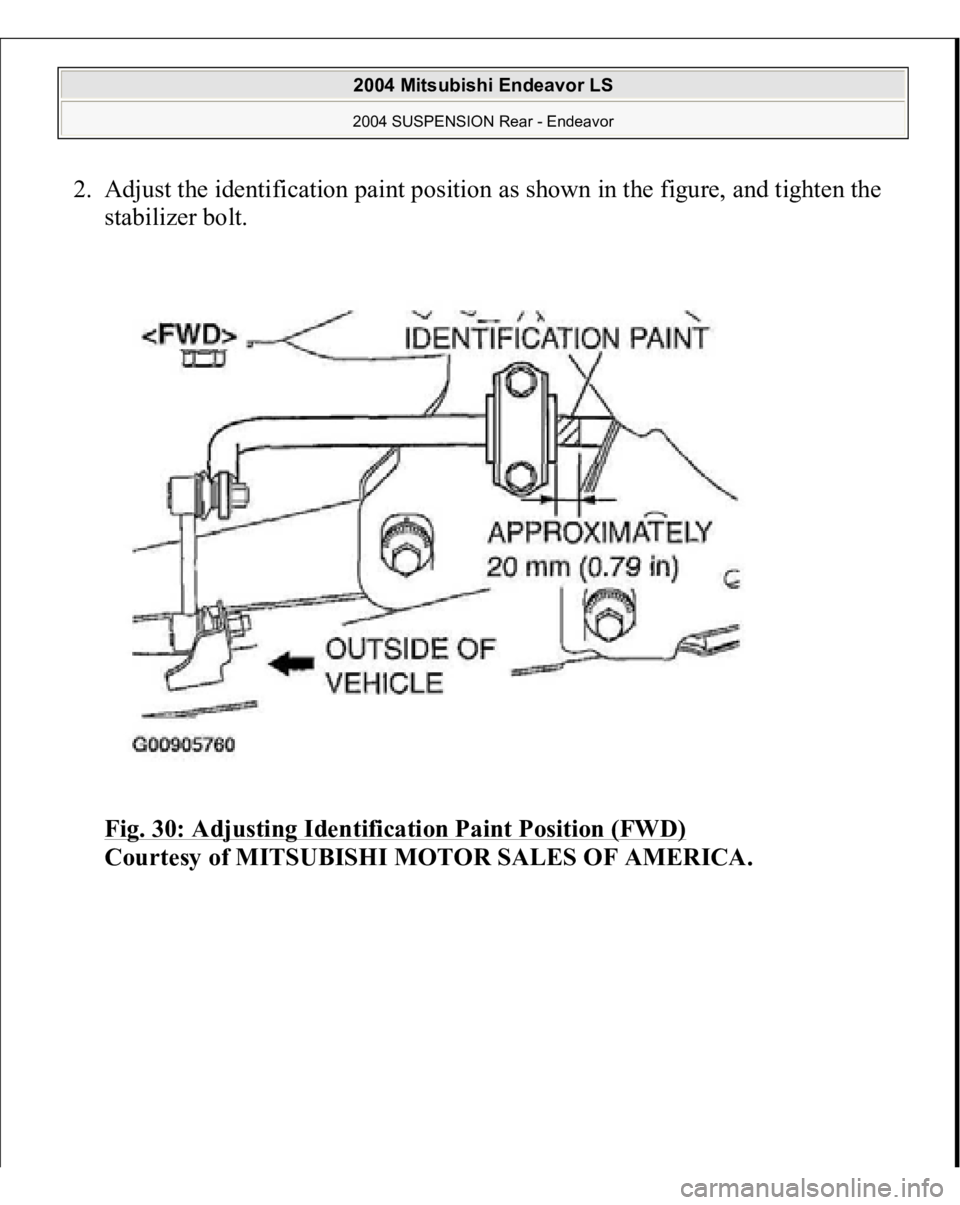
2. Adjust the identification paint position as shown in the figure, and tighten the
stabilizer bolt.
Fig. 30: Adjusting Identification Paint Position (FWD)
Courtesy of MITSUBISHI MOTOR SALES OF AMERICA.
2004 Mitsubishi Endeavor LS 2004 SUSPENSION Rear - Endeavor
Page 3072 of 3870
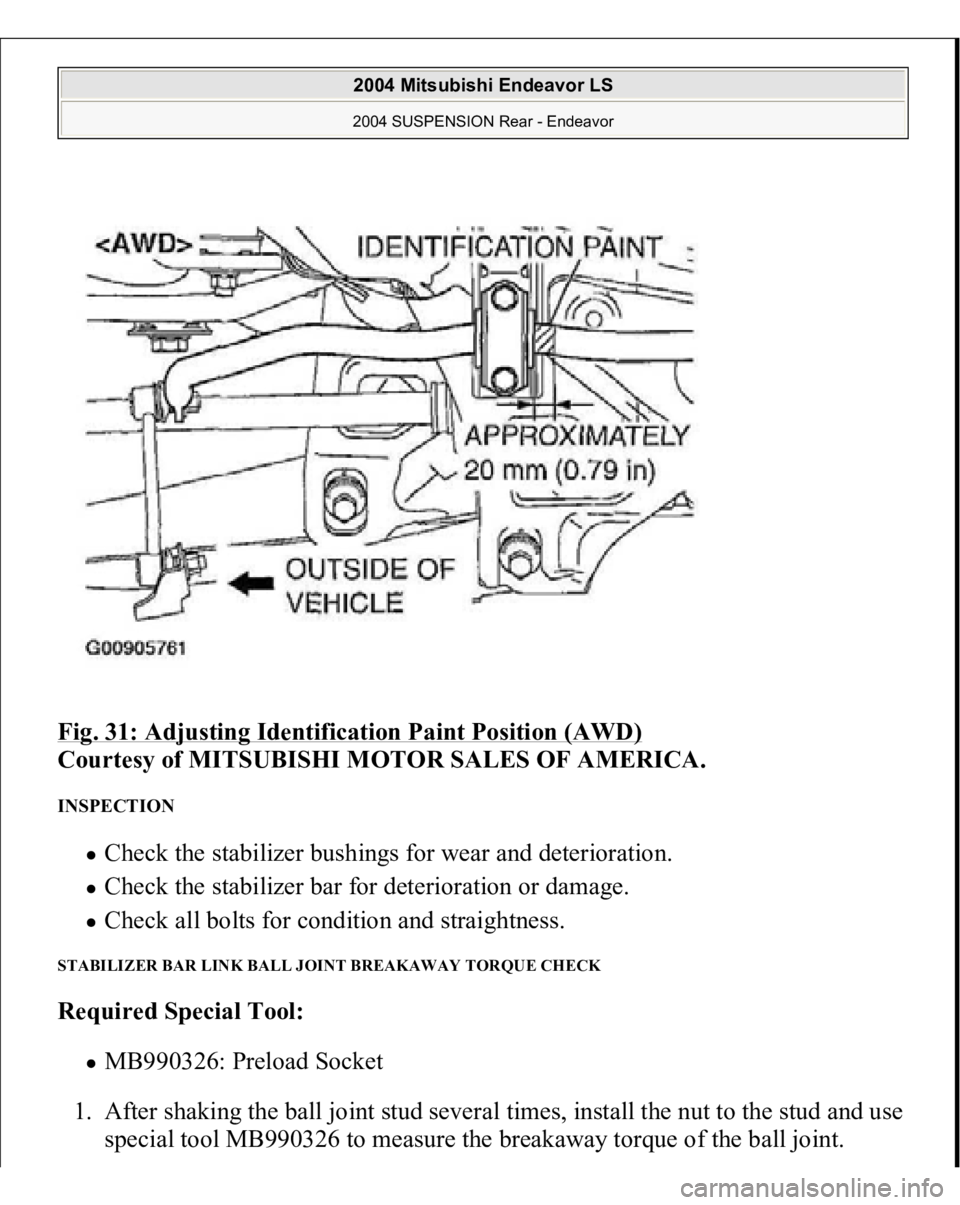
Fig. 31: Adjusting Identification Paint Position (AWD)
Courtesy of MITSUBISHI MOTOR SALES OF AMERICA.
INSPECTION
Check the stabilizer bushings for wear and deterioration. Check the stabilizer bar for deterioration or damage. Check all bolts for condition and straightness.
STABILIZER BAR LINK BALL JOINT BREAKAWAY TORQUE CHECK Required Special Tool:
MB990326: Preload Socket
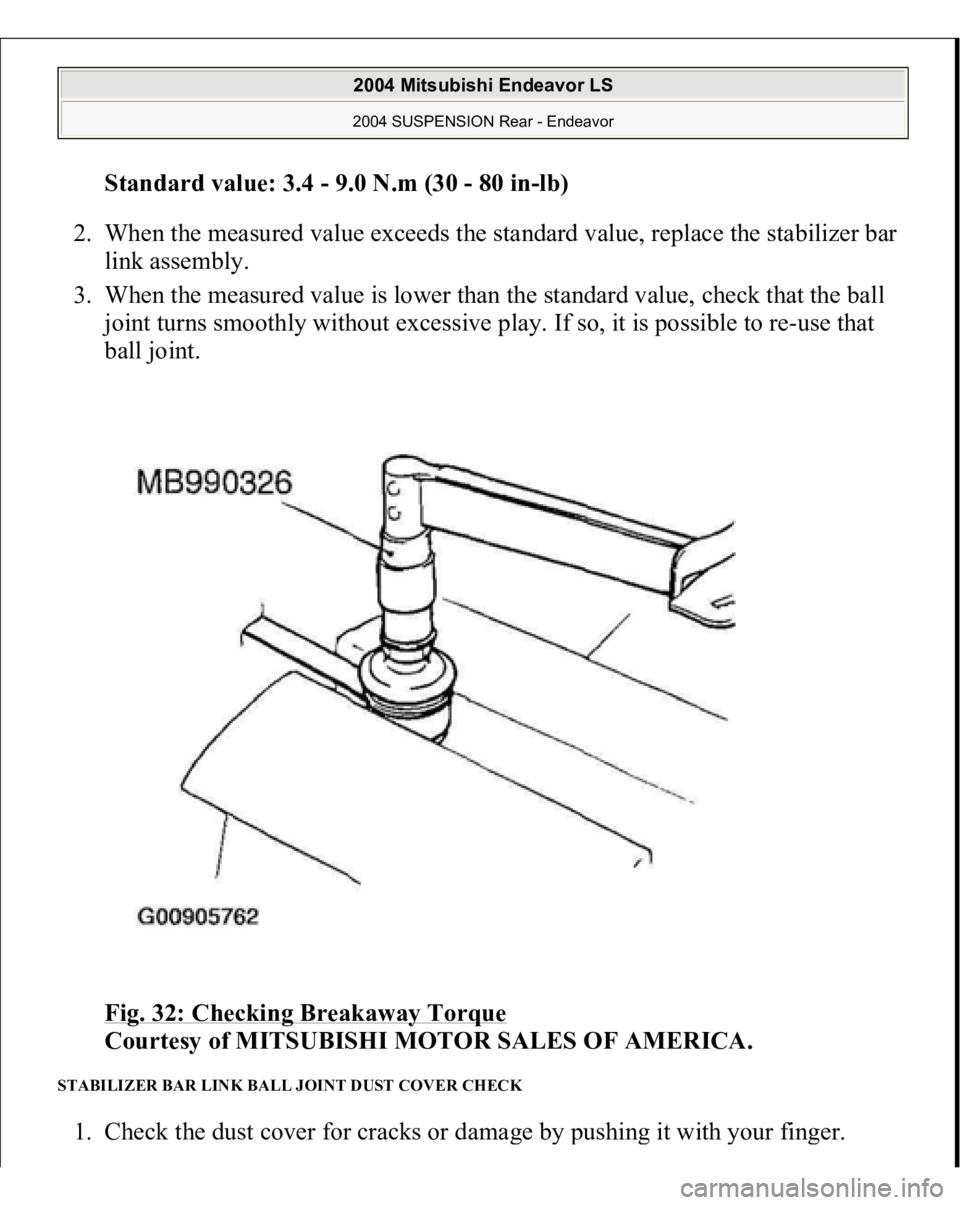
1. After shaking the ball joint stud several times, install the nut to the stud and use
special tool MB990326 to measure the breakaway torque of the ball joint.
2004 Mitsubishi Endeavor LS 2004 SUSPENSION Rear - Endeavor
Page 3073 of 3870
Standard value: 3.4 - 9.0 N.m (30 - 80 i
n-lb)
2. When the measured value exceeds the standard value, replace the stabilizer bar
link assembly.
3. When the measured value is lower than the standard value, check that the ball
joint turns smoothly without excessive play. If so, it is possible to re-use that
ball joint.
Fig. 32: Checking Breakaway Torque
Courtesy of MITSUBISHI MOTOR SALES OF AMERICA.
STABILIZER BAR LINK BALL JOINT DUST COVER CHECK 1. Check the dust cover for cracks or dama
ge b
y pushin
g it with
your fin
ger.
2004 Mitsubishi Endeavor LS 2004 SUSPENSION Rear - Endeavor
Page 3074 of 3870
2. If the dust cover is cracked or damaged, replace the stabilizer bar link
assembly. REAR SUSPENSION CROSSMEMBER REMOVAL AND INSTALLATION < FWD>
NOTE: Cracks or damage of the dust cover may cause damage
to the ball joint.
CAUTION: For vehicles with ABS, be careful when handling the
pole piece at the tip of the ABS sensor so as not to
damage it by striking against other parts.
2004 Mitsubishi Endeavor LS 2004 SUSPENSION Rear - Endeavor
Page 3075 of 3870
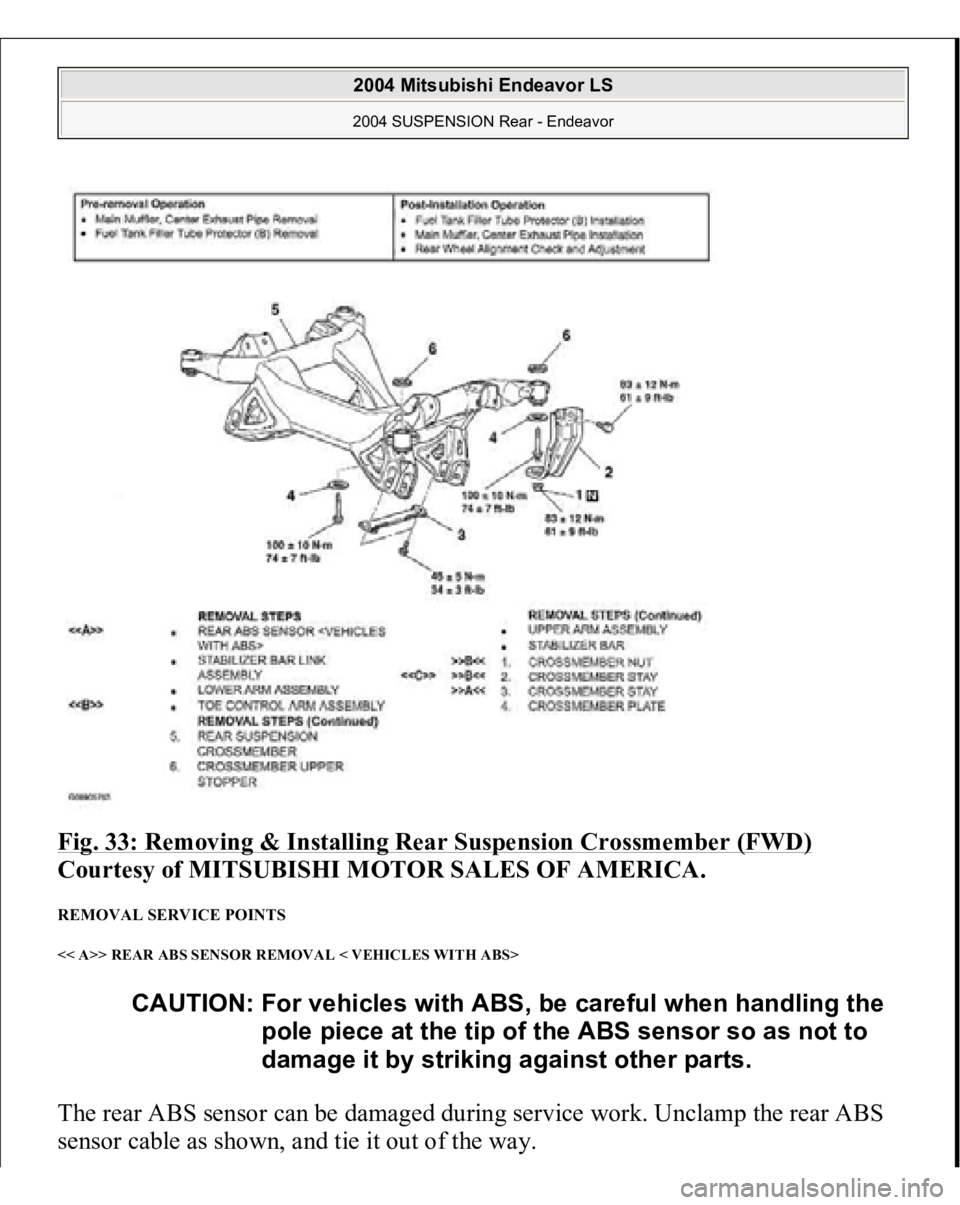
Fig. 33: Removing & Installing Rear Suspension Crossmember (FWD)
Courtesy of MITSUBISHI MOTOR SALES OF AMERICA.
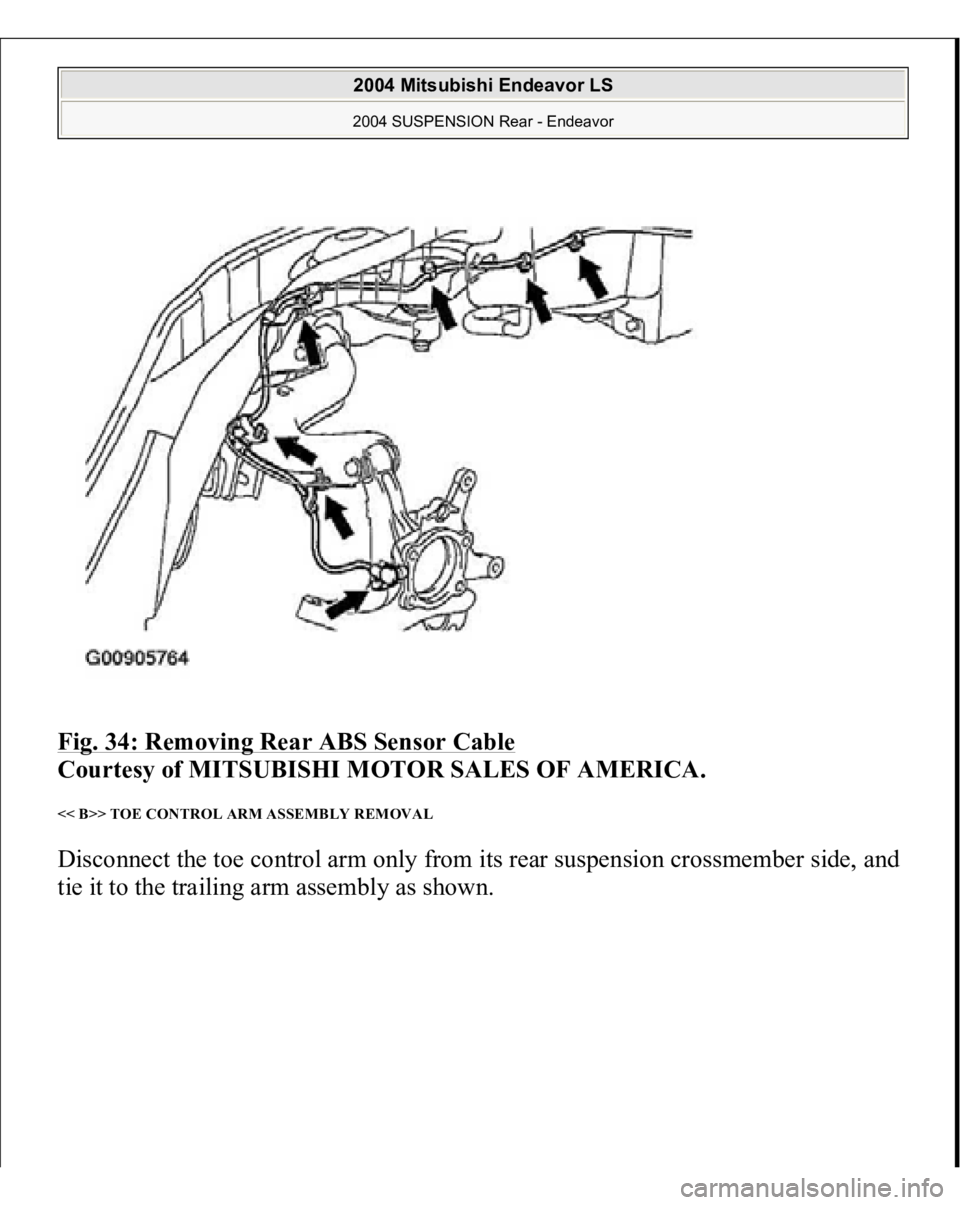
REMOVAL SERVICE POINTS << A>> REAR ABS SENSOR REMOVAL < VEHICLES WITH ABS> The rear ABS sensor can be damaged during service work. Unclamp the rear ABS
sensor cable as shown, and tie it out of the wa
y.
CAUTION: For vehicles with ABS, be careful when handling the
pole piece at the tip of the ABS sensor so as not to
damage it by striking against other parts.
2004 Mitsubishi Endeavor LS 2004 SUSPENSION Rear - Endeavor
Page 3076 of 3870
Fig. 34: Removing Rear ABS Sensor Cable
Courtesy of MITSUBISHI MOTOR SALES OF AMERICA.
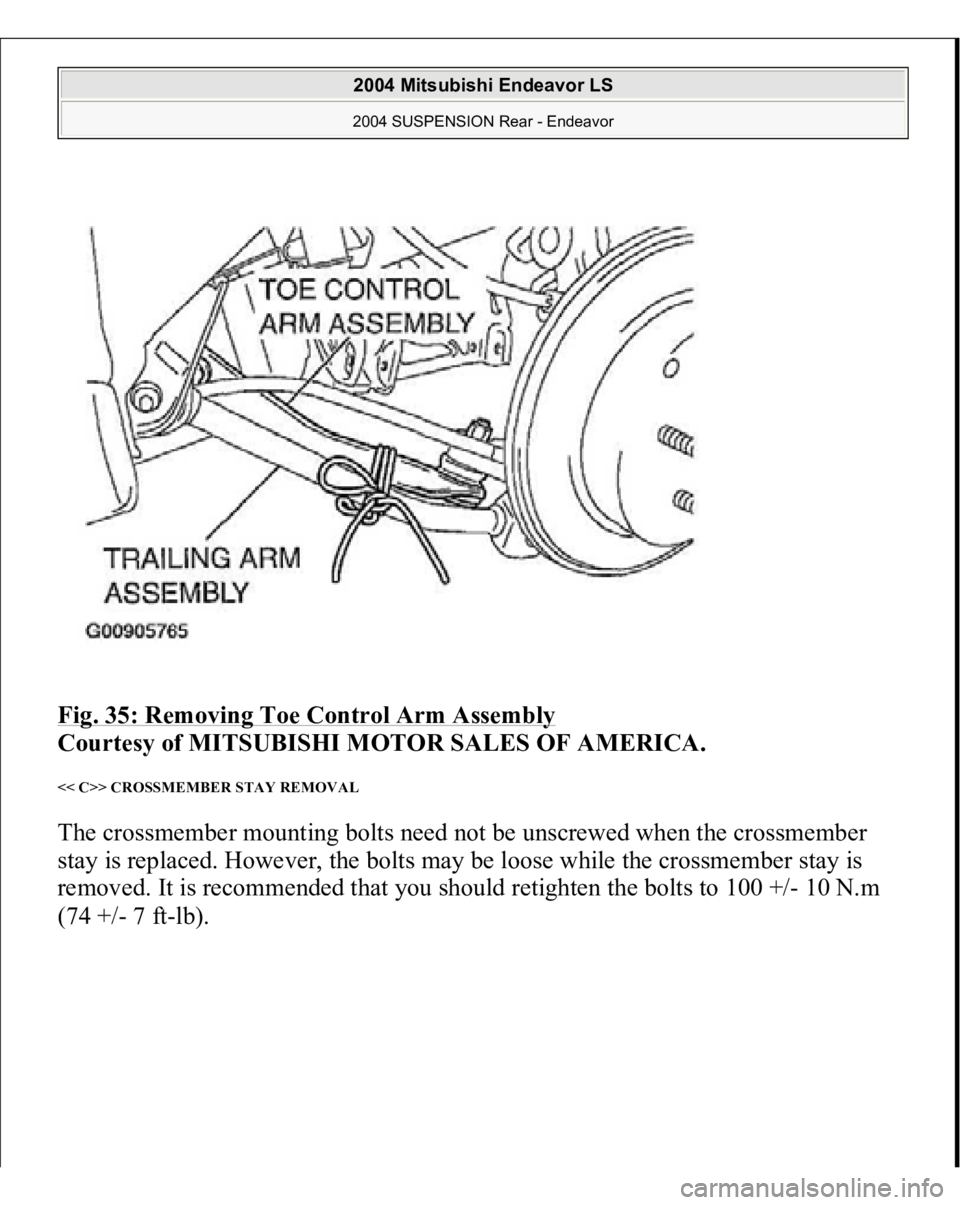
<< B>> TOE CONTROL ARM ASSEMBLY REMOVAL Disconnect the toe control arm only from its rear suspension crossmember side, and
tie it to the trailin
g arm assembl
y as shown.
2004 Mitsubishi Endeavor LS 2004 SUSPENSION Rear - Endeavor
Page 3077 of 3870
Fig. 35: Removing Toe Control Arm Assembly
Courtesy of MITSUBISHI MOTOR SALES OF AMERICA.
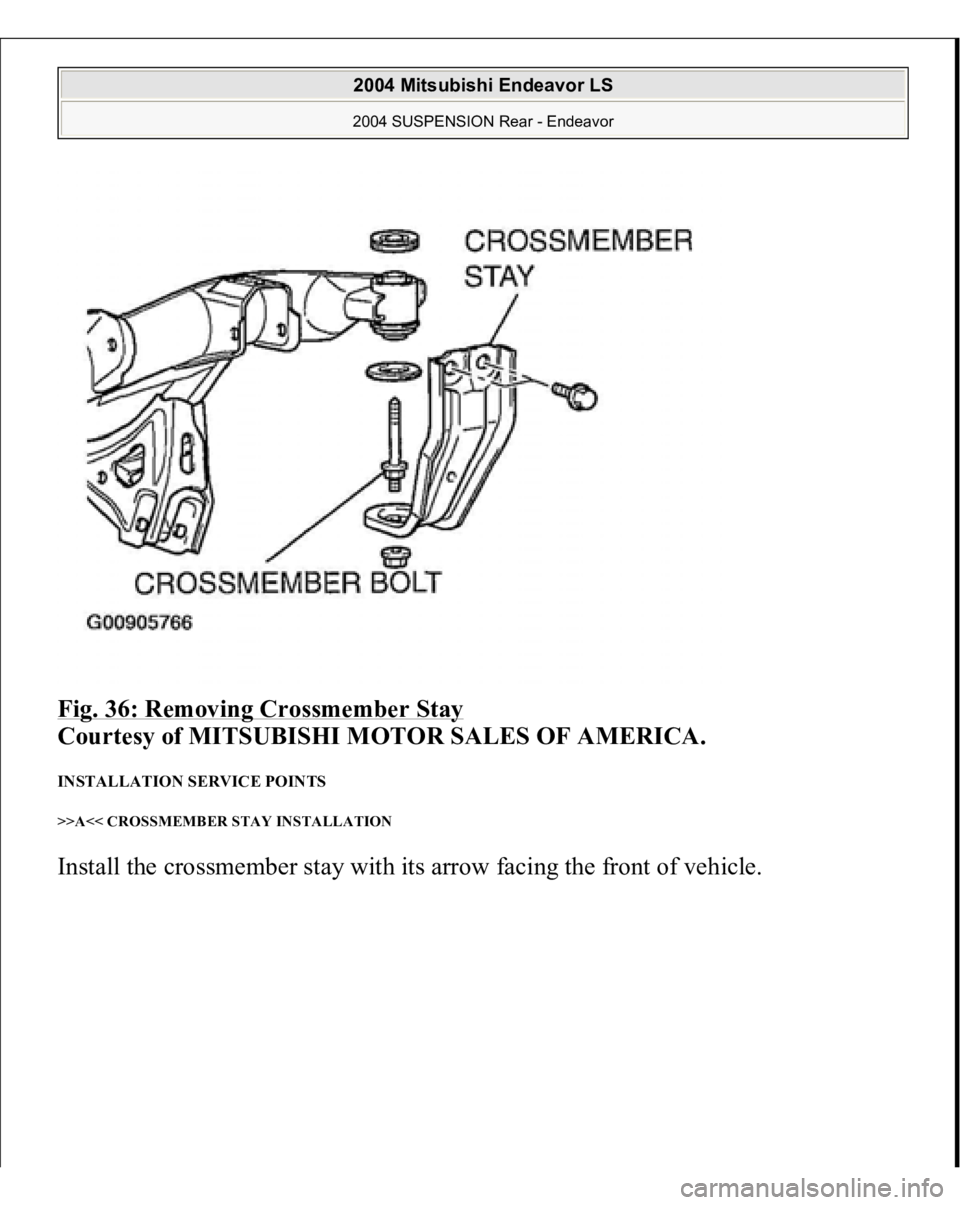
<< C>> CROSSMEMBER STAY REMOVAL The crossmember mounting bolts need not be unscrewed when the crossmember
stay is replaced. However, the bolts may be loose while the crossmember stay is
removed. It is recommended that you should retighten the bolts to 100 +/- 10 N.m (74 +
/- 7 f
t-lb
).
2004 Mitsubishi Endeavor LS 2004 SUSPENSION Rear - Endeavor
Page 3078 of 3870
Fig. 36: Removing Crossmember Stay
Courtesy of MITSUBISHI MOTOR SALES OF AMERICA.
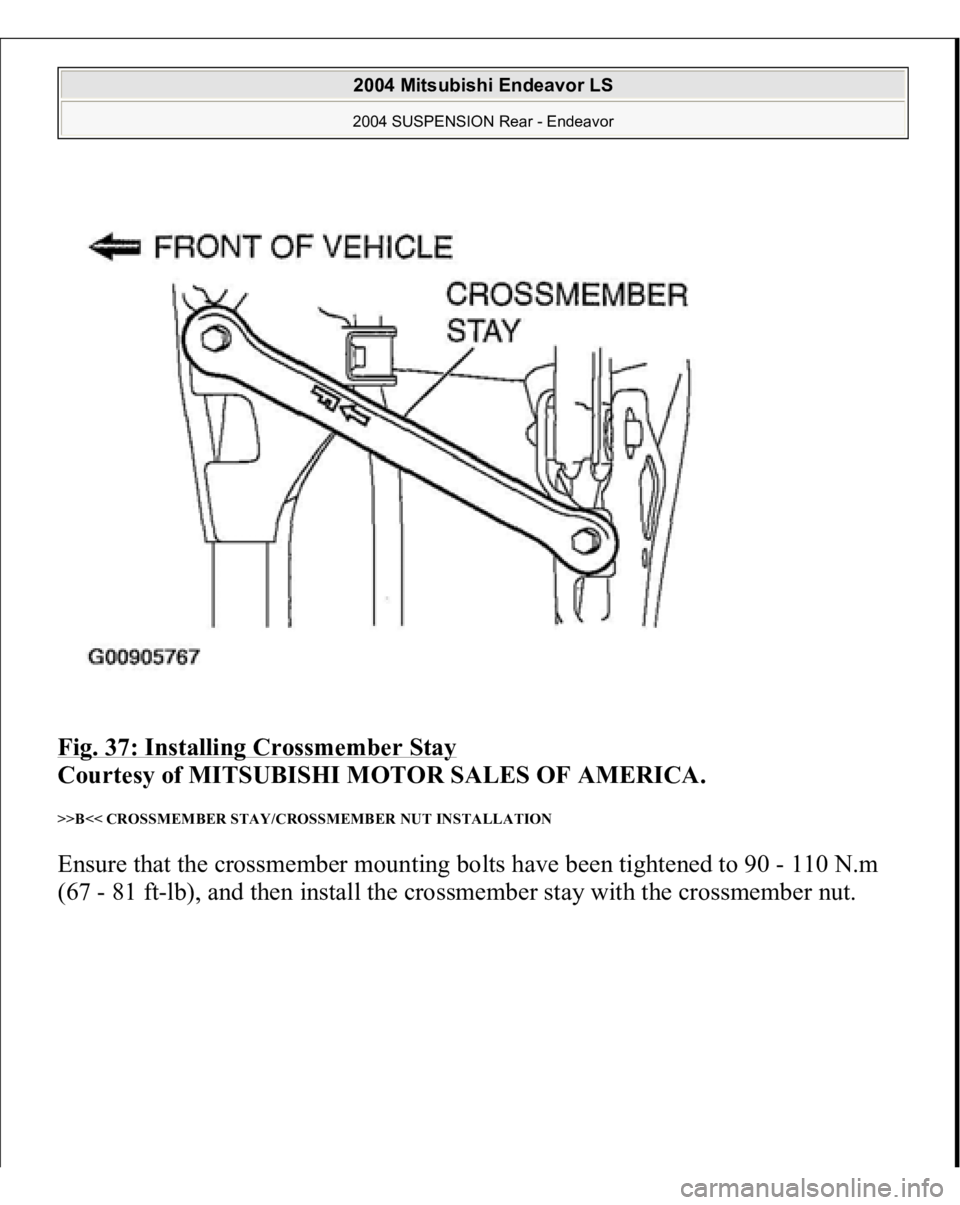
INSTALLATION SERVICE POINTS >>A<< CROSSMEMBER STAY INSTALLATION Install the crossmember stay with its arrow facing the front of vehicle.
2004 Mitsubishi Endeavor LS 2004 SUSPENSION Rear - Endeavor
Page 3079 of 3870
Fig. 37: Installing Crossmember Stay
Courtesy of MITSUBISHI MOTOR SALES OF AMERICA.
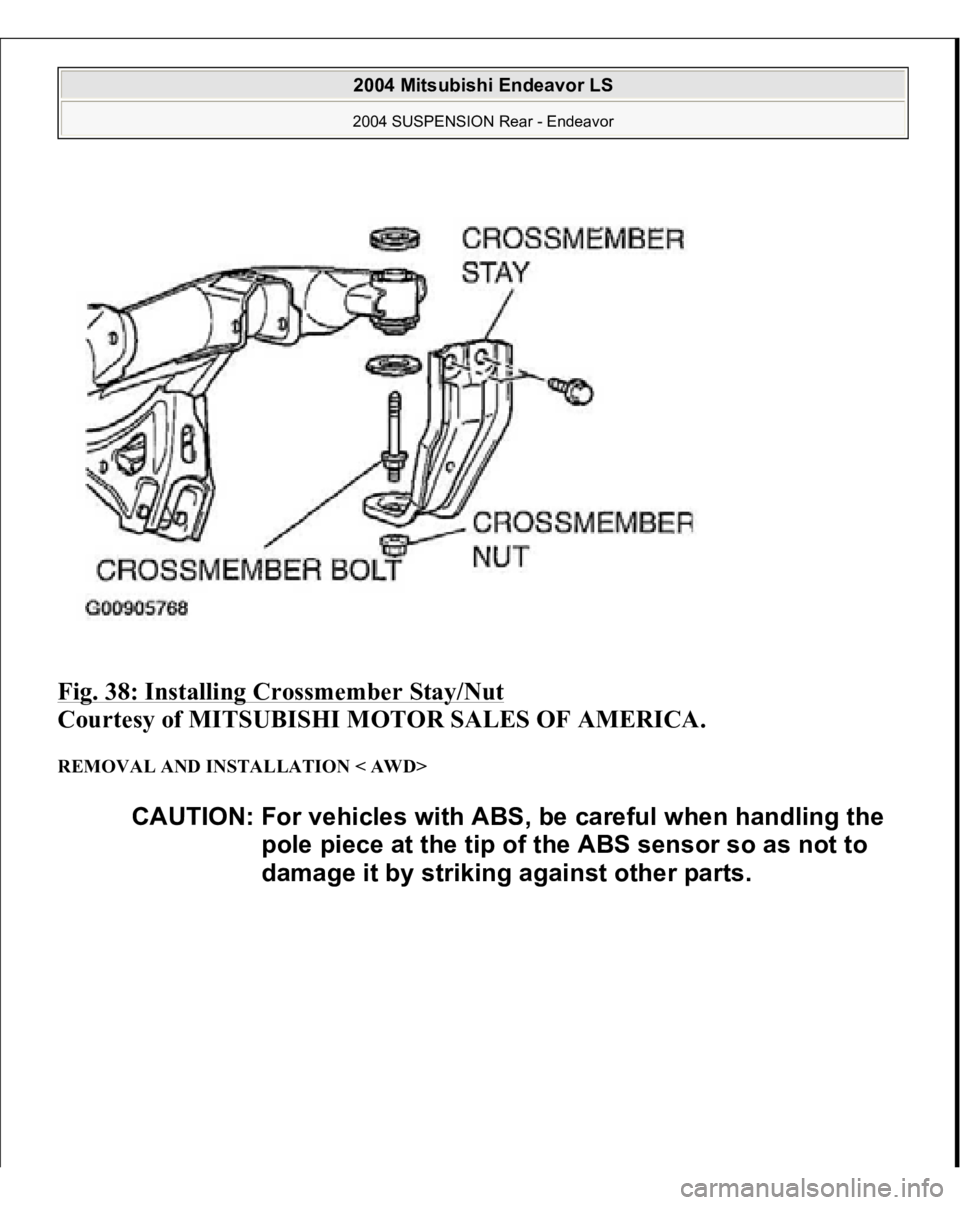
>>B<< CROSSMEMBER STAY/CROSSMEMBER NUT INSTALLATION Ensure that the crossmember mounting bolts have been tightened to 90 - 110 N.m (67 - 81 f
t-lb
), and then install the crossmember sta
y with the crossmember nut.
2004 Mitsubishi Endeavor LS 2004 SUSPENSION Rear - Endeavor
Page 3080 of 3870
Fig. 38: Installing Crossmember Stay/Nut
Courtesy of MITSUBISHI MOTOR SALES OF AMERICA.
REMOVAL AND INSTALLATION < AWD>
CAUTION: For vehicles with ABS, be careful when handling the
pole piece at the tip of the ABS sensor so as not to
damage it by striking against other parts.
2004 Mitsubishi Endeavor LS 2004 SUSPENSION Rear - Endeavor
Trending: O2 sensors, engine, Antifr, Battery terminals, high beam, fuel pump, wiring diagram
