ISUZU KB P190 2007 Workshop Repair Manual
Manufacturer: ISUZU, Model Year: 2007, Model line: KB P190, Model: ISUZU KB P190 2007Pages: 6020, PDF Size: 70.23 MB
Page 4831 of 6020
TRANSFER CASE 7D-1
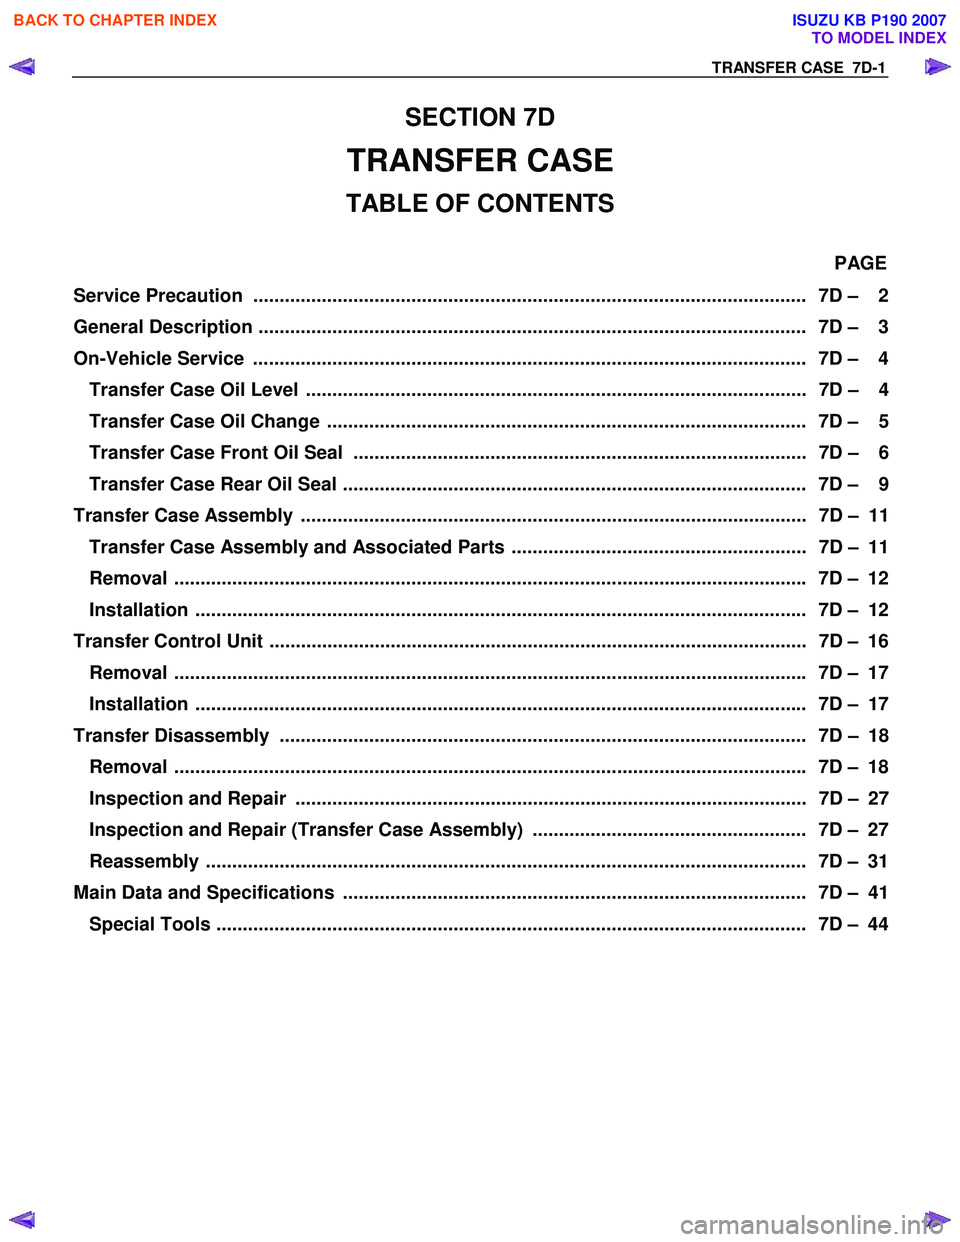
SECTION 7D
TRANSFER CASE
TABLE OF CONTENTS
PAGE
Service Precaution ......................................................................................................... 7D – 2
General Description ........................................................................................................ 7D – 3
On-Vehicle Service ......................................................................................................... 7D – 4
Transfer Case Oil Level ............................................................................................... 7D – 4
Transfer Case Oil Change ........................................................................................... 7D – 5
Transfer Case Front Oil Seal ...................................................................................... 7D – 6
Transfer Case Rear Oil Seal ........................................................................................ 7D – 9
Transfer Case Assembly ................................................................................................ 7D – 11
Transfer Case Assembly and Associated Parts ........................................................ 7D – 11
Removal ....................................................................................................................... . 7D – 12
Installation .................................................................................................................. .. 7D – 12
Transfer Control Unit ...................................................................................................... 7D – 16
Removal ....................................................................................................................... . 7D – 17
Installation .................................................................................................................. .. 7D – 17
Transfer Disassembly .................................................................................................... 7D – 18
Removal ....................................................................................................................... . 7D – 18
Inspection and Repair ................................................................................................. 7D – 27
Inspection and Repair (Transfer Case Assembly) .................................................... 7D – 27
Reassembly .................................................................................................................. 7 D – 31
Main Data and Specifications ........................................................................................ 7D – 41
Special Tools ................................................................................................................ 7D – 44
BACK TO CHAPTER INDEX
TO MODEL INDEX
ISUZU KB P190 2007
Page 4832 of 6020
7D-2 TRANSFER CASE
Service Precaution
WARNING: THIS VEHICLE HAS A SUPPLEMENTAL
RESTRAINT SYSTEM (SRS). REFER TO THE SRS
COMPONENT AND WIRING LOCATION VIEW IN
ORDER TO DETERMINE WHETHER YOU ARE
PERFORMING SERVICE ON OR NEAR THE SRS
COMPONENTS OR THE SRS WIRING. WHEN YOU
ARE PERFORMING SERVICE ON OR NEAR THE SRS
COMPONENTS OR THE SRS WIRING, REFER TO
THE SRS SERVICE INFORMATION. FAILURE TO
FOLLOW WARNINGS COULD RESULT IN POSSIBLE
AIR BAG DEPLOYMENT, PERSONAL INJURY, OR
OTHERWISE UNNECESSARY SRS SYSTEM
REPAIRS.
CAUTION: Always use the correct fastener in the
proper location. When you replace a fastener, use
ONLY the exact part number for that application.
ISUZU/GM will call out those fasteners that require a
replacement after removal. ISUZU/GM will also call
out the fasteners that require thread lockers or
thread sealant. UNLESS OTHERWISE SPECIFIED,
do not use supplemental coatings (Paints, greases,
or other corrosion inhibitors) on threaded fasteners
or fastener joint interfaces. Generally, such coatings
adversely affect the fastener torque and the joint
clamping force, and may damage the fastener. When
you install fasteners, use the correct tightening
sequence and specifications. Following these
instructions can help you avoid damage to parts and
systems.
BACK TO CHAPTER INDEX
TO MODEL INDEX
ISUZU KB P190 2007
Page 4833 of 6020
TRANSFER CASE 7D-3
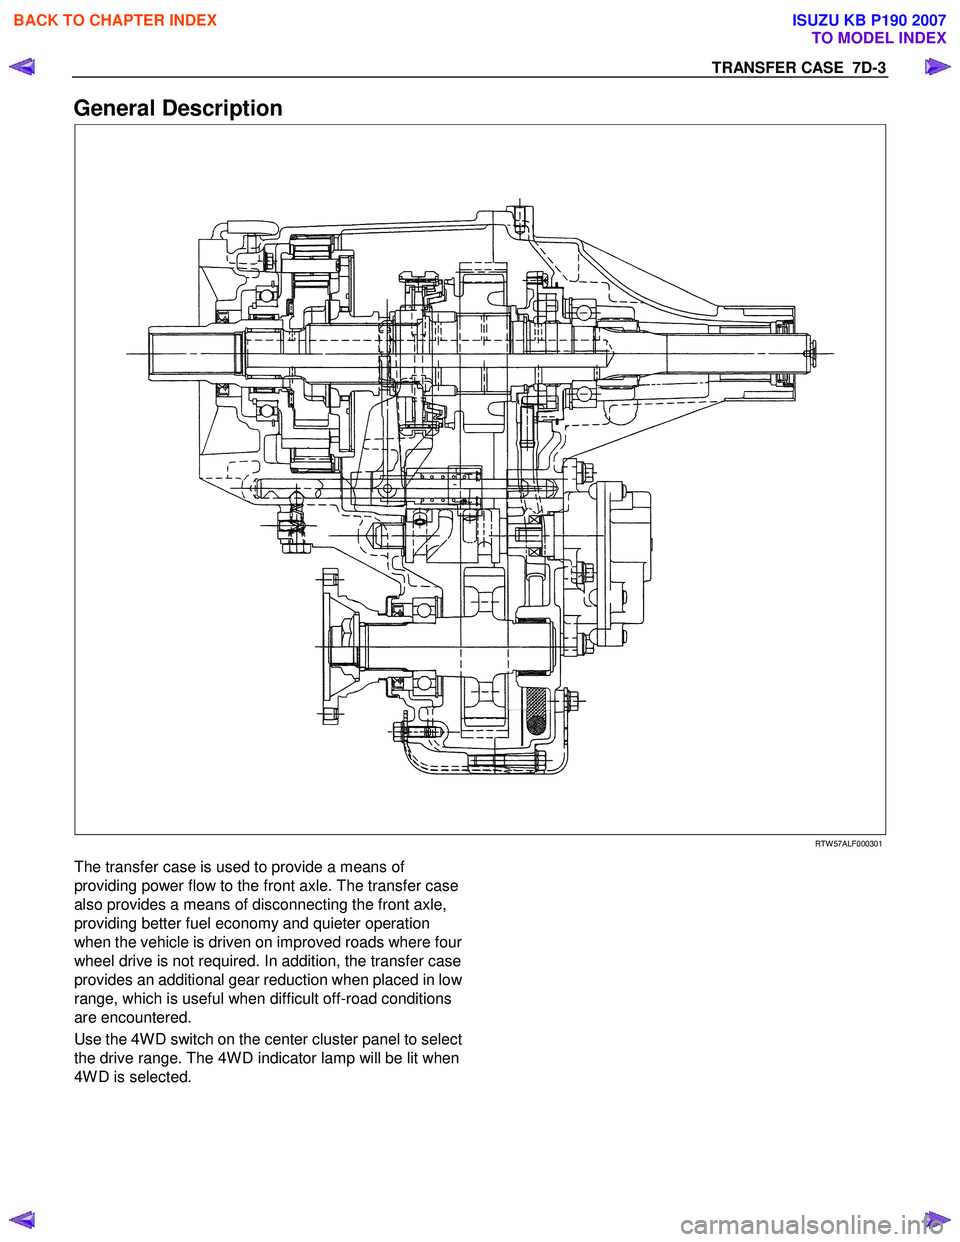
General Description
RTW 57ALF000301
The transfer case is used to provide a means of
providing power flow to the front axle. The transfer case
also provides a means of disconnecting the front axle,
providing better fuel economy and quieter operation
when the vehicle is driven on improved roads where fou
r
wheel drive is not required. In addition, the transfer case
provides an additional gear reduction when placed in lo
w
range, which is useful when difficult off-road conditions
are encountered.
Use the 4W D switch on the center cluster panel to select
the drive range. The 4W D indicator lamp will be lit when
4W D is selected.
BACK TO CHAPTER INDEX
TO MODEL INDEX
ISUZU KB P190 2007
Page 4834 of 6020
7D-4 TRANSFER CASE
On-Vehicle Service
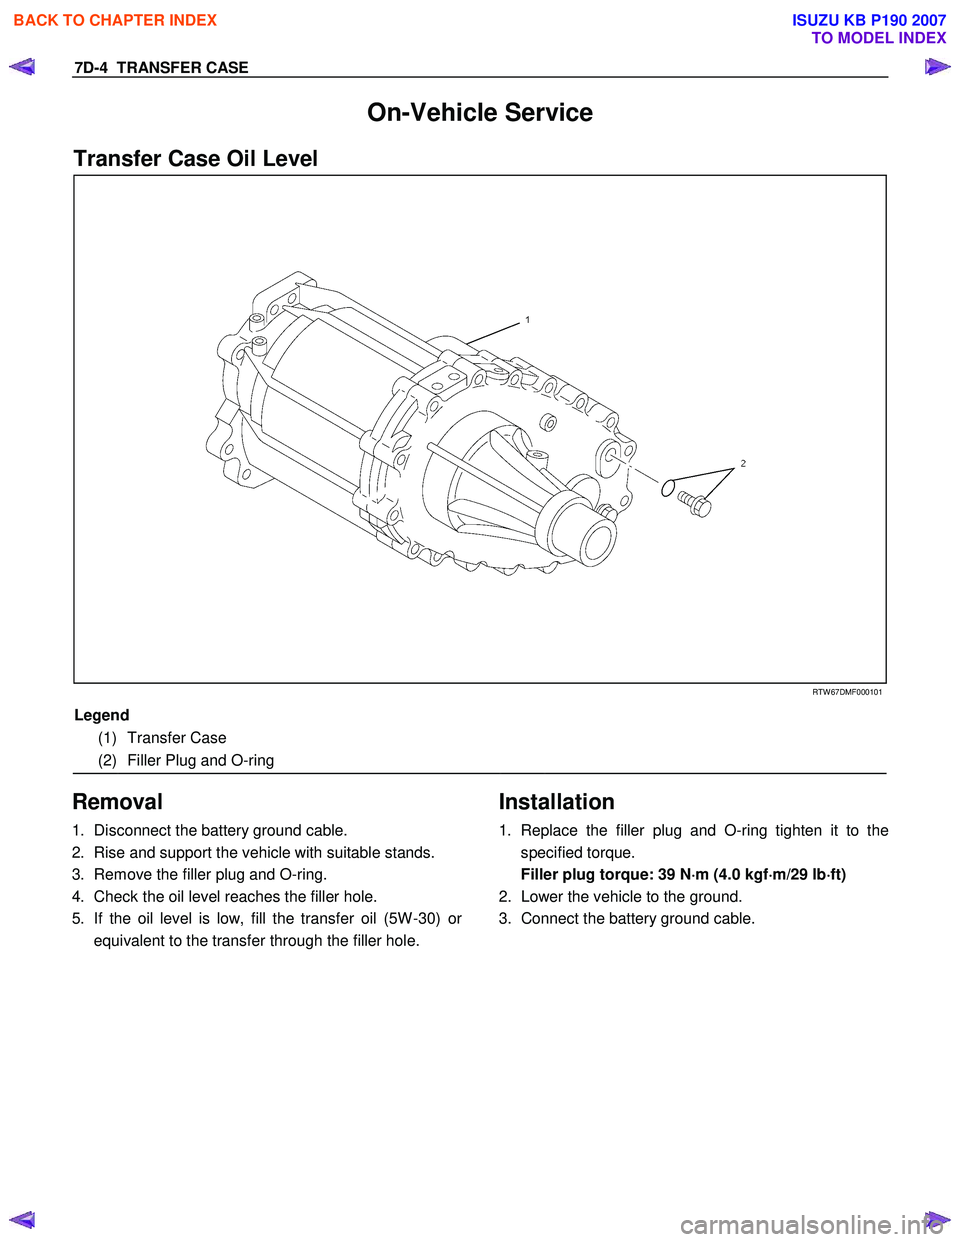
Transfer Case Oil Level
RTW 67DMF000101
Legend
(1) Transfer Case
(2) Filler Plug and O-ring
Removal
1. Disconnect the battery ground cable.
2. Rise and support the vehicle with suitable stands.
3. Remove the filler plug and O-ring.
4. Check the oil level reaches the filler hole.
5. If the oil level is low, fill the transfer oil (5W -30) o
r
equivalent to the transfer through the filler hole.
Installation
1. Replace the filler plug and O-ring tighten it to the
specified torque.
Filler plug torque: 39 N ⋅
⋅⋅
⋅
m (4.0 kgf ⋅
⋅⋅
⋅
m/29 lb ⋅
⋅⋅
⋅
ft)
2. Lower the vehicle to the ground.
3. Connect the battery ground cable.
BACK TO CHAPTER INDEX
TO MODEL INDEX
ISUZU KB P190 2007
Page 4835 of 6020
TRANSFER CASE 7D-5
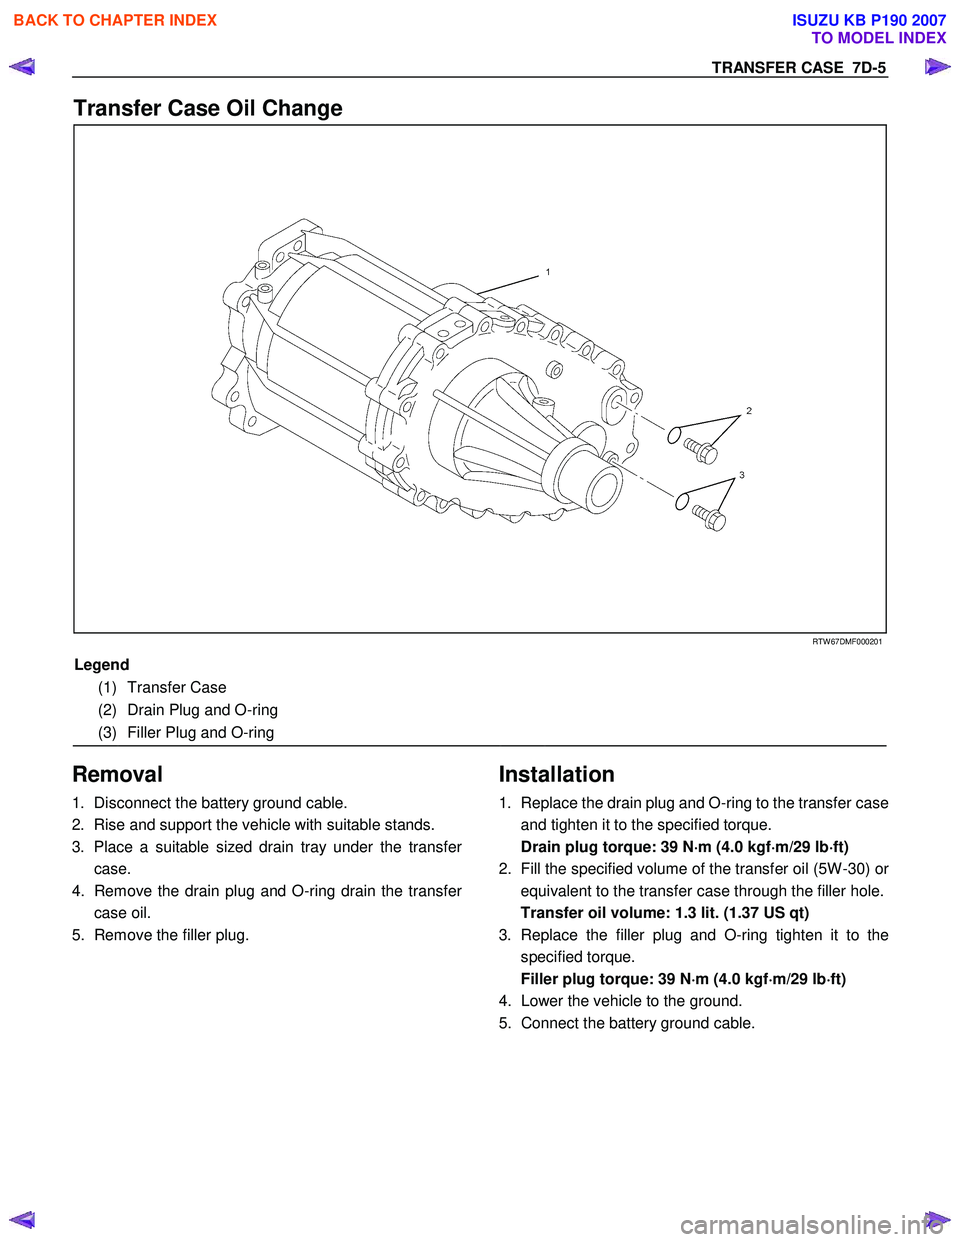
Transfer Case Oil Change
RTW 67DMF000201
Legend
(1) Transfer Case
(2) Drain Plug and O-ring
(3) Filler Plug and O-ring
Removal
1. Disconnect the battery ground cable.
2. Rise and support the vehicle with suitable stands.
3. Place a suitable sized drain tray under the transfe
r
case.
4. Remove the drain plug and O-ring drain the transfe
r
case oil.
5. Remove the filler plug.
Installation
1. Replace the drain plug and O-ring to the transfer case
and tighten it to the specified torque.
Drain plug torque: 39 N ⋅
⋅⋅
⋅
m (4.0 kgf ⋅
⋅⋅
⋅
m/29 lb ⋅
⋅⋅
⋅
ft)
2. Fill the specified volume of the transfer oil (5W -30) o
r
equivalent to the transfer case through the filler hole.
Transfer oil volume: 1.3 lit. (1.37 US qt)
3. Replace the filler plug and O-ring tighten it to the specified torque.
Filler plug torque: 39 N ⋅
⋅⋅
⋅
m (4.0 kgf ⋅
⋅⋅
⋅
m/29 lb ⋅
⋅⋅
⋅
ft)
4. Lower the vehicle to the ground.
5. Connect the battery ground cable.
BACK TO CHAPTER INDEX
TO MODEL INDEX
ISUZU KB P190 2007
Page 4836 of 6020
7D-6 TRANSFER CASE
Transfer Case Front Oil Seal
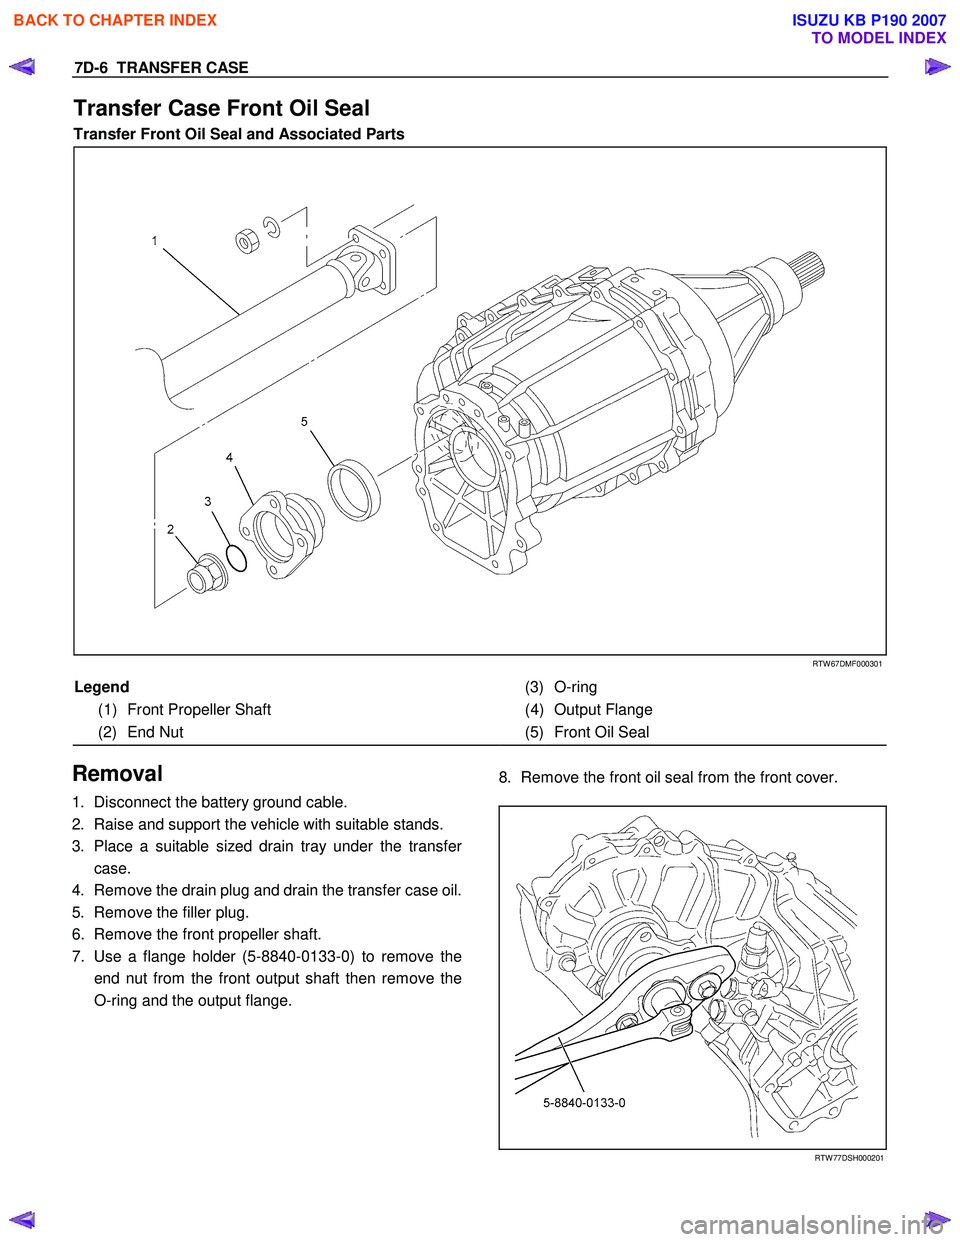
Transfer Front Oil Seal and Associated Parts
RTW 67DMF000301
Legend
(3) O-ring
(1) Front Propeller Shaft (4) Output Flange
(2) End Nut (5) Front Oil Seal
Removal
1. Disconnect the battery ground cable.
2. Raise and support the vehicle with suitable stands.
3. Place a suitable sized drain tray under the transfe
r
case.
4. Remove the drain plug and drain the transfer case oil.
5. Remove the filler plug.
6. Remove the front propeller shaft.
7. Use a flange holder (5-8840-0133-0) to remove the end nut from the front output shaft then remove the
O-ring and the output flange.
8. Remove the front oil seal from the front cover.
RTW 77DSH000201
BACK TO CHAPTER INDEX
TO MODEL INDEX
ISUZU KB P190 2007
Page 4837 of 6020
TRANSFER CASE 7D-7
Installation
1. Thoroughly clean around the oil seal bore in the case
and ensure there are no burrs.
2.
Apply the engine oil to the new oil seal outer surfaces
and apply the recommended grease (BESCO L2) o
r
equivalent to the oil seal lip.
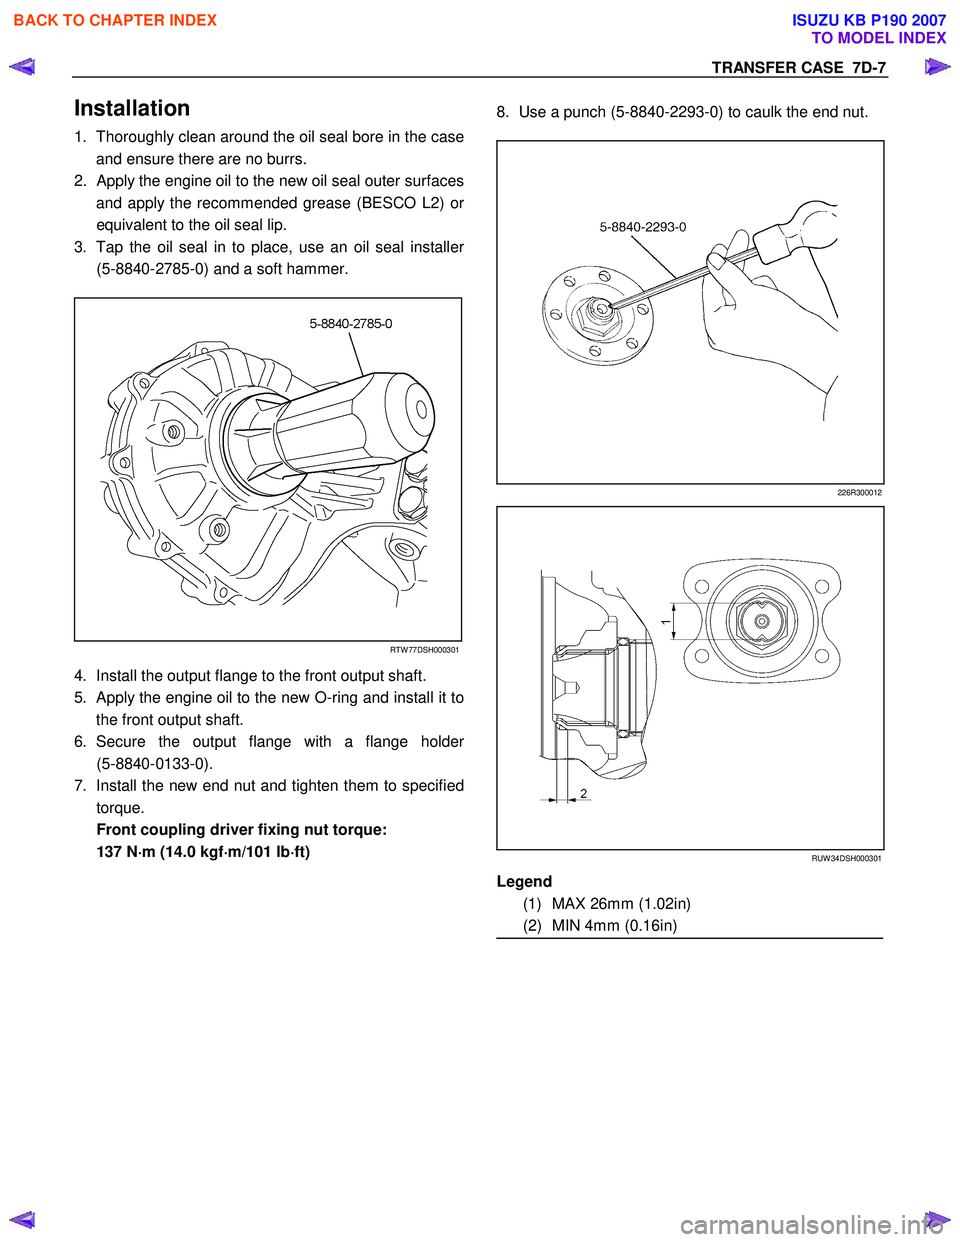
3. Tap the oil seal in to place, use an oil seal installe
r
(5-8840-2785-0) and a soft hammer.
RTW 77DSH000301
4. Install the output flange to the front output shaft.
5. Apply the engine oil to the new O-ring and install it to the front output shaft.
6. Secure the output flange with a flange holde
r
(5-8840-0133-0).
7. Install the new end nut and tighten them to specified torque.
Front coupling driver fixing nut torque: 137 N ⋅
⋅⋅
⋅
m (14.0 kgf ⋅
⋅⋅
⋅
m/101 lb ⋅
⋅⋅
⋅
ft)
8. Use a punch (5-8840-2293-0) to caulk the end nut.
226R300012
RUW 34DSH000301
Legend
(1) MAX 26mm (1.02in)
(2) MIN 4mm (0.16in)
BACK TO CHAPTER INDEX
TO MODEL INDEX
ISUZU KB P190 2007
Page 4838 of 6020
7D-8 TRANSFER CASE
9. Install the drain plug to the transfer case and tighten it
to the specified torque.
Drain plug torque: 39 N ⋅
⋅⋅
⋅
m (4.0 kgf ⋅
⋅⋅
⋅
m/29 lb ⋅
⋅⋅
⋅
ft)
Transfer oil volume: 1.3 lit. (1.37 US qt)
10. Install the filler plug and tighten it to the specified torque:
Filler plug torque: 39 N ⋅
⋅⋅
⋅
m (4.0 kgf ⋅
⋅⋅
⋅
m/29 lb ⋅
⋅⋅
⋅
ft)
11. Install the front propeller shaft.
Propeller shaft bolts torque: 59 N ⋅
⋅⋅
⋅
m (6.0 kgf ⋅
⋅⋅
⋅
m/43 lb ⋅
⋅⋅
⋅
ft)
12. Lower the vehicle to the ground.
13. Connect the battery ground cable.
BACK TO CHAPTER INDEX
TO MODEL INDEX
ISUZU KB P190 2007
Page 4839 of 6020
TRANSFER CASE 7D-9
Transfer Case Rear Oil Seal
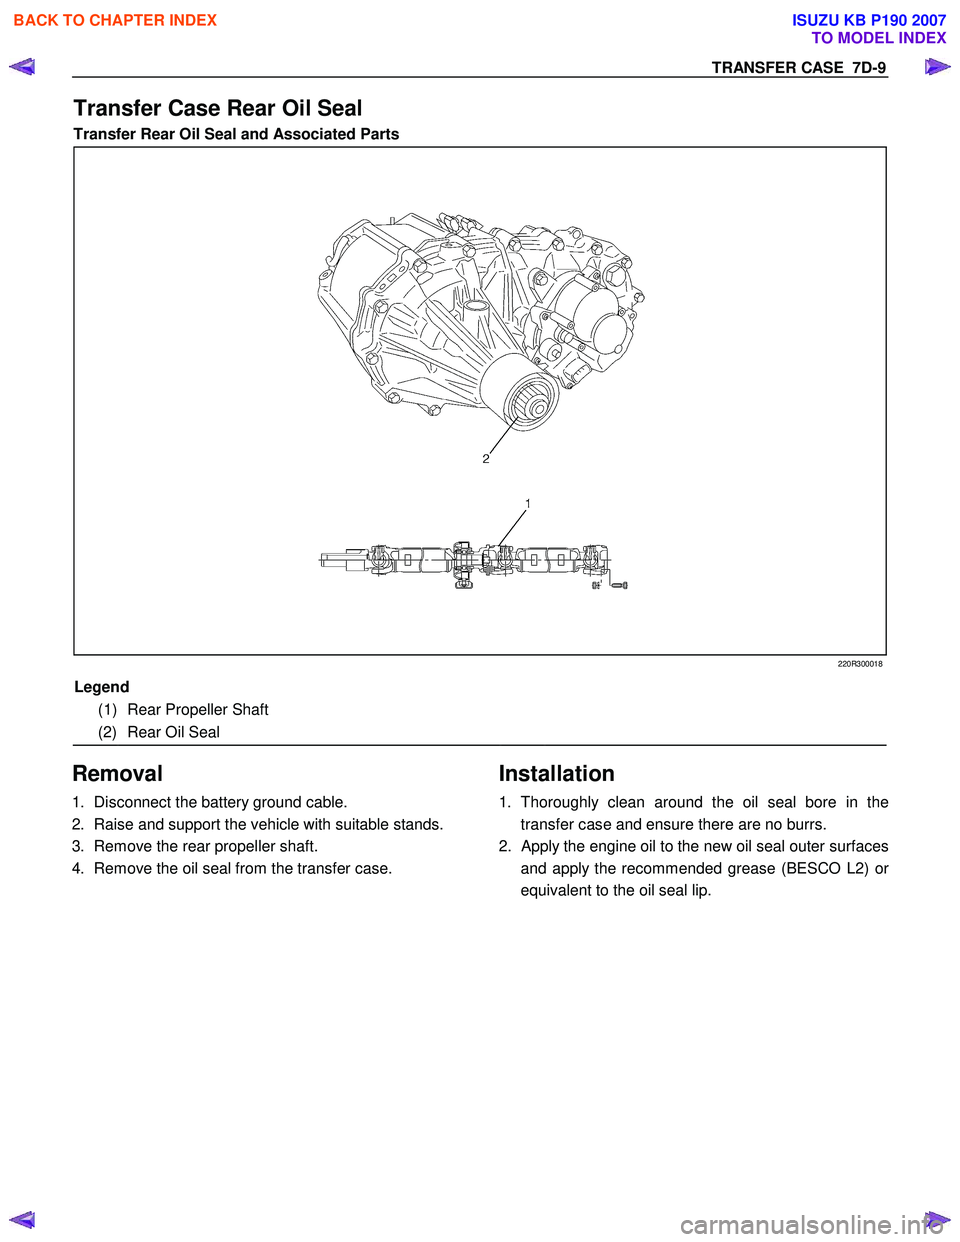
Transfer Rear Oil Seal and Associated Parts
220R300018
Legend
(1) Rear Propeller Shaft
(2) Rear Oil Seal
Removal
1. Disconnect the battery ground cable.
2. Raise and support the vehicle with suitable stands.
3. Remove the rear propeller shaft.
4. Remove the oil seal from the transfer case.
Installation
1. Thoroughly clean around the oil seal bore in the
transfer case and ensure there are no burrs.
2.
Apply the engine oil to the new oil seal outer surfaces
and apply the recommended grease (BESCO L2) o
r
equivalent to the oil seal lip.
BACK TO CHAPTER INDEX
TO MODEL INDEX
ISUZU KB P190 2007
Page 4840 of 6020
7D-10 TRANSFER CASE
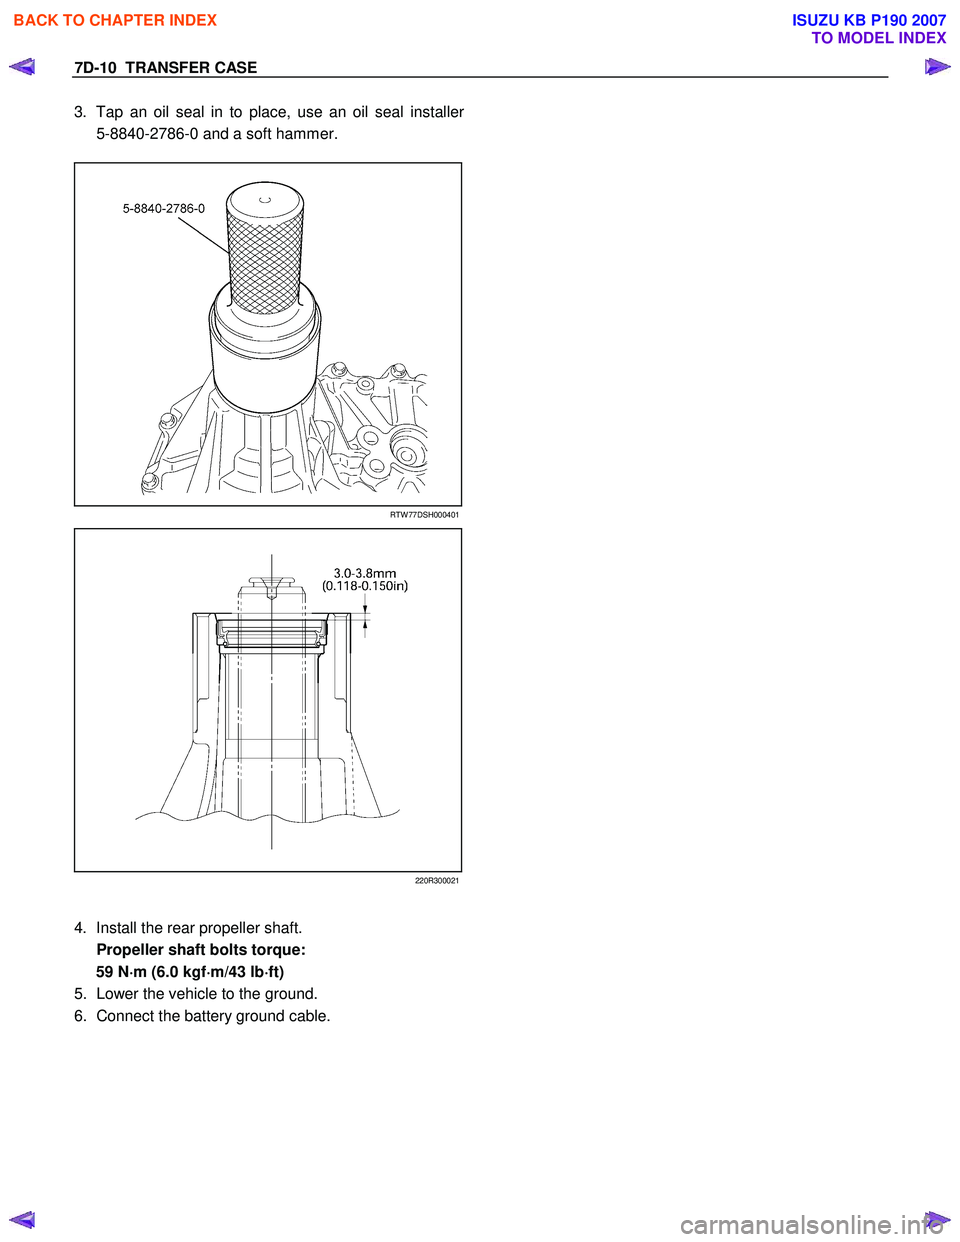
3. Tap an oil seal in to place, use an oil seal installer
5-8840-2786-0 and a soft hammer.
RTW 77DSH000401
220R300021
4. Install the rear propeller shaft.
Propeller shaft bolts torque: 59 N ⋅
⋅⋅
⋅
m (6.0 kgf ⋅
⋅⋅
⋅
m/43 lb ⋅
⋅⋅
⋅
ft)
5. Lower the vehicle to the ground.
6. Connect the battery ground cable.
BACK TO CHAPTER INDEX
TO MODEL INDEX
ISUZU KB P190 2007