LEXUS LS430 2003 Factory Repair Manual
Manufacturer: LEXUS, Model Year: 2003,
Model line: LS430,
Model: LEXUS LS430 2003
Pages: 4500, PDF Size: 87.45 MB
LEXUS LS430 2003 Factory Repair Manual
LS430 2003
LEXUS
LEXUS
https://www.carmanualsonline.info/img/36/57050/w960_57050-0.png
LEXUS LS430 2003 Factory Repair Manual
Trending: Sp1, sport mode, differential, fuse box location, alternator, transmission fluid, boot
Page 1241 of 4500
NG-B: CHECK CAN BUS LINE FOR SHORT TO GND (W/ LEXUS NAVIGATION SYSTEM)
OK: HOW TO PROCEED WITH TROUBLESHOOTING
MODE DESCRIPTION
Fig. 36: Problem Symptom Diagnostic Chart
Courtesy of TOYOTA MOTOR SALES, U.S.A., INC.
WIRING DIAGRAM
Page 1242 of 4500
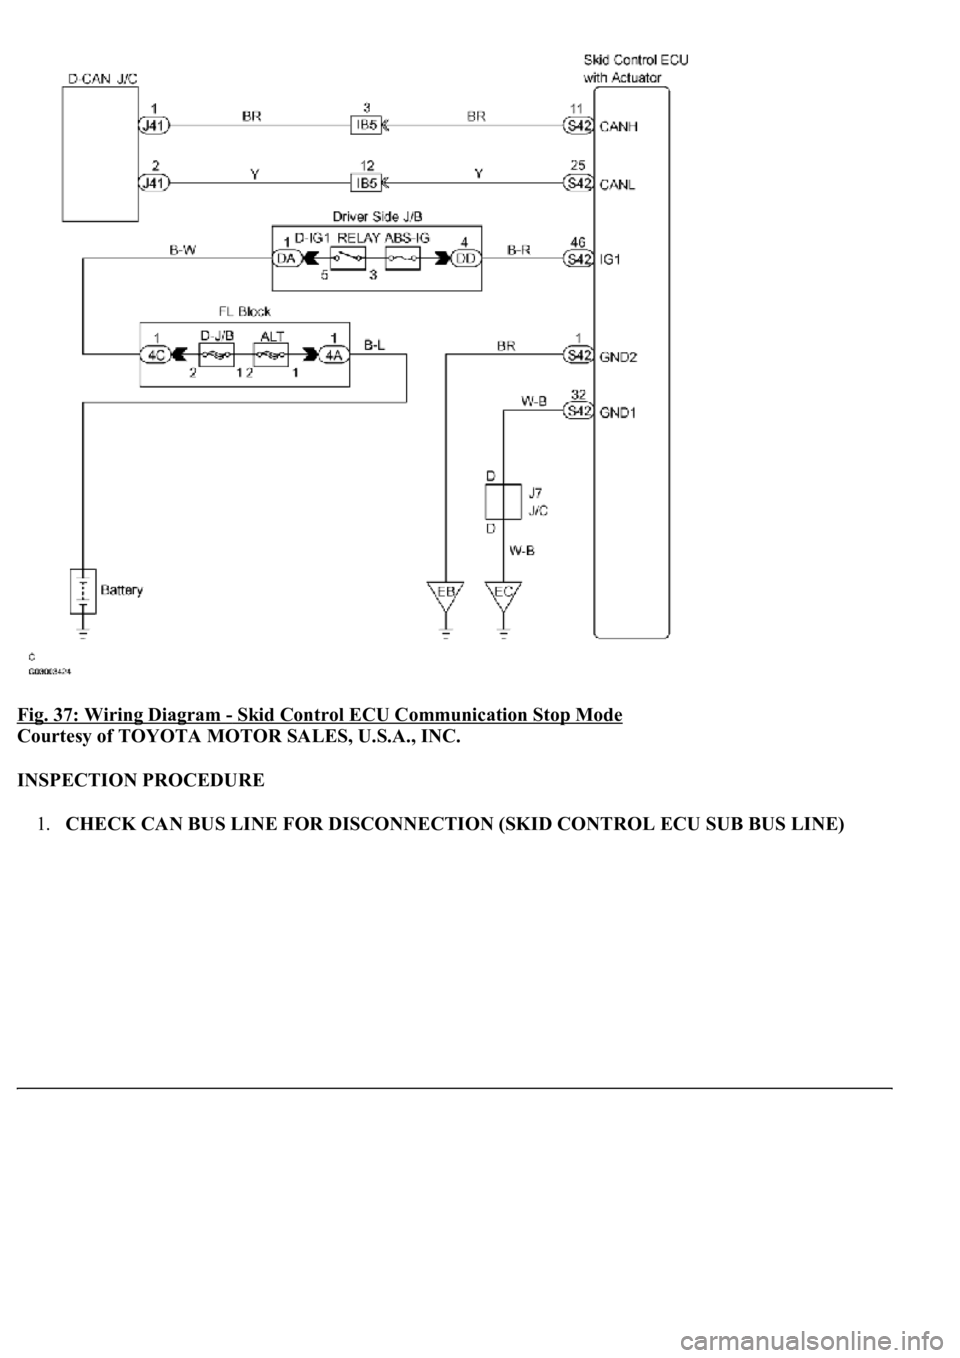
Fig. 37: Wiring Diagram - Skid Control ECU Communication Stop Mode
Courtesy of TOYOTA MOTOR SALES, U.S.A., INC.
INSPECTION PROCEDURE
1.CHECK CAN BUS LINE FOR DISCONNECTION (SKID CONTROL ECU SUB BUS LINE)
Page 1243 of 4500
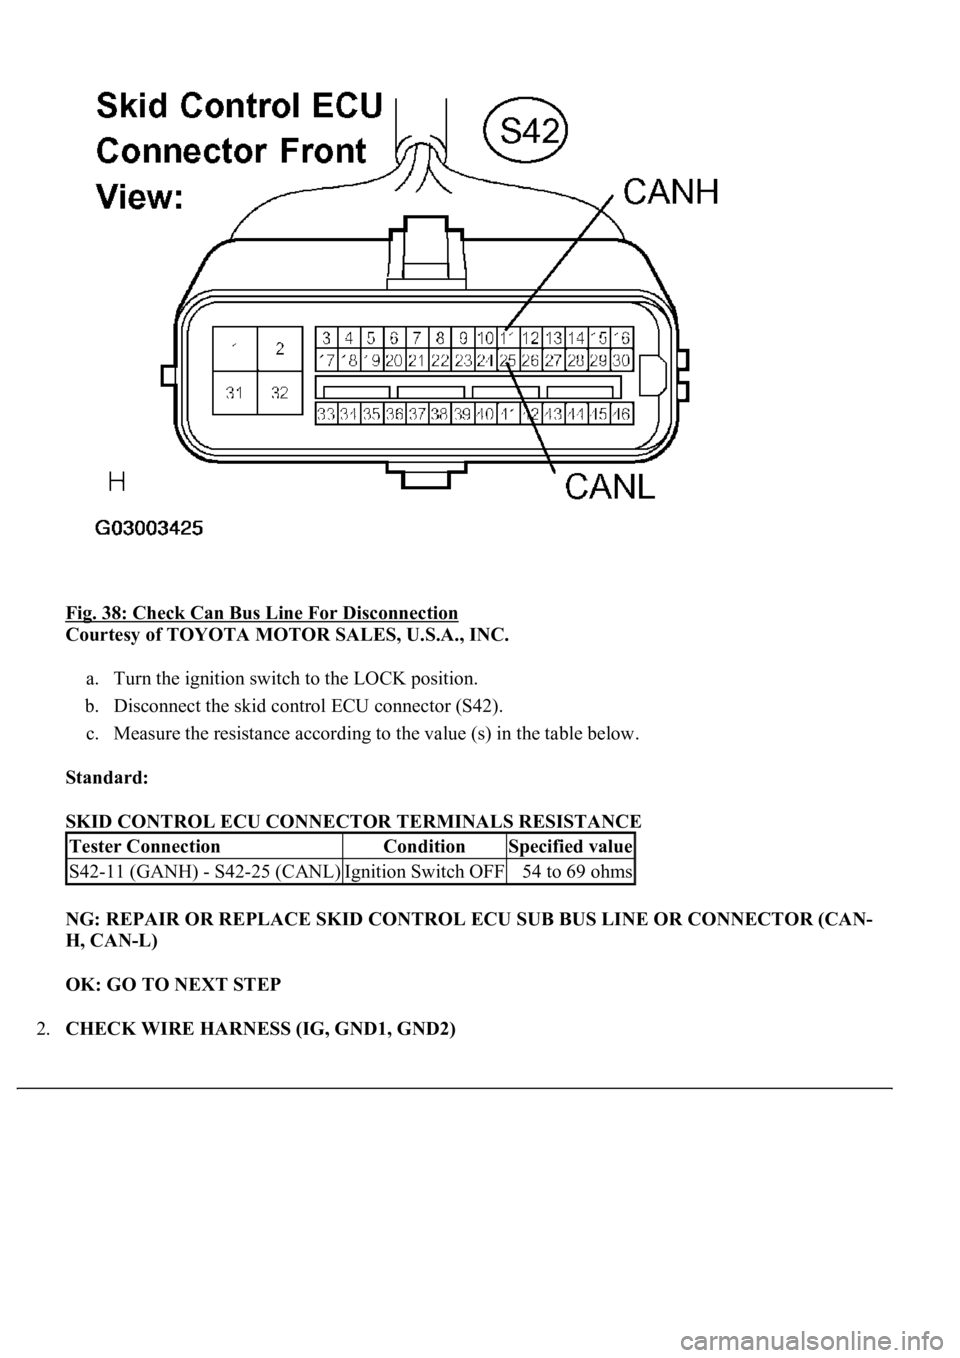
Fig. 38: Check Can Bus Line For Disconnection
Courtesy of TOYOTA MOTOR SALES, U.S.A., INC.
a. Turn the ignition switch to the LOCK position.
b. Disconnect the skid control ECU connector (S42).
c. Measure the resistance according to the value (s) in the table below.
Standard:
SKID CONTROL ECU CONNECTOR TERMINALS RESISTANCE
NG: REPAIR OR REPLACE SKID CONTROL ECU SUB BUS LINE OR CONNECTOR (CAN-
H, CAN-L)
OK: GO TO NEXT STEP
2.CHECK WIRE HARNESS (IG, GND1, GND2)
Tester ConnectionConditionSpecified value
S42-11 (GANH) - S42-25 (CANL)Ignition Switch OFF54 to 69 ohms
Page 1244 of 4500
Fig. 39: Identifying Skid Control ECU Connectors
Courtesy of TOYOTA MOTOR SALES, U.S.A., INC.
a. Measure the resistance according to the value (s) in the table below.
b. Measure the voltage according to the value (s) in the table below.
Standard:
SKID CONTROL ECU CONNECTOR TERMINALS VOLTAGE
NG: REPAIR OR REPLACE WIRE HARNESS OR CONNECTOR
OK: REPLACE SKID CONTROL ECU WITH ACTUATOR (SEE REPLACEMENT
)
Tester ConnectionConditionSpecified value
S42-1 (GND2) - Body groundAlwaysBelow 1
S42-32 (GND1) - Body groundAlwaysBelow 1
S42-46 (IG1) - Body groundIgnition Switch ON10 to 14 V
Page 1245 of 4500
MODE DESCRIPTION
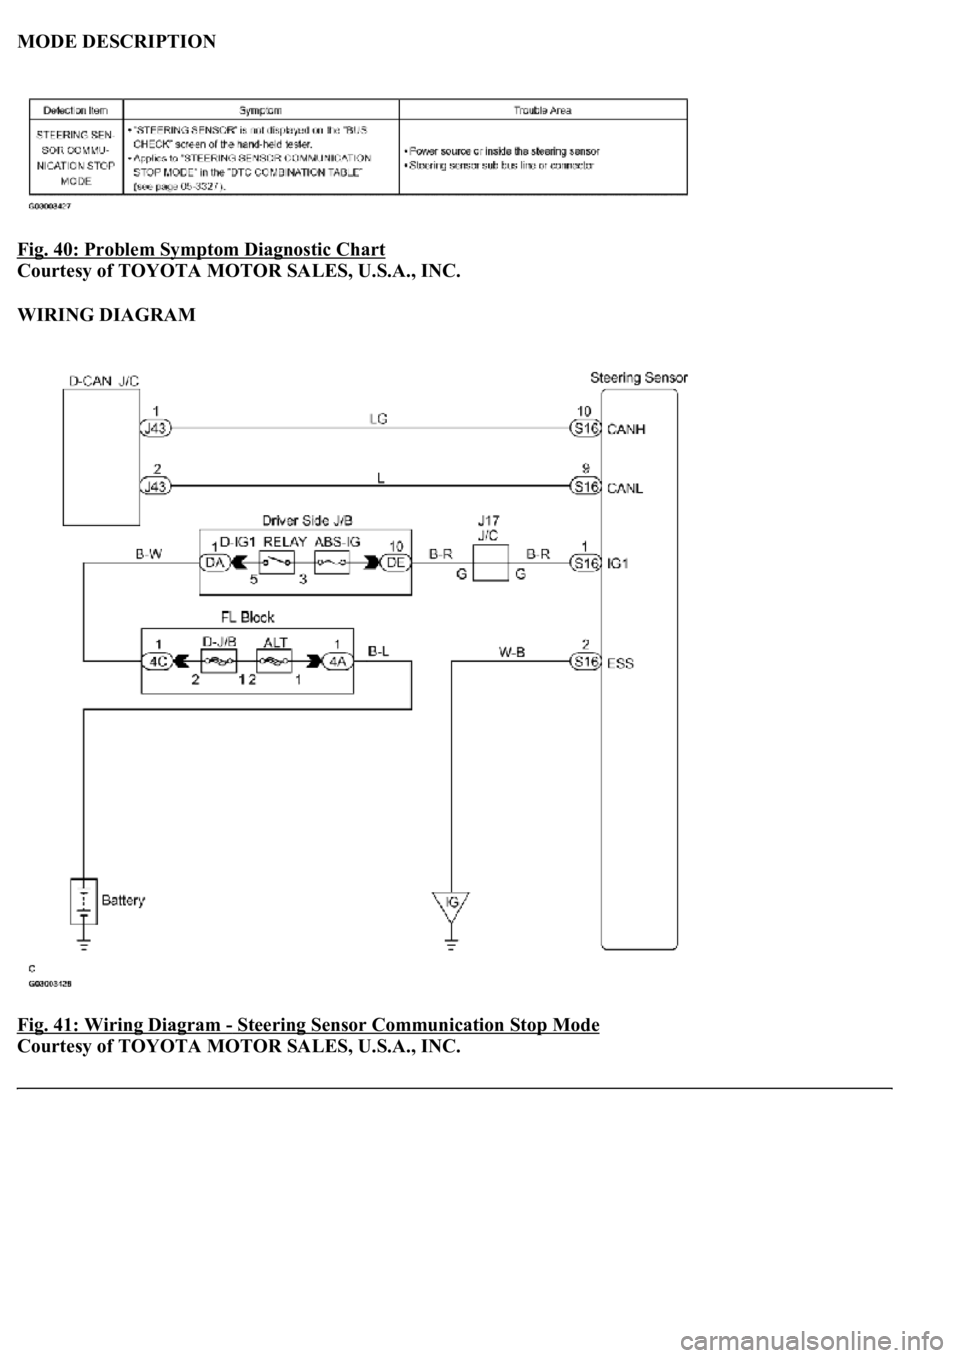
Fig. 40: Problem Symptom Diagnostic Chart
Courtesy of TOYOTA MOTOR SALES, U.S.A., INC.
WIRING DIAGRAM
Fig. 41: Wiring Diagram
- Steering Sensor Communication Stop Mode
Courtesy of TOYOTA MOTOR SALES, U.S.A., INC.
Page 1246 of 4500
INSPECTION PROCEDURE
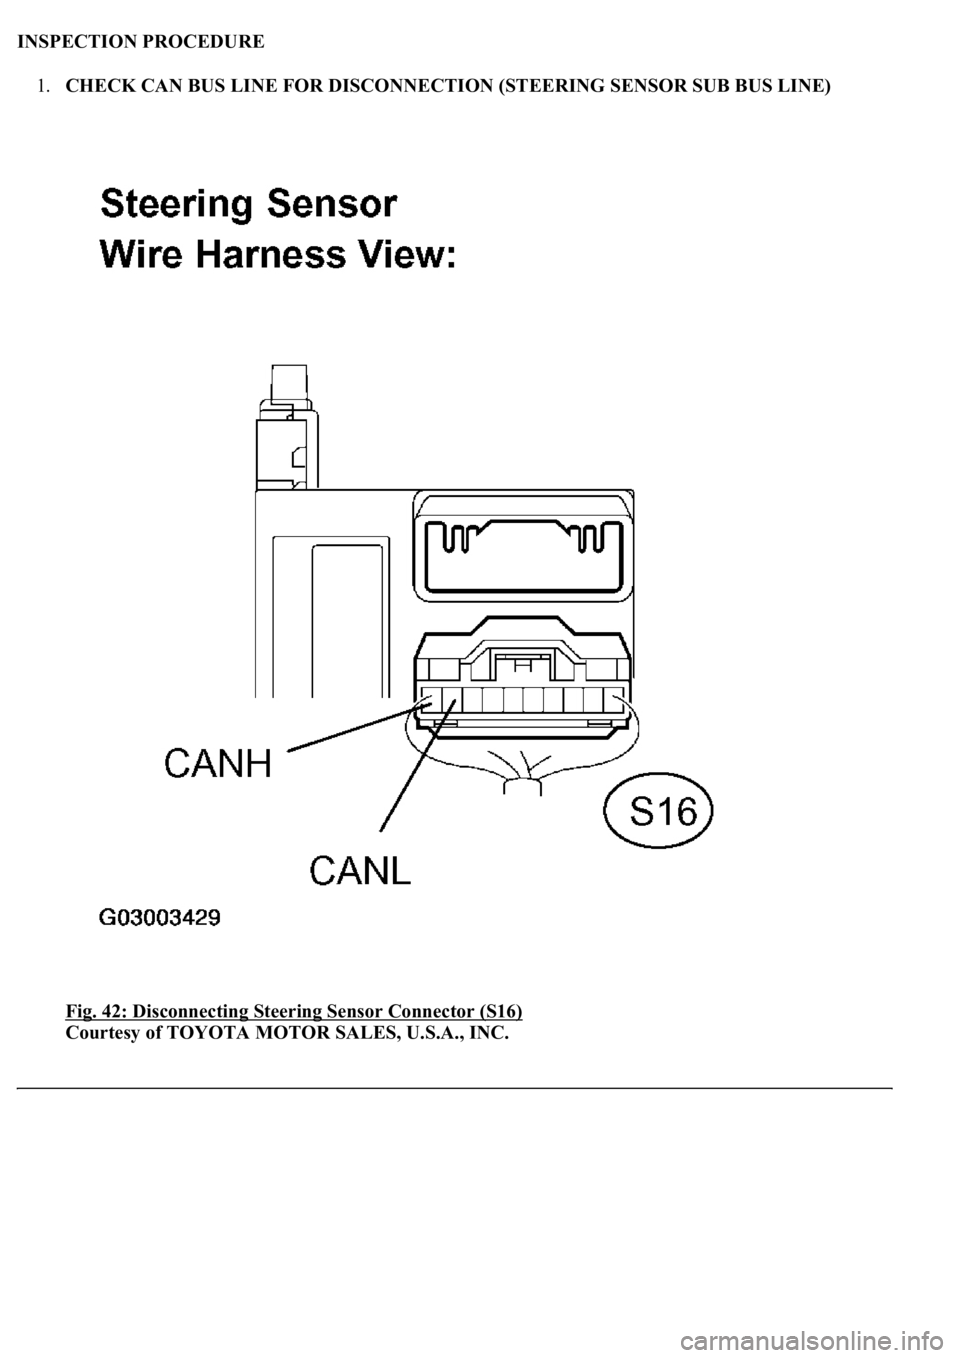
1.CHECK CAN BUS LINE FOR DISCONNECTION (STEERING SENSOR SUB BUS LINE)
Fig. 42: Disconnecting Steering Sensor Connector (S16)
Courtesy of TOYOTA MOTOR SALES, U.S.A., INC.
Page 1247 of 4500
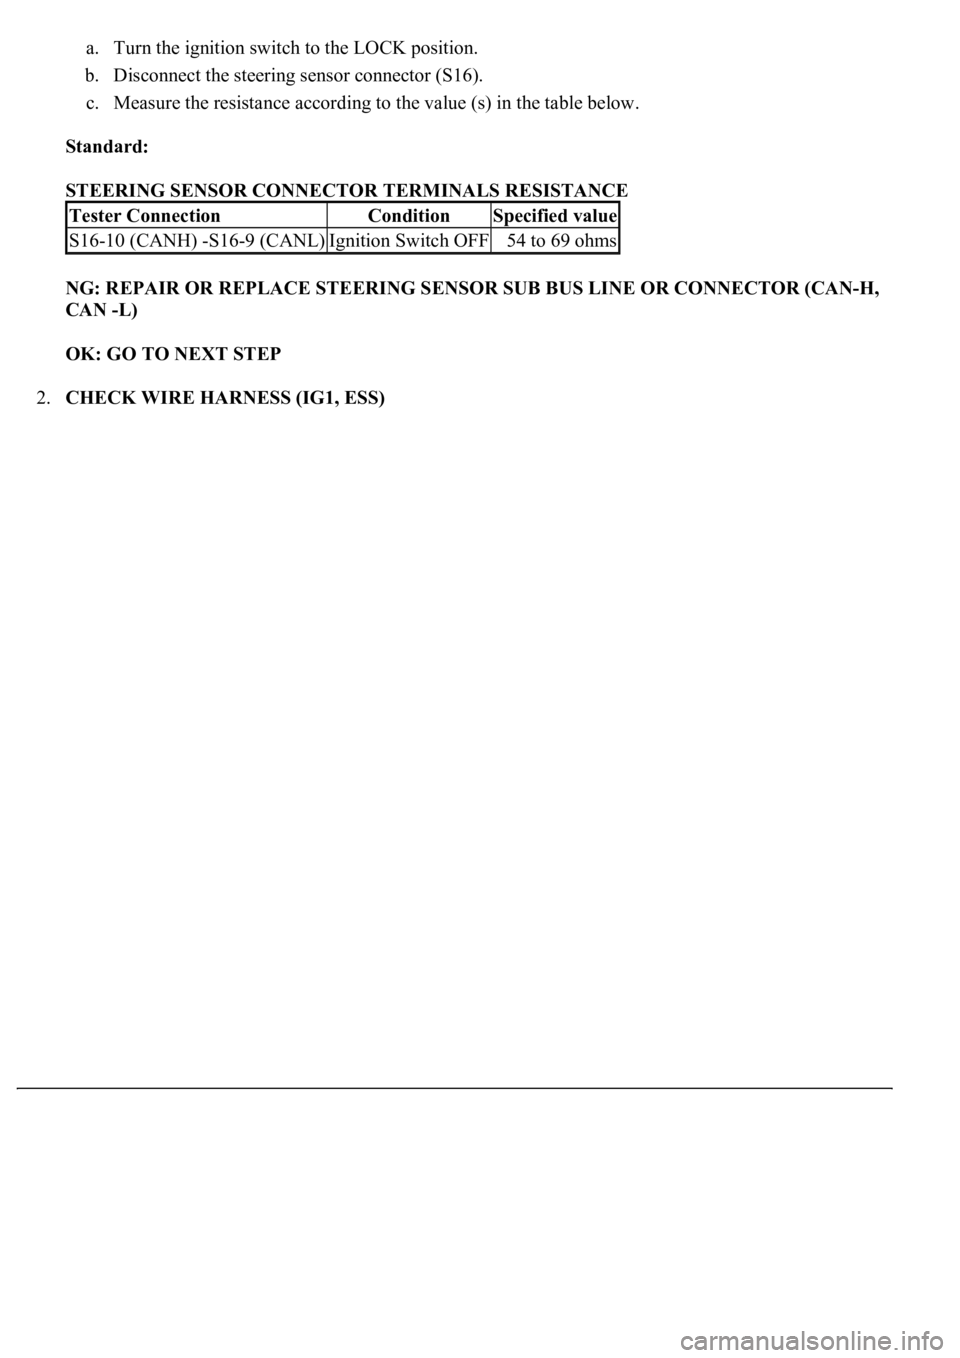
a. Turn the ignition switch to the LOCK position.
b. Disconnect the steering sensor connector (S16).
c. Measure the resistance according to the value (s) in the table below.
Standard:
STEERING SENSOR CONNECTOR TERMINALS RESISTANCE
NG: REPAIR OR REPLACE STEERING SENSOR SUB BUS LINE OR CONNECTOR (CAN-H,
CAN -L)
OK: GO TO NEXT STEP
2.CHECK WIRE HARNESS (IG1, ESS)
Tester ConnectionConditionSpecified value
S16-10 (CANH) -S16-9 (CANL)Ignition Switch OFF54 to 69 ohms
Page 1248 of 4500
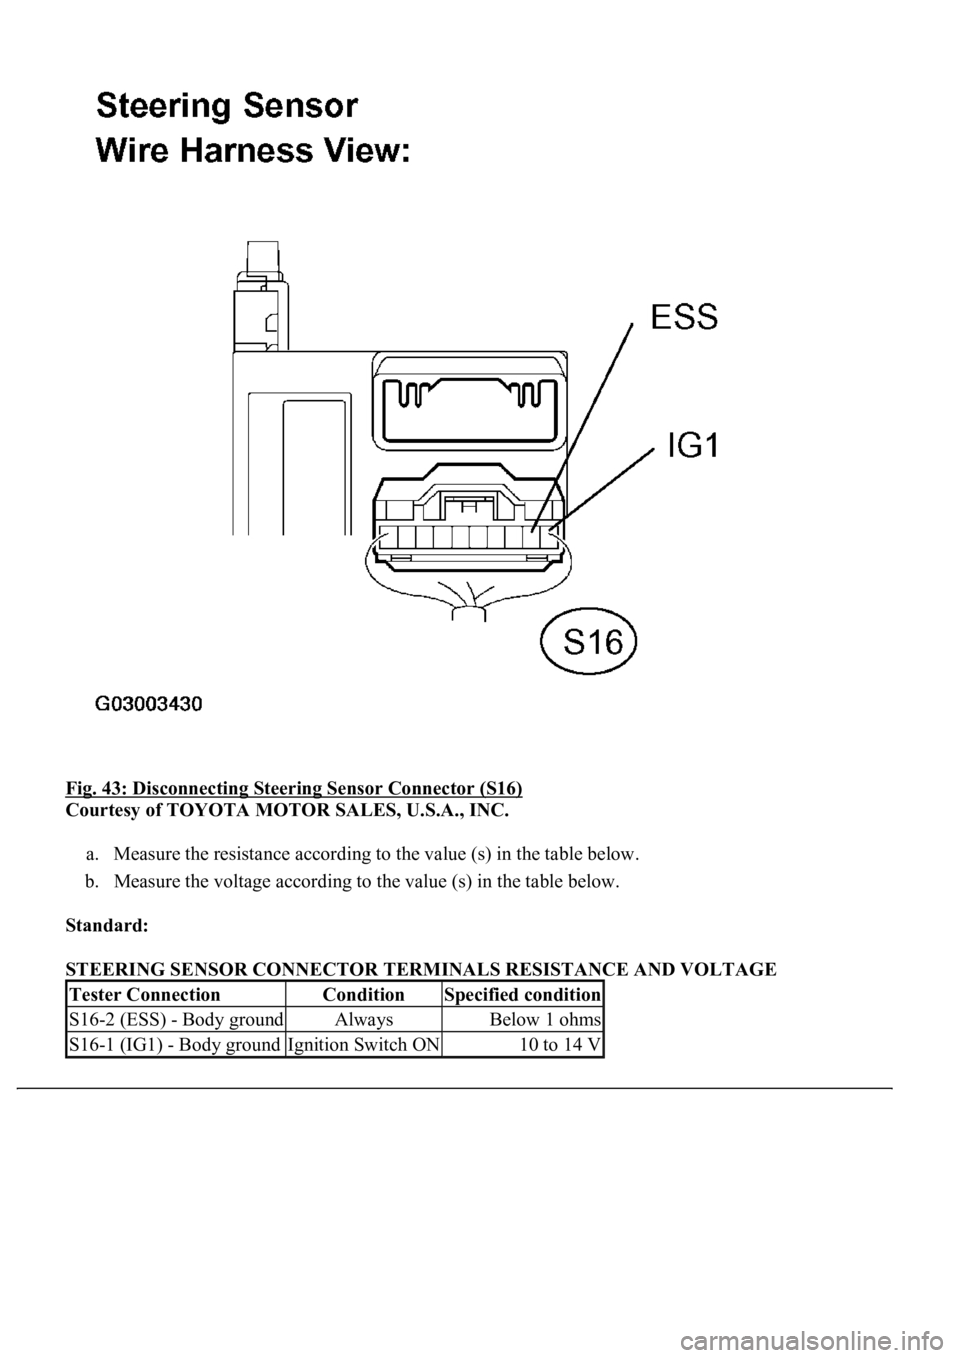
Fig. 43: Disconnecting Steering Sensor Connector (S16)
Courtesy of TOYOTA MOTOR SALES, U.S.A., INC.
a. Measure the resistance according to the value (s) in the table below.
b. Measure the voltage according to the value (s) in the table below.
Standard:
STEERING SENSOR CONNECTOR TERMINALS RESISTANCE AND VOLTAGE
Tester ConnectionConditionSpecified condition
S16-2 (ESS) - Body groundAlwaysBelow 1 ohms
S16-1 (IG1) - Body groundIgnition Switch ON10 to 14 V
Page 1249 of 4500
NG: REPAIR OR REPLACE WIRE HARNESS OR CONNECTOR
OK: REPLACE STEERING SENSOR (SEE REPLACEMENT )
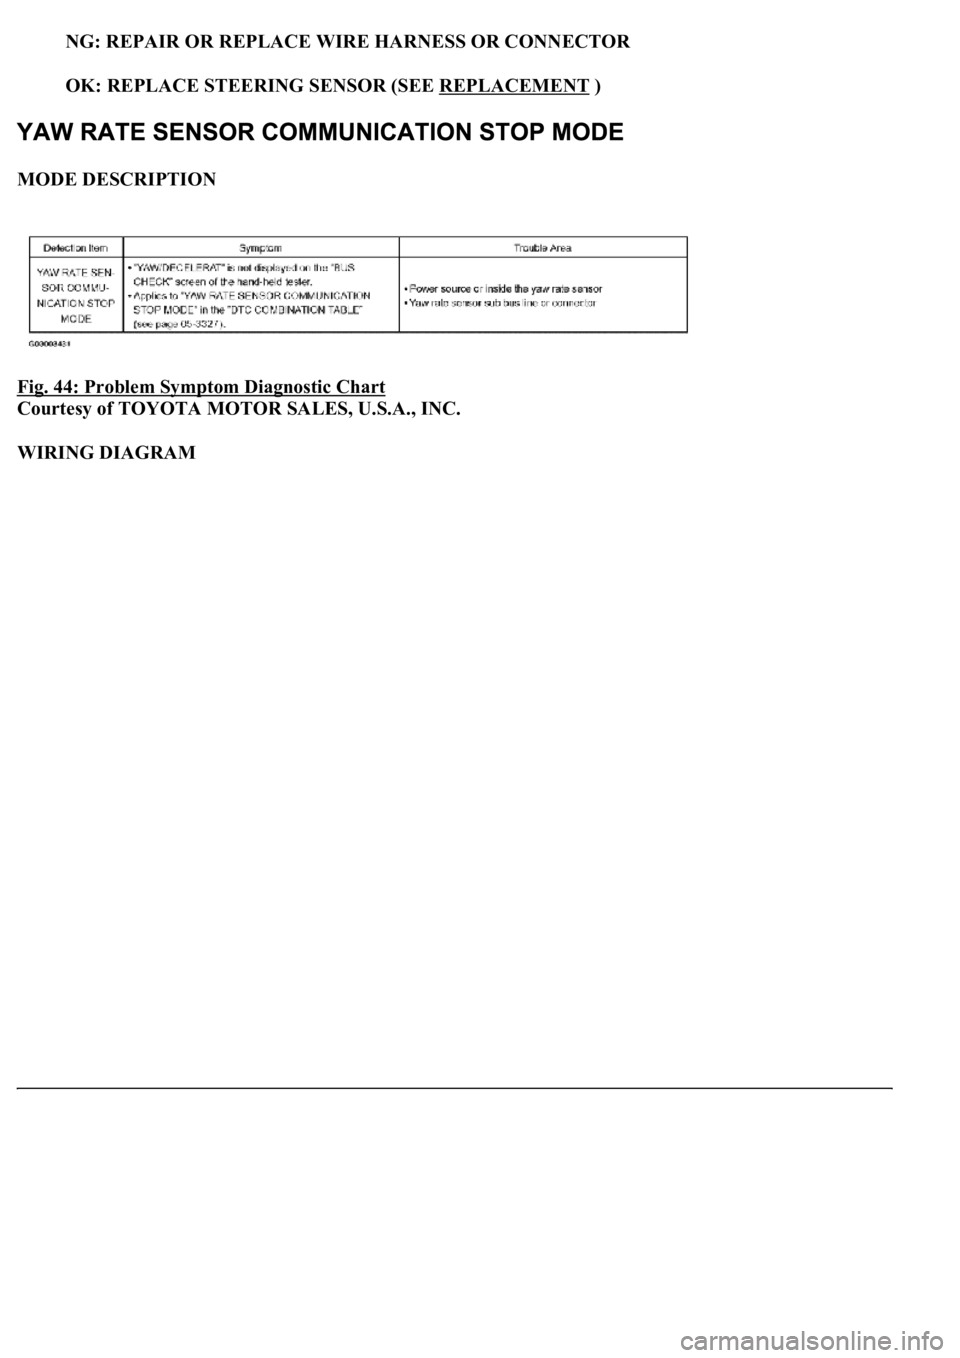
MODE DESCRIPTION
Fig. 44: Problem Symptom Diagnostic Chart
Courtesy of TOYOTA MOTOR SALES, U.S.A., INC.
WIRING DIAGRAM
Page 1250 of 4500
Fig. 45: Wiring Diagram - Yaw Rate Sensor Communication Stop Mode
Courtesy of TOYOTA MOTOR SALES, U.S.A., INC.
INSPECTION PROCEDURE
1.CHECK CAN BUS LINE FOR DISCONNECTION (YAW RATE SENSOR SUB BUS LINE)
Trending: Sp2, ground clearance, reset, light, Spd, Diagram AC, engine oil
