LEXUS LS430 2003 Factory Repair Manual
Manufacturer: LEXUS, Model Year: 2003,
Model line: LS430,
Model: LEXUS LS430 2003
Pages: 4500, PDF Size: 87.45 MB
LEXUS LS430 2003 Factory Repair Manual
LS430 2003
LEXUS
LEXUS
https://www.carmanualsonline.info/img/36/57050/w960_57050-0.png
LEXUS LS430 2003 Factory Repair Manual
Trending: fuse chart, ECO mode, Speedometer, B2419, Rear suspension, keyless, park assist
Page 3391 of 4500
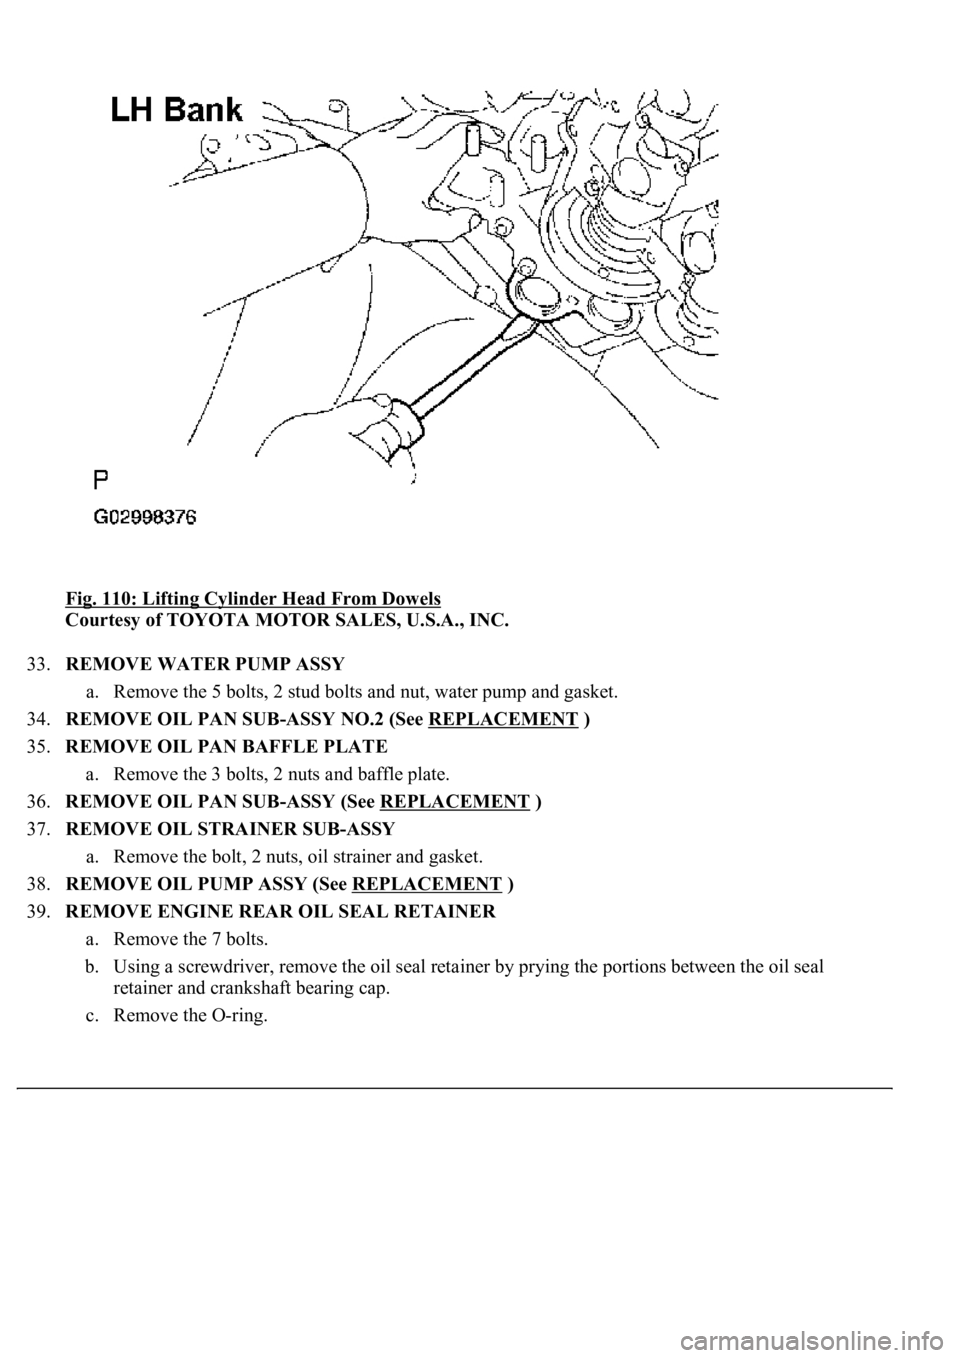
Fig. 110: Lifting Cylinder Head From Dowels
Courtesy of TOYOTA MOTOR SALES, U.S.A., INC.
33.REMOVE WATER PUMP ASSY
a. Remove the 5 bolts, 2 stud bolts and nut, water pump and gasket.
34.REMOVE OIL PAN SUB-ASSY NO.2 (See REPLACEMENT
)
35.REMOVE OIL PAN BAFFLE PLATE
a. Remove the 3 bolts, 2 nuts and baffle plate.
36.REMOVE OIL PAN SUB-ASSY (See REPLACEMENT
)
37.REMOVE OIL STRAINER SUB-ASSY
a. Remove the bolt, 2 nuts, oil strainer and gasket.
38.REMOVE OIL PUMP ASSY (See REPLACEMENT
)
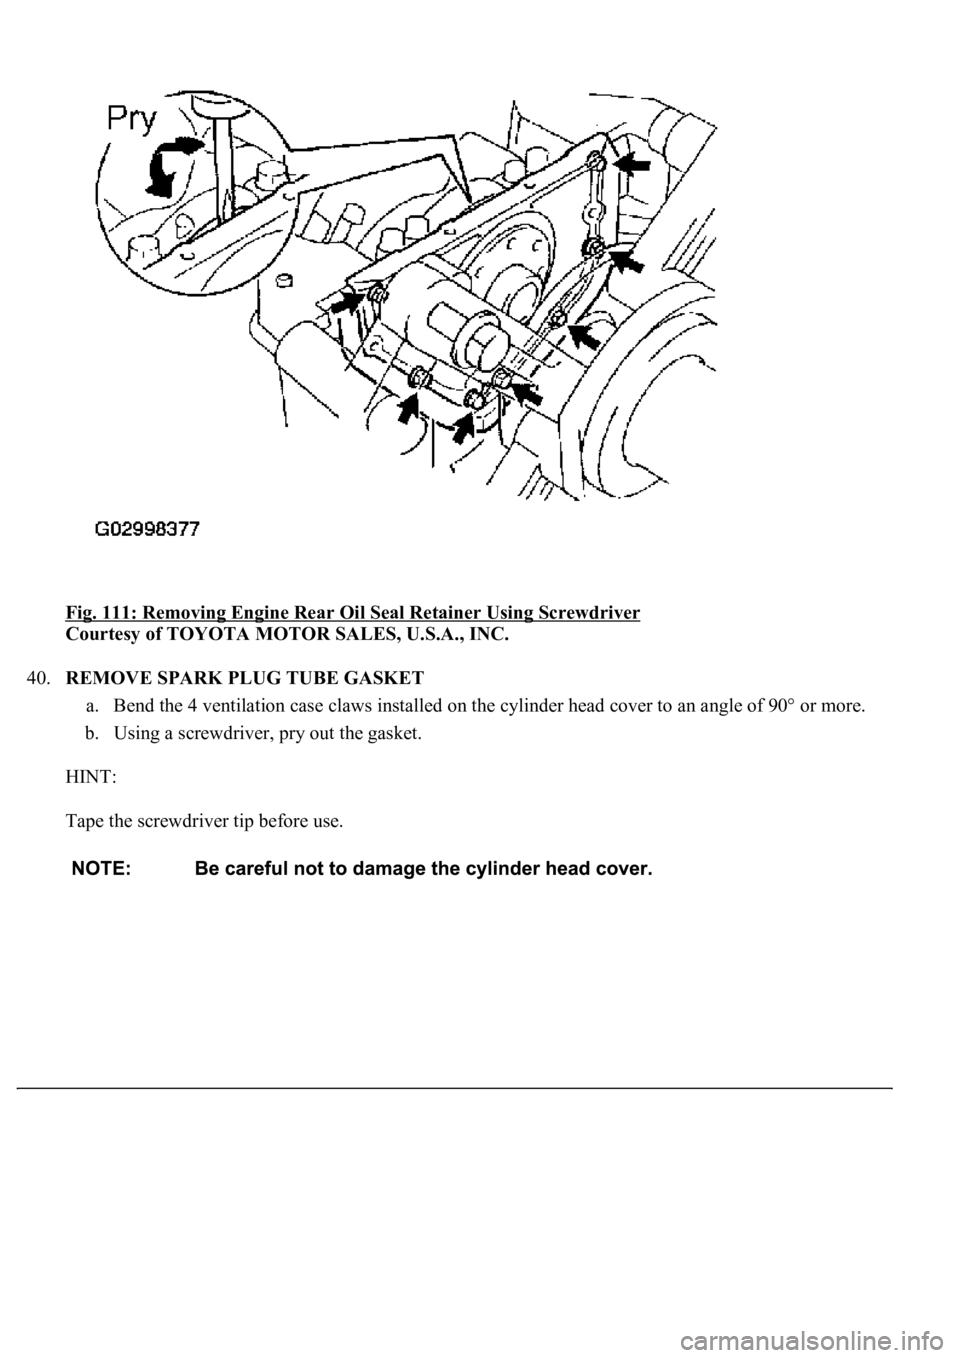
39.REMOVE ENGINE REAR OIL SEAL RETAINER
a. Remove the 7 bolts.
b. Using a screwdriver, remove the oil seal retainer by prying the portions between the oil seal
retainer and crankshaft bearing cap.
c. Remove the O-ring.
Page 3392 of 4500
Fig. 111: Removing Engine Rear Oil Seal Retainer Using Screwdriver
Courtesy of TOYOTA MOTOR SALES, U.S.A., INC.
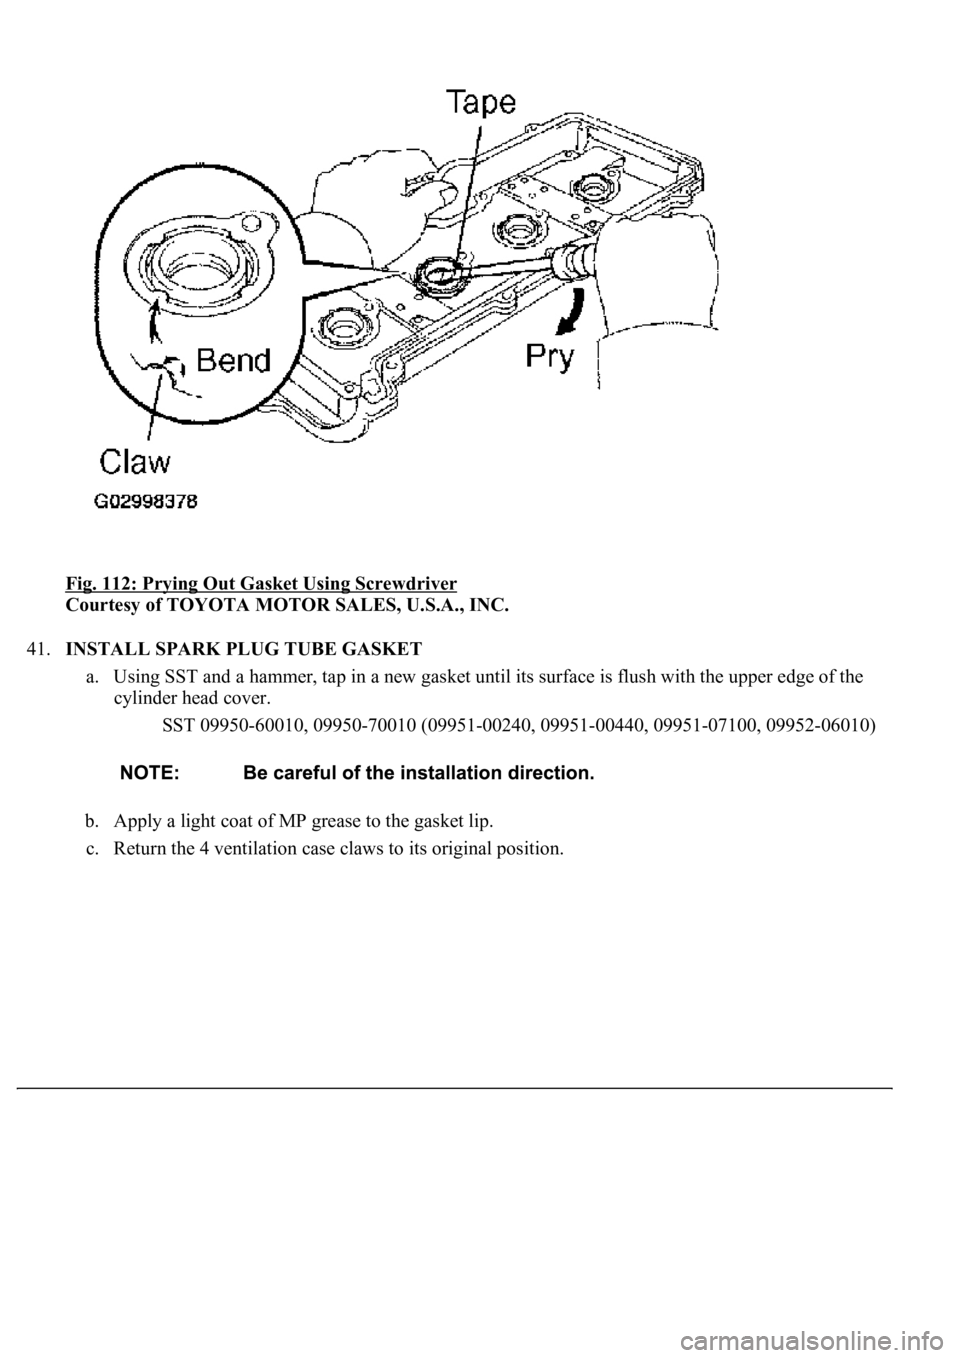
40.REMOVE SPARK PLUG TUBE GASKET
a. Bend the 4 ventilation case claws installed on the cylinder head cover to an angle of 90° or more.
b. Using a screwdriver, pry out the gasket.
HINT:
Tape the screwdriver tip before use.
Page 3393 of 4500
Fig. 112: Prying Out Gasket Using Screwdriver
Courtesy of TOYOTA MOTOR SALES, U.S.A., INC.
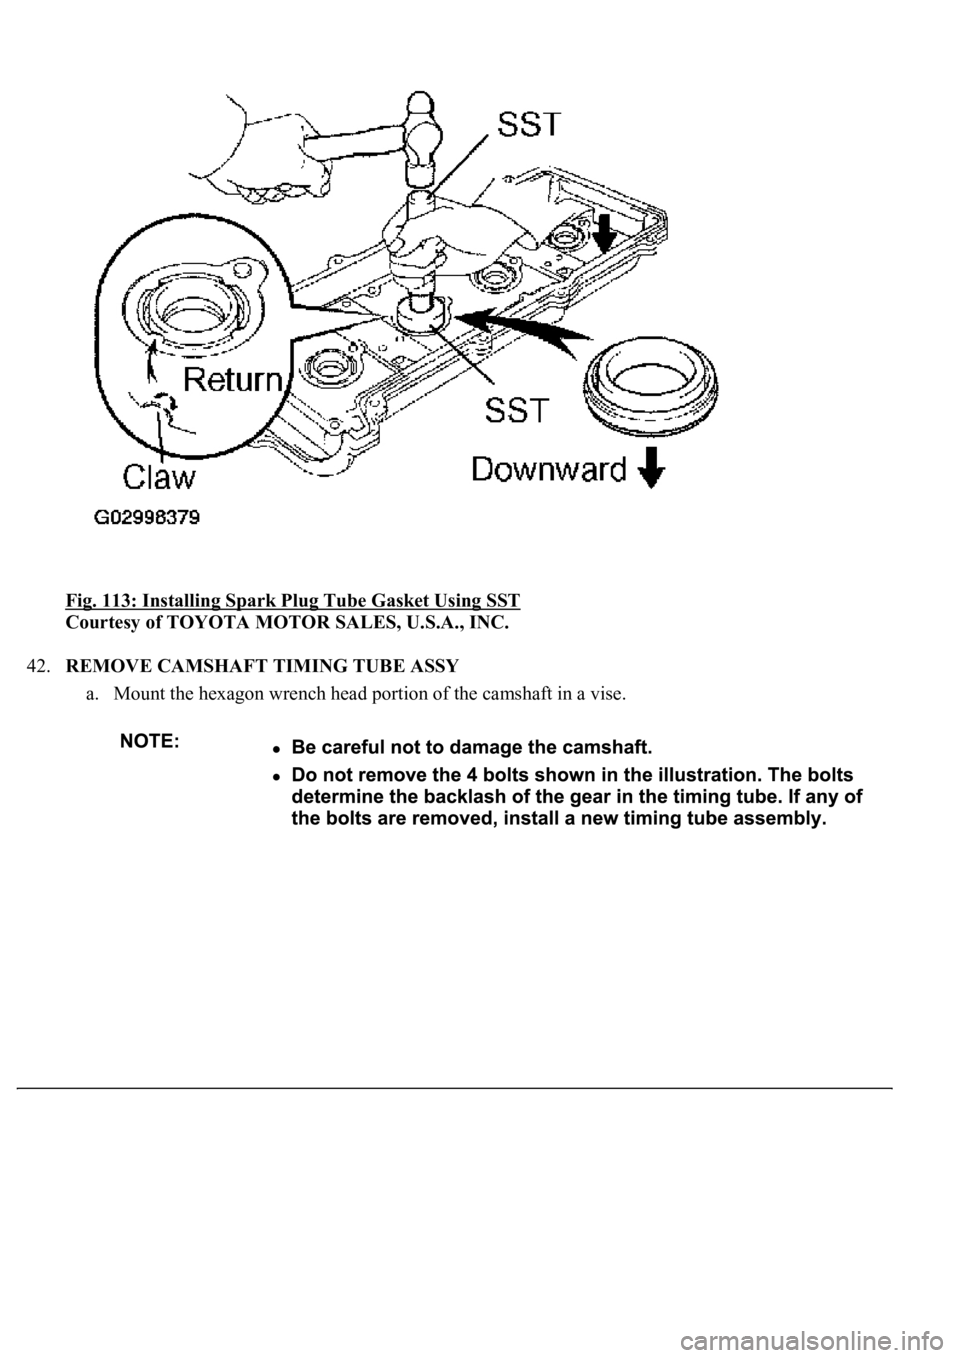
41.INSTALL SPARK PLUG TUBE GASKET
a. Using SST and a hammer, tap in a new gasket until its surface is flush with the upper edge of the
cylinder head cover.
SST 09950-60010, 09950-70010 (09951-00240, 09951-00440, 09951-07100, 09952-06010)
b. Apply a light coat of MP grease to the gasket lip.
c. Return the 4 ventilation case claws to its ori
ginal position.
Page 3394 of 4500
Fig. 113: Installing Spark Plug Tube Gasket Using SST
Courtesy of TOYOTA MOTOR SALES, U.S.A., INC.
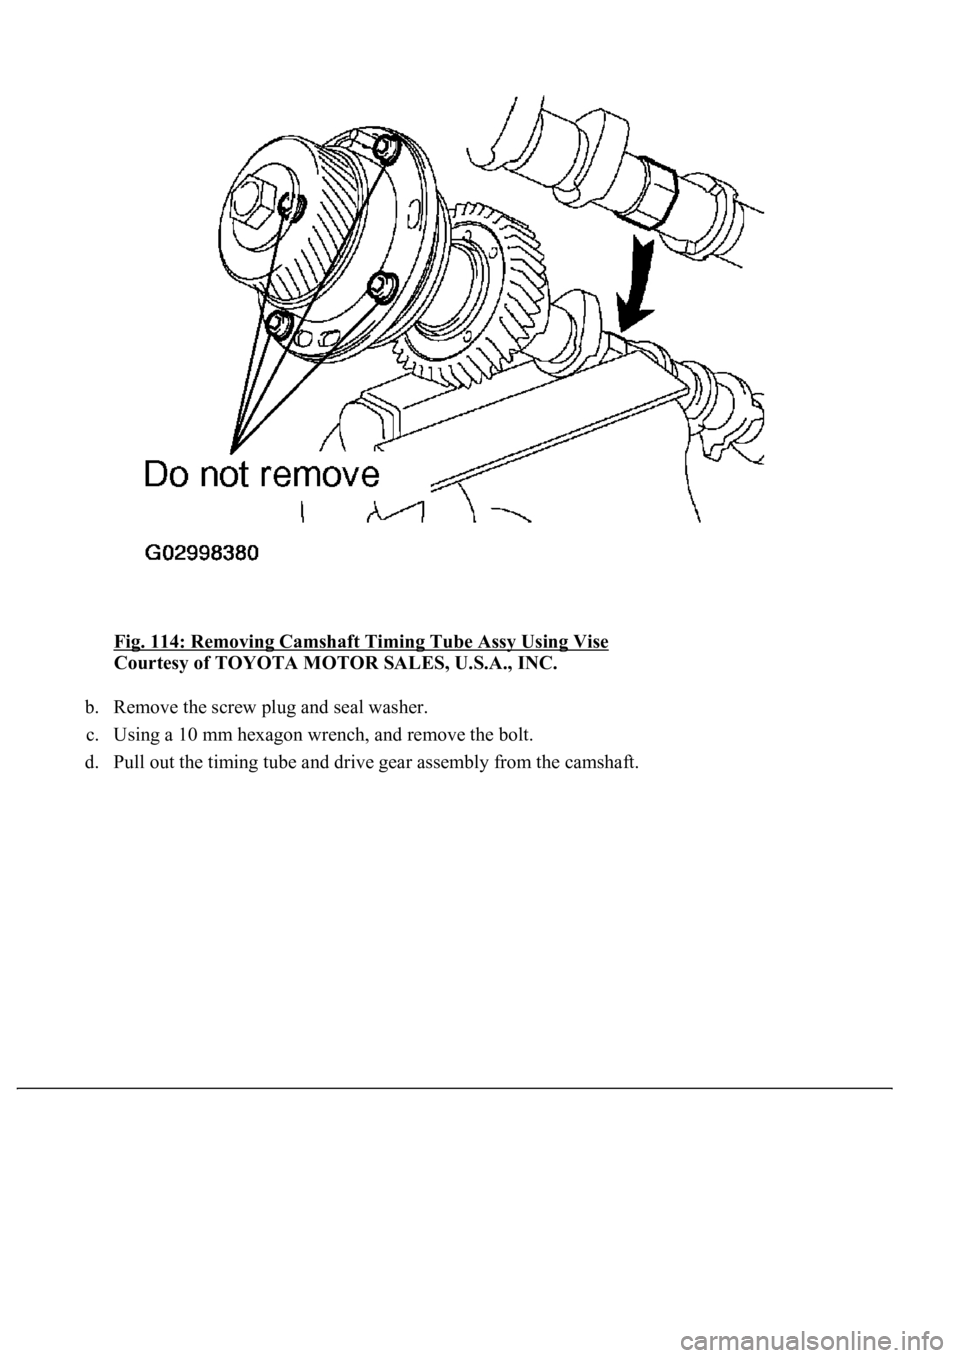
42.REMOVE CAMSHAFT TIMING TUBE ASSY
a. Mount the hexagon wrench head portion of the camshaft in a vise.
Page 3395 of 4500
Fig. 114: Removing Camshaft Timing Tube Assy Using Vise
Courtesy of TOYOTA MOTOR SALES, U.S.A., INC.
b. Remove the screw plug and seal washer.
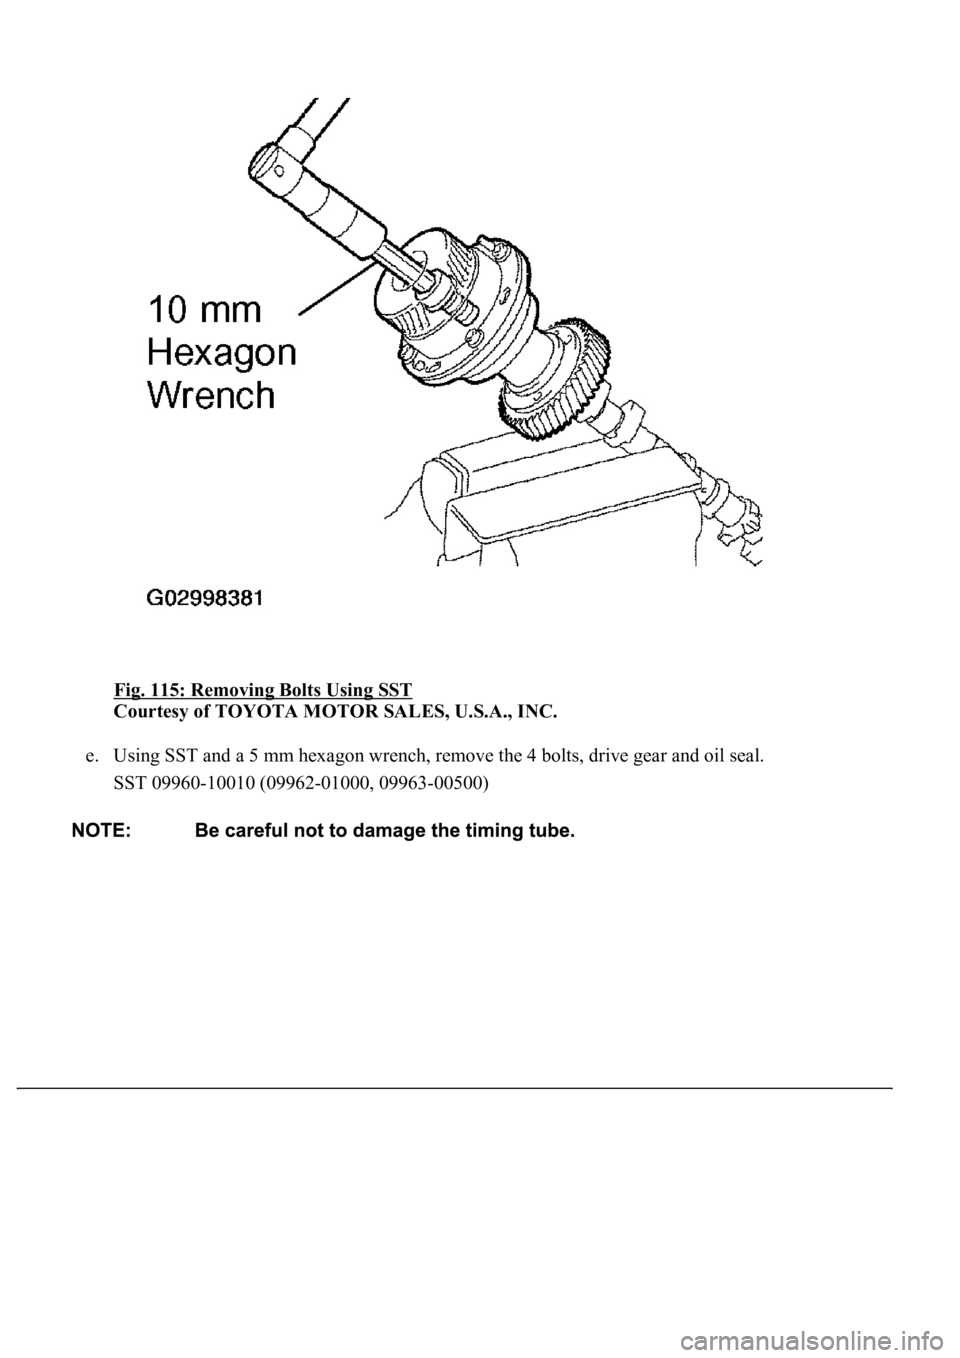
c. Using a 10 mm hexagon wrench, and remove the bolt.
d. Pull out the timing tube and drive gear assembly from the camshaft.
Page 3396 of 4500
Fig. 115: Removing Bolts Using SST
Courtesy of TOYOTA MOTOR SALES, U.S.A., INC.
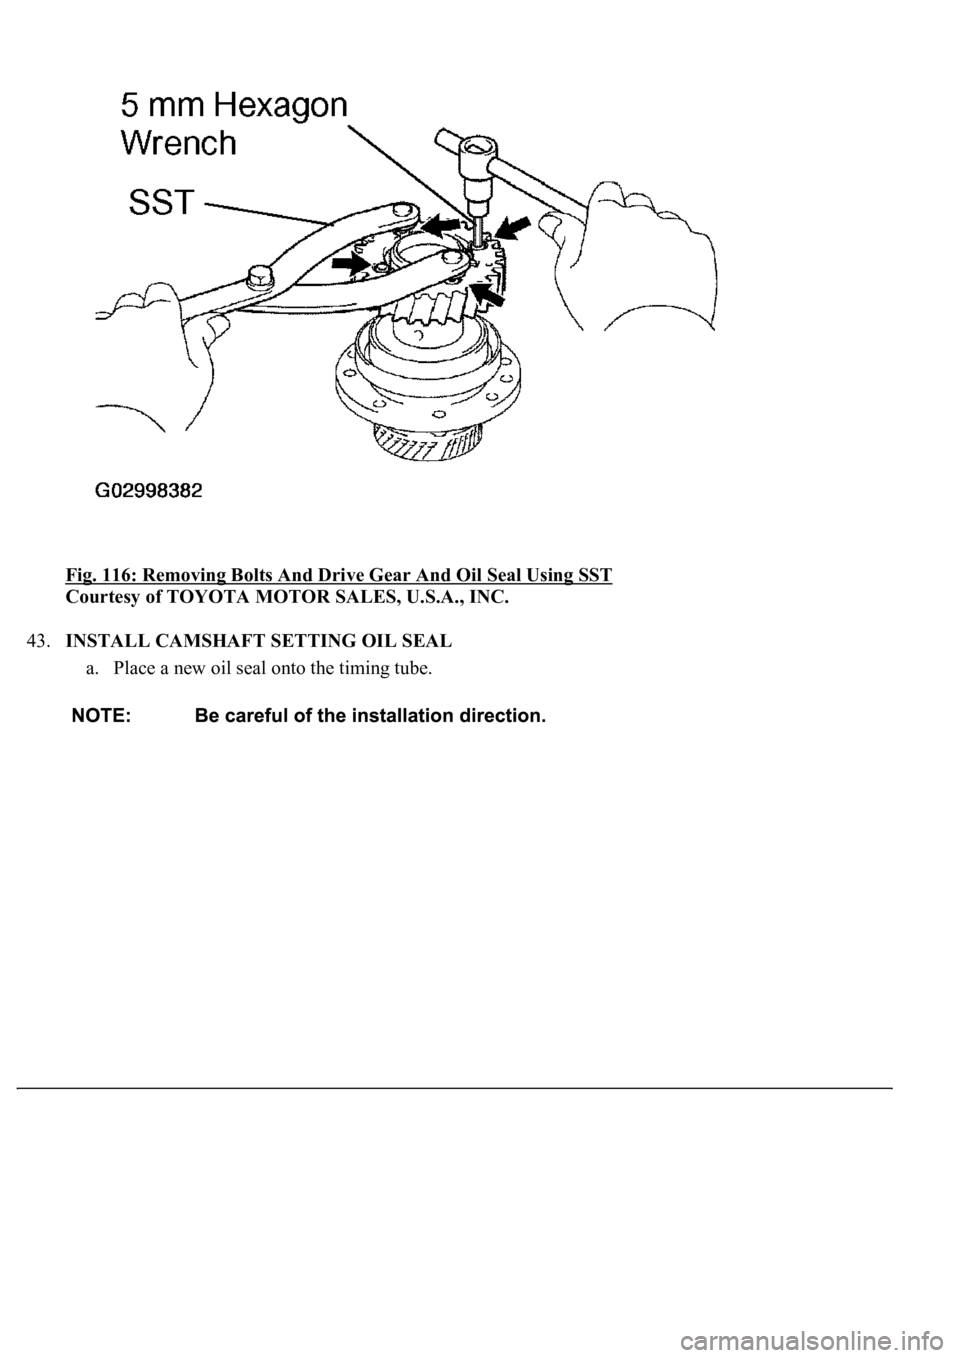
e. Using SST and a 5 mm hexagon wrench, remove the 4 bolts, drive gear and oil seal.
SST 09960-10010 (09962-01000, 09963-00500)
Page 3397 of 4500
Fig. 116: Removing Bolts And Drive Gear And Oil Seal Using SST
Courtesy of TOYOTA MOTOR SALES, U.S.A., INC.
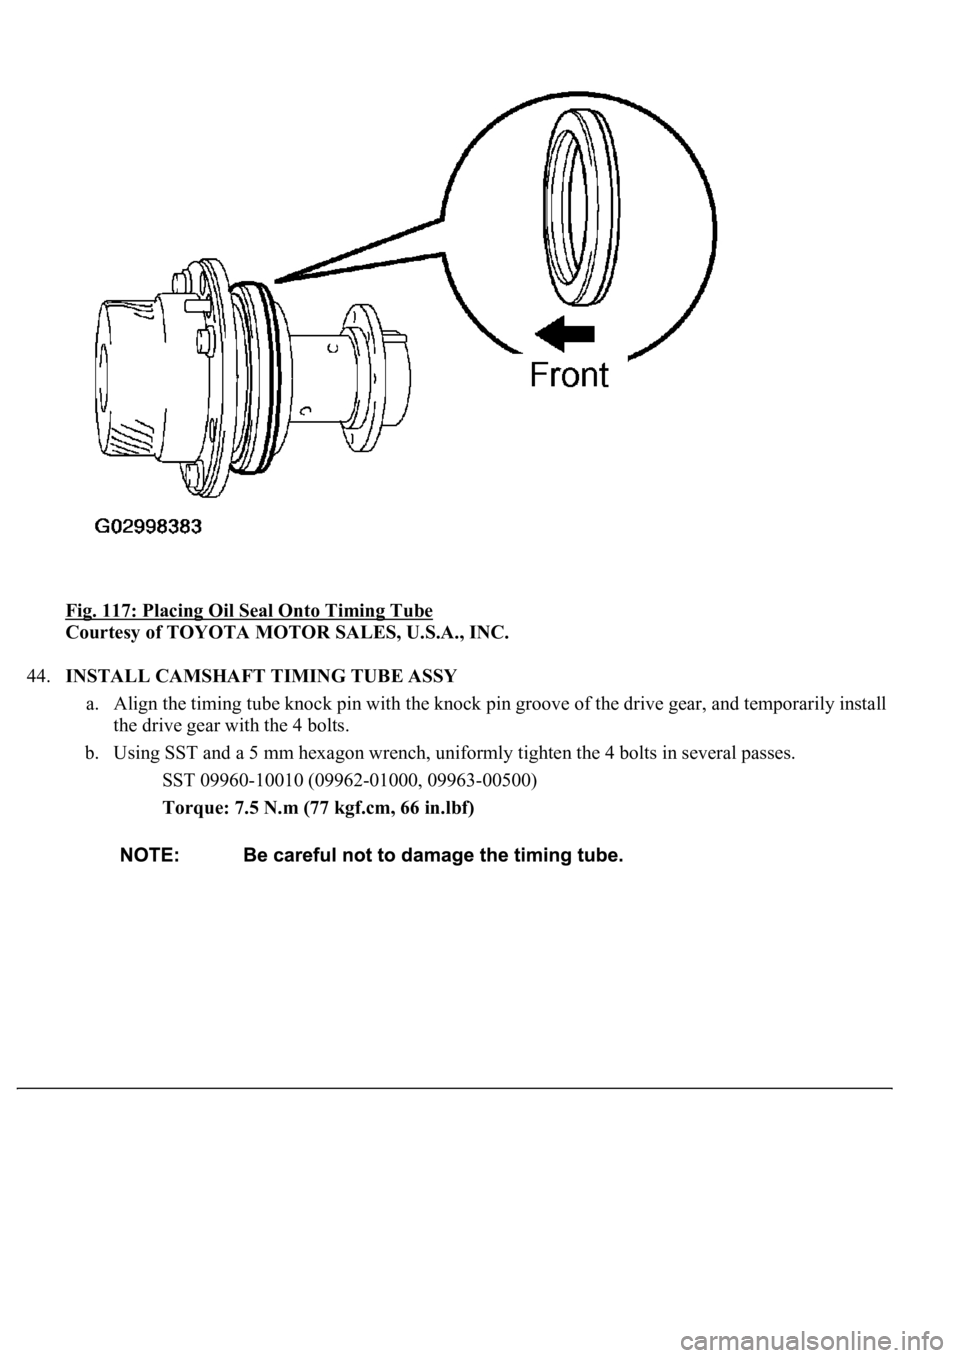
43.INSTALL CAMSHAFT SETTING OIL SEAL
a. Place a new oil seal onto the timing tube.
Page 3398 of 4500
Fig. 117: Placing Oil Seal Onto Timing Tube
Courtesy of TOYOTA MOTOR SALES, U.S.A., INC.
44.INSTALL CAMSHAFT TIMING TUBE ASSY
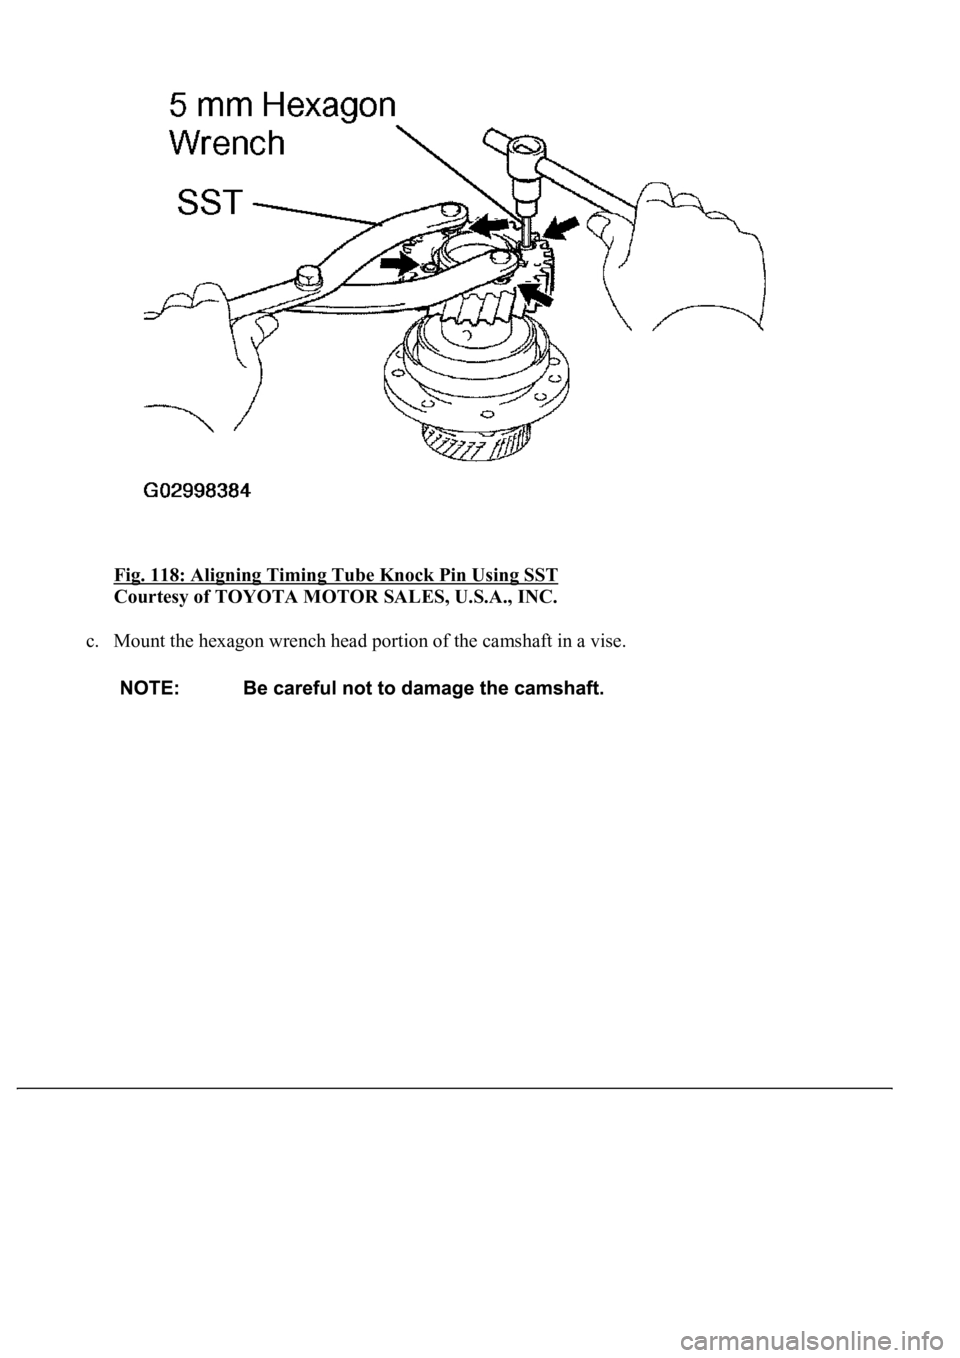
a. Align the timing tube knock pin with the knock pin groove of the drive gear, and temporarily install
the drive gear with the 4 bolts.
b. Using SST and a 5 mm hexagon wrench, uniformly tighten the 4 bolts in several passes.
SST 09960-10010 (09962-01000, 09963-00500)
Torque: 7.5 N.m (77 kgf.cm, 66 in.lbf)
Page 3399 of 4500
Fig. 118: Aligning Timing Tube Knock Pin Using SST
Courtesy of TOYOTA MOTOR SALES, U.S.A., INC.
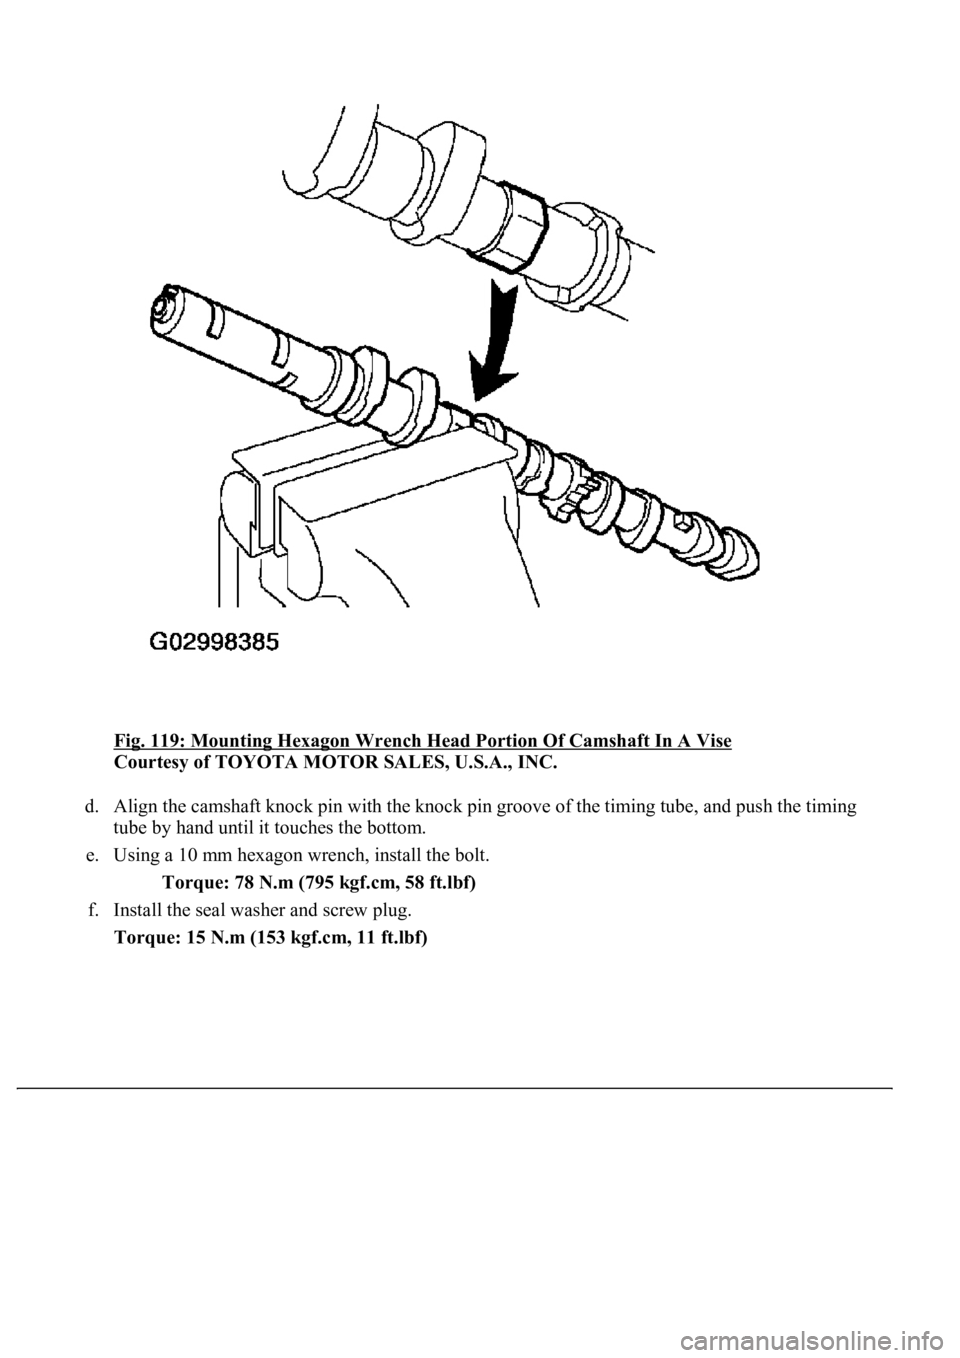
c. Mount the hexagon wrench head portion of the camshaft in a vise.
Page 3400 of 4500
Fig. 119: Mounting Hexagon Wrench Head Portion Of Camshaft In A Vise
Courtesy of TOYOTA MOTOR SALES, U.S.A., INC.
d. Align the camshaft knock pin with the knock pin groove of the timing tube, and push the timing
tube by hand until it touches the bottom.
e. Using a 10 mm hexagon wrench, install the bolt.
Torque: 78 N.m (795 kgf.cm, 58 ft.lbf)
f. Install the seal washer and screw plug.
Torque: 15 N.m (153 kgf.cm, 11 ft.lbf)
Trending: service indicator, overheating, cylinder head, engine coolant, torque, AC Expansion Valve, wheel
