LEXUS LS430 2003 Factory Repair Manual
Manufacturer: LEXUS, Model Year: 2003,
Model line: LS430,
Model: LEXUS LS430 2003
Pages: 4500, PDF Size: 87.45 MB
LEXUS LS430 2003 Factory Repair Manual
LS430 2003
LEXUS
LEXUS
https://www.carmanualsonline.info/img/36/57050/w960_57050-0.png
LEXUS LS430 2003 Factory Repair Manual
Trending: phone, Rear suspension, wheel torque, brake, relay, c1336, wheel alignment
Page 3411 of 4500
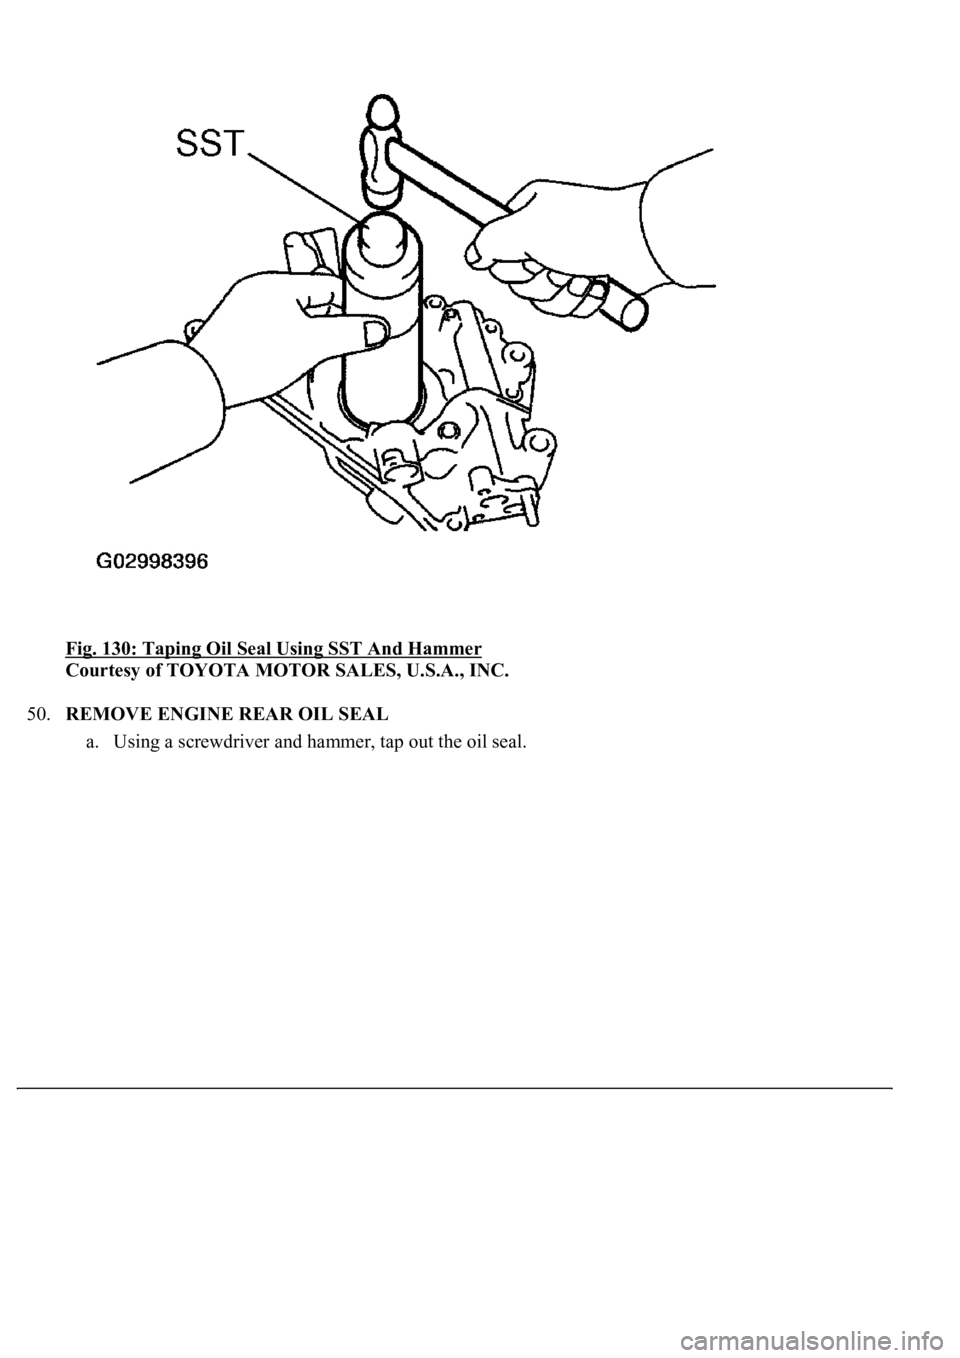
Fig. 130: Taping Oil Seal Using SST And Hammer
Courtesy of TOYOTA MOTOR SALES, U.S.A., INC.
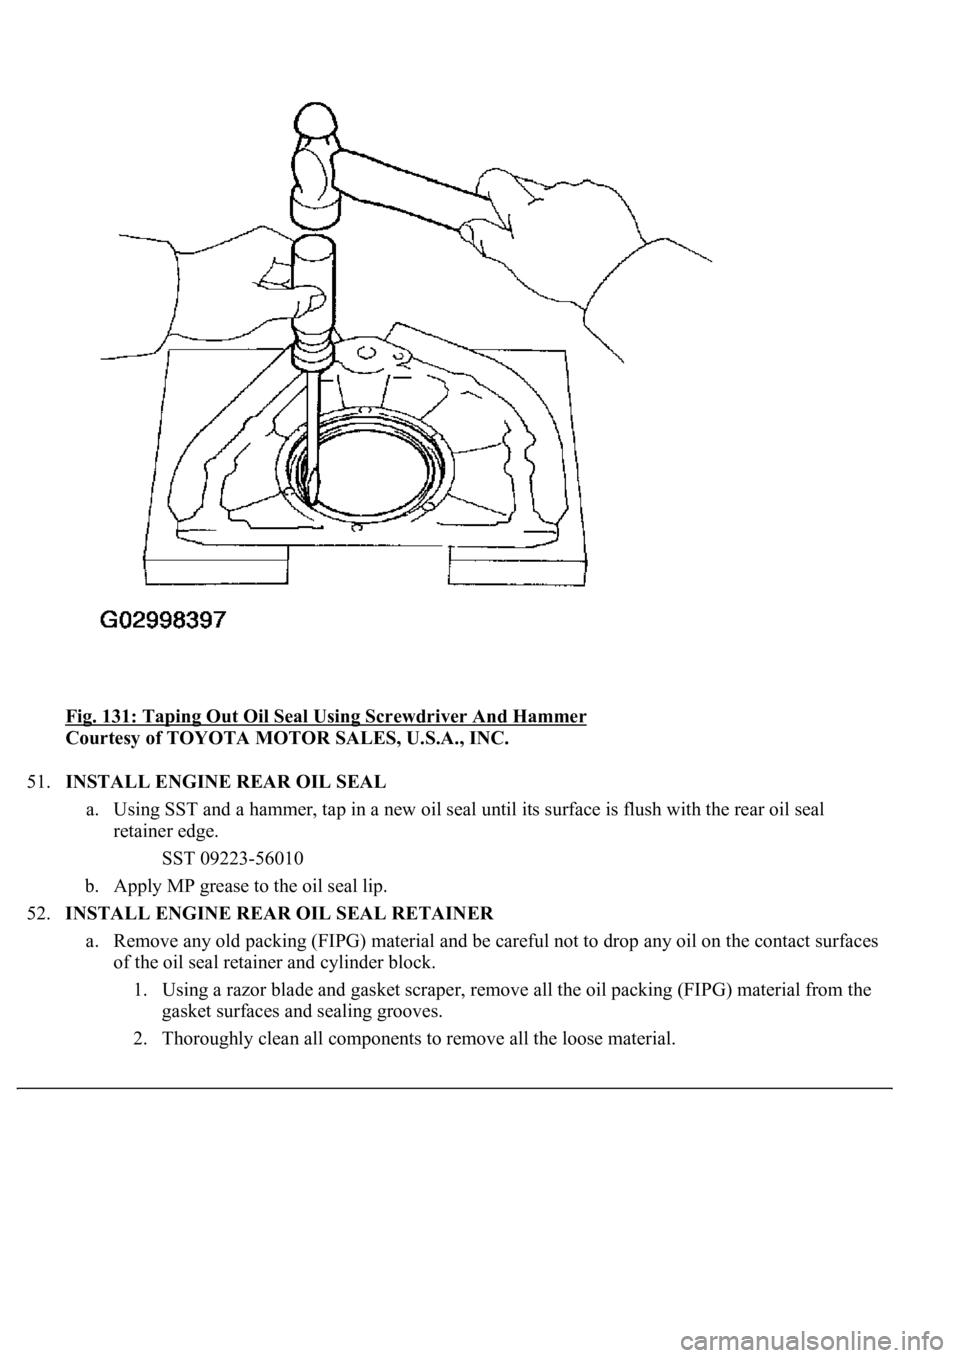
50.REMOVE ENGINE REAR OIL SEAL
a. Using a screwdriver and hammer, tap out the oil seal.
Page 3412 of 4500
Fig. 131: Taping Out Oil Seal Using Screwdriver And Hammer
Courtesy of TOYOTA MOTOR SALES, U.S.A., INC.
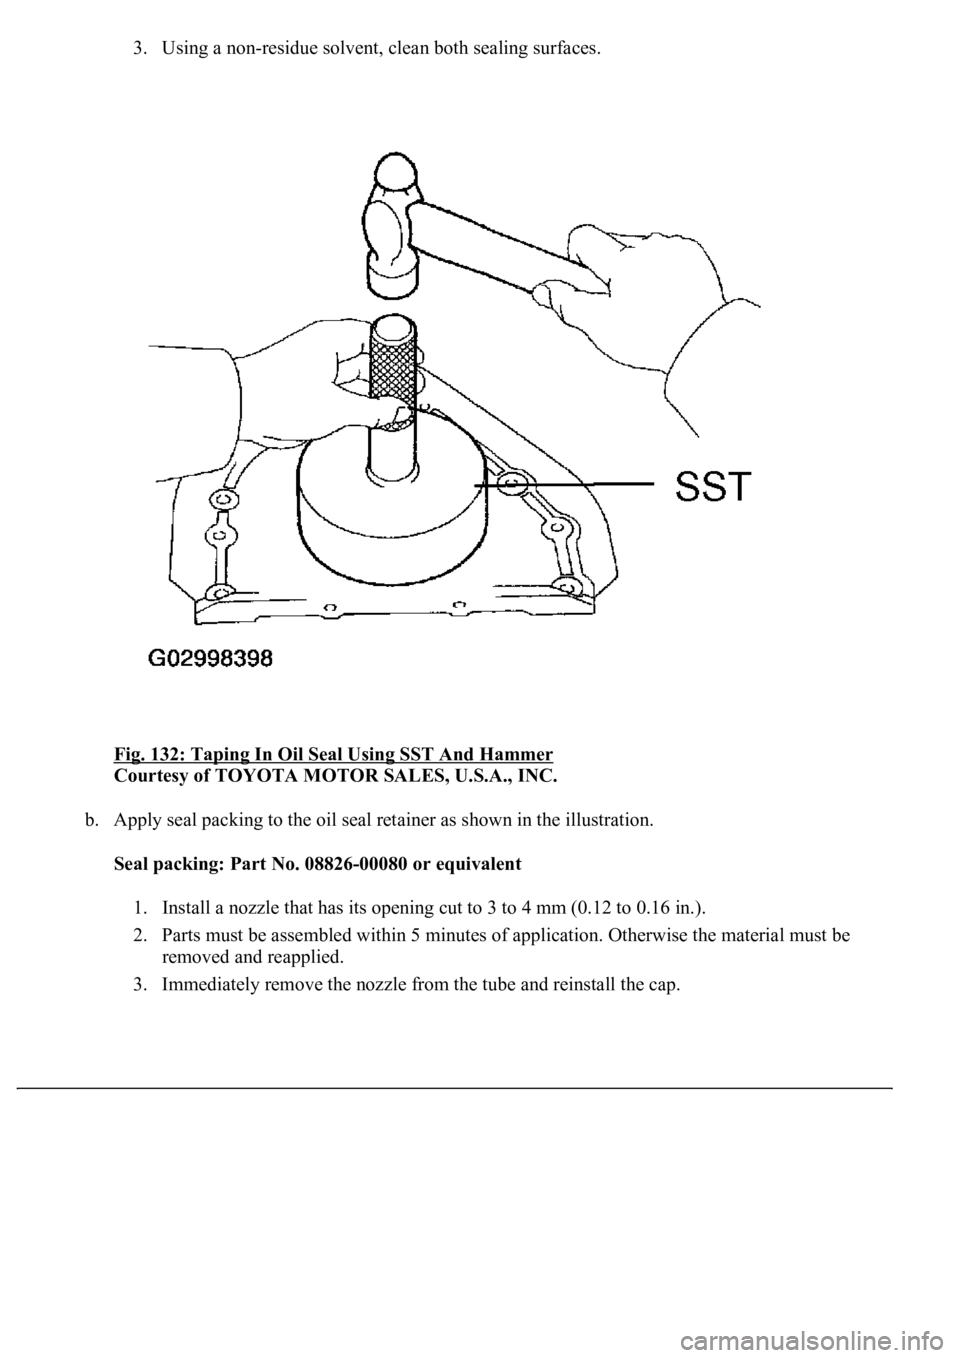
51.INSTALL ENGINE REAR OIL SEAL
a. Using SST and a hammer, tap in a new oil seal until its surface is flush with the rear oil seal
retainer edge.
SST 09223-56010
b. Apply MP grease to the oil seal lip.
52.INSTALL ENGINE REAR OIL SEAL RETAINER
a. Remove any old packing (FIPG) material and be careful not to drop any oil on the contact surfaces
of the oil seal retainer and cylinder block.
1. Using a razor blade and gasket scraper, remove all the oil packing (FIPG) material from the
gasket surfaces and sealing grooves.
2. Thoroughly clean all components to remove all the loose material.
Page 3413 of 4500
3. Using a non-residue solvent, clean both sealing surfaces.
Fig. 132: Taping In Oil Seal Using SST And Hammer
Courtesy of TOYOTA MOTOR SALES, U.S.A., INC.
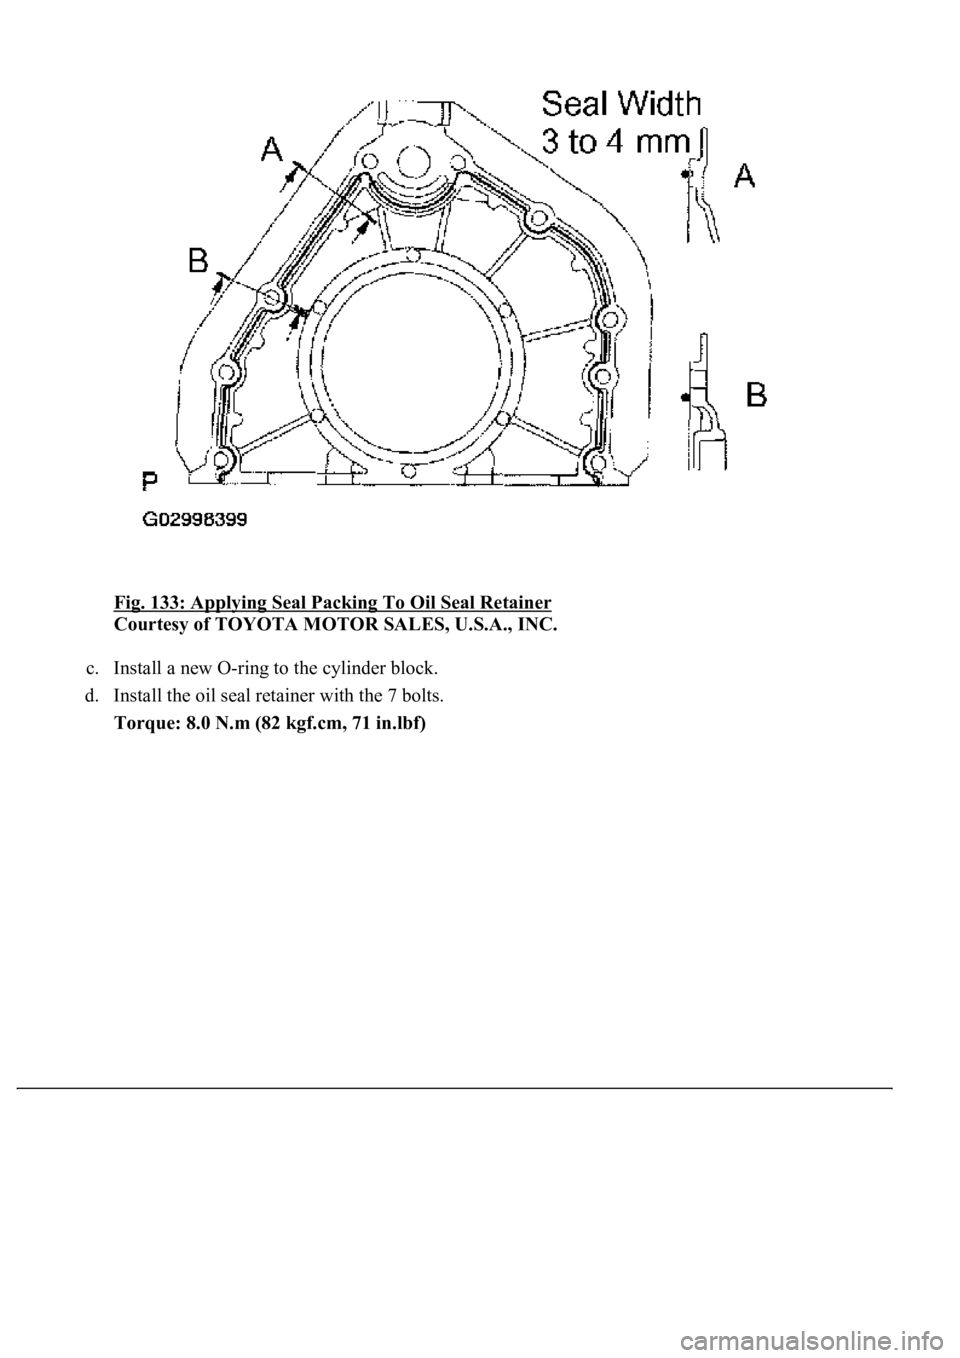
b. Apply seal packing to the oil seal retainer as shown in the illustration.
Seal packing: Part No. 08826-00080 or equivalent
1. Install a nozzle that has its opening cut to 3 to 4 mm (0.12 to 0.16 in.).
2. Parts must be assembled within 5 minutes of application. Otherwise the material must be
removed and reapplied.
3. Immediatel
y remove the nozzle from the tube and reinstall the cap.
Page 3414 of 4500
<0029004c004a00110003001400160016001d0003002400530053004f005c004c0051004a0003003600480044004f0003003300440046004e004c0051004a00030037005200030032004c004f0003003600480044004f00030035004800570044004c005100
480055[
Courtesy of TOYOTA MOTOR SALES, U.S.A., INC.
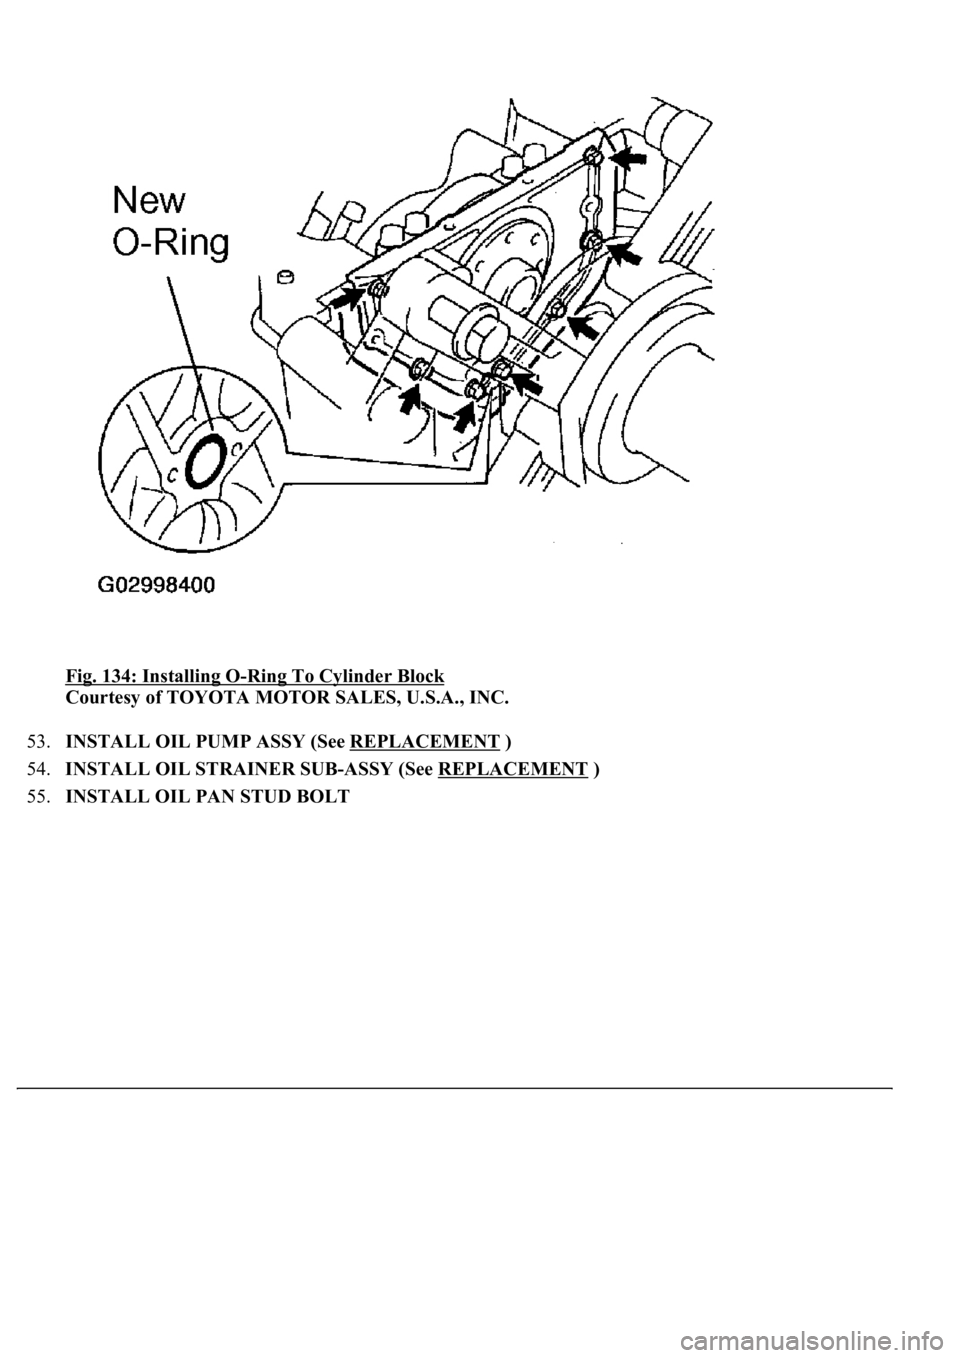
c. Install a new O-ring to the cylinder block.
d. Install the oil seal retainer with the 7 bolts.
Torque: 8.0 N.m (82 kgf.cm, 71 in.lbf)
Page 3415 of 4500
Fig. 134: Installing O-Ring To Cylinder Block
Courtesy of TOYOTA MOTOR SALES, U.S.A., INC.
53.INSTALL OIL PUMP ASSY (See REPLACEMENT
)
54.INSTALL OIL STRAINER SUB-ASSY (See REPLACEMENT
)
55.INSTALL OIL PAN STUD BOLT
Page 3416 of 4500
Fig. 135: Identifying Oil Pan Stud Bolt Diameter
Courtesy of TOYOTA MOTOR SALES, U.S.A., INC.
56.INSTALL OIL PAN SUB-ASSY (See REPLACEMENT
)
57.INSTALL OIL PAN BAFFLE PLATE (See REPLACEMENT
)
58.INSTALL OIL PAN SUB-ASSY NO.2 (See REPLACEMENT
)
59.INSTALL WATER PUMP ASSY
a. Install a new gasket and water pump with the 5 bolts, 2 stud bolts and nut. Uniformly tighten the
bolts, stud bolts and nut in several passes.
Torque:
21 N.m (214 kgf.cm, 16 ft.lbf) for bolt
18 N.m (184 kgf.cm, 13 ft.lbf) for stud bolt and nut
HINT:
Use bolts that are 30 mm (1.18 in.) in len
gth.
Page 3417 of 4500
Fig. 136: Identifying Water Pump Assy Bolts
Courtesy of TOYOTA MOTOR SALES, U.S.A., INC.
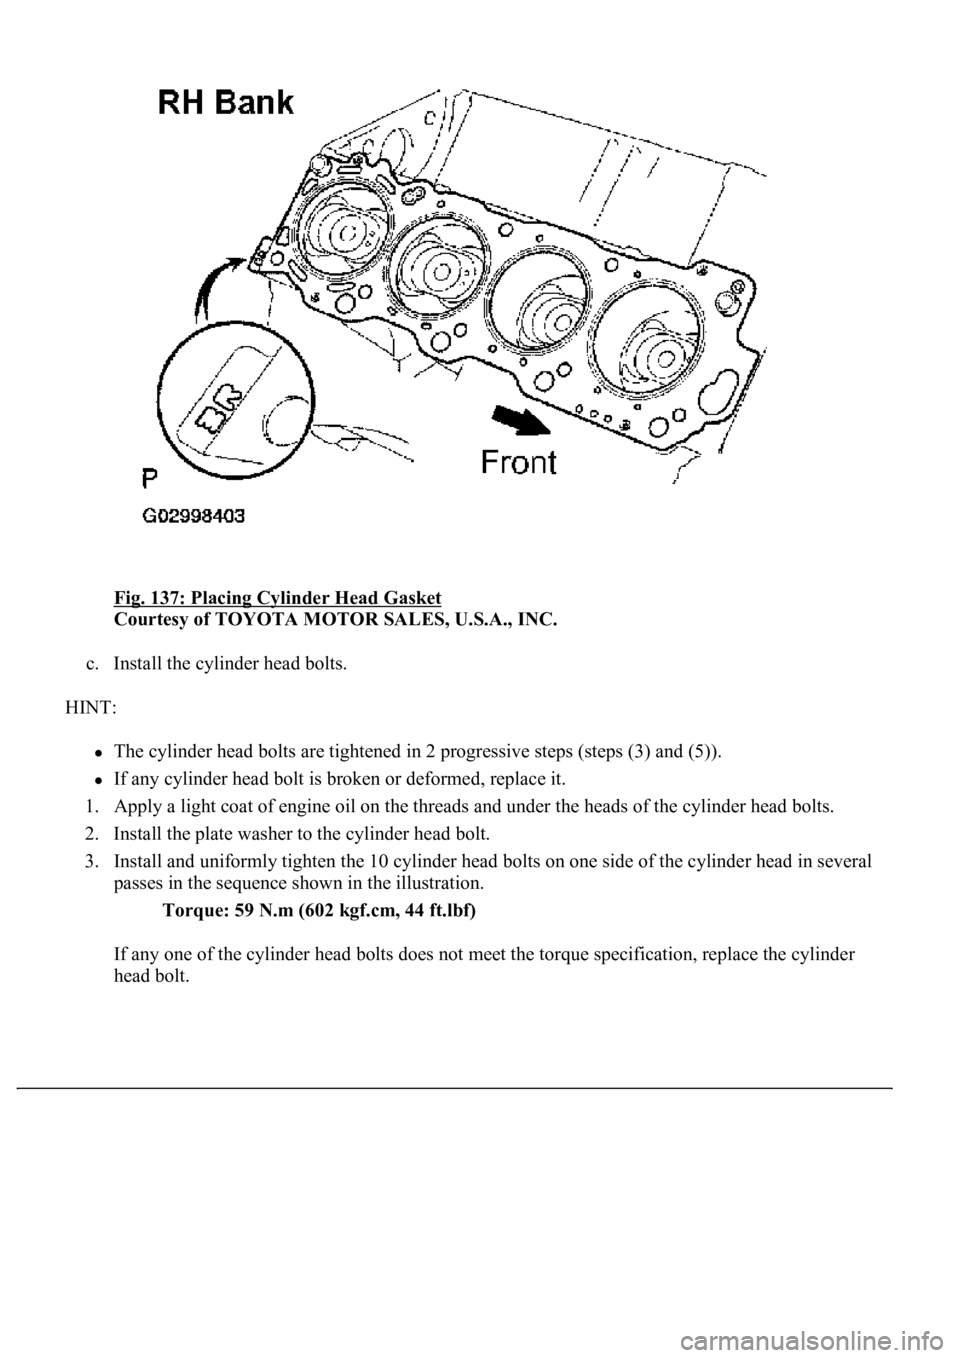
60.INSTALL CYLINDER HEAD SUB-ASSY
a. Place a new cylinder head gasket on the cylinder block.
HINT:
The rear side of the cylinder head gasket has marks so that the RH and LH banks can be
distinguished. A "3R" mark is on the RH bank's gasket.
b. Place the cylinder head on the cylinder head gasket.
Page 3418 of 4500
Fig. 137: Placing Cylinder Head Gasket
Courtesy of TOYOTA MOTOR SALES, U.S.A., INC.
c. Install the cylinder head bolts.
HINT:
The cylinder head bolts are tightened in 2 progressive steps (steps (3) and (5)).
If any cylinder head bolt is broken or deformed, replace it.
1. Apply a light coat of engine oil on the threads and under the heads of the cylinder head bolts.
2. Install the plate washer to the cylinder head bolt.
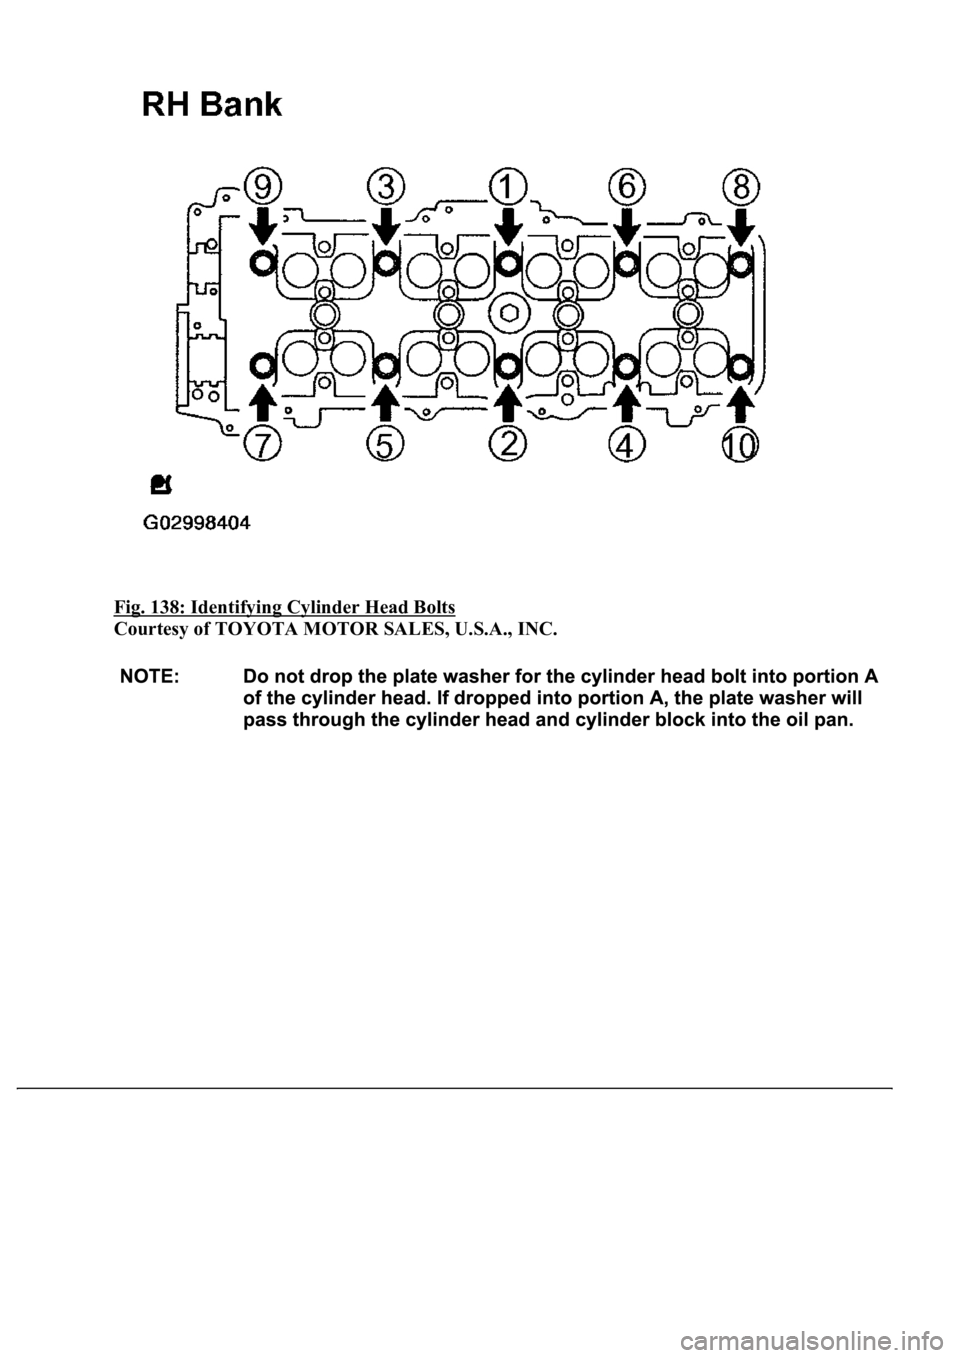
3. Install and uniformly tighten the 10 cylinder head bolts on one side of the cylinder head in several
passes in the sequence shown in the illustration.
Torque: 59 N.m (602 kgf.cm, 44 ft.lbf)
If any one of the cylinder head bolts does not meet the torque specification, replace the cylinder
head bolt.
Page 3419 of 4500
Fig. 138: Identifying Cylinder Head Bolts
Courtesy of TOYOTA MOTOR SALES, U.S.A., INC.
Page 3420 of 4500
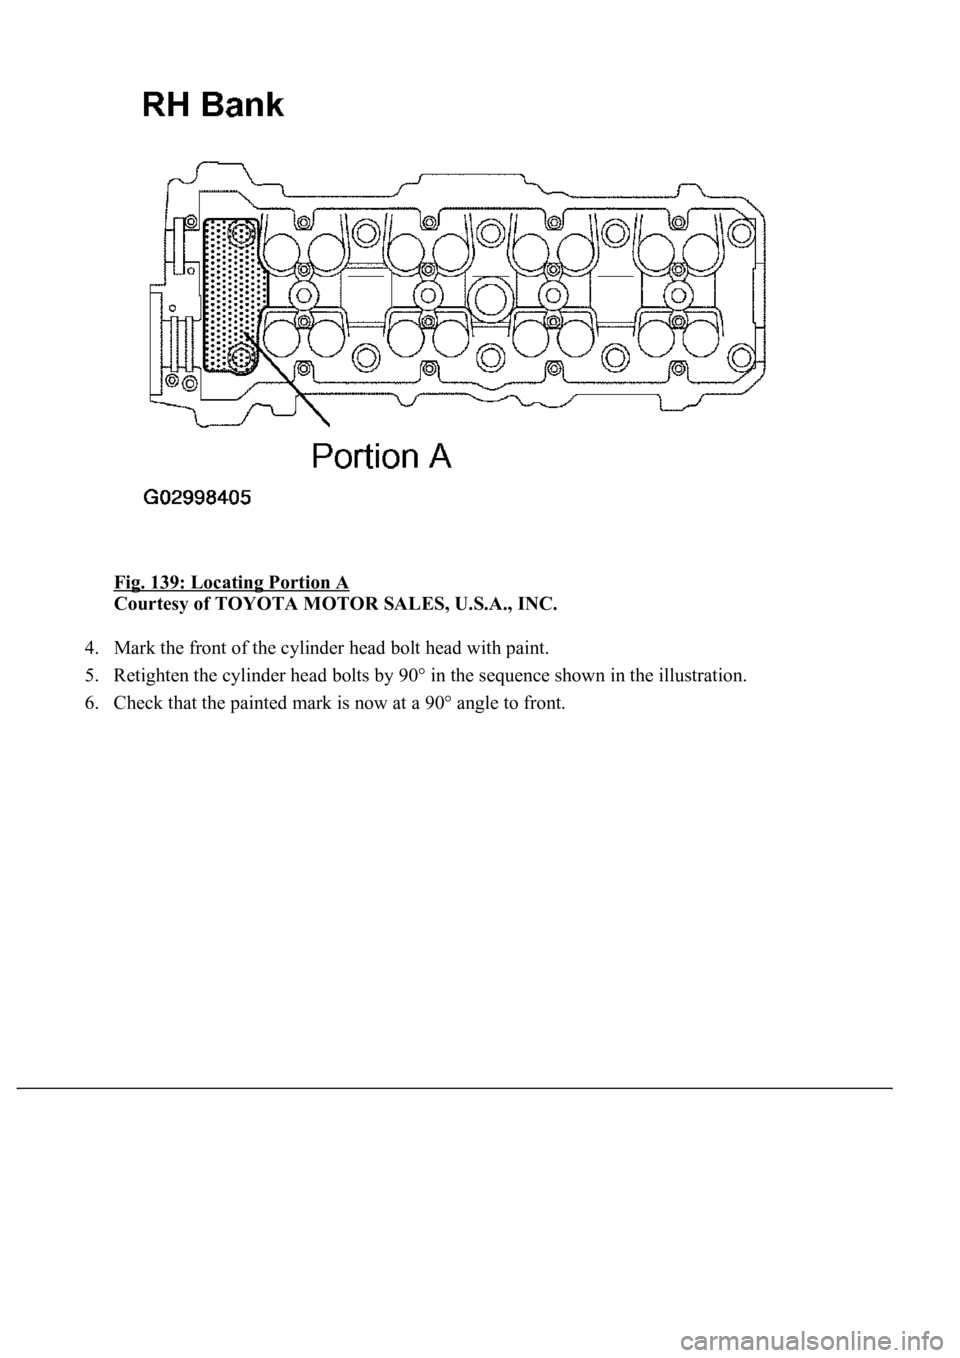
Fig. 139: Locating Portion A
Courtesy of TOYOTA MOTOR SALES, U.S.A., INC.
4. Mark the front of the cylinder head bolt head with paint.
5. Retighten the cylinder head bolts by 90° in the sequence shown in the illustration.
6. Check that the painted mark is now at a 90° an
gle to front.
Trending: cruise control, width, check engine light, oil capacity, horn, injection, Modulated
