MAZDA 626 1987 Workshop Manual
Manufacturer: MAZDA, Model Year: 1987,
Model line: 626,
Model: MAZDA 626 1987
Pages: 1865, PDF Size: 94.35 MB
MAZDA 626 1987 Workshop Manual
626 1987
MAZDA
MAZDA
https://www.carmanualsonline.info/img/28/57059/w960_57059-0.png
MAZDA 626 1987 Workshop Manual
Trending: alarm, headrest, roof rack, Rear brakes, gas type, battery replacement, brake light
Page 521 of 1865
FUEL SYSTEM 4B
3. Install the injectors and the injector insulators.
86U04A-109
Delivery Pipe
1. Remove the pulsation damper and pressure regu-
lator from the delivery pipe.
2. Remove the injectors (Refer to page 4B—58).
76G04B-081
Replace the delivery pipe.
Install in the reverse order of removal, referring to
installation note.
Tightening torque:
Pressure regulator
8—11 Nm (0.8—1.1 m-kg, 69—95 in-lb)
Delivery pipe
19—25
N
m (1.9—2.6 m-kg, 14—19 ft-lb)
76G04B-082
Installation note
Injector
Refer to page 4B—58.
4B—59
Page 522 of 1865
4B FUEL SYSTEM
Pressure Regulator
1. Disconnect the vacuum hose and fuel return hose.
2. Remove the pressure regulator.
3. Install in the reverse order of removal.
Tightening torque:
8—11 N-m (0.8—1.1 m-kg, 69—95 in-lb)
76G04B-084
Pulsation Damper
1. Loosen the pulsation damper and remove it.
2. Install in the reverse order of removal.
76G04B-085
^-Fuel hose
ML*? ^-Fuel pump
^silntank filter
ti* e
76G04B-086
h
tS
Is o
Sjfbj
Fuel Filter
Low pressure side
Refer to page 4B—57.
86U04A-116
High pressure side
The fuel filter must be replaced at the intervals out-
lined in the maintenance schedule.
Warning
Always work away from sparks or open
flames.
1. Disconnect the fuel hoses from the fuel filter.
2. Remove the fuel filter and the bracket.
3. Install a new filter and the bracket.
4. Connect the fuel hoses.
Note
When installing the filter, push the fuel hoses
fully onto the fuel filter and secure the hoses
with spring clamps.
4B-60
Page 523 of 1865
FUEL SYSTEM 4B
FUEL TANK
Removal
Caution
a) Before performing the following procedure, release the fuel pressure from the fuel sys-
tem to reduce the possibility of injury or fire. (Refer to page 4B—45)
b) When removing the fuel tank, keep sparks, cigarettes, and open flames away from the
fuel tank.
Remove in the sequence shown in the figure.
76G04B-087
Note
Drain the fuel from the fuel tank before removing the tank.
1. Fuel pump connectors 5. Breather hose
2. Fuel hoses 6. Fuel tank strap
3. Evaporative hoses 7. Fuel tank
4. Fuel filler hose
4B—61
Page 524 of 1865
4B FUEL SYSTEM
Inspection
1. Check the fuel tank for cracks and corrosion.
2. If any defect is found, repair or replace the tank.
Warning
Before repairing, clean the fuel tank thorough-
ly with steam to sufficiently remove all explo-
sive gas.
86U04A-118
Installation
Install in the reverse order of removal, referring to the installation note.
Torque Specifications
22—30 N-m (2.2—3.1 m-kg, 16—22 ft-lb)
4B—62
86U04A-119
Page 525 of 1865
FUEL SYSTEM 4B
Fuel filler hose: Push in at least 35 mm (1.4 in)
Others: At least 25 mm (1.0 in)
Installation note
1. Push the hose ends of the main fuel hose, fuel re-
turn hose and evaporation hoses onto the fuel tank
fittings at least 25 mm (1.0 in).
2. Push the fuel filler hose ends onto the fuel tank pipe
and filler pipe at least 35 mm (1.4 in).
86u04a-120
4B-63
Page 526 of 1865
4B DECELERATION CONTROL SYSTEM
DECELERATION CONTROL SYSTEM
This system consists of the dashpot and fuel cut system. The dashpot is to prevent after-burn so that
the throttle valve gradually closes during deceleration.
The control unit detects engine deceleration judging from the engine speed and the idle switch, and
signals a fuel cut operation to match the engines need, based on the coolant temperature and the
driving condition.
4B—64
Page 527 of 1865

DECELERATION CONTROL SYSTEM 4B
COMPONENT DESCRIPTIONS
Component Function Remarks
Brake light switch Detects braking operation (deceleration);
sends signal to engine control unit
Clutch switch Detects in-gear condition;
sends signal to engine control unit Switch ON when clutch pedal released
Dashpot (MTX) Prevents sudden closing of throttle valve during deceleration or shifting Adjustment speed: 1,900—2,100 rpm
Engine control unit Detects signals from input sensors and switches; cuts fuel injection
Idle switch Detects when throttle valve fully closed; sends signal to engine control unit Installed in throttle sensor
Ignition coil (-) terminal Detects engine speed; sends signal to engine control unit
Neutral switch Detects in-gear condition; sends signal to engine control unit Switch ON when in-gear
Water thermo sensor Detects coolant temperature; sends signal to engine control unit
Water thermo switch Detects radiator coolant temperature; sends signal to engine control unit ON: above 17°C (63°F)
76G04B-089
4B—65
Page 528 of 1865
4B DECELERATION CONTROL SYSTEM
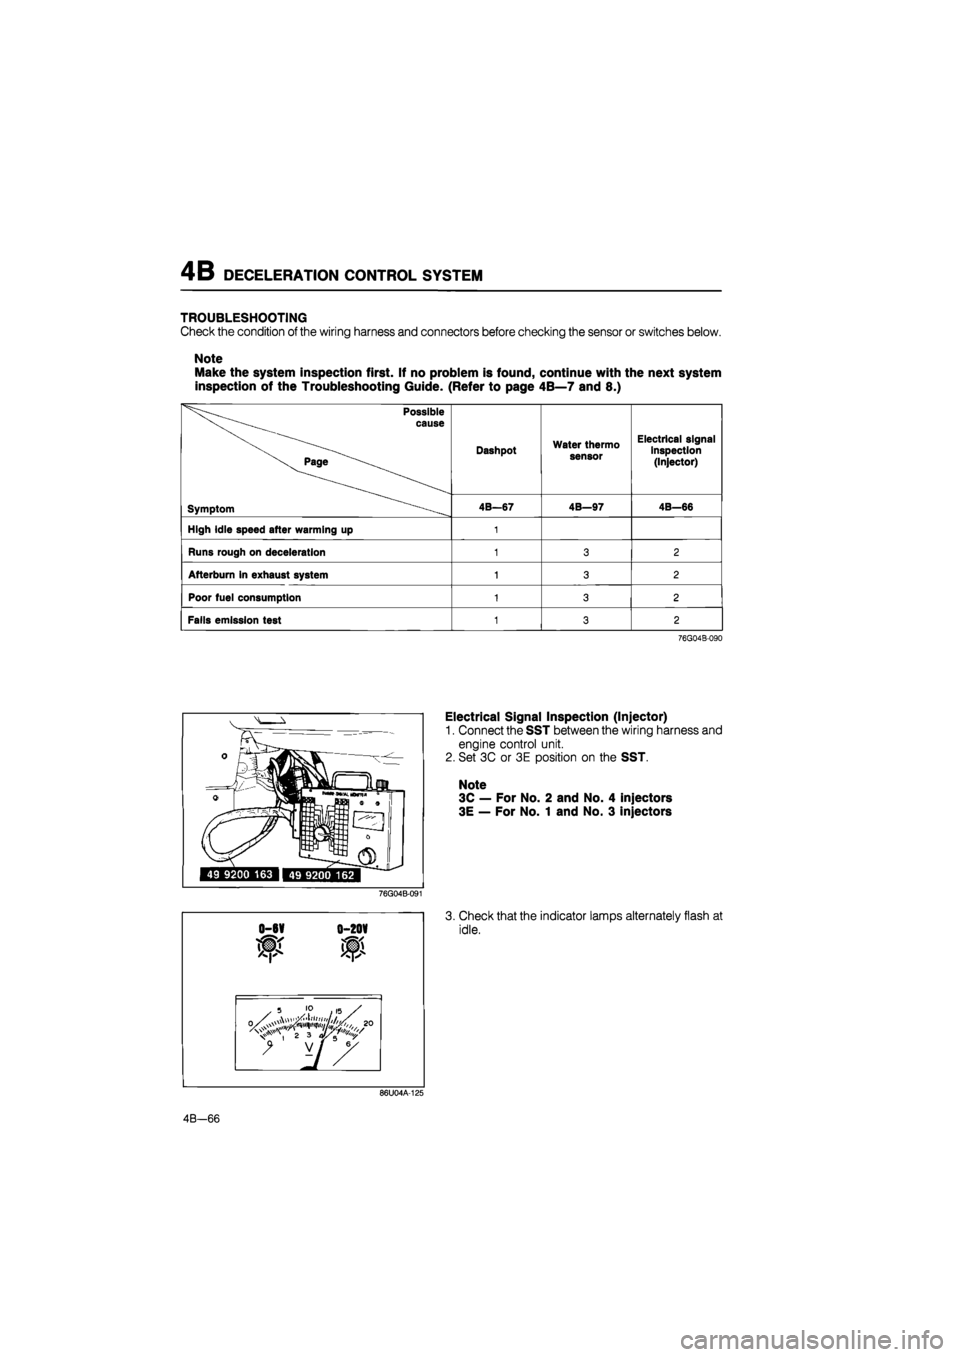
TROUBLESHOOTING
Check the condition of the wiring harness and connectors before checking the sensor or switches below.
Note
Make the system inspection first. If no problem is found, continue with the next system
inspection of the Troubleshooting Guide. (Refer to page 4B—7 and 8.)
Possible
^^ cause
Symptom
Dashpot Water thermo
sensor
Electrical signal
inspection
(Injector)
Possible
^^ cause
Symptom 4B—67 4B—97 4B-66
High idle speed after warming up 1
Runs rough on deceleration 1 3 2
Afterburn in exhaust system 1 3 2
Poor fuel consumption 1 3 2
Fails emission test 1 3 2
76G04B-090
Electrical Signal Inspection (Injector)
1. Connect the SST between the wiring harness and
engine control unit.
2. Set 3C or 3E position on the SST.
Note
3C — For No. 2 and No. 4 injectors
3E — For No. 1 and No. 3 injectors
76G04B-091
0-6V 0-20V
3. Check that the indicator lamps alternately flash at
idle.
86U04A-125
4B—66
Page 529 of 1865

DECELERATION CONTROL SYSTEM 4B
86U04A-126
76G04B-092
76G04B-093
Lock nutLg*
rJpM
Lever-V- y"
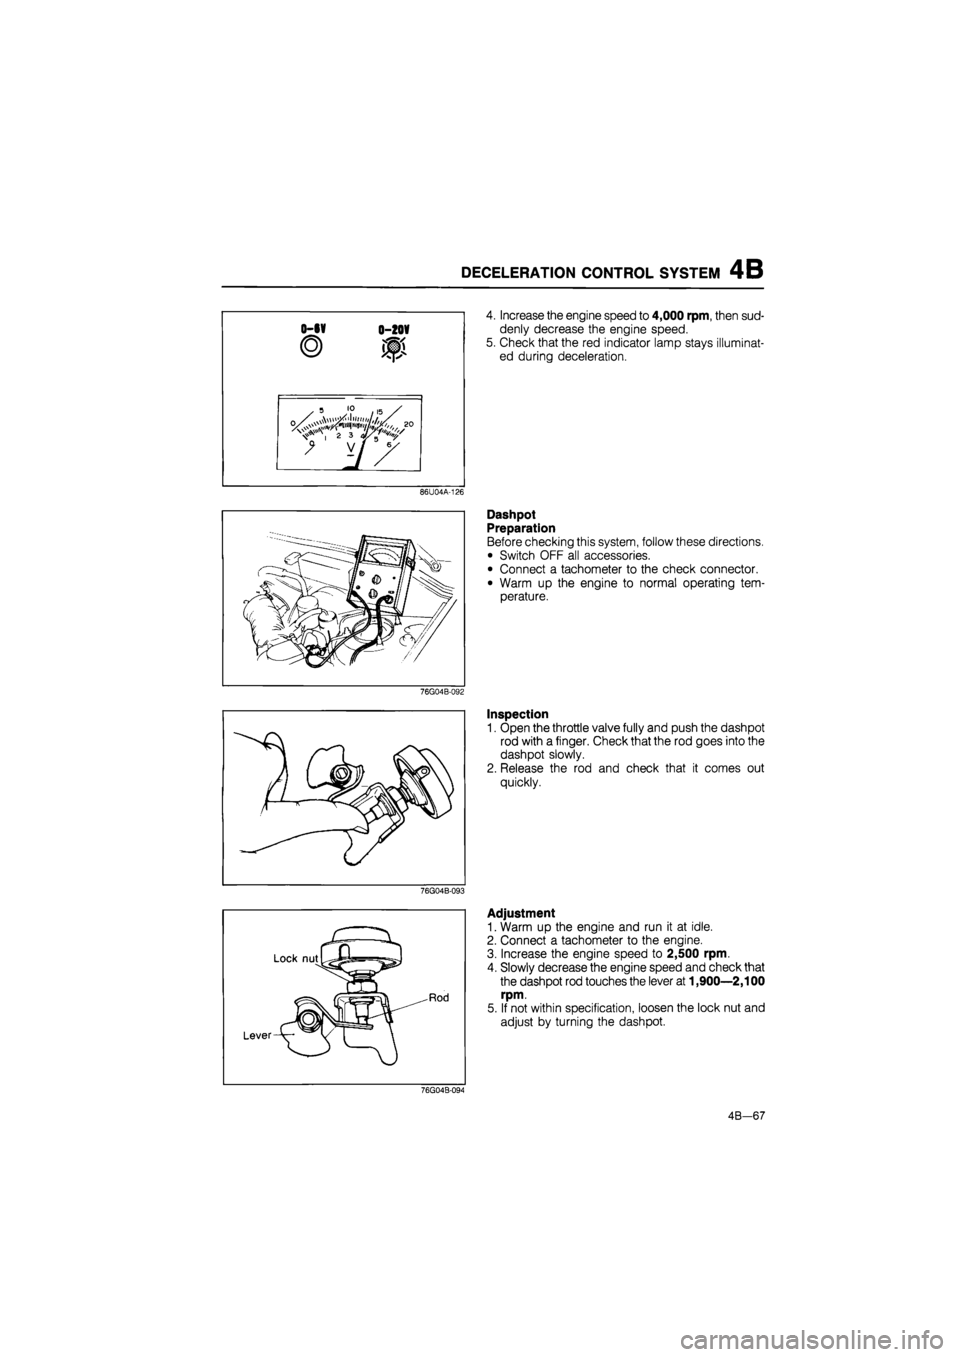
4. Increase the engine speed to 4,000 rpm, then sud-
denly decrease the engine speed.
5. Check that the red indicator lamp stays illuminat-
ed during deceleration.
Dashpot
Preparation
Before checking this system, follow these directions.
• Switch OFF all accessories.
• Connect a tachometer to the check connector.
• Warm up the engine to normal operating tem-
perature.
Inspection
1. Open the throttle valve fully and push the dashpot
rod with a finger. Check that the rod goes into the
dashpot slowly.
2. Release the rod and check that it comes out
quickly.
Adjustment
1. Warm up the engine and run it at idle.
2. Connect a tachometer to the engine.
3. Increase the engine speed to 2,500 rpm.
4. Slowly decrease the engine speed and check that
the dashpot rod touches the lever at 1,900—2,100
rpm.
5. If not within specification, loosen the lock nut and
adjust by turning the dashpot.
76G04B-094
4B-67
Page 530 of 1865
4B AIR INJECTION SYSTEM
AIR INJECTION SYSTEM
76G04B-095
This system supplies secondary air into the exhaust system to improve idle stability.
COMPONENT DESCRIPTIONS
Component Function Remark
Air cleaner Filters air entering throttle body
Air control valve Directs air to reed valve Installed on air cleaner
Reed valve Directs air to exhaust manifold Improves idle stability
76G04B-096
4B—68
Trending: radio controls, fog light, sunroof, service reset, door lock, fuel tank removal, windshield wipers


