NISSAN TERRANO 2002 Service Repair Manual
TERRANO 2002
NISSAN
NISSAN
https://www.carmanualsonline.info/img/5/57393/w960_57393-0.png
NISSAN TERRANO 2002 Service Repair Manual
Trending: turn signal bulb, cruise control, OBD port, wheel bolt torque, wheel bolts, dead battery, fuel tank removal
Page 221 of 1767
Removal and Installation
YBR260
VACUUM HOSE
BR-19
Page 222 of 1767
CAUTION:
When installing vacuum hoses, pay attention to the following
points.
IDo not apply any oil or lubricants to vacuum hose and
check valve.
IInsert vacuum tube into vacuum hose over a length of min.
24 mm (0.94 in) as shown.
Take care to main vacuum hoses in their original direction and
position.
YBR292
SBR225B
VACUUM HOSE
Removal and Installation (Cont'd)
BR-20
Page 223 of 1767
Inspection
HOSES AND CONNECTORS
ICheck condition of vacuum hoses and connectors.
ICheck vacuum hoses and check valve for air tightness.
CHECK VALVE
ICheck vacuum with a manual vacuum pump.
Connect to booster
sideVacuum should exist.
Connect to engine
sideVacuum should not exist.
VACUUM WARNING SWITCH
Test continuity though vacuum warning switch with an ohmmeter
and vacuum pump.
VacuumLess than 26.7 kPa
(267 mbar, 200 mmHg,
7.87 inHg)0W
33.3 kPa
(333 mbar, 250 mmHg,
9.84 inHg) or more
W
EBR008
EBR009
SBR007A
VACUUM HOSE
BR-21
Page 224 of 1767
VACUUM PUMP (TD27Ti ENGINE)
1. Install vacuum gauge.
2. Run engine at 1,000 rpm or more.
3. Check vacuum.
Specified vacuum:
93.3 kPa
(933 mbar, 700 mmHg, 27.56 inHg) or more
VACUUM PUMP (ZD30DDTi ENGINE)
Refer to EM section, ªINSPECTIONº in ªVACUUM PUMP Ð
Removal and Installationº.
NBR004
VACUUM HOSE
Inspection (Cont'd)
BR-22
Page 225 of 1767
Removal and Installation
IDrain oil from vacuum pump before removal.
Manually rotate fan belt clockwise to discharge any oil which
may have accumulated in vacuum pump.
IInstall vane so that its round surface faces pump housing.
IAfter installing vacuum pump assembly, apply 5 m(0.2 Imp fl
oz) of engine oil into vacuum pump assembly. Then, make sure
that pulley can be smoothly rotated by hand.
Inspection
Clean all parts and check them as follows:
ICheck for wear or scratches on mating surfaces of rotor and
vacuum pump housing and on rotor and center plate. If wear
or scratches are noted, replace those parts.
ICheck for wear or scratches on vanes. If necessary, replace.
NBR131
NBR132
NBR133
VACUUM PUMP (TD27Ti engine model)
BR-23
Page 226 of 1767
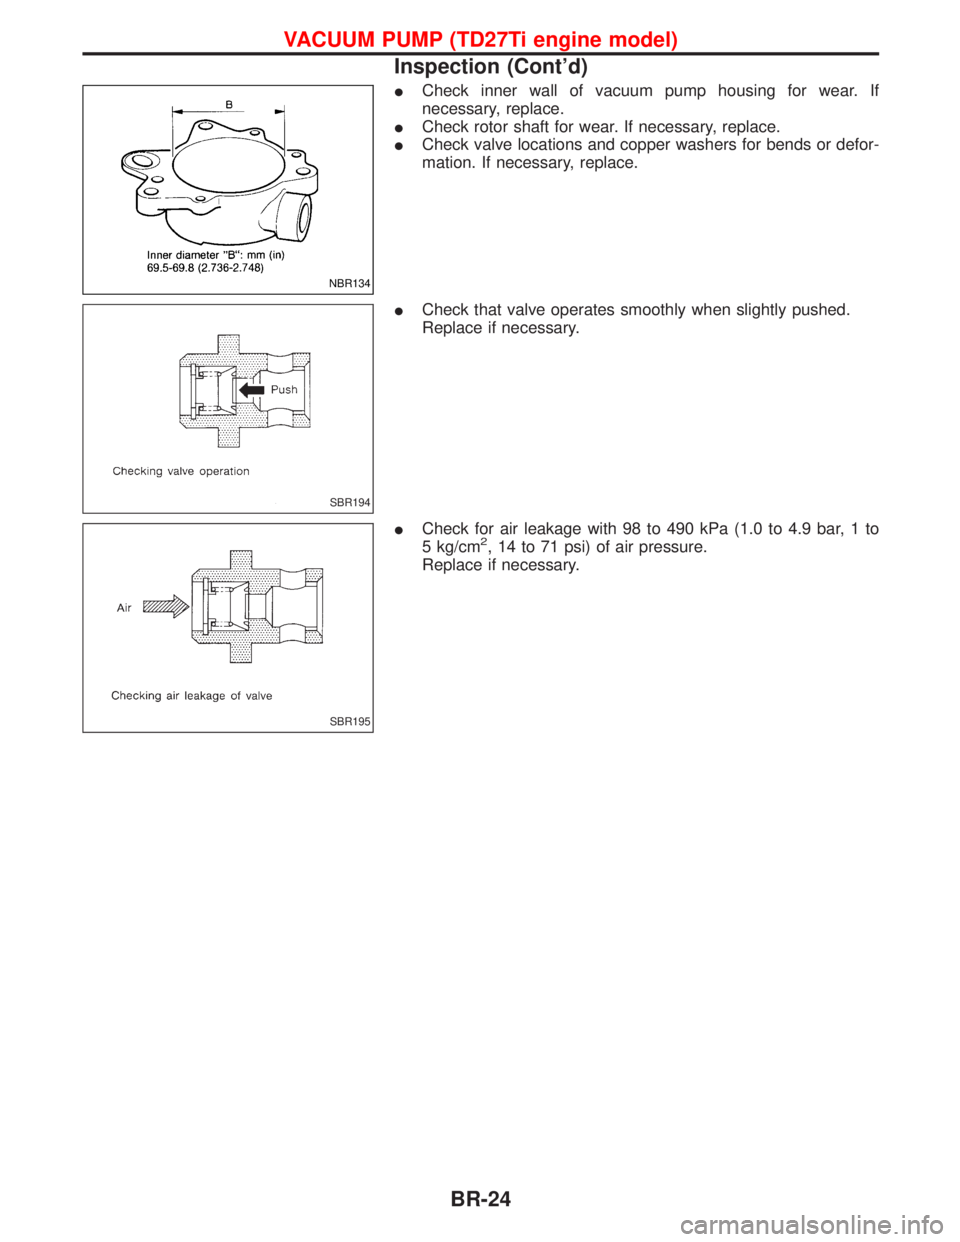
ICheck inner wall of vacuum pump housing for wear. If
necessary, replace.
ICheck rotor shaft for wear. If necessary, replace.
ICheck valve locations and copper washers for bends or defor-
mation. If necessary, replace.
ICheck that valve operates smoothly when slightly pushed.
Replace if necessary.
ICheck for air leakage with 98 to 490 kPa (1.0 to 4.9 bar, 1 to
5 kg/cm
2, 14 to 71 psi) of air pressure.
Replace if necessary.
NBR134
SBR194
SBR195
VACUUM PUMP (TD27Ti engine model)
Inspection (Cont'd)
BR-24
Page 227 of 1767
Removal and Installation
Refer to EM section, ªVACUUM PUMP Ð Removal and Installa-
tionº.
VACUUM PUMP (ZD30DDTi engine model)
BR-25
Page 228 of 1767
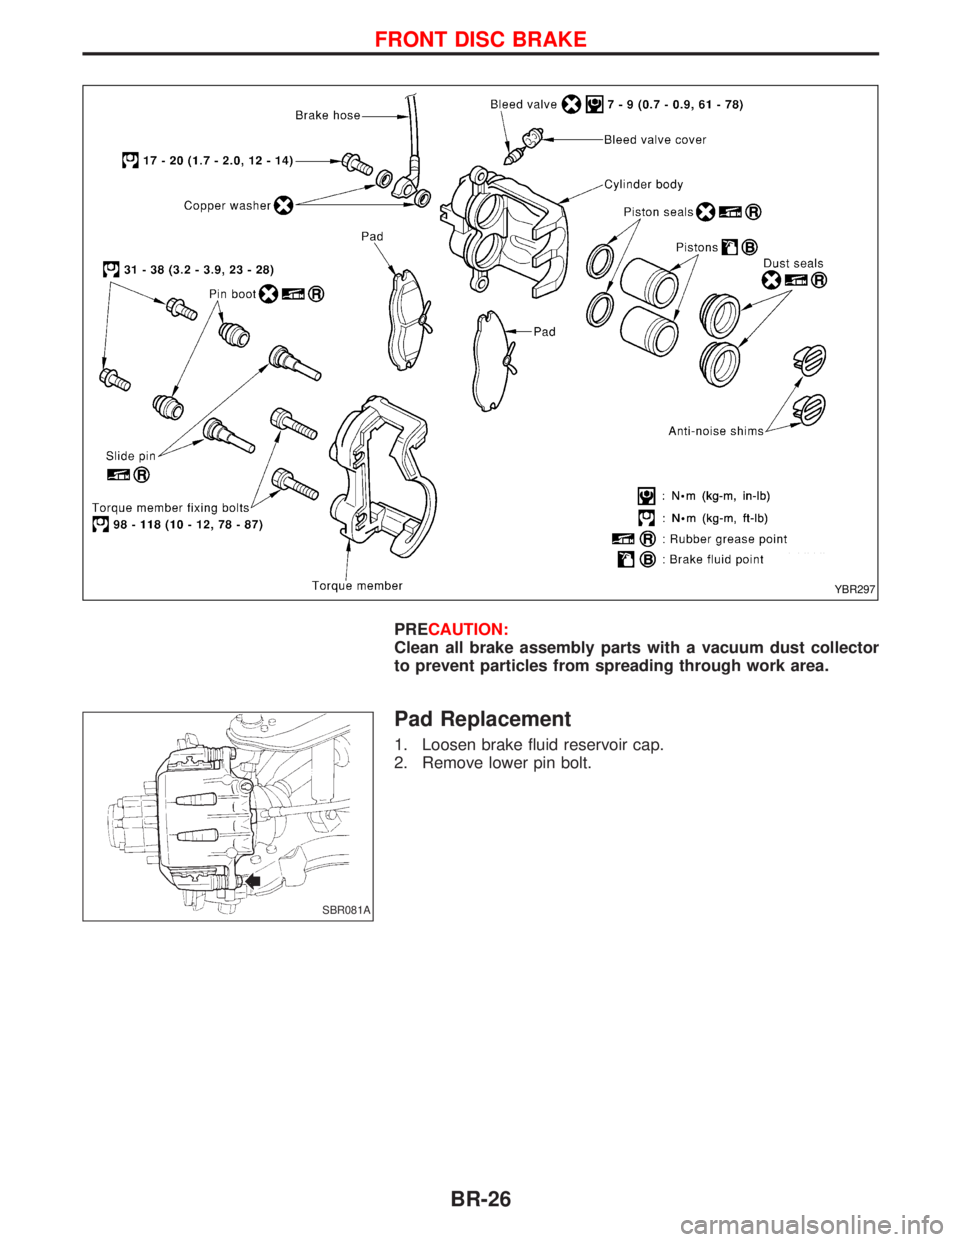
PRECAUTION:
Clean all brake assembly parts with a vacuum dust collector
to prevent particles from spreading through work area.
Pad Replacement
1. Loosen brake fluid reservoir cap.
2. Remove lower pin bolt.
YBR297
SBR081A
FRONT DISC BRAKE
BR-26
Page 229 of 1767
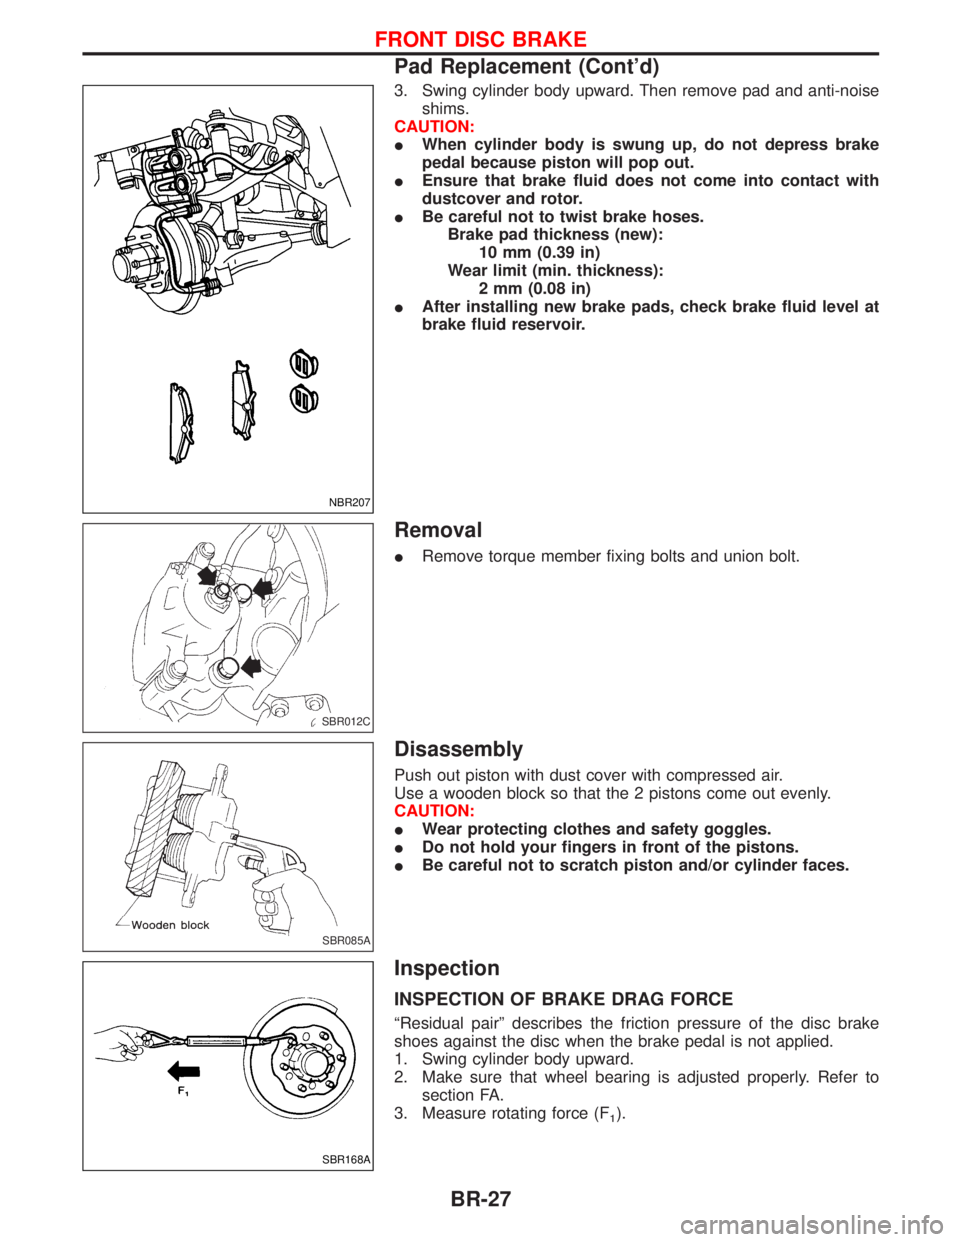
3. Swing cylinder body upward. Then remove pad and anti-noise
shims.
CAUTION:
IWhen cylinder body is swung up, do not depress brake
pedal because piston will pop out.
IEnsure that brake fluid does not come into contact with
dustcover and rotor.
IBe careful not to twist brake hoses.
Brake pad thickness (new):
10 mm (0.39 in)
Wear limit (min. thickness):
2 mm (0.08 in)
IAfter installing new brake pads, check brake fluid level at
brake fluid reservoir.
Removal
IRemove torque member fixing bolts and union bolt.
Disassembly
Push out piston with dust cover with compressed air.
Use a wooden block so that the 2 pistons come out evenly.
CAUTION:
IWear protecting clothes and safety goggles.
IDo not hold your fingers in front of the pistons.
IBe careful not to scratch piston and/or cylinder faces.
Inspection
INSPECTION OF BRAKE DRAG FORCE
ªResidual pairº describes the friction pressure of the disc brake
shoes against the disc when the brake pedal is not applied.
1. Swing cylinder body upward.
2. Make sure that wheel bearing is adjusted properly. Refer to
section FA.
3. Measure rotating force (F
1).
NBR207
SBR012C
SBR085A
SBR168A
FRONT DISC BRAKE
Pad Replacement (Cont'd)
BR-27
Page 230 of 1767
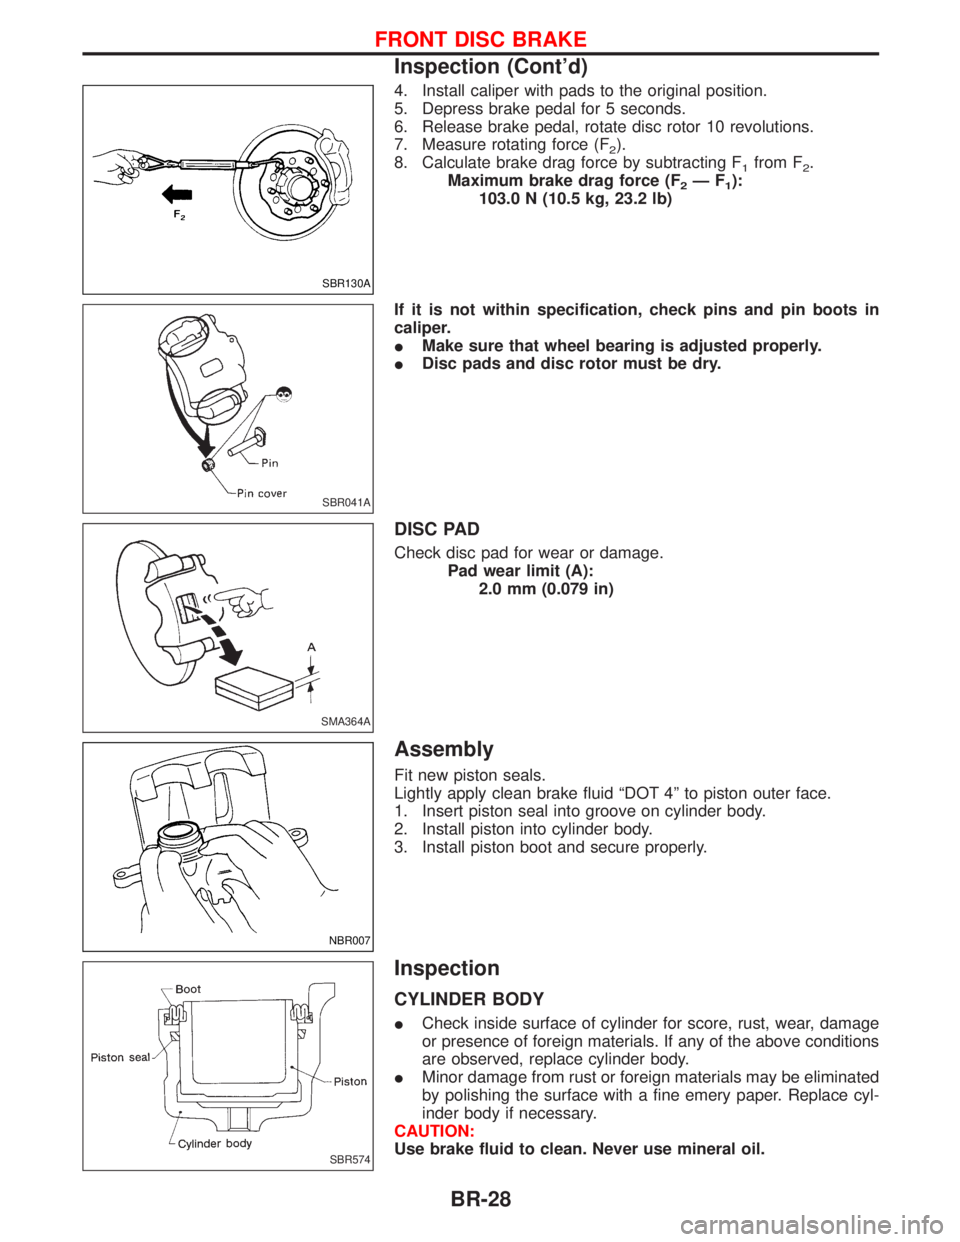
4. Install caliper with pads to the original position.
5. Depress brake pedal for 5 seconds.
6. Release brake pedal, rotate disc rotor 10 revolutions.
7. Measure rotating force (F
2).
8. Calculate brake drag force by subtracting F
1from F2.
Maximum brake drag force (F
2ÐF1):
103.0 N (10.5 kg, 23.2 lb)
If it is not within specification, check pins and pin boots in
caliper.
IMake sure that wheel bearing is adjusted properly.
IDisc pads and disc rotor must be dry.
DISC PAD
Check disc pad for wear or damage.
Pad wear limit (A):
2.0 mm (0.079 in)
Assembly
Fit new piston seals.
Lightly apply clean brake fluid ªDOT 4º to piston outer face.
1. Insert piston seal into groove on cylinder body.
2. Install piston into cylinder body.
3. Install piston boot and secure properly.
Inspection
CYLINDER BODY
ICheck inside surface of cylinder for score, rust, wear, damage
or presence of foreign materials. If any of the above conditions
are observed, replace cylinder body.
IMinor damage from rust or foreign materials may be eliminated
by polishing the surface with a fine emery paper. Replace cyl-
inder body if necessary.
CAUTION:
Use brake fluid to clean. Never use mineral oil.
SBR130A
SBR041A
SMA364A
NBR007
SBR574
FRONT DISC BRAKE
Inspection (Cont'd)
BR-28
Trending: service indicator, lighting system, reset, ECU, remote, dimensions, seats

