RENAULT KANGOO 1997 KC / 1.G Engine And Peripherals Workshop Manual
Manufacturer: RENAULT, Model Year: 1997, Model line: KANGOO, Model: RENAULT KANGOO 1997 KC / 1.GPages: 208
Page 111 of 208

DIESEL EQUIPMENT
Injector with sensor (needle lift)
13
10579R1
PRM1315
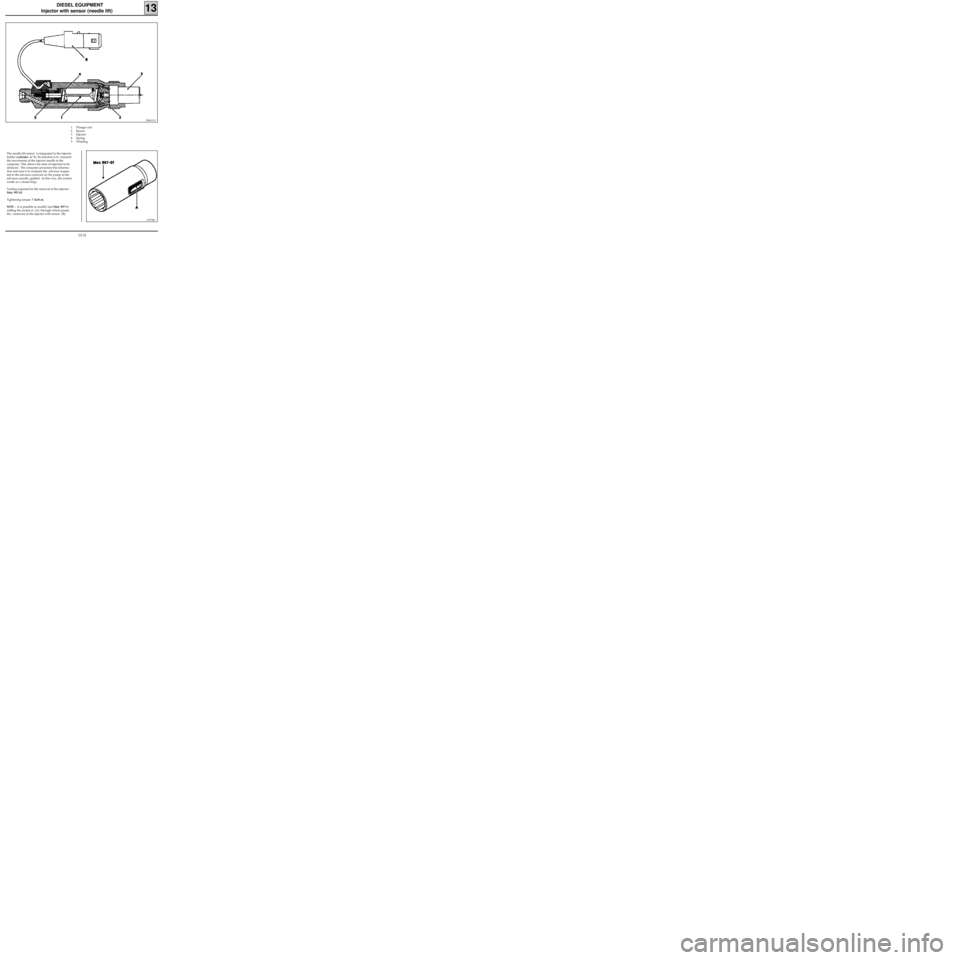
The needle lift sensor is integrated to the injector
holder (cylinder n° 3). Its function is to transmit
the movements of the injector needle to the
computer. This allows the start of injection to be
deduced. The computer processes this informa-
tion and uses it to compare the advance reques-
ted to the advance corrector on the pump to the
advance actually applied . In this way, the system
works as a closed loop.
Tooling required for the removal of the injector :
Mot. 997-01.
Tightening torque: 7 daN.m.
NOTE : it is possible to modify tool Mot. 997 by
milling the socket at (A), through which passes
the connector of the injector with sensor (B).1 Plunger rod
2 Spacer
3 Injector
4 Spring
5 Winding
13-31
Page 112 of 208

DIESEL EQUIPMENT
Injection warning light
13
OPERATING PRINCIPLE OF THE DIESEL INJECTION WARNING LIGHT ON THE INSTRUMENT PANEL
On switching on the ignition, the diesel injection fault warning light is illuminated. It extinguishes as the en-
gine begins to run.
•Fault in a component of the injection assembly
Faults in the following components may cause the warning light to illuminate :
- injector with sensor
- advance solenoid valve,
- engine speed sensor ,
- load lever potentiometer,
- pre-postheating (according to version).
13-32
Page 113 of 208

DIESEL EQUIPMENT
Pre-postheating control
13
The pre-postheating function is controlled by the
computer, which controls the preheating plug re-
lay housing.
1) Ignition - Preheating
The preheating process is divided in two
phases :
a) Variable preheating
This is dependent on the coolant tempera-
ture, on the battery voltage and on alti-
tude (internal computer sensor) when the
ignition is switched on (the preheating
warning light illuminates).b) Fixed preheating
After the preheating warning light has
extinguished (variable preheating), the
plugs remain fed for 8 seconds before the
engine is started.
2) Starting the engine
During the action of the starter motor, the
four plugs are fed continuously.
3) Engine running - Postheating
The postheating also may be divided in two
phases:
a) Fixed postheating
After starting the engine, the plugs are
supplied simultaneously for a period of 10
seconds.
b) Variable postheating
Variable postheating begins when fixed
postheating ends. The time during which
the plugs are fed (continuously) depends
upon :
- the coolant temperature
- the engine speed ,
- the load (load potentiometer on pump
lever ).
Maximum preheating limit (battery vol-
tage lower than 9.3 volts and altitude hi-
gher than 2 000 m).
Minimum preheating limit (battery
voltage greater than 10.5 volts altitude
lower than 350 m).
13041S
13-33
Page 114 of 208

DIESEL EQUIPMENT
Pre-postheating control
13
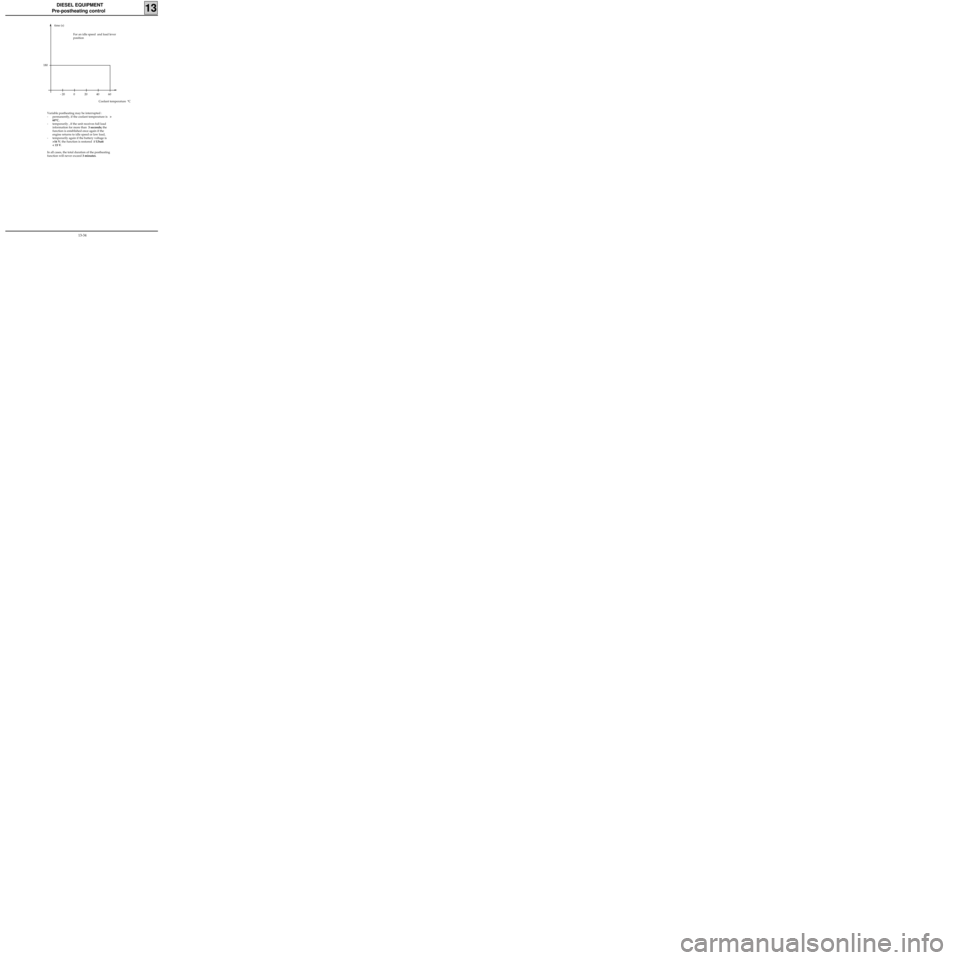
- 20 180time (s)
For an idle speed and load lever
position
Coolant temperature °C0204060
Variable postheating may be interrupted :
- permanently, if the coolant temperature is >
60°C,
- temporarily , if the unit receives full load
information for more than 3 seconds; the
function is established once again if the
engine returns to idle speed or low load,
- temporarily again if the battery voltage is
>16 V; the function is restored if Ubatt
< 15 V.
In all cases, the total duration of the postheating
function will never exceed 3 minutes.
13-34
Page 115 of 208

DIESEL EQUIPMENT
Fast idle speed control
13
- if the engine speed falls to 650 rpm and the
vehicle speed is lower than 15 mph (25 km/h)
(engine start improvement programming).
The fast idle speed is cut off once the speed
becomes > 850 rpm
NOTE :
- Fast idle speed operational :
• solenoid valve not operated,
• cable loose, and not tensioned.
- Nominal idle sped :
• solenoid valve operated
• cable tensioned
SPECIAL FEATURES : once the AC has been
selected on the instrument panel, the fast idle
speed function is activated. The fast idle speed function is controlled by the
computer via a solenoid valve operating the dia-
phragm (versions with or without air conditio-
ning).
The fast idle speed control becomes operational :
- if, on switching on the ignition, the coolant
temperature is below 10°C,
Coolant
temperature
on switching
ignition on (°C)Fast idle speed
cut-off
temperature
(°C) Fast idle speed
cut-off
temperature
(°C)
10
5
0
- 10
- 2020
20
30
40
5011
15
20
25
30
F8Q 662F8Q 630
13-35
Page 116 of 208

DIESEL EQUIPMENT
Injection/air conditioning programming
13
CONNECTION BETWEEN AIR CONDITIONING ASSEMBLY AND INJECTION COMPUTER
The electrical connection :
- from the air conditioning computer to the diesel injection computer consists of one wire. This track only
carries the information that the AC is operating. From this, the diesel injection computer deduces the AC
selection information : track 11,
- from the diesel injection computer to the air conditioning computer consists of one wire. This track
carries all information regarding authorising and preventing operation of the compressor : track 19.
COMPRESSOR OPERATION PROGRAMMING
During certain stages of operation, the diesel injection computer stops the compressor from functioning.
Engine start programming
After the engine has started running, the compressor is prevented from functioning for 3 seconds.
Performance return programming
If the full load position is detected, the AC compressor is prevented from functioning for 8 seconds.
Stalling prevention programming
If the engine speed is lower than 650 rpm., the compressor is automatically cut off. It will only be allowed to
function again if the engine speed exceeds 775 rpm.
13-36
Page 117 of 208

DIESEL EQUIPMENT
Computer
13
PRM1316
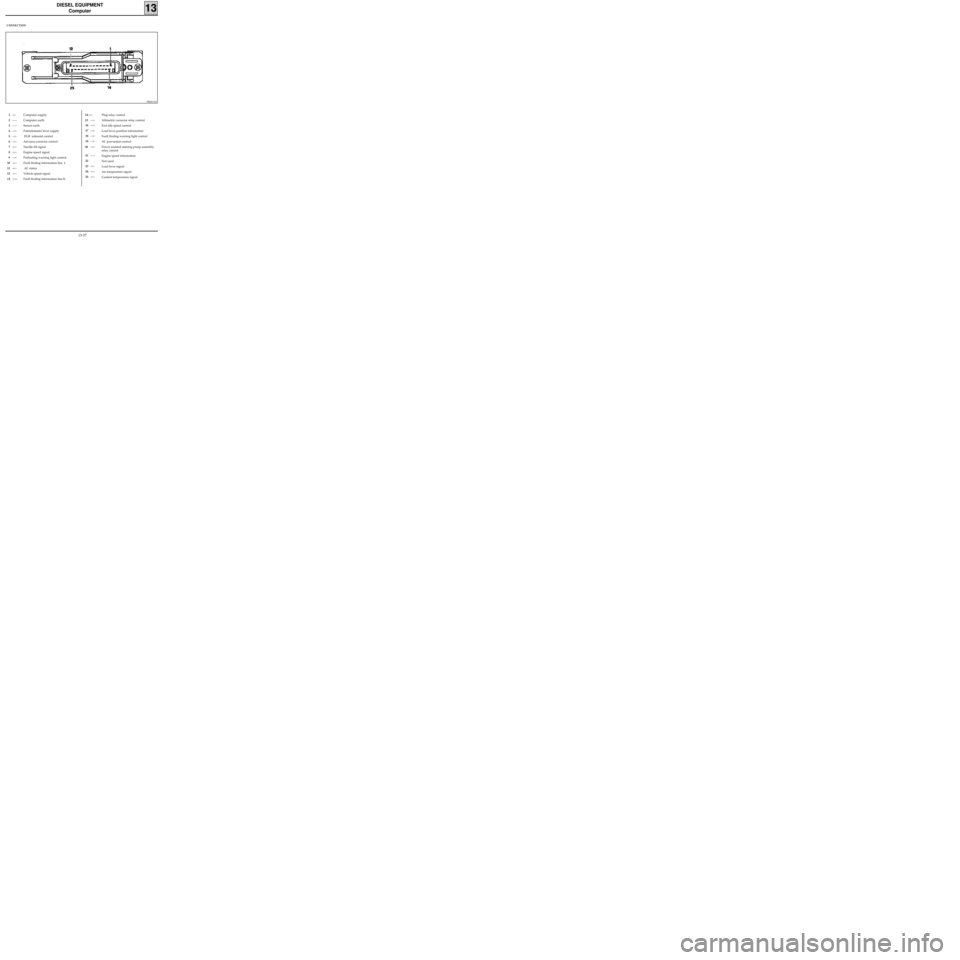
CONNECTION
1-<-
2-----
3-----
4-->-
5-->-
6-->-
7-<--
8-<--
9-->-
10-<--
11-<--
12-<--
13-><-Computer supply
Computer earth
Sensor earth
Potentiometer lever supply
EGR solenoid control
Advance corrector control
Needle lift signal
Engine speed signal
Preheating warning light control
Fault finding information line L
AC status
Vehicle speed signal
Fault finding information line KPlug relay control
Altimetric corrector relay control
Fast idle speed control
Load lever position information
Fault finding warning light control
AC prevention control
Power assisted steering pump assembly
relay control
Engine speed information
Not used
Load lever signal
Air temperature signal
Coolant temperature signal14-->-
15-->-
16-->-
17-->-
18-->-
19-->-
20 -->-
21-----
22
23-<--
24-<--
25-<--
13-37
Page 118 of 208

DIESEL EQUIPMENT
Defect modes
13
If there is a fault with one of the components listed below, the computer enters "defect mode", which means
that replacement values are used to ensure engine operation.
Faulty
componentSet values (for replacement)
Advance
corrector Pre-postheating
timeEGR function Fast idle speed AC function
Coolant sensorRunning time
functionPreheating : -
30°C
Postheating :
80°CCutRunning time
function-
Air sensorTemperature
= 22°C- Cut - -
Load
potentiometer100 % load lever
positionPostheating:
30 % load lever
position Cut - 20 % load lever
position
Altitude sensorAltitude
= 900 mAltitude
= 900 mCut - -
Battery
16 V < U < 6 VUbatt = 13.5V Not controlled - - -
TDC sensorMinimum
advance
Solenoid valve
fully open
position Postheating :
Not controlled
until ignition is
switched off
then on againCutSpeed
= 2 000 rpmSpeed
= 2 000 rpm
Needle lift
sensorDefect mode
advance
(Carto soft
F8Q 662)
Maximum
advance
(F8Q 630)----
Vehicle speed
sensor--Position :
V = 175 km/hPosition :
V = 175 km/hPosition :
V = 175 km/h
Heater plugs
relay housing- Cut - - -
13-38
Page 119 of 208

DIESEL EQUIPMENT
Pump
13
REMOVAL
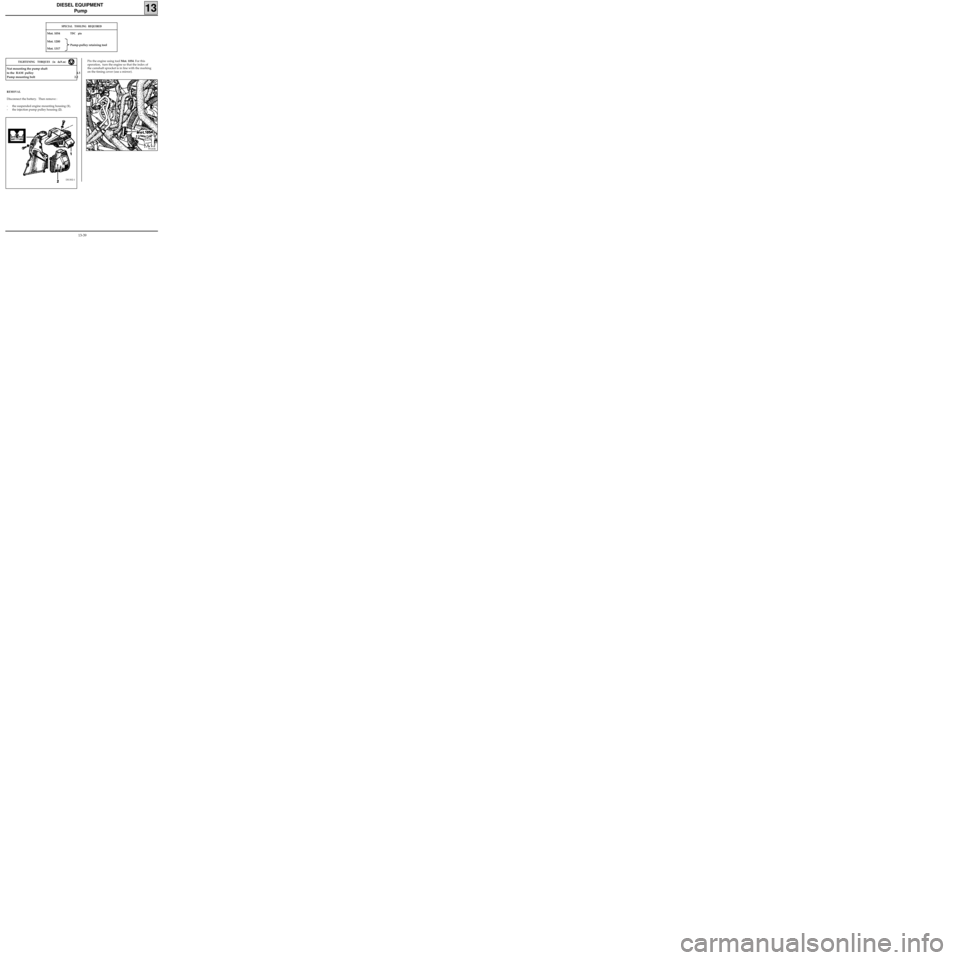
Disconnect the battery. Then remove :
- the suspended engine mounting housing (1),
- the injection pump pulley housing (2).
DI1302-1
Pin the engine using tool Mot. 1054. For this
operation, turn the engine so that the index of
the camshaft sprocket is in line with the marking
on the timing cover (use a mirror).
SPECIAL TOOLING REQUIRED
Mot. 1054TDC pin
Mot. 1200
Pump-pulley retaining tool
Mot. 1317
99183R
Nut mounting the pump shaft
to the RAM pulley 4.5
Pump mounting bolt 2.2
TIGHTENING TORQUES (in daN.m)
13-39
Page 120 of 208

DIESEL EQUIPMENT
Pump
13
Remove :
- the fuel supply pipe (A),
- the fuel return pipe (B),
- the pump connector (C),
- the accelerator cable (D),
- the vacuum pipe (E) connected to the fast
idle speed LDA,
- the high pressure wiring loom using tool Mot.
1383,
10578R
- the rear support mounting bolt.
12869R
Fit tool Mot. 1200 or Mot. 1317 , for retaining the
pump pulley.
12410R
Inserting a torx screwdriver in the gaps of the
RAM pulley, slacken:
- the three bolts mounting the pump
- the central nut securing the pump shaft to the
RAM pulley.
Slacken the central nut and all three of the bolts
mounting the pump until they are completely
free.
Extract the pump.
REFITTING
Clean the pump shaft very thoroughly, using sol-
vent to eliminate all trace of grease.
Refit the pump.
Tighten the three bolts mounting the pump .
Pretighten the central nut of the pump to 2
daN.m.
IMPORTANT : it is vital to carry out a pretighte-
ning operation before the final tightening; tigh-
ten the central pump nut to a torque of 4.5
daN.m.
Carry out the timing operations (see "Pump -
Timing").
For all other operations, refitting is the reverse of
removal.
13-40